How to Use the Sanitize Value Feature
A Sanitize value feature helps validate the data entered into the form. It works immediately once the form is submitted and is available for some of the JetFormBuilder plugin’s blocks.
The “Sanitize value” feature is available for the following fields: Text Field, Textarea Field, Checkbox Field, Radio Field, Select Field, Switcher Field, Advanced Choices Field, Calculated Field, Color Picker, Date Field, Datetime Field, Hidden Field, Number Field, Range Field, Time Field, and WYSIWYG Field.
In this tutorial, we will use a Text Field as an example. However, feel free to use the Sanitize value feature for any mentioned block.
Create a Form with a Text Field
Initially, the needed field should be placed in the form. So, proceed to WordPress Dashboard > JetFormBuilder > Add New.
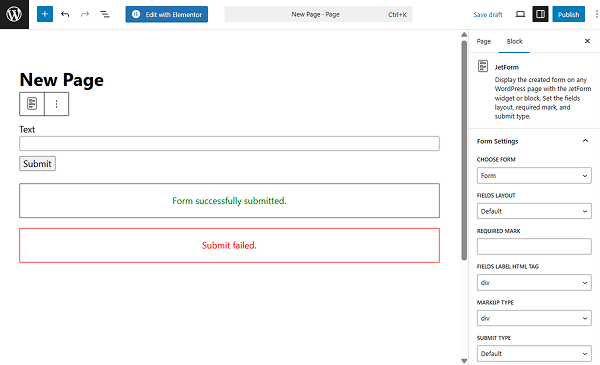
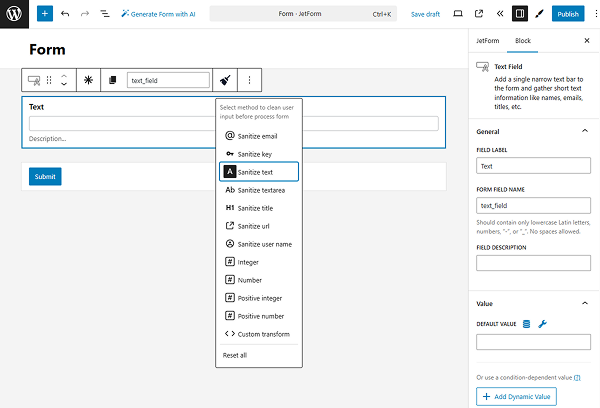
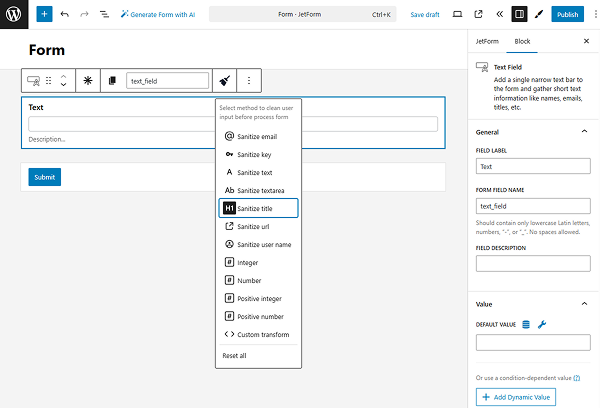
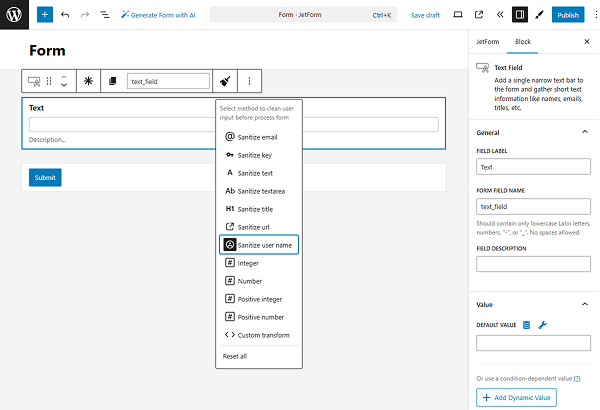
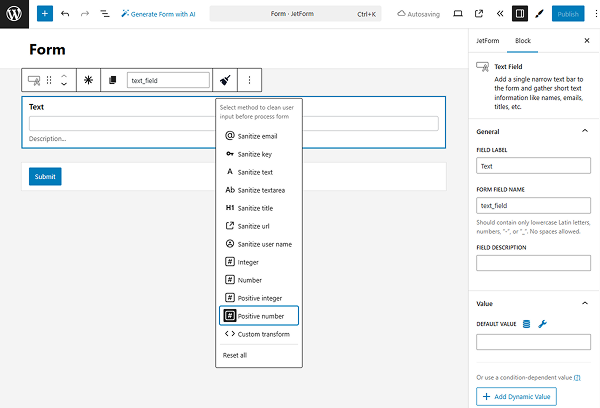
We will delete the default Hidden Field and search for the Text Field.The “Sanitize value” button can be found by clicking on the Text Field (it works the same for any other block you work with).
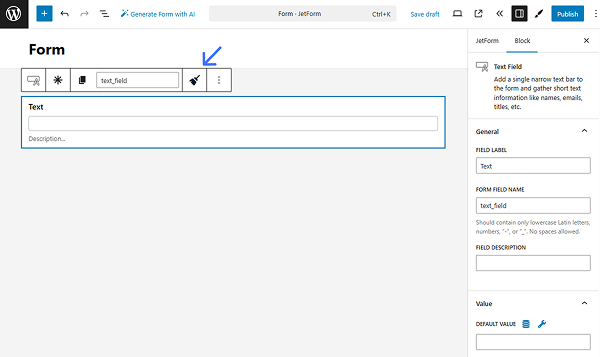
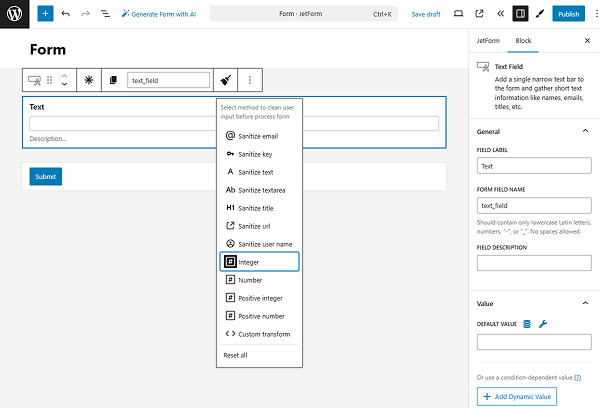
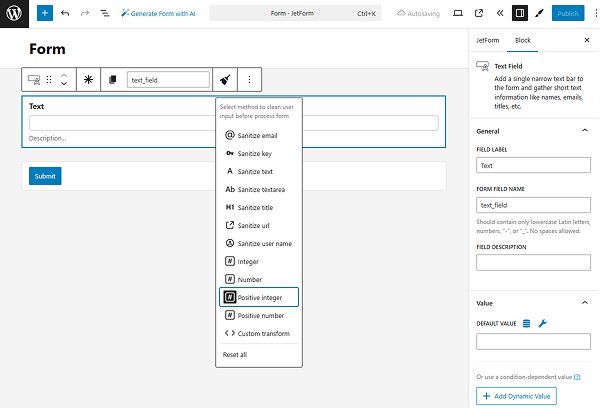
After pressing the “Sanitize value” button, a list of sanitizing options is displayed.
Set Up the Form
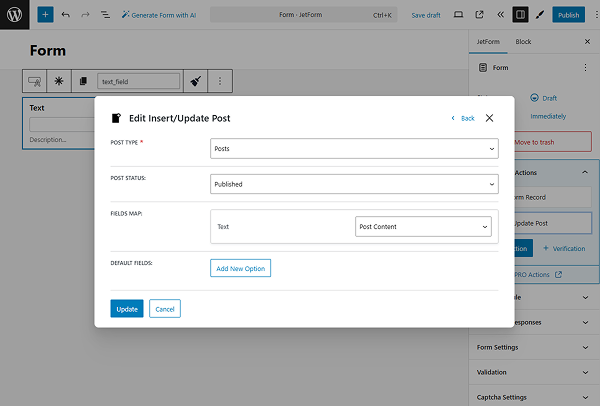
The next step is adjusting Post Submit Actions in the JetForm settings tab.
Once opened, choose the “Insert/Update Post” option and press the pencil-shaped button to edit the action.
Using the newly opened Edit Action pop-up, we can configure the form to add a new post and complete its content with the value we put in the Text Field.
Select the desired POST TYPE. For instance, we pick the default WordPress “Posts.”
Pick the needed POST STATUS.
The FIELD MAP area contains all the fields from the form. Now, we have one Text Field and connect it to the “Post Content” to demonstrate the result of the sanitized value in the post. However, you can choose any desired option.
To save the changes, hit the “Update” button.
That’s all about adjusting the basic form. Now, let’s look through all the “Sanitize value” options.
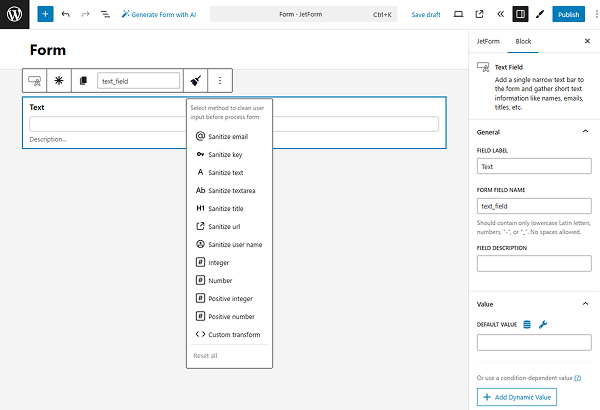
Adjust the Sanitize Value Options
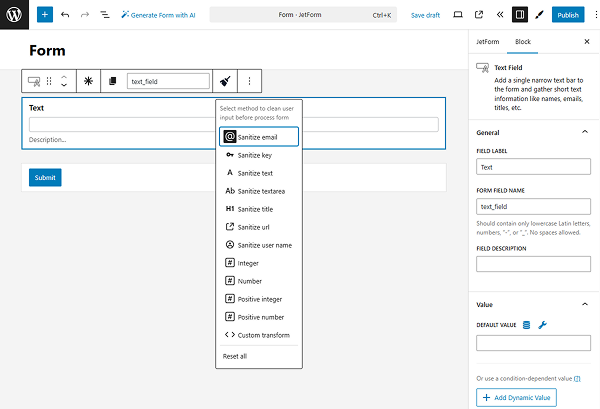
Select one or several desired options in the Sanitize value list.
Let’s look through the available options.
Sanitize email
This option clears all the characters that are not allowed in the email address.
Let’s assume you need this option. So, once the form is ready, press the “Publish” button.
Then, we go to WordPress Dashboard > Pages and press “Add New” to create a new page.
Search for the JetForm block and add it to the page.
After selecting the Form from the list and making any adjustments, click the “Publish/Update” button.
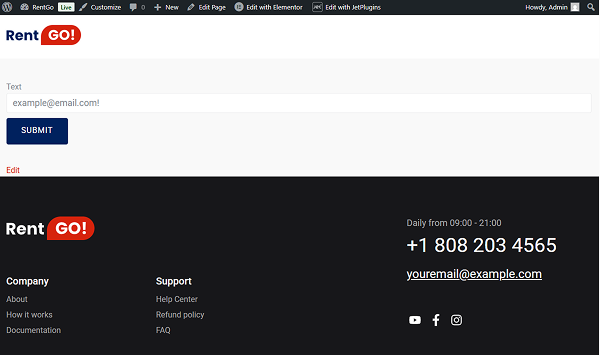
Then open the page you just built and complete the field with data.
For instance, our email input looks like: “example@email.com!”.
Now we go to WordPress Dashboard > Posts, where, in our case, the new posts will be displayed. Then, we open the latest post to check the content. So now it is set to “example@email.com”.

Sanitize key
This feature can be used to validate keys, such as post slugs or category names. It ensures that input data is safe to use in URLs or other contexts.
Lowercase alphanumeric characters, dashes, and underscores are allowed.

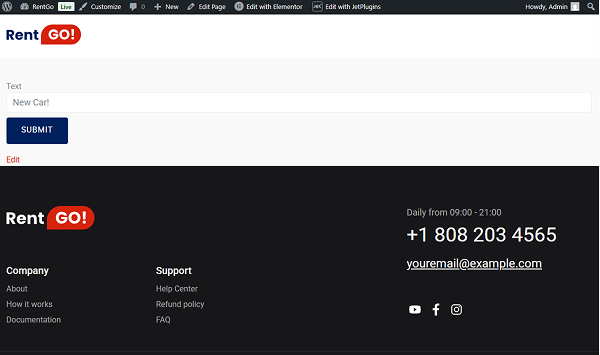
For instance, we put the “New Car!” value and submit the form.
The content in the post will be changed to “newcar”.

Sanitize text
A text sanitizing process includes checking for invalid UTF-8, converting “less-than” (“<”) characters to an entity, stripping all tags, removing line breaks, tabs, and extra whitespace, and removing percent-encoded characters.
The user can complete the form with something like: “<b>My name is <i>Dave</i></b>.”
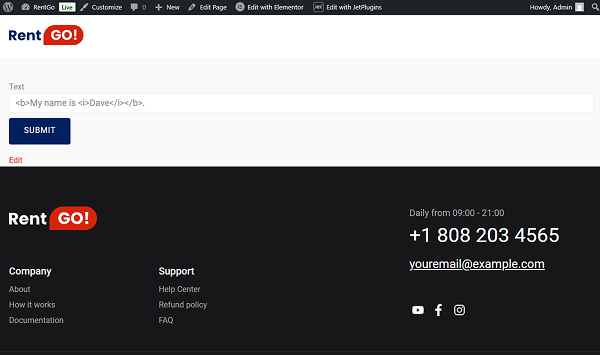
After the sanitizing process, the data will appear as follows: “My name is Dave.”

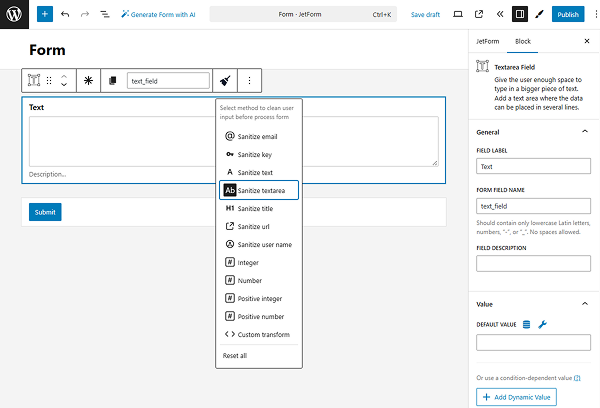
Sanitize textarea
It is similar to the “Sanitize text” option. However, it doesn’t clear new lines and whitespaces as they are considered normal for textarea fields.
To see the difference, let’s change the Text Field to a Textarea Field.
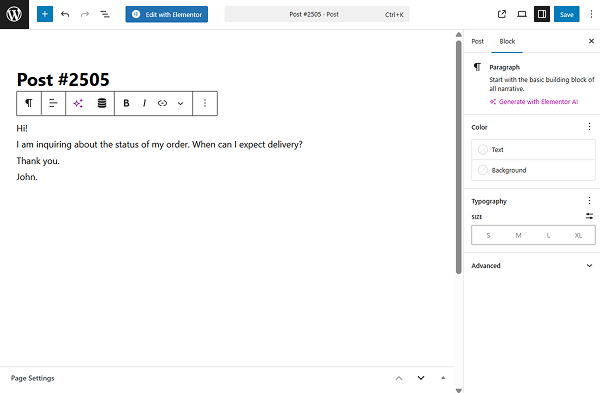
So, it’s better for the text that includes several lines. For instance, the user writes a letter in the text area that looks like this:
“Hi!
<p>I am inquiring about the status of <b>my order</b>. When can I expect delivery?</p>
Thank you.
John.”
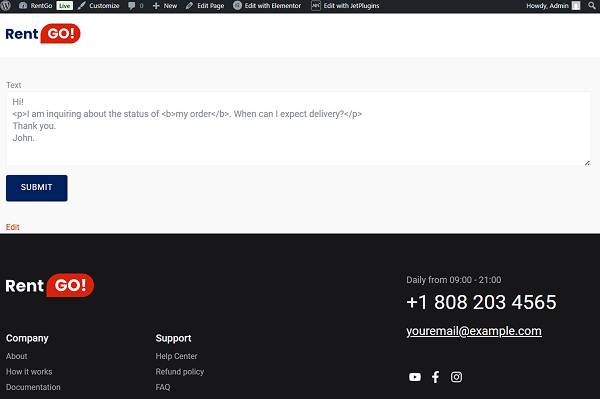
As you can notice, new lines (\n) are put in the text. If we used “Sanitize text” instead, the new lines would not be preserved:
“Hi! I am inquiring about the status of my order. When can I expect delivery? Thank you. John.”
Sanitize title
Sanitizes string to a slug, which can be used in URLs or HTML attributes.
We entered the title “My Article” in the field.
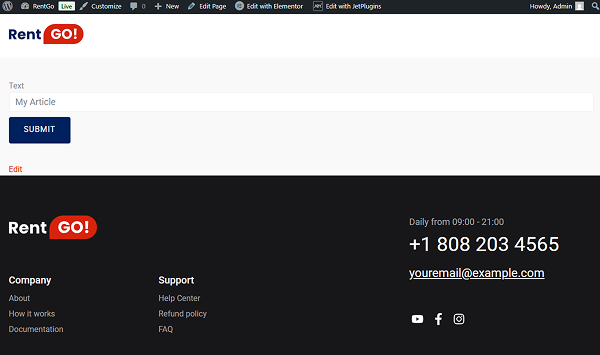
The content is now sanitized to “my-article.”

Sanitize url
This option sanitizes the URL for use in redirects. It helps avoid issues with special characters that are not allowed in the links.
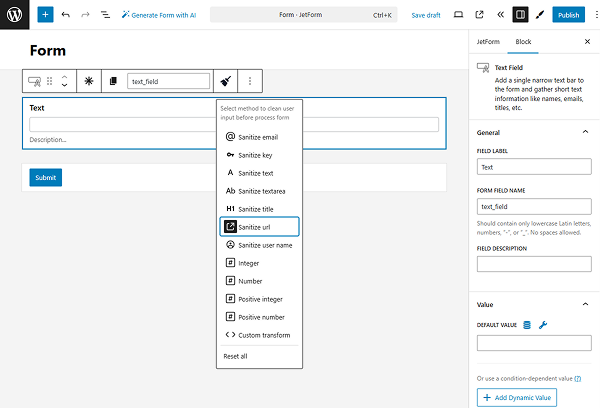
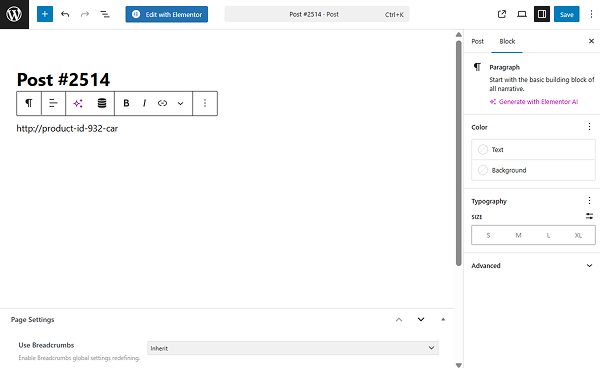
For instance, we put the “product-id-932-car” value in the Text Field.

The value will be sanitized to “http://product-id-932-car.”
Sanitize user name
This option can be used for user names accordingly. It clears all unsafe characters, such as tags, percent-encoded characters, or HTML entities.
We complete the field in the form with the “User%231” value.
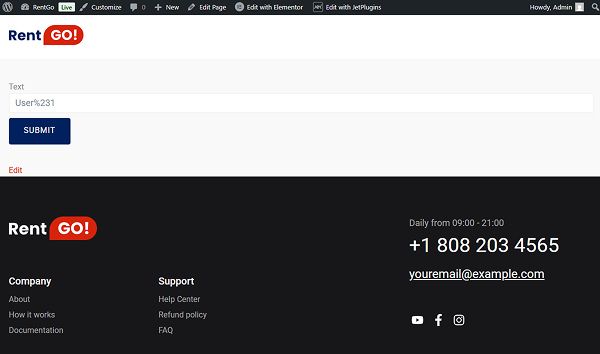
So, the content will be changed to “User1.”

Integer
The “Integer” sanitizing option converts an entered value to an integer. It removes all characters except digits and, optionally, the minus sign at the beginning of the number.
For example, we enter: “-12.1”.

After sanitizing, the value is saved as “-12”.

Number
The “Number” method sanitizes the value to a valid floating-point number. It allows only digits, a decimal point, and an optional leading minus.

For instance, we input “003.50” into the form.

The sanitized result in the post is “3.5”.

Positive integer
The “Positive integer” method works similarly to “Integer”, but only positive integers are allowed. A leading minus sign will be removed, so negative input becomes a positive integer.
Let’s enter the “-27.3” in the form.

After sanitizing, the value becomes “27”.

Positive number
The “Positive number” sanitizing method returns a positive floating-point number. Minus signs are removed, and only numeric and decimal characters are kept.
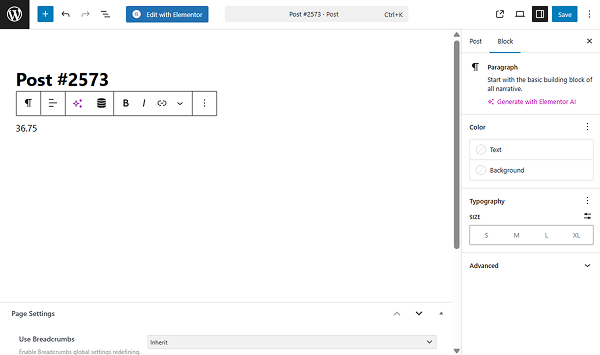
For example, we type “-36.75”.
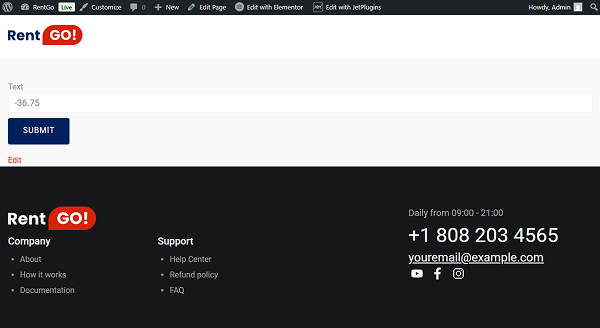
The sanitized value appears as “36.75”.
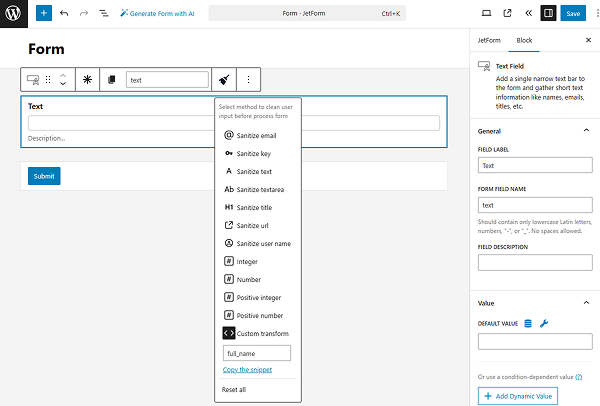
Custom transform
If this option is selected, the additional completion field appears. It allows adding custom sanitizing code if needed.
For instance, we complete the field with the “full_name” value.
According to this custom value, the content will be returned as the first and last name.
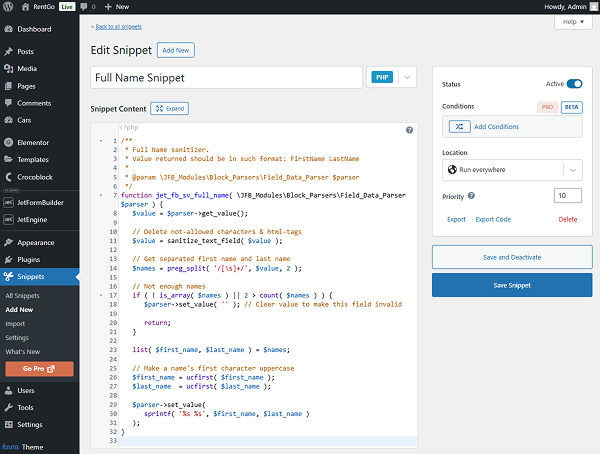
To make it work, you can go to WordPress Dashboard > Appearance > Theme File Editor, open the Theme Functions (functions.php) tab, or use any preferred code snippet plugin. In our tutorial, we work with the Code Snippets plugin.
Paste the following code at the end of the file.
/**
 * Full Name sanitizer.
 * Value returned should be in such format: FirstName LastName
 *
 * @param \JFB_Modules\Block_Parsers\Field_Data_Parser $parser
 */
function jet_fb_sv_full_name( \JFB_Modules\Block_Parsers\Field_Data_Parser $parser ) {
   $value = $parser->get_value();

   // Delete not-allowed characters & html-tags
   $value = sanitize_text_field( $value );

   // Get separated first name and last name
   $names = preg_split( '/[\s]+/', $value, 2 );

   // Not enough names
   if ( ! is_array( $names ) || 2 > count( $names ) ) {
      $parser->set_value( '' ); // Clear value to make this field invalid

      return;
   }

   list( $first_name, $last_name ) = $names;

   // Make a name's first character uppercase
   $first_name = ucfirst( $first_name );
   $last_name  = ucfirst( $last_name );

   $parser->set_value(
      sprintf( '%s %s', $first_name, $last_name )
   );
}
Then, we hit the “Update File” button.
This is just a case example; you are free to use the needed piece of code.
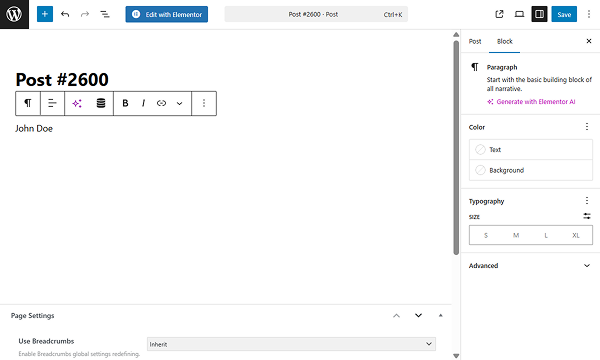
To see the result, we return to the page where the form is located and complete it with the “<b>John <i>Doe</i></b>” value.
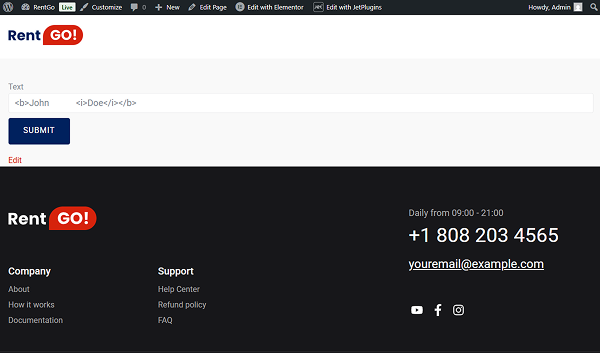
In the post, the content will look like this: “Jonh Doe.”
That’s all about using the Sanitize value feature available for form fields from the JetFormBuilder plugin for WordPress.