How to Set Recurring PayPal Payments in WordPress Form
The PayPal Recurring Payments add-on for JetFormBuilder adds the PayPal subscriptions to forms, manages their settings, keeps them up to date, and tracks all payments.
In this case, we explain creating a subscription plan using the Sandbox mode of the PayPal functionality. This mode simulates transactions during payment processing without real payments. If you want to use the Live mode, you should upgrade your PayPal account. Nonetheless, the Subscription plan creation workflow is the same for both modes. Still, you should set the appropriate API credentials for each mode (Live or Sandbox). Follow the Get Started with PayPal REST APIs tutorial to learn how.
- What PayPal Recurring Payments PRO Add-on Does
- Install the Add-on
- Create a Subscription Plan
- Configure the JetFormBuilder Settings
- Create a Form
- Place the Form on a Page
- Test the Flow
- Manage the Subscription
- Make a Refund
What PayPal Recurring Payments PRO Add-on Does
The PayPal Recurring Payments add-on is a PRO add-on for the JetFormBuilder plugin. The add-on integrates pre-created PayPal subscriptions to forms and manages payment settings. It also transfers payments according to the PayPal subscription settings (pricing plans, billing cycles, trial periods, subscription quantities, etc.). The add-on aggregates subscription data through one dashboard.
Add-on functionality includes:
- Recurring payments — supports periodic payments of different types (fixed, quantity-based, volume-based, or tiered) with trial time consideration;
- Convenient subscriptions dashboard — allows viewing and editing subscription details (subscribers, billing cycle, status) and payment details (payer, payment shipping, dates, gross sums) through the dashboard;
- Refunds — carries out refund payment from the Subscriptions dashboard;
- Suspend or cancel subscriptions — sets the needed status for the user subscription from the dashboard;
- Action Events — applies different actions as form settings (events) instead of the callbacks as php-functions;
- Usability — applies PayPal gateway actions, syncs Access Token data, adds quantity fields, uses redirects, and creates custom payment success/failed messages.
Install the Add-on
Head to WordPress Dashboard > JetFormBuilder > Addons. Among the available items, find the PayPal Recurring Payments add-on and press the “Install Addon” button.
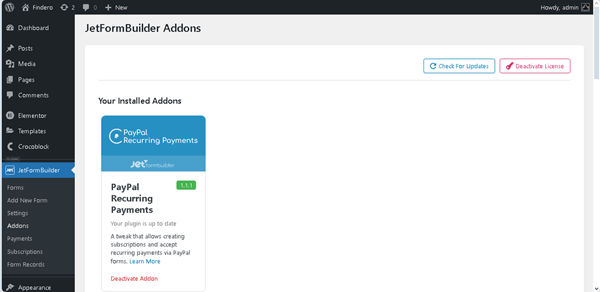
Then, don’t forget to activate the add-on to get access to all of its features.
To do so, proceed to WordPress Dashboard > Plugins and find the installed add-on. Hit the “Activate” button.
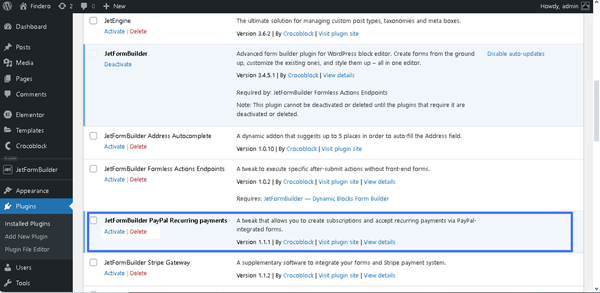
Also, you can install and activate this add-on as any other WordPress plugin.
Create a Subscription Plan
Initially, log in to your PayPal Developer account. By default, you will be directed to the Sandbox test accounts page of your main PayPal account. On this page, your business and personal accounts are listed.

Unroll the needed business account to observe the sandbox account Login Info and REST API apps sections.
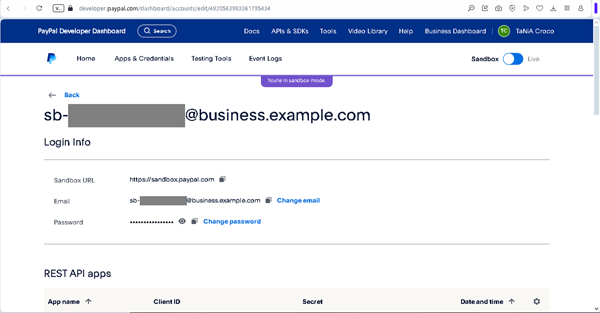
Then, enter the Sandbox PayPal account using the presented “Email” and “Password” Login info. Here, the “John Doe” user name is set by default, but you can set the needed one.
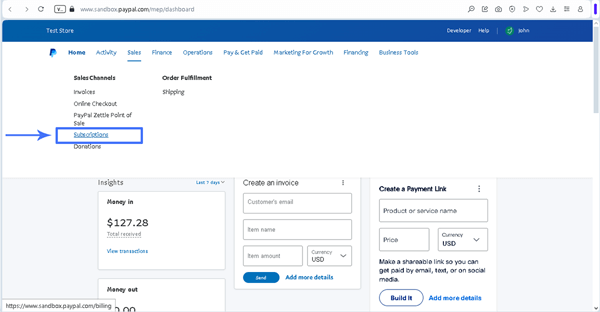
Unroll the Sales tab and then observe available pages. The Subscriptions page is the one we need.
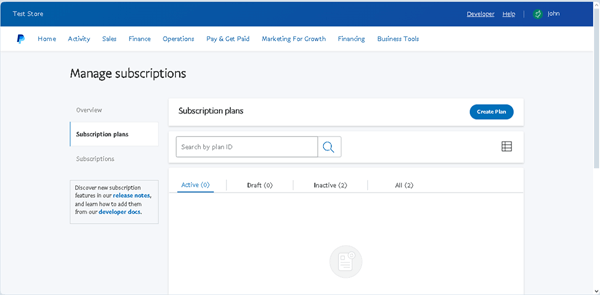
After that, you will be redirected to the Manage subscriptions page. Here, switch to the Subscriptions plans tab.
So, here we can see the PayPal subscription plans in the same named tab.
Click on the “Create Plan” button to build a new one.
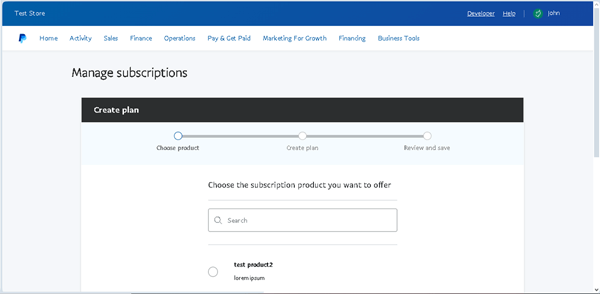
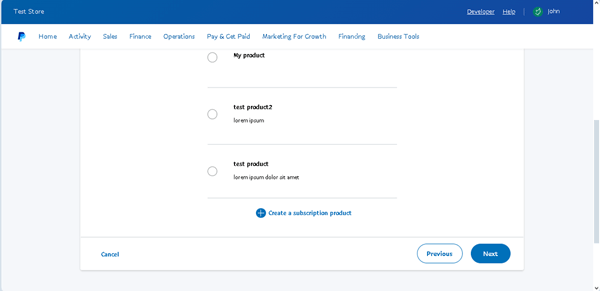
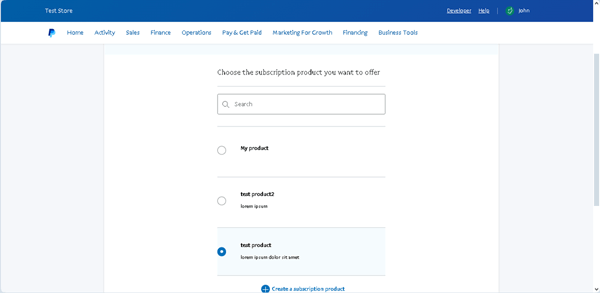
If you have already built some plans, they will be suggested to you as options for selection in the Choose the subscription product you want to offer section. You can select the needed plan, scroll down the page, and click the “Next” button at the bottom of the page.
Or, just scroll this page down and press the “Create a subscription product” button to set the plan from scratch.
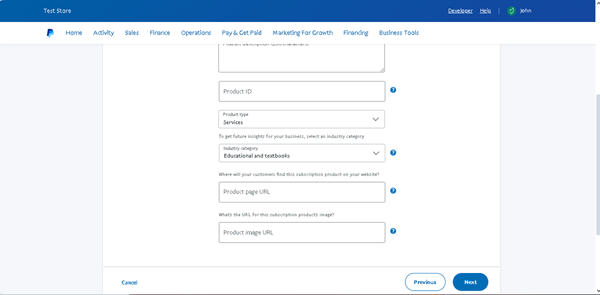
You will be redirected to the Tell us about the subscription product you want to offer section, which has the obligatory Product name and Product type fields (scroll the page to see these fields). Fill in the suggested fields that correspond to the info about the product you will provide in a subscription.
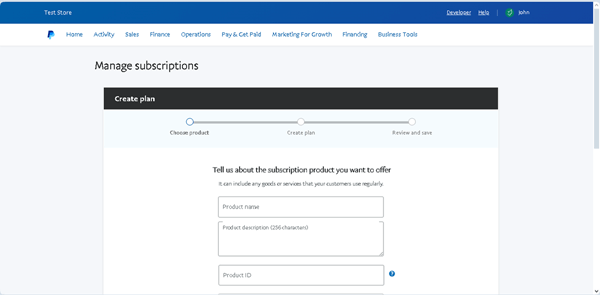
You can complete the fields or leave some empty, as they are not obligatory. Hit the “Next” button to proceed to the next step.
After that, you will be redirected back to the Choose the subscription product you want to offer step. Here, the created plan will be added to the list of other plans. Tick the needed one, scroll the page down, and click the “Next” button.
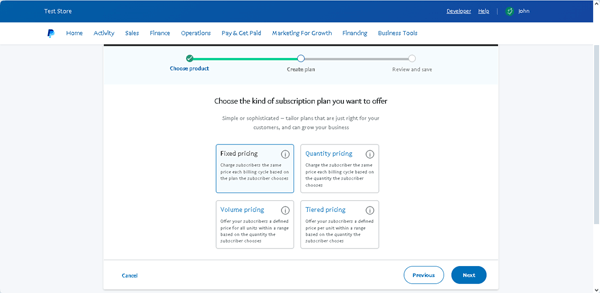
In the next step, you will be redirected to the Choose the kind of subscription plan you want to offer section. This step is one of the most important for customization. Pick the pricing option that is the most preferable for the subscription plan you create.
Then, push the “Next” button once again.
In this case, we chose the “Fixed pricing” option. To redirect to the following page, click the “Next” button at the button in the right corner of the page.
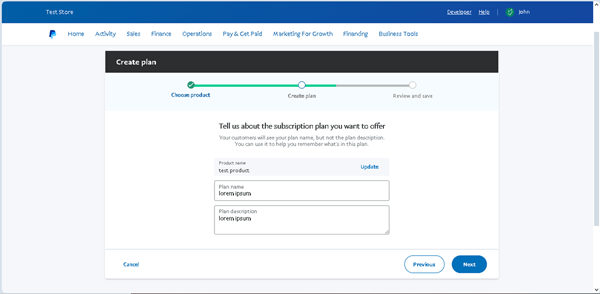
In the Tell us about the subscription plan you want to offer section, fill out the needed fields. In particular, the previously entered data will be transferred to the obligatory Product name field, and you can change this text. Also, the Plan name field is required.
Finally, click the “Next” button to continue the setup.
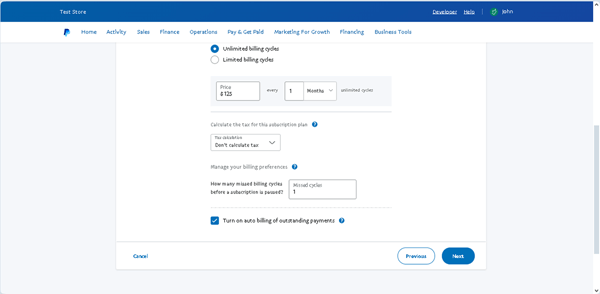
In the next Define pricing for this subscription plan section, adjust the settings concerning pricing. Specify the currency and check the other available options.
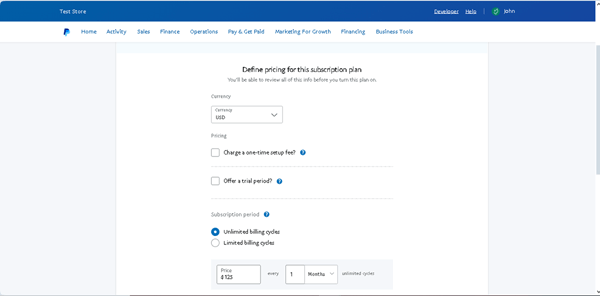
Don’t forget to specify the price in the corresponding field and decide how it will be charged. There, hit the “Next” button to review the plan you have just customized.
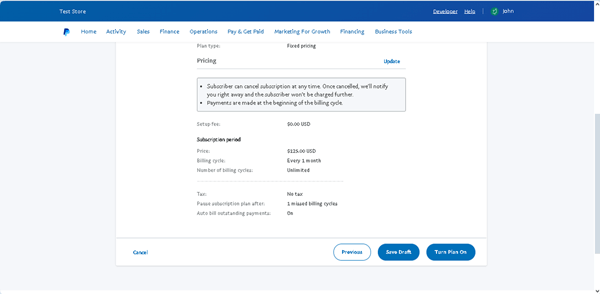
The last step is called Review and save your new plan. Here, check the details and push the “Update” button next to the information if it needs to be edited.

Once done, hit the “Turn Plan On” button to make the plan live.
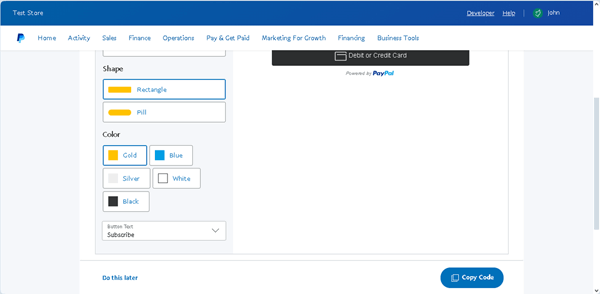
Last, you will be transferred to the Set up your PayPal Checkout experience for subscriptions page, which lets you copy the code and add it to your site.
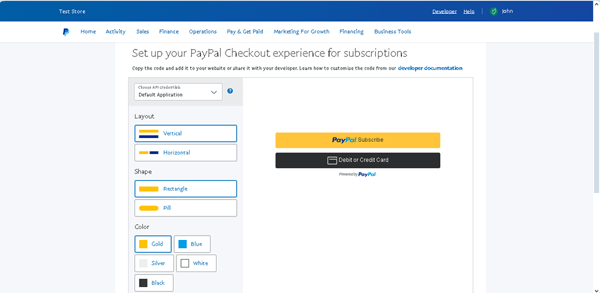
If needed, set the layout options, scroll down the page, press the “Copy Code” button, and then the “Go to plans” link to be redirected to the Subscription plans page.
Otherwise, press the “Do it later” link to be redirected to the Subscription plans page.
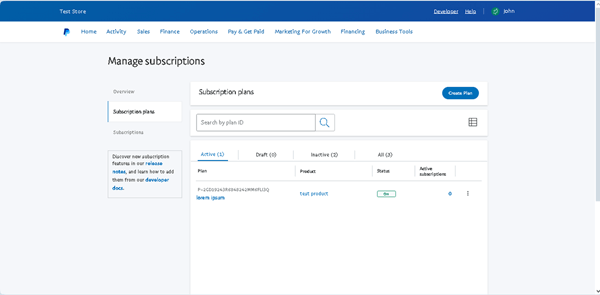
Now, your subscription plan is displayed on the Sandbox PayPal Dashboard > Sales > Subscriptions > Subscription plans page.
Configure the JetFormBuilder Settings
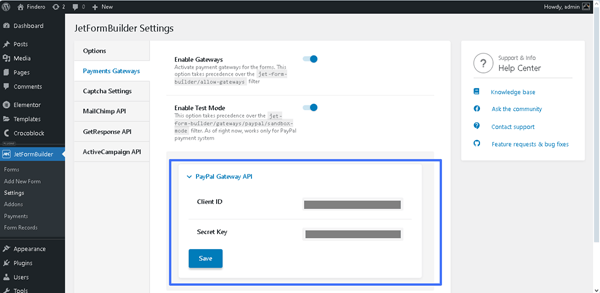
Before building the form, ensure that the PayPal gateways are activated for your website. Open the WordPress Dashboard > JetFormBuilder > Settings page and check the Payments Gateways settings.
Toggle the Enable Gateways switcher. Optionally, activate the Enable Test Mode switcher if you test work with your PayPal account in the “Sandbox” mode.
Then, return to your main PayPal Dashboard > Sandbox test accounts page, which lists your business and live accounts. Next, unfold the business account you used while creating your subscription plan; after that, move to the REST API apps section and unroll the needed app.
Here, copy the Client ID and Secret key field values for further pasting.

Then, go back to the WordPress Dashboard > JetFormBuilder > Settings > Payments Gateways subtab, complete the Client ID and Secret Key fields and the corresponding data, and hit the “Save” button.
Create a Form
Add the form’s fields
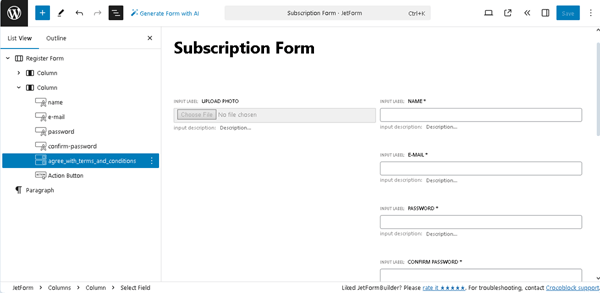
Go to WordPress Dashboard > JetFormBuilder > Add New. The form will be opened in the Block Editor (Gutenberg).
Select the needed embedded form in the Welcome block or build the form from scratch.
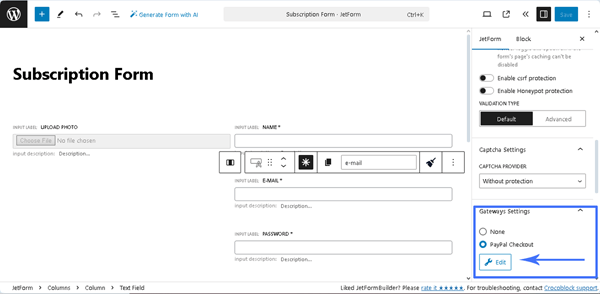
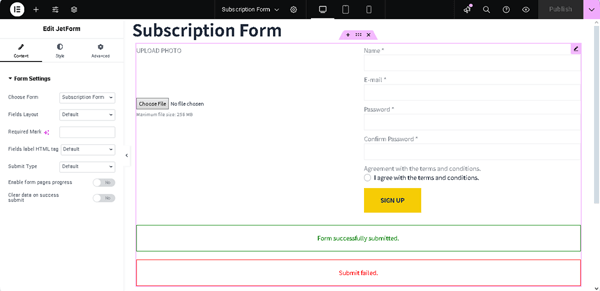
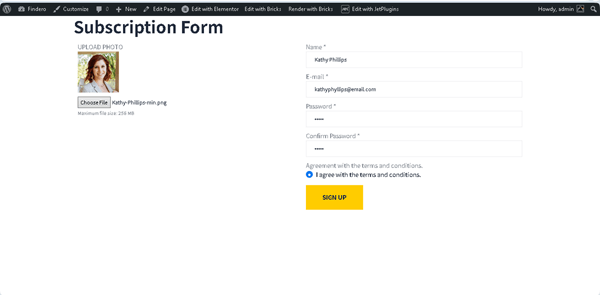
In this case, we type the form’s name (the “Subscription Form” text), press the “Start from Scratch” button, and create a form with the Text Fields, Image Field, Radio Field, and Action Button.
This form creation tutorial explains how to build forms from scratch.
Adjust the PayPal Checkout Settings
In this step, scroll the JetForm settings down to the Gateways Settings section. Enable the PayPal Checkout option and press the “Edit” button below to get to the settings.
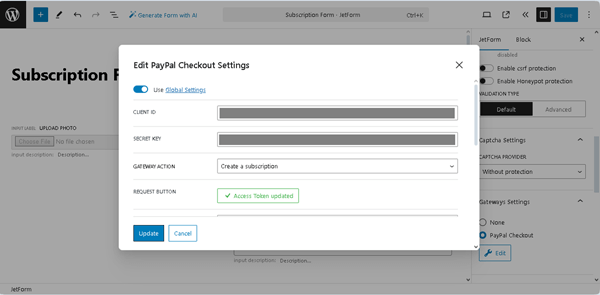
After that, the Edit PayPal Checkout Settings pop-up will be opened.
First, in the newly opened Edit PayPal Checkout Settings window, enable the Use Global Settings toggle to inherit the Client ID and Secret Key you entered earlier in the JetFormBuilder settings.
Or, if you haven’t done it before or need to substitute data, you can do it right in the following fields.
Mind setting the GATEWAY ACTION by selecting the “Create a subscription” option from the drop-down menu.
Push the “Sync Access Token” button to synchronize the data. Once the synchronization is successfully updated, the corresponding text will appear on this button.
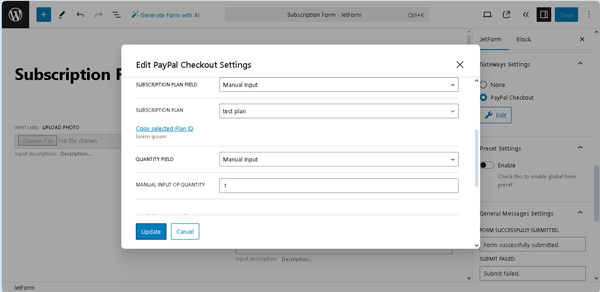
Select the needed option in the SUBSCRIPTION PLAN FIELD. Here, you can choose one of the fields you have added to the form or pick the “Manual Input” option. Now, the last mentioned option is our case.
So, as we have picked the “Manual input” option, we need to specify the required plan in the SUBSCRIPTION PLAN drop-down list (here, we selected the “test” subscription plan we built earlier.)
As for the QUANTITY FIELD, we leave it with the default “Manual Input” value, but for the MANUAL INPUT OF QUANTITY field, we type the “1” text.
Scroll down to available macros and change the messages shown to the user in the specific cases if needed.
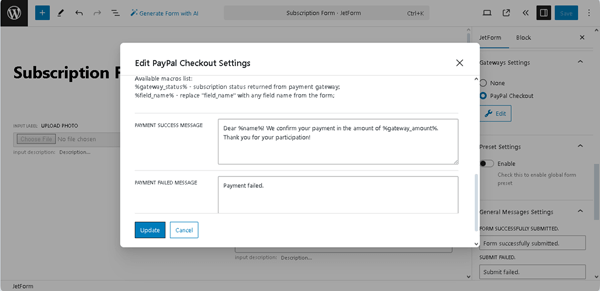
Read the How to Build WordPress Registration Form With Payment tutorial to learn how to manage macros in settings.
Click on the “Update” button to save the adjusted settings.
Manage the Post Submit Actions
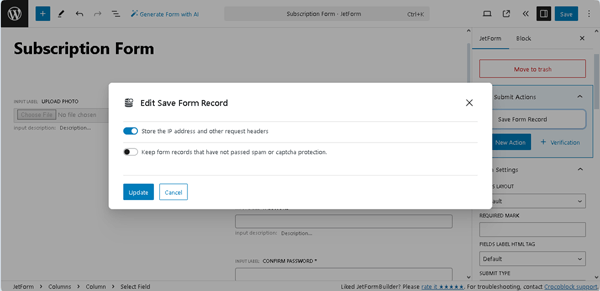
In the next step, navigate to the Post Submit Actions tab. Press the “+New Action” button and select the “Save Form Record” Post Submit Action in the newly appearing Add new action window. If the “Save Form Record” Post Submit Action is set by default, press the “pencil” icon to configure its settings.
After that, activate the Store the IP address and other request headers toggle to save the user’s IP address in the Edit Save Form Record window.
Click the “Update” button.
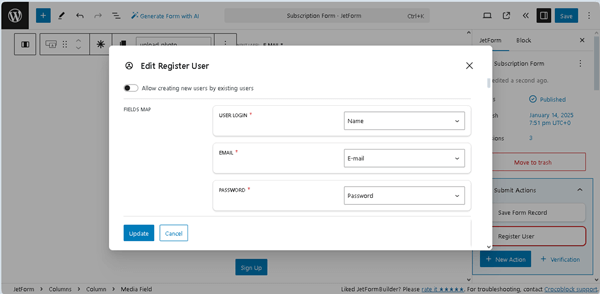
After that, we add the “Register User” Post Submit Action since the form is intended to manage the subscribers.
In the “Edit Register User” pop-up, we assign the corresponding FIELDS MAP fields to the form’s block fields.
Once completed, press the “Update” button.
Read the Register Form tutorial to learn how to build register forms and manage their settings.
Set the Action Events
The Action Events tool applies actions at different performing moments, e.g., during its execution, after request processing, after checkouts, etc.
Navigate to the Post Submit Actions settings of the form settings and select the action you need from the corresponding drop-down menu.
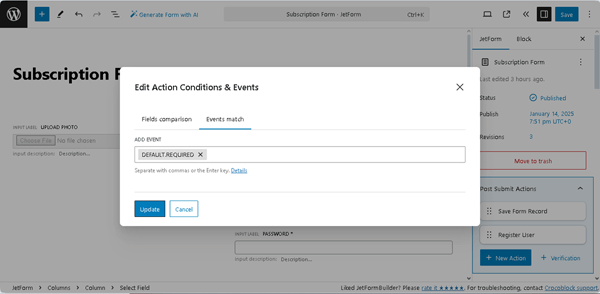
Press the “Condition“ button to open the Edit Action Conditions & Events pop-up window. Here, select the Events Match tab and choose the needed subscription event(s) from the Add Event drop-down menu:
- DEFAULT.PROCESS ー the event that is performed simultaneously with the specified action. This event is executed before redirecting to check out if the PayPal/Stripe functionality is enabled;
- BAD.REQUEST ー the event that is performed after processing the request if the form fields have errors like the wrong field format of the media field or the field text exceeds the limit;
- DEFAULT.REQUIRED ー the event that is performed in any case, even if the form fields have errors or unsuccessfully performed actions. This event is launched at the end of the form response is submitted. This event runs before the form response is sent. By default, this event is used by the “Save Form Record” Post Submit Action and cannot be added to other events through the form editor;
- GATEWAY.SUCCESS ー the event that is performed after the payment system has checked up on the payment made or subscription issued;
- GATEWAY.FAILED ー the event that is performed if users have returned from the checkout page of the payment system without making a payment or subscribing;
- GATEWAY.SUBSCRIPTION.CANCELLED ー the event that is performed if users have canceled the subscriptions;
- GATEWAY.SUBSCRIPTION.EXPIRED ー the subscription expiration event that is performed if the PayPal subscription expires;
- GATEWAY.SUBSCRIPTION.SUSPENDED ー the event that is performed if the subscription is suspended.
- RENEWAL.PAYMENT ー the event that performs the specified Post Submit Action if the subscription is renewed and paid again.
In this case, we set the “GATEWAY.SUCCESS” event and pressed the “Update” button.

That’s it for the form; now, you can hit the “Publish” button.
Place the Form on a Page
Open an editor you prefer and find the JetForm widget/block/element. In this tutorial, we use Elementor.
Read the Displaying a JetFormBuilder Form in Any Page Builder tutorial to learn how to add the JetForm widget/block/element in Elementor, Block Editor, and the Bricks theme.
Test the Flow
Complete the Form
Move to the front end, complete the form with the required information, and submit it by pressing the “SIGN UP” button.
Pay for the Subscription
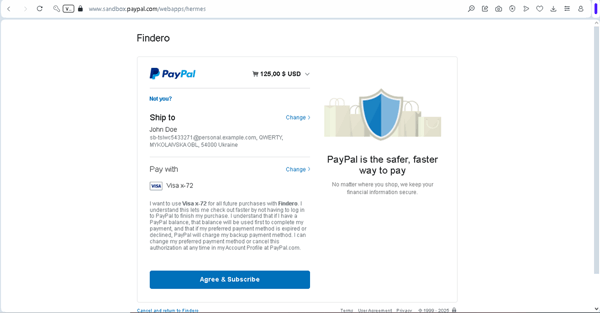
Once the form is submitted, users will be redirected to the PayPal payment page. Now log in to the account and select the bank card if needed. Press the “Continue” button.
Check the provided info and press the “Agree & Subscribe” button.
After payment, you will be redirected back to the form.
Manage the Subscription
You can manage PayPal subscriptions via PayPal and the JetFormBuilder Dashboard.
Manage the submissions via PayPal
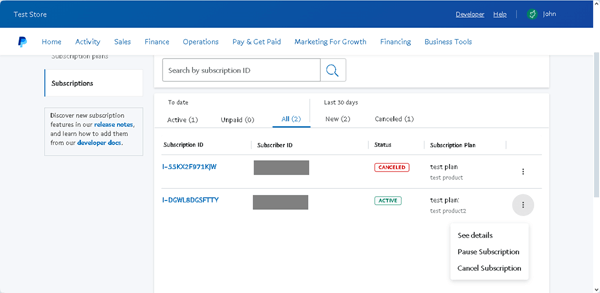
Another way to suspend the subscription is through a PayPal account. Head to the Subscriptions tab and find the needed subscription (in the Sandbox mode, the PayPal Dashboard > Sales > Subscriptions tab).
This tab displays the subscriptions and their actual status.
Press the “three dots” button and select the needed option. Since the submission is “ACTIVE,” you can change its status to “PAUSE” or “CANCELLED” by selecting the corresponding option from this list.
This way, you can change the submission’s status, i.e., reactivate it. However, you can only do this from your PayPal account. Click the “Activate Subscription” button next to the item to enable the subscription once again.
Also, you can cancel the submission.
Manage the submissions via JetFormBuilder
Let’s check the subscription status by heading to WordPress Dashboard > JetFormBuilder > Subscriptions.
The new PayPal subscription info is right here. We can also see that its status is set to active.
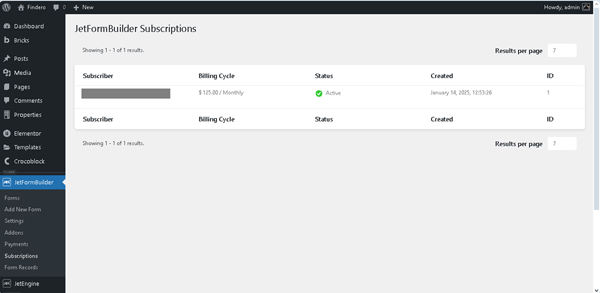
If we hover over the item, we can spot the “Suspend” and “Cancel” links below the subscriber’s name.
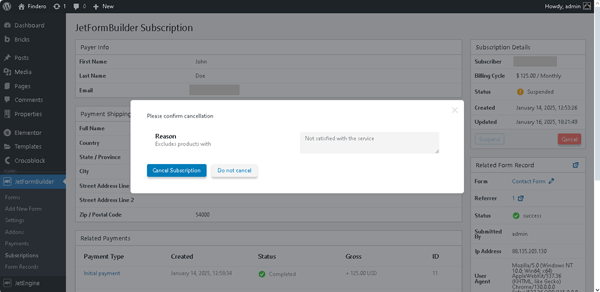
Open the created PayPal subscription to see additional details.
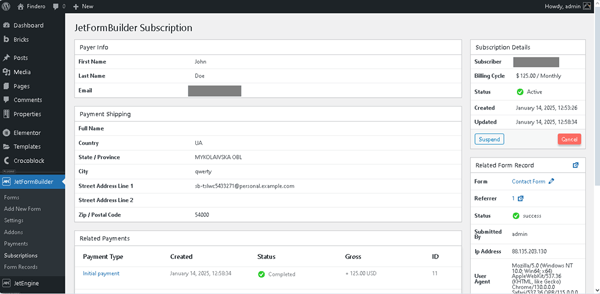
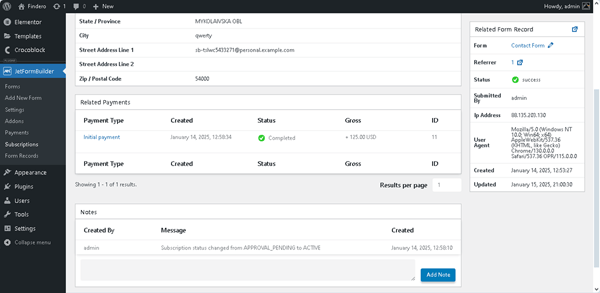
Look at the several blocks presented here: Payer Info, Payment Shipping, Subscription Details, and, not less important, Related Form Record.
Another section available is Notes. Here, you can see messages about subscription status changes or add your note by completing the field and pressing the “Add Note” button.
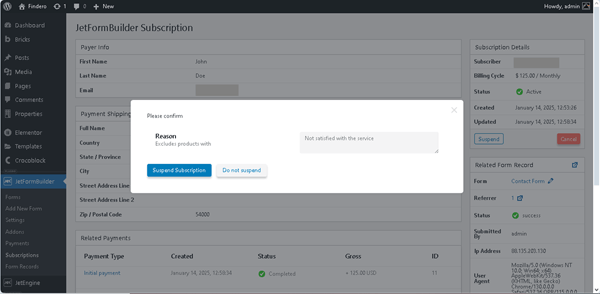
You may also notice the “Suspend” and “Cancel” buttons here.
Press the “Suspend” button. If necessary, specify the reason or leave the default value and push the “Suspend Subscription” button.
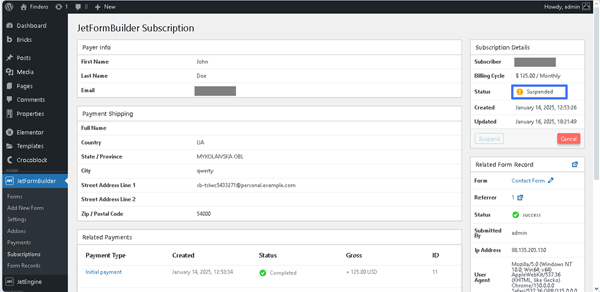
Check the Status field. Now it is changed to “Suspended.”
Also, you can cancel the submission by pressing the “Cancel” button.
Make a Refund
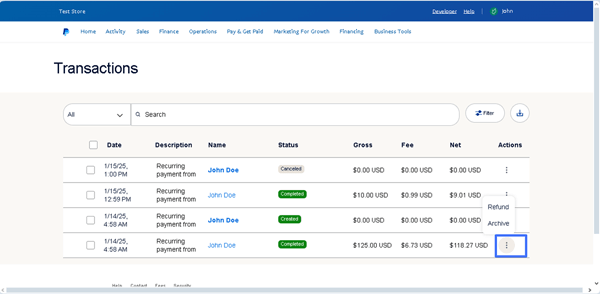
A refund can be made via PayPal as well. Go to Activity > All Transactions and click the “three dots” button next to the received payment. Then, select the “Refund” option to see the refund details.
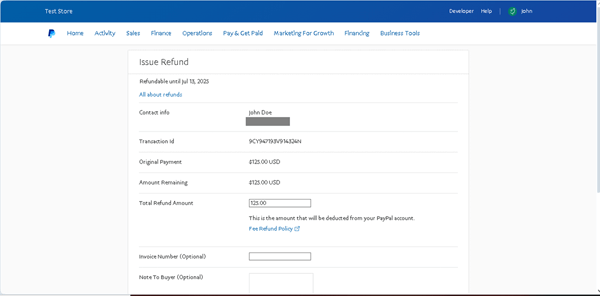
Specify the total refund in the Total Refund Amount. Optionally, you can enter the Invoice Number and leave a Note to Buyer.
That’s it; now you know how to use the PayPal Recurring Payments add-on and manage PayPal subscriptions available with the JetFormBuilder PRO plugin for WordPress websites.