Macros Guide
JetFormBuilder macros let you create dynamic forms without custom code. They can pull values from fields, calculate dates, display conditional messages, or even format post data automatically. In this guide, you’ll learn how each macro works, where it can be used, and how to combine them for advanced form automation.
Contents
- Basic Field Macros
- Date and Time Macros
- Milliseconds Conversion Macros
- String Macro
- Post and Term Macros (When a Field Stores IDs)
- Media Field Macros
- Macros for Emails Only
Basic Field Macros
- %field-name% — returns the value of any form field. Works everywhere inside the form. The ‘field-name’ part should be replaced with the actual name of the form field (e.g., if there is a Text Field with the name ‘text’, the macro will look like this: %text%). The macro also supports multiple optional fields, including Radio, Select, and Checkbox Fields.
- %checkbox-field|render_acf_checkbox% — displays values selected in the Checkbox Field created with the ACF plugin. The ‘checkbox-field’ part should be replaced with the form field name.
Date and Time Macros
These are commonly used in Date, Time, or Datetime Field in conjunction with the Calculated Field to generate final dates or time intervals.
- %date_field|format_date(F j, Y g:i a) – formats date or datetime into a specific pattern.
- |T% – converts date/time into a timestamp.
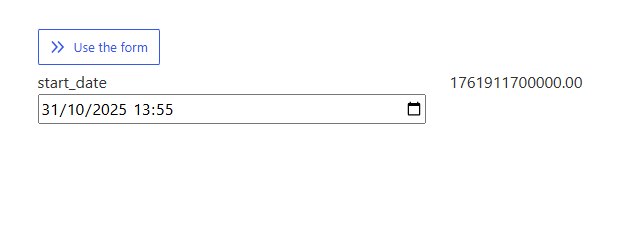
To showcase how this macro works, we create a Datetime Field with the “start_date” name and a Calculated Field, where we enter the “%start_date|T%” macro.

On the front end, after setting the date and time in the Datetime Field, the Calculated Field converts it into a timestamp.
- |toDate, |toDateTime, |toTime — converts timestamp back to date and time format (e.g., 2025-10-21).
- |addDay(N), |addMonth(N), |addYear(N) — adds N days/months/years to a date or timestamp. If N is not specified, it adds 1 day, month, or year. For example, use the %date_field|addDay(1)% macro in the Calculated Field to add 1 day to the date set in the form field, so if you set “10-09-2025”, the Calculated Field will display “10-10-2025”. The “date_field” part should be replaced with the form field name.
For the showcase, we use the previous Datetime and Calculated Fields. Into the Calculated Field, we enter the macro:
‘%start_date|T|addDay(5)|toDateTime%’which takes the selected date, turns it into a timestamp, adds 5 days, and outputs the new date.

On the front end, we set the date and time. The Calculated Field shows five days after the selected Start Date.

- |subDay(N), |subMonth(N), |subYear(N) — subtract N days/months/years from a date or timestamp. If N is not specified, it subtracts 1 day, month, or year.
- |addMin(N), |addHour(N), |subMin(N), |subHour(N) – manipulate hours and minutes.
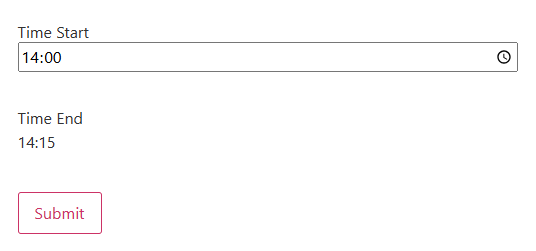
For example, we set the Time Field and enter the macro (“time_start” should be replaced with the Time Field name) into the Calculated Field:
%time_start|addMin(15)%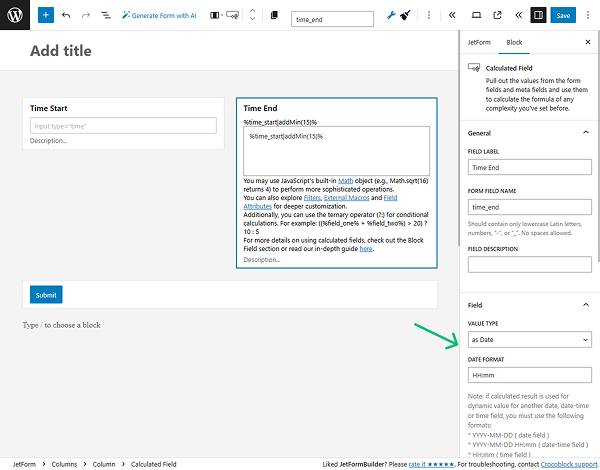
On the front end, we set the time in the Time Field, and the Calculated Field shows the time with 15 minutes added.
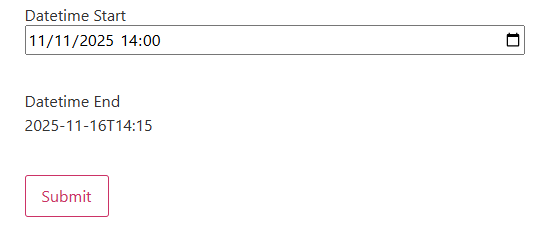
If you want to add both date and time, use the macro with a formula like this:
'%datetime_start|T|addMin(15)|addDay(5)|toDateTime%'And set the VALUE TYPE to “as String” in the Calculated Field block settings.

On the front end, we set the date and time in the Datetime Field, and the Calculated Field shows the datetime with 5 days and 15 minutes added.
- |setDay, |setMonth, |setYear — sets a specific month/day/year for a date or timestamp.
For example, we use the Datetime Field and enter such a macro into the Calculated Field:
%datetime_start|setYear(2077)%We also set the VALUE TYPE to “as Date” in the Calculated Field block settings and set the required DATE FORMAT (e.g., “YYYY-MM-DD HH:mm” for the Datetime Field).
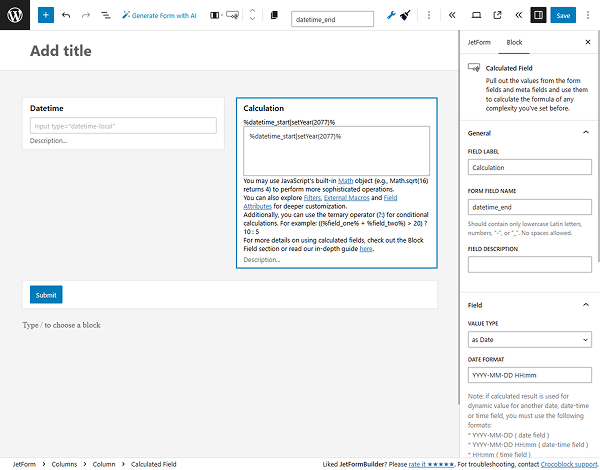
On the front end, we set the date and time in the Datetime Field (20/11/2025 13:43), and the Calculated Field shows the datetime with the year set with a macro (20/11/2077 13:43).

Milliseconds Conversion Macros
- |toMinuteInMs, |toHourInMs, |toDayInMs, |toWeekInMs, |toMonthInMs, |toYearInMs — converts a regular number (e.g., from a Number Field) into the number of milliseconds equal to these minutes/seconds/days, etc. They can be used to perform math operations, e.g., to calculate the future date or to compare two dates by converting durations into milliseconds.
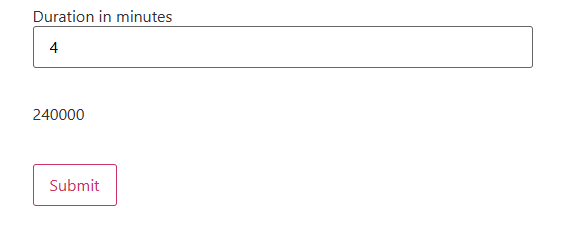
For example, we add a Number Field with the “duration_in_minutes” name and a Calculated Field with such a macro:
%duration_in_minutes|toMinuteInMs%and the “as Number” VALUE TYPE selected.
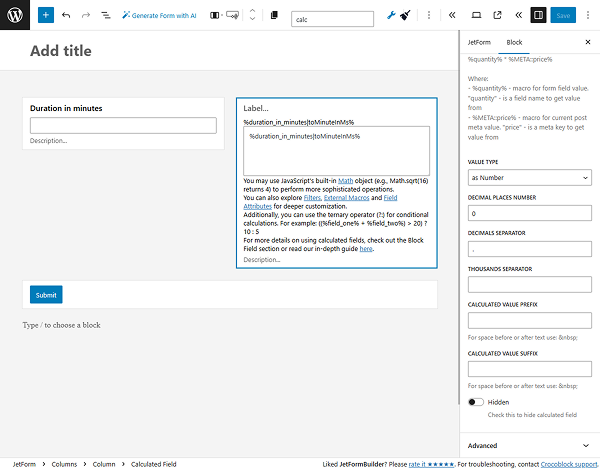
On the front end, we enter “4” minutes in the Number Field, and a calculated result is displayed below as “240000” ms (milliseconds).
String Macro
- length — returns the length of a string (number of characters) or the number of elements in an array.
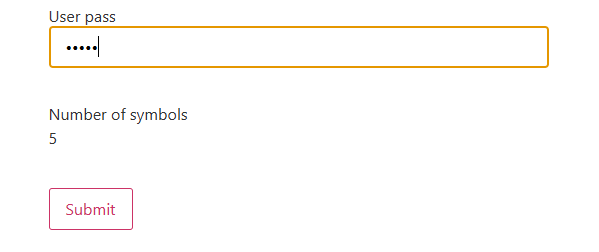
For instance, we add a Text Field with the “Password” FIELD TYPE and a Calculated Field with such a macro:
%user_pass|length%where the “user_pass” is the Text Field name. We also set the “as Number” VALUE TYPE.
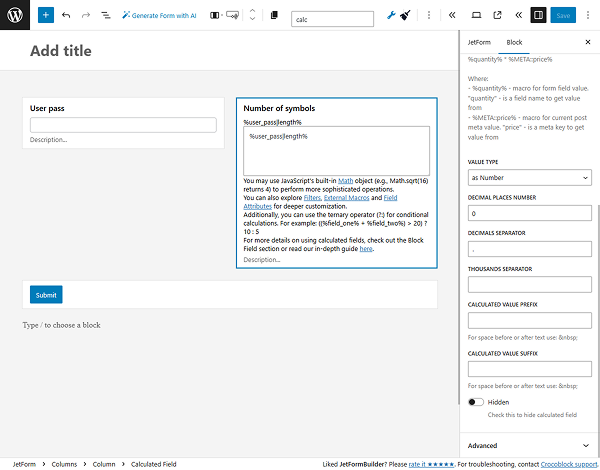
On the front end, the Calculated Field counts the number of symbols entered in the password field.
Post and Term Macros (When a Field Stores IDs)
These macros can be used in emails, calculated fields, or displayed dynamically on confirmation pages:
- %post_field|post_title_by_id%
- %post_field|post_titles_by_ids%
- %term_field|term_title_by_id%
- %term_field|term_titles_by_ids%
Media Field Macros
These can be used in emails, Dynamic Values, hidden fields, or custom messages.
- %media_field|img_url_by_id% – get the image URL.
- %media_field|file_url_by_id% – get the file URL.
Macros for Emails Only
A few are specifically tied to the “Send Email” action context:
- %inserted_post_id|post_url_by_id%
- %inserted_post_id|post_link_by_id%
These rely on the form, creating a post with the “Insert/Update Post” action, so they don’t work in real-time form fields.
For more details, refer to the How to Insert a Link to a Newly Created Post chapter in the How to Use Macros in Email Formatting tutorial.
That’s all. Now you know about the JetFormBuilder macros and how to use them for dynamic forms in WordPress. Additionally, you can combine them with the JetEngine macros. For more details, check this guide.