Media Field
The Media Field block from JetFormBuilder is intended to upload media files of a pre-specified type to a website as well as use specific macros and filters.
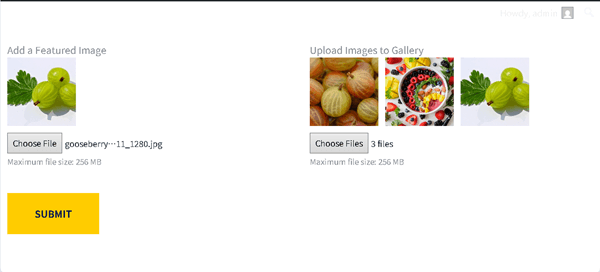
After inserting the Media Field, a button will be added to the form that allows users to upload a media file from their PC to the website. The media files uploaded this way will be stored in the JetFormBuilder folder (“wordpress\htdocs\wp-content\uploads\jet-form-builder”) on the PC where WordPress is installed. Also, the protection for directories where files are saved is provided by the Media Field functionality.
On the front end, the Media Field shows not only the thumbnails of the uploaded images but also the uploaded file names or the number of files.
Adding the Media Field
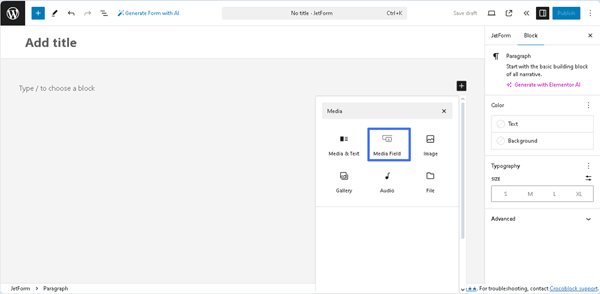
After creating a new form or opening a previously built one, the Media Field block can be found in the search bar of the block inserter (represented by the “plus” icon) and then placed where needed.
Also, the Media Field can be inserted as part of JetFormBuilder’s embedded templates, presented in the Welcome block, and patterns.
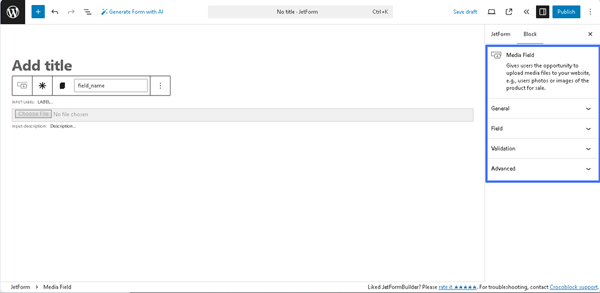
Settings of the Media Field
The Media Field block settings are presented by the General, Field, Validation, and Advanced tabs.
General
The General settings tab includes the following fields:
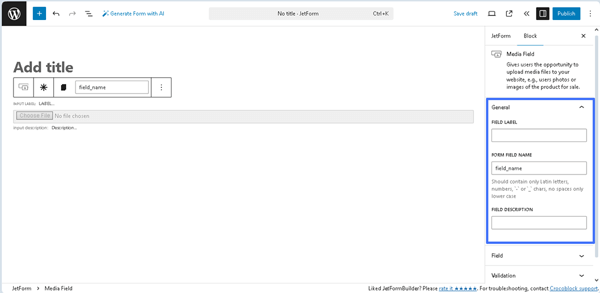
- FIELD LABEL ㅡ a field for inserting the field’s label;
- FORM FIELD NAME ㅡ a field for the field’s name. This field will be filled out automatically after the text is added to the FIELD LABEL field;
- FIELD DESCRIPTION ㅡ a non-required field intended to insert the field’s description.
Field
The following fields are presented in Field tab:
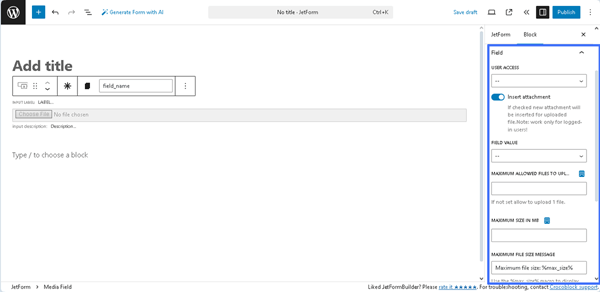
- USER ACCESS ㅡ a drop-down list that allows choosing the type of users that will be able to upload media files. Those could be all registered users (“Any registered user”), all users permitted to upload files (“Any user who is allowed to upload files”), the users permitted to edit posts (“Any user who is allowed to edit posts”) and all users in general, including guests (“Any user (incl. Guest)”). Mind that allowing all users to upload files could make the website a target of spam and inappropriate content;
- Insert attachment ㅡa toggle that, if disabled, allows storing the uploaded media files in the folder on the PC without accessing them via the Media Library. If enabled, this toggle turns on the FIELD VALUE drop-down list, which has three options: to store the ID of the file (“Attachment ID”), the URL of the file (“Attachment URL”), and both of them (“Array with attachment ID and URL”);
- MAXIMUM ALLOWED FILES TO UPLOAD ㅡ a text field intended to specify how many files the users will be able to upload. The needed value can be typed or selected from the SOURCE drop-down list. In particular, pressing the “Dynamic Tag” icon opens the Edit Preset pop-up, which includes a SOURCE drop-down list with the following options: “Post,” “User,” “URL Query Variable,” and “Option Page.”
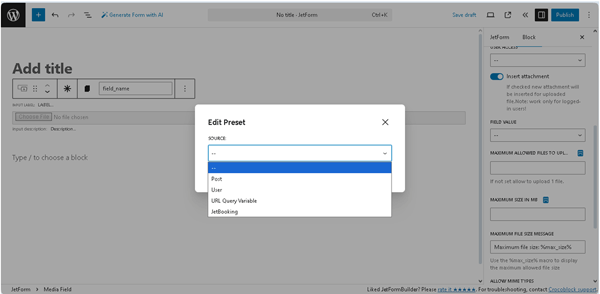
- MAXIMUM SIZE IN MB ㅡ a text field intended to specify the maximum file size the user can upload instead of the default 40 MB. The needed value can be typed or selected from the SOURCE field. In particular, pressing the “Dynamic Tag” icon opens the Edit Preset pop-up, which includes a SOURCE drop-down list with the following options: “Post,” “User,” “URL Query Variable,” and “Option Page.”
- MAXIMUM FILE SIZE MESSAGE ㅡ a text field intended to insert the text to display the maximum allowed file size;
- ALLOW MIME TYPES ㅡ a text field designed to add the types of files that users are allowed to upload. If left empty, all file types will be allowed. The entered data should be separated by commas, spaces, or the “Enter” key.
Validation
The setting is presented by the VALIDATION TYPE field with three buttons:
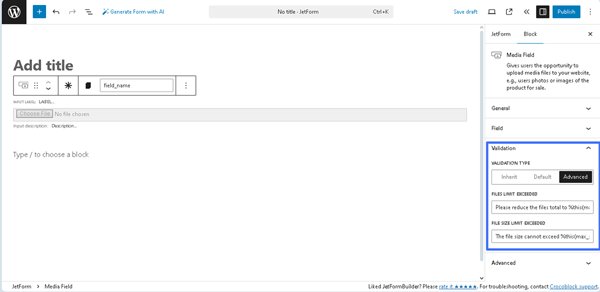
- Inherit ㅡ an option that sets the validation to be inherited from the form arguments;
- Default ㅡ an option that sets the native validation that works by a browser;
- Advanced ㅡ an option that sets the advanced rules for validation. If pressed, the FILES LIMIT EXCEEDED and FILE SIZE LIMIT EXCEEDED text fields will be shown, which are intended to type the corresponding text or use a macro.
Read the Advanced Form Validation and Advanced Field Validation with JetFormBuilder: Use Cases tutorials for a better understanding.
Advanced
The Advanced section includes the following fields:
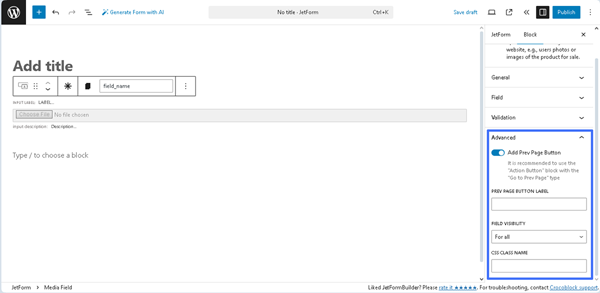
- Add Prev Page Button ㅡ a toggle that enables the PREV PAGE BUTTON LABEL field for inserting a text that will be displayed on the corresponding button (if added);
- FIELD VISIBILITY 一 a drop-down list that allows selecting who can observe the block: “For all,” “Only for logged in users,” or “Only for NOT-logged in users”;
- CSS CLASS NAME 一 a text field that allows inserting an additional CSS class to design the block field.
More details on managing the corresponding settings can be found in the JetFormBuilder Plugin: Looking Through Advanced Settings tutorial.
Styling the Block
After installation and activation of the free JetStyleManager plugin, the “Block Style” button will appear in the top right corner. This plugin configures the Alignment, Border, Color, Margin, Padding, and Typography settings of the Media Field.
That’s all about the Media Field available with the JetFormBuilder plugin for WordPress.