How to Use Repeater and Calculated Fields
From this tutorial, you will find out how to combine the Repeater Field and Calculated Field to create a form that will calculate values correctly.
Table of Contents:
There are two ways the WordPress form Repeater Field value can be used in the formula of Calculated Field — as a row count and as a custom calculated value. You can choose how to use it in the CALCULATE REPEATER ROW VALUE drop-down list of the Field settings menu section.
In this tutorial, we will build two forms with each type of calculation, both of which will be used for the event registration. So, let’s walk through the form creation process.
Default (returns row count)
Head to WordPress Dashboard > JetFormBuilder > Add New.
Name the form. In our case, it’s “Event Registration.”
Add fields
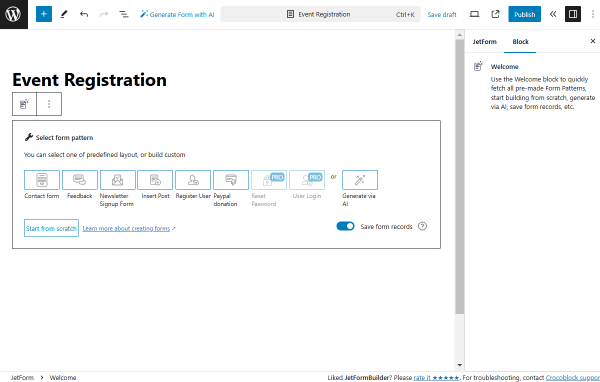
First, we delete the Welcome block added by default to build a form from scratch.
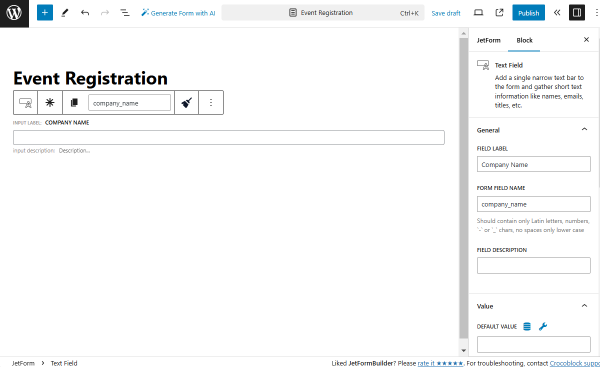
The first field we add to the form is a Text Field named “Company Name.” We don’t alter the settings, leaving them default.
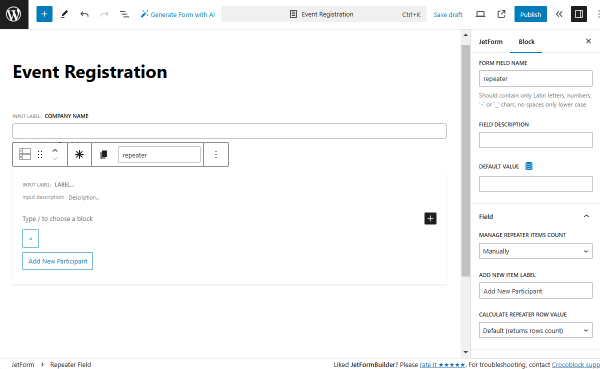
Next, we add a Repeater Field.
This time, we leave the FIELD LABEL empty and only complete the FORM FIELD NAME with the “repeater” value.
In the Field tab, we set the “Add New Participant” ADD NEW ITEM LABEL and leave the “Default (returns rows count)” option in the CALCULATE REPEATER ROW VALUE field.
This way, the calculation will be made based on the number of repeater fields.
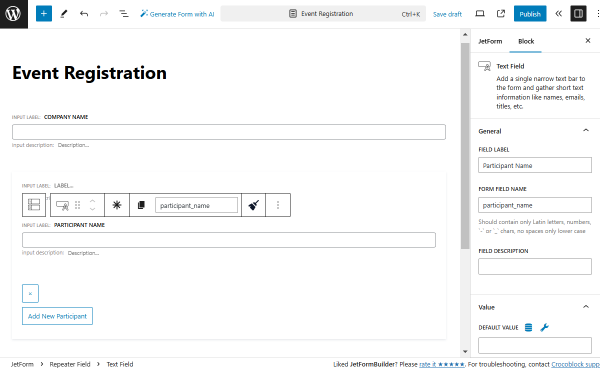
Inside the added Repeater Field, we put a Text Field with the “Participant Name” FIELD LABEL.
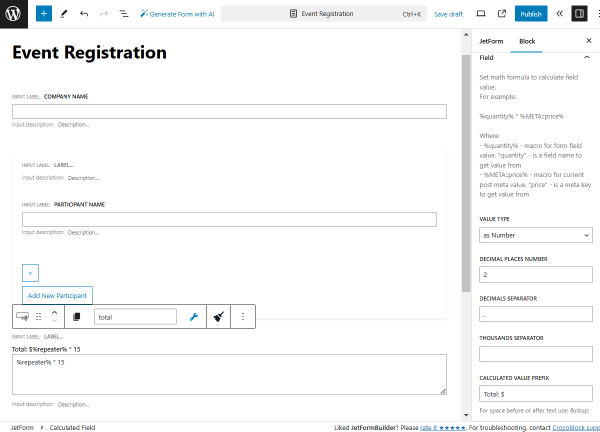
Next, outside the Repeater Field, we add a Calculated Field with the following value:
%repeater% * 15where the “%repeater%” value is the FORM FIELD NAME of the Repeater Field and “15” is the price of the ticket to the event per person.
Also, we add a “Total: $” value in the CALCULATED VALUE PREFIX field.
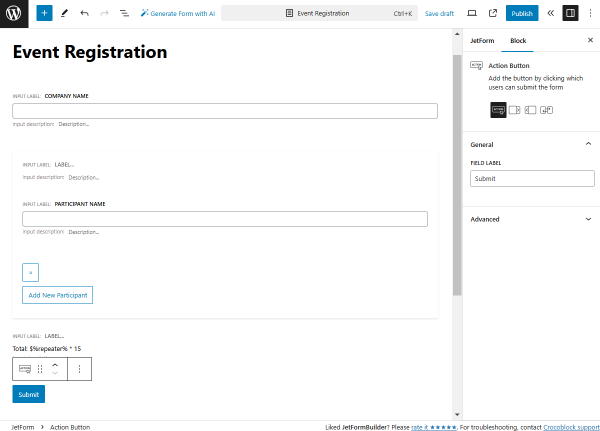
The final field we add to the form is the Action Button.
We don’t change the settings for this field.
Adjust post submit actions and payment gateways
Next, we want to customize the post submit actions and attach the payment system to the form.
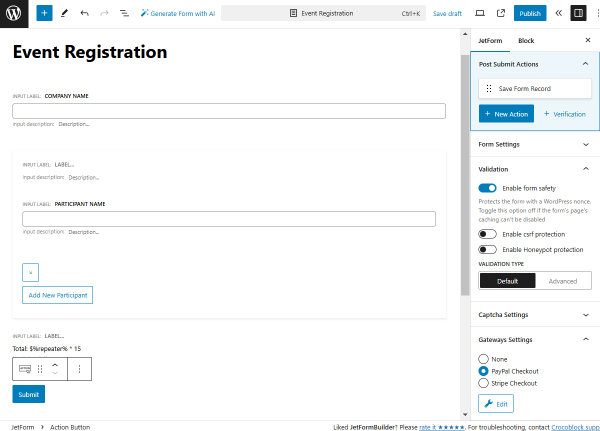
To do this, first, move to the Post Submit Actions section of the JetForm tab and press the “+ New Action” button. Then, select the needed action. For instance, we pick the “Save Form Record” action to save the form submissions on the Form Records page of JetFormBuilder.
After that, we open the Gateways Settings tab and pick the “PayPal Checkout” option.
To customize its settings, press the “Edit” button.
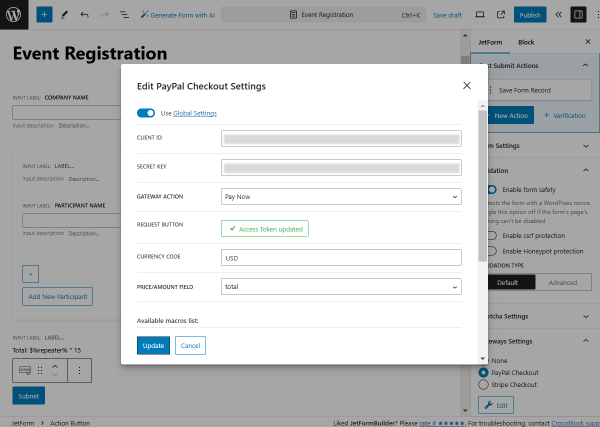
In the opened pop-up, we activate the Use Global Settings toggle to pull the CLIENT ID and SECRET KEY values from the global settings.
We leave the default “Pay Now” GATEWAY ACTION and click the “Sync Access Token” button.
Then, complete the CURRENCY CODE field; in our case, it is set to “USD”, and select the Calculated Field name as the PRICE/AMOUNT FIELD.
To save the settings, press the “Update” button.
Then, click the “Publish” button to save the form.
Place form on the page
Head to the page/template where you want to place the form. In our case, it will be the “Registration Page,” so we go to WordPress Dashboard > Pages > Add New Page to create a page in the Elementor editor.
We fill the page with content and place a JetForm widget on the page.
In the widget’s settings, pick a just-built form in the Choose Form selector and customize other settings if desired.
Once the page is ready, press the “Publish” button.

Check the result
Head to the just-edited page at the front end and complete the form.
You will observe how the price is changing with every new participant added with the “Add New Participant” button.
Submit the form to check if the form is working correctly.

Now, let’s check the WordPress Dashboard > JetFormBuilder > Form Records directory. Here, if the first form was submitted correctly, the form record will be displayed in the list.
Click the “View” button to check the details.
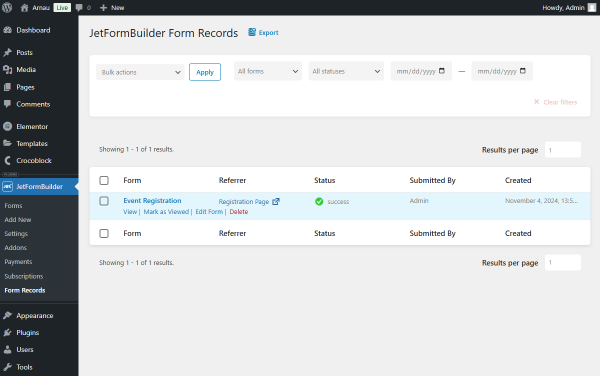
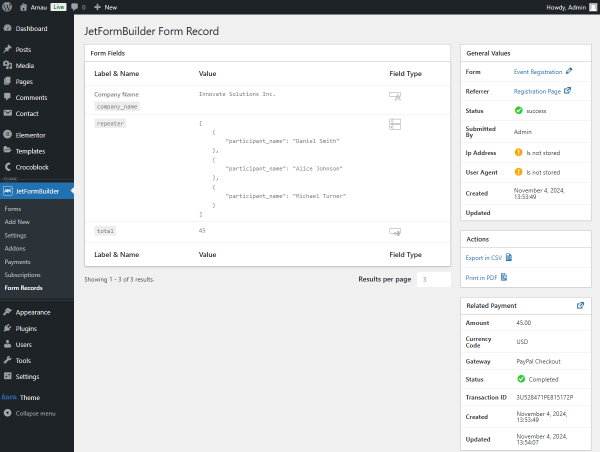
Once done, the page with the form records will be opened.
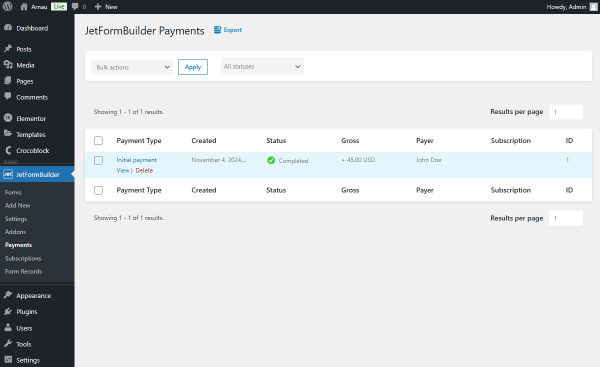
Also, proceed to WordPress Dashboard > JetFormBuilder > Payments page to check the information about the transaction made during the form submission.
Find the corresponding payment and press the “View” button that appears when hovering over the item.
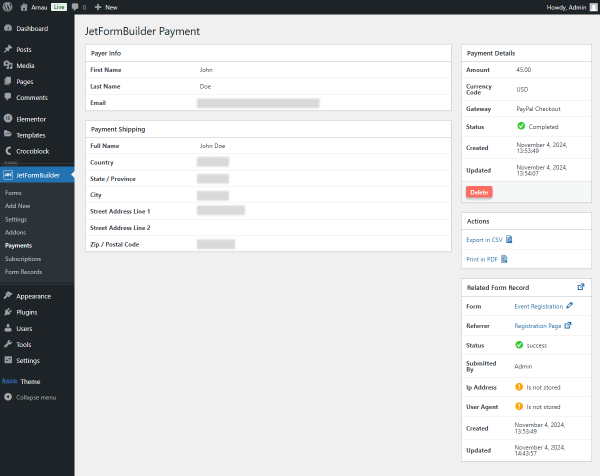
When the payment page is opened, you can check the info on payer information, related form record, and other payment details.
Custom (calculate custom value for each row)
Now, let’s build a second form with a different calculation type; this time, it will be custom.
Add fields
For this form, we also add a “Company Name” Text Field and a Repeater Field with the “repeater” FORM FIELD NAME.
Inside the Repeater Field, we add a “Participant Name” Text Field.
Then, we add the Checkbox Field in the Repeater Field and set its FORM FIELD NAME to “vip-access-checkbox”.
Next, we leave the default “Manual Input” option and press the “Manage items” button to add field options.
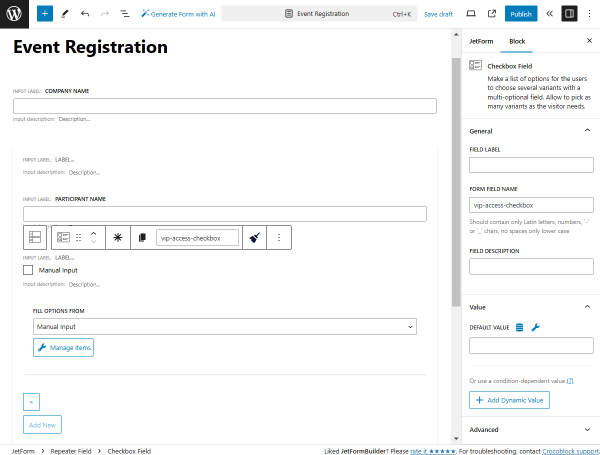
Click the “+ Add new Option” button.
Here, we set the “VIP Access” LABEL and the “vip-access” VALUE.
In the CALCULATE field, we put the “20” value to make it a price for VIP access to the event.
In case you want to add more options, click the “+ Add new Option”.
To save the settings, press the “Update” button.
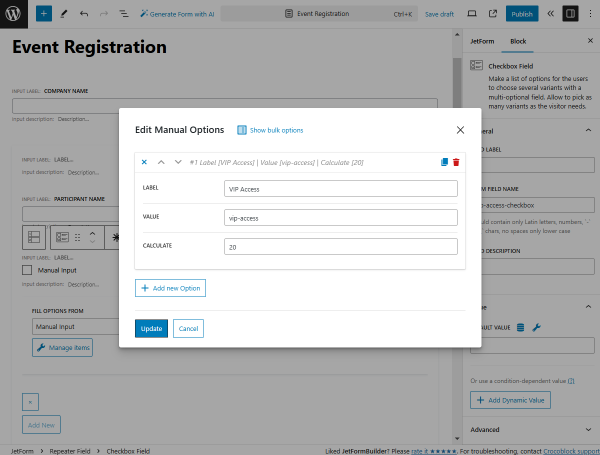
Now, click on the Repeater Field to open its settings.
Open the Field tab and pick the “Custom (calculate custom value for each row)” option in the CALCULATE REPEATER ROW VALUE field.
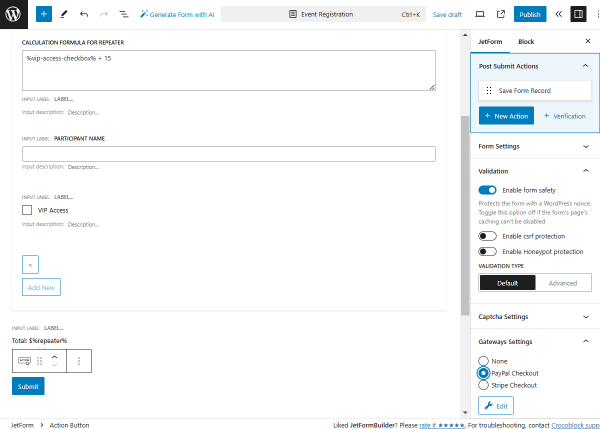
Now, the CALCULATION FORMULA FOR REPEATER appears in the Repeater Field. We put the following formula in this field:
%vip-access-checkbox% + 15where the “%vip-access-checkbox%” is the FORM FIELD NAME of the Checkbox Field and the “15” value is the intended price of the event ticket.
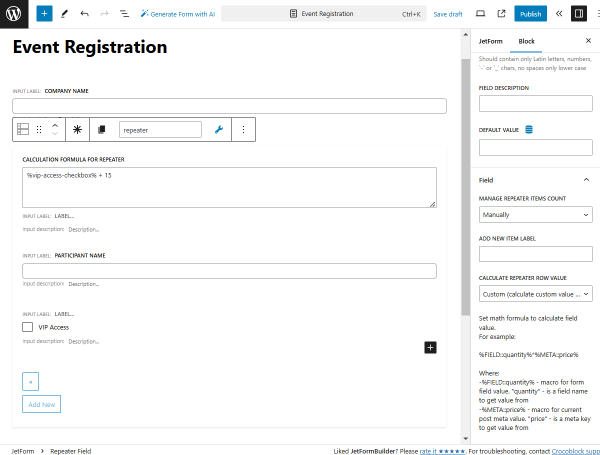
Next, we add the Calculated Field; now, it is placed outside the Repeater Field.
Inside this field, we put the “%repeater%” value, which is the FORM FIELD NAME of the added Repeater Field.
In the Calculated Field settings, we also complete the CALCULATED VALUE PREFIX field with the “Total: $” value.
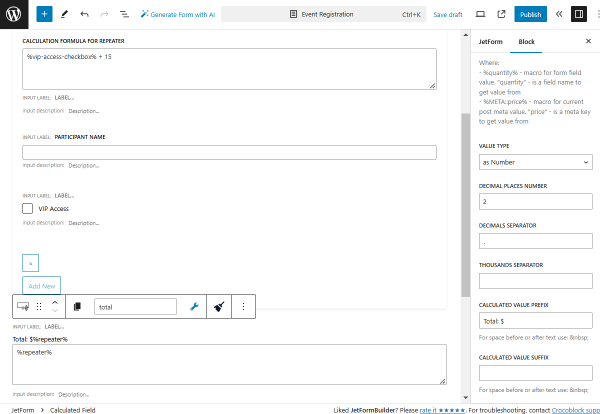
Ultimately, we add an Action Button to the form.
Adjust post submit actions and payment gateways
As for the Post Submit Actions and Payment Gateways, we adjust them just as we did for the first form.
Publish the form by pressing the corresponding button.
Place form on the page
Proceed to the page where you want to add a form and place the JetForm widget/block/element on the page.
Pick the just-built form in the Choose Form selector.
Work on other settings if needed and press the “Publish” button to save the page.

Check the result
Head to the front end to check the form. There, complete the form to see that the total sum is calculated correctly.

Now, you can check the WordPress Dashboard > JetFormBuilder > Form Records directory to see if the data was saved after the form submission.
Click the “View” button next to the needed form record and check the saved information.
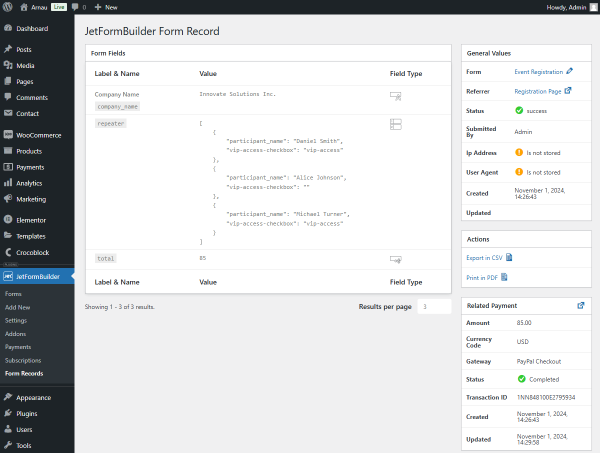
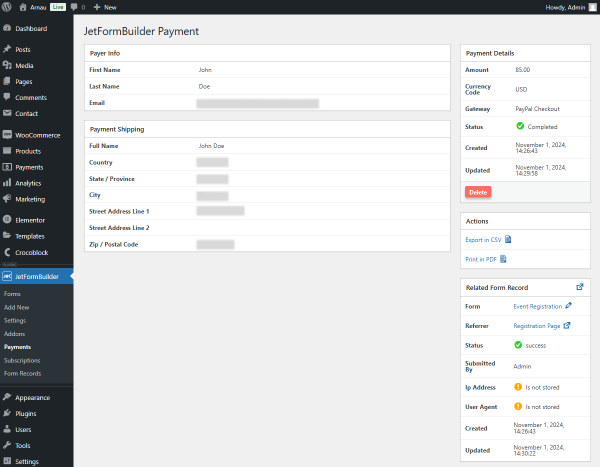
Also, you can check if the payment after the form submission was made successfully in the WordPress Dashboard > JetFormBuilder > Payments directory. To do so, click the “View” button next to the needed payment.
On the opened page, you will see the payment details.
That’s all; now you know how to use the Repeater Field with the Calculated Field available with the JetFormBuilder plugin for your WordPress website.