How to Translate JetFormBuilder Form With WPML
Check how to translate JetFormBuilder forms on the WordPress website by using the WPML plugin.
Table of Contents:
- Activate Forms Translation
- Translate the Form
- Create a Page
- Translate the Page with the Form
- Check the Result
In this guide, we will show you how to activate the form translation functionality on your website and translate the form along with the page where it is located.
Activate Forms Translation
First, go to WordPress Dashboard > WPML > Settings and move to the Post Types translation section.
Find the Forms (jet-form-builder) row and set it to “Translatable.”
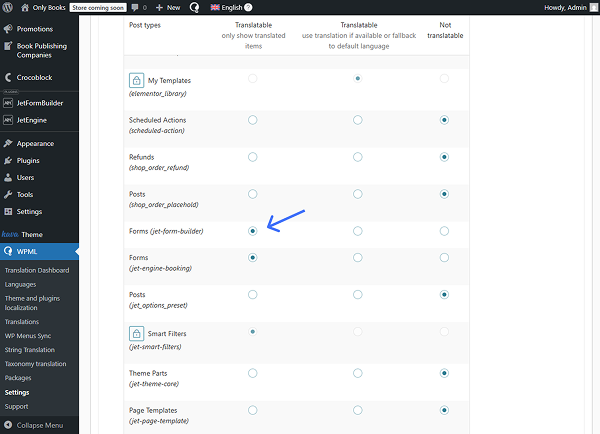
Don’t forget to click the “Save” button below the section.
Translate the Form
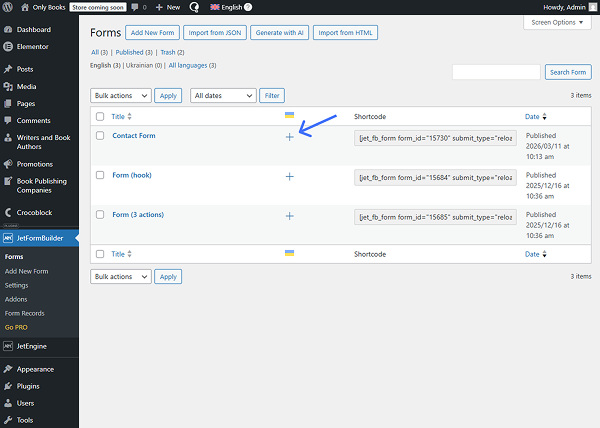
Let’s assume you have built a form beforehand. For example, we have a “Contact Form” that should be translated.
Find it in the WordPress Dashboard > JetFormBuilder > Forms list and press the “+” button next to it to add the translation.
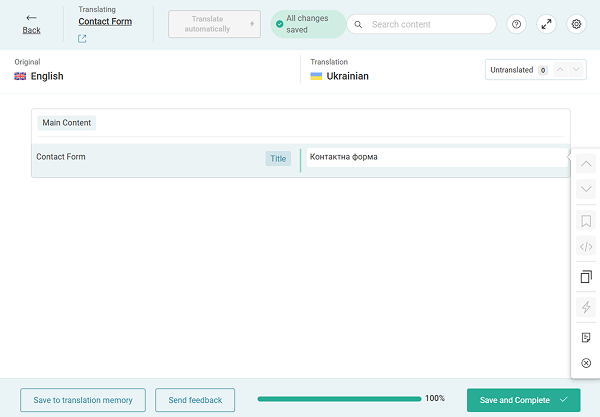
For now, you will be able to translate only the title of the form. Translate it and click the “Save and Complete” button.
Now, proceed to the forms page in the translated language. In our case, it’s Ukrainian.
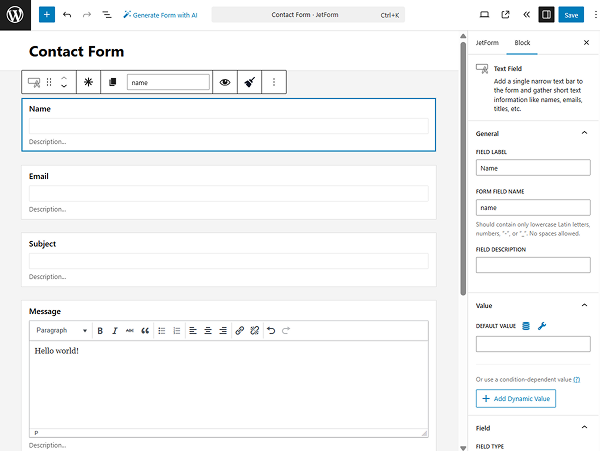
Click the “Edit” button to open the form editor.

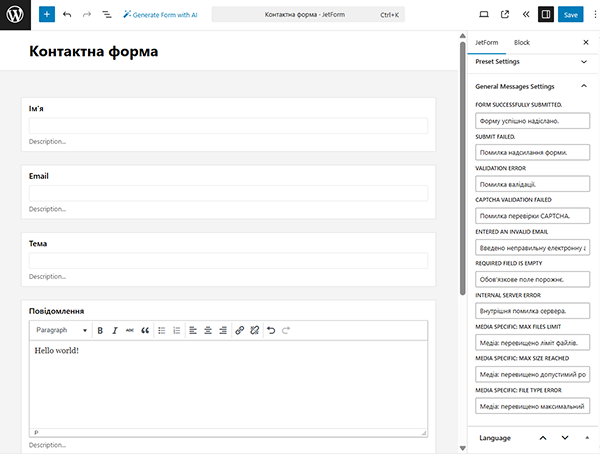
Translate the Labels of the fields and move to the General Messages Settings section of the JetForm tab.
Translate the notifications and save the page.
Create a Page
If you haven’t built a page with the created form yet, you can do it now in the WordPress Dashboard > Pages directory.
We create a “Form Page” in the Elementor builder. However, you are free to work with Gutenberg or Bricks if preferred.
When the page is opened in Elementor, add the JetForm widget to it.
Pick the original form in the Choose Form field.
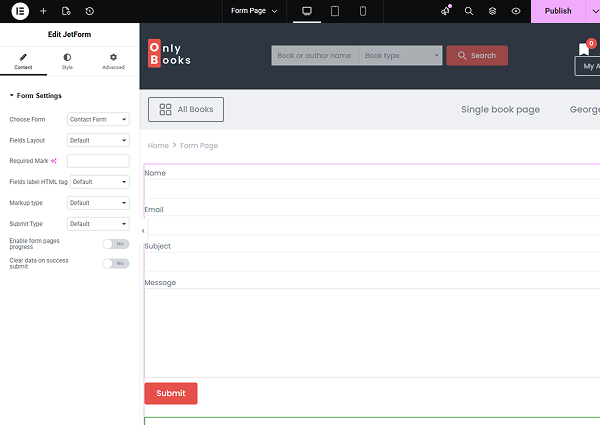
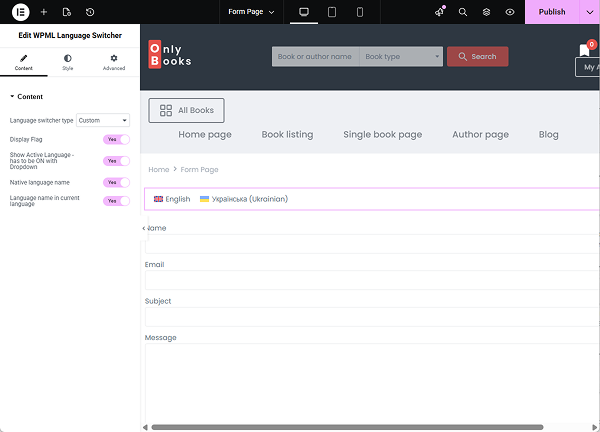
We also add the WPML Language Switcher widget above the form to be able to switch between languages on the front end.
Make other changes to the page if needed and save the result.
Translate the Page with the Form
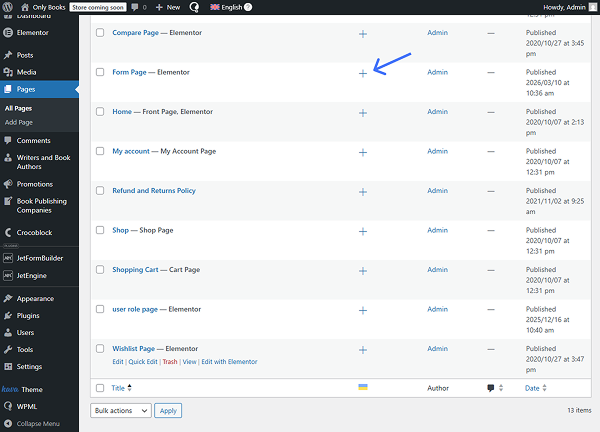
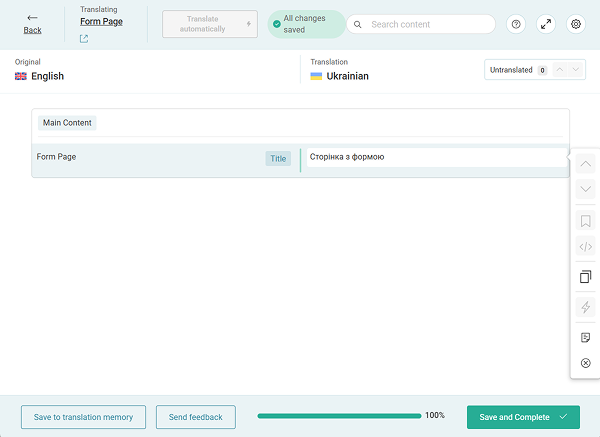
Find the built page in the Pages list and click the “+” button next to it.
Translate the page’s title in the translation editor and press the “Save and Complete” button.
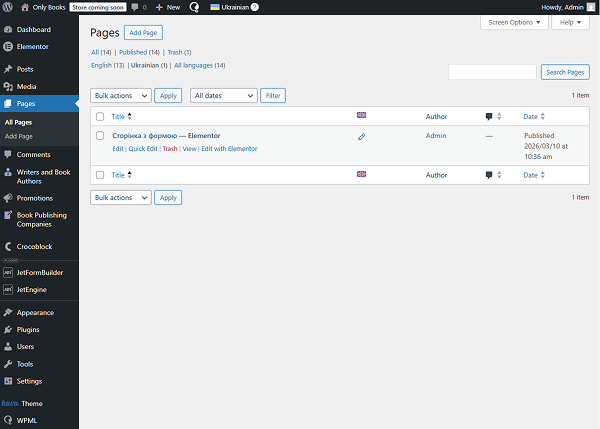
Proceed to the list of translated pages and click the “Edit” button next to the needed page.
In the Choose Form field of the JetForm widget, pick the translated version of the current form.
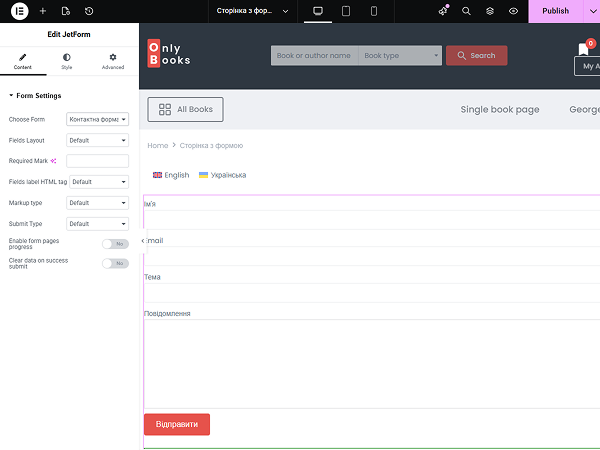
Save the result by pressing the “Publish” button.
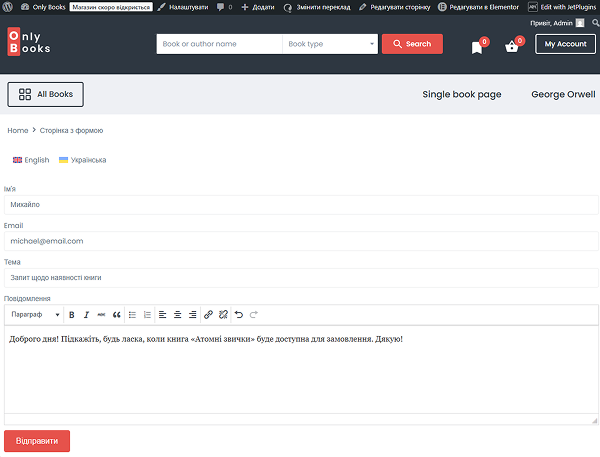
Check the Result
Now, proceed to the frontend page with the added form.
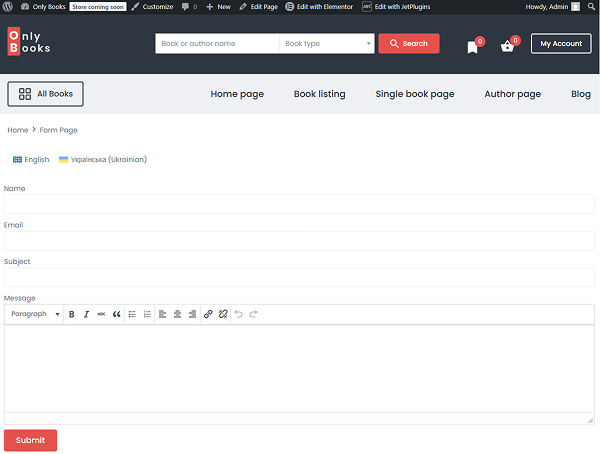
You can switch to the second language with the help of the Language Switcher.
Complete the form to check if it works correctly.
That’s all; now you know how to translate JetFormBuilder forms on your WordPress website with the help of the WPML plugin.