How to Use Check Mark Block for Custom Templates in Appointment Forms
Tutorial requirements:
- Elementor (Free version), Block editor (Gutenberg), or Bricks;
- JetAppointment plugin installed and activated;
- JetEngine plugin installed and activated;
- JetFormBuilder plugin installed and activated.
Combining the JetAppointment and JetEngine plugins, you can build a custom item template with the Check mark block/widget/element and then set it for the “Service” and “Provider” fields of the checkbox and radio types in the appointment booking forms.
Before you start, ensure to complete the JetAppointment setup. During this process, you can create appointment forms via JetFormBuilder in the Additional Settings tab.
The appointment forms can be placed on the Static pages and Single Provider and Service templates.
You can create custom item templates for the “Services” and “Providers” Custom Post Types (CPTs) and attach them to the form fields in such ways:
- For the Static Page Booking Form, you can add templates to the “Service” and “Provider” fields;
- For the Single Service Booking Form, you can add a template to the “Provider” field;
- For the Single Provider Booking Form, you can add a template to the “Service” field.
In this tutorial, we will create a custom item template with the Check mark block for the “Service” field in the Single Provider (Teams) Booking Form. The form will be placed on the Single Provider page template.
Contents:
Creating a Custom Item Template
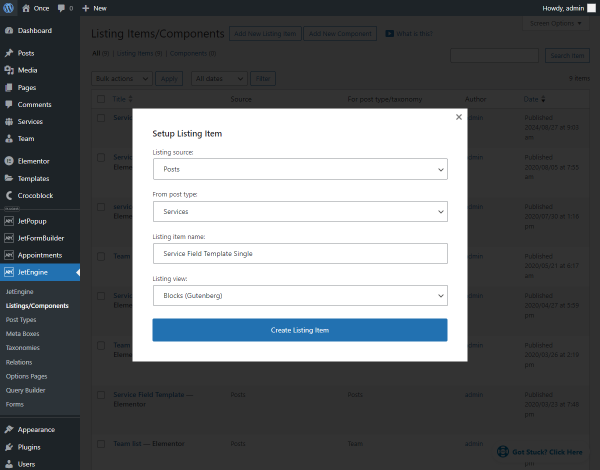
Go to WordPress Dashboard > JetEngine > Listings/Components and press the “Add New Listing Item” button.
In the Setup Listing Item pop-up, pick the “Posts” option as the Listing source, set the required post type in the From post type field (“Services” in our case), enter the Listing item name, and choose the Listing view (for this case we choose “Blocks (Gutenberg),” but it can also be “Elementor” or “Bricks”).
Afterward, click the “Create Listing Item” button.
Customizing the Check mark widget/block/element
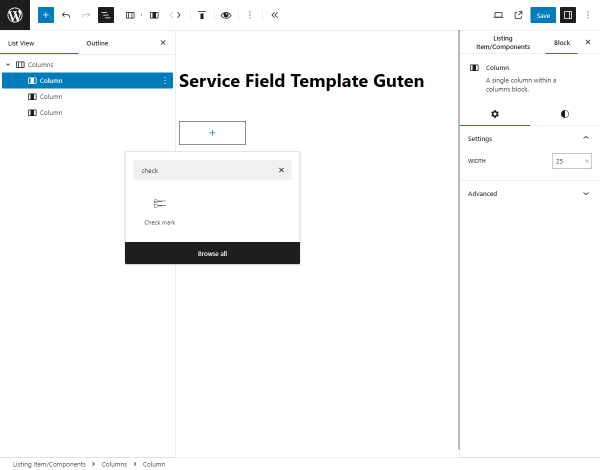
On the editor page, choose the desired layout for your new section, such as adding three columns.
Search for the Check mark widget/block/element and place it in the first column.
This block has two CONTROL TYPE options:
- HTML input — keep this option if you want the default look for the checked and unchecked states;
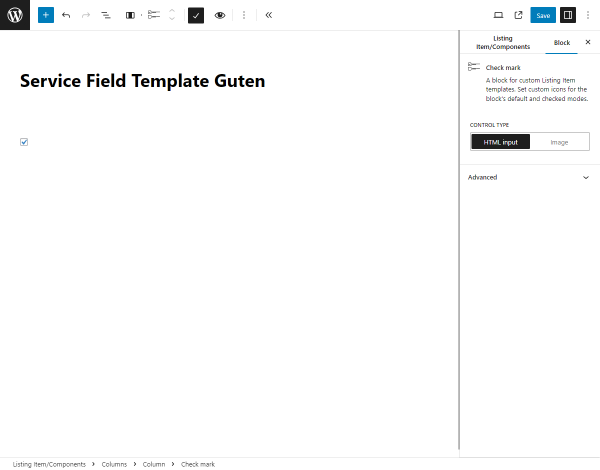
- Image — pick this option if you want to add a custom Default icon and Checked icon.
To set the custom icons, hit the “Choose” button next to the required fields.
Configuring the Dynamic Fields
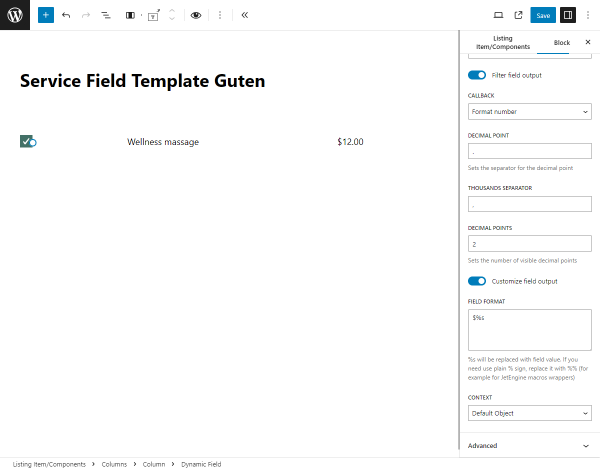
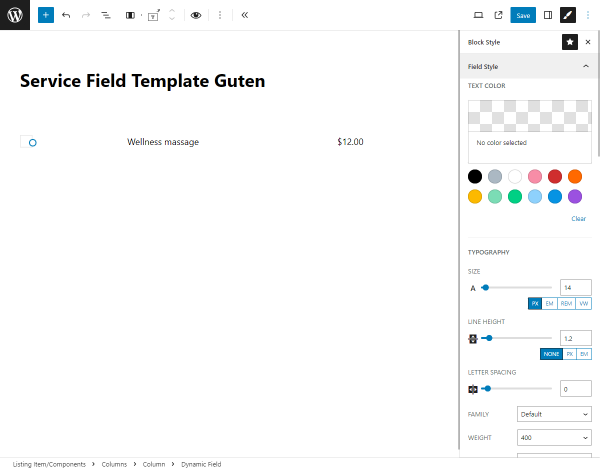
Now, you can use the Dynamic Blocks, e.g., the Dynamic Field for the second and third columns, to pull the metadata for the service posts.
For the first Dynamic Field, we keep the “Post/Term/User/Object Data” SOURCE and “Title” OBJECT FIELD.
For the second, we choose the “Meta Data” SOURCE, keep the META KEY option unselected, and enter the “_app_price” in the OBJECT FIELD / META FIELD / REPEATER KEY / COMPONENT PROP field.

To customize the displayed value, we enable the Filter field output toggle and select the “Format number” Callback. Other settings we keep by default: the “.” Decimal point and “2” Decimal points.
Then, we enable the Customize field output toggle and enter the “$%s” into the FIELD FORMAT, where “$” is the currency and “%s” stands for the pulled value.
With the free JetStyleManager plugin installed and activated, you can alter the style settings of the Dynamic Field blocks by hitting the “pencil” button.
Once you finish adjusting the custom item template, hit the “Save” button.
Setting the Template for the Services Field
Choosing and editing the form
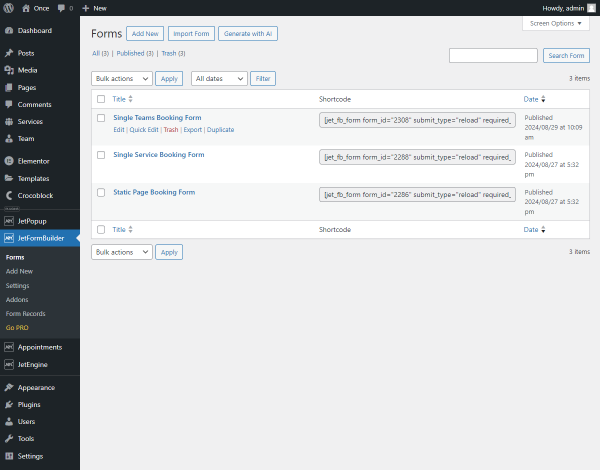
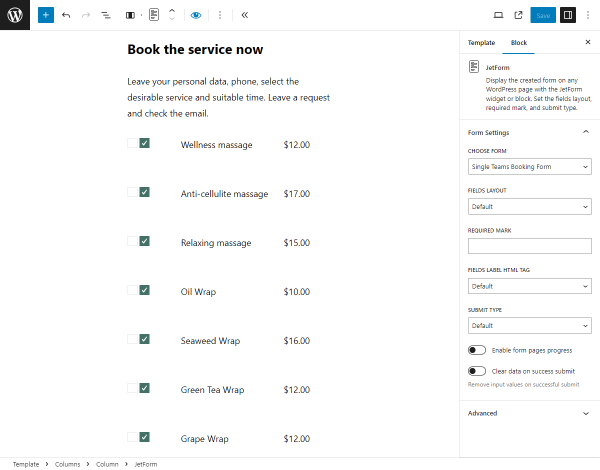
Go to WordPress Dashboard > JetFormBuilder, hover over the form you want to customize, and hit the “Edit” link. In our case, we edit the “Single Teams Booking Form” that is placed on the Single Provider page.
Configuring the “Service” field settings
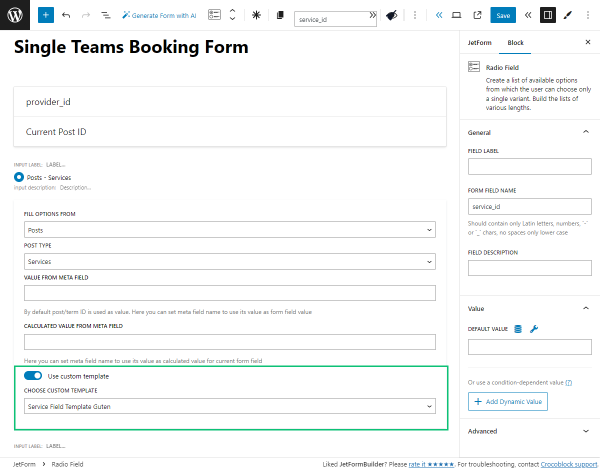
On the form editing page, open the “Service” form field settings.
Enable the Use custom template toggle, and the CHOOSE CUSTOM TEMPLATE drop-down will appear. Select the just-built Listing template here and “Save” the form settings.
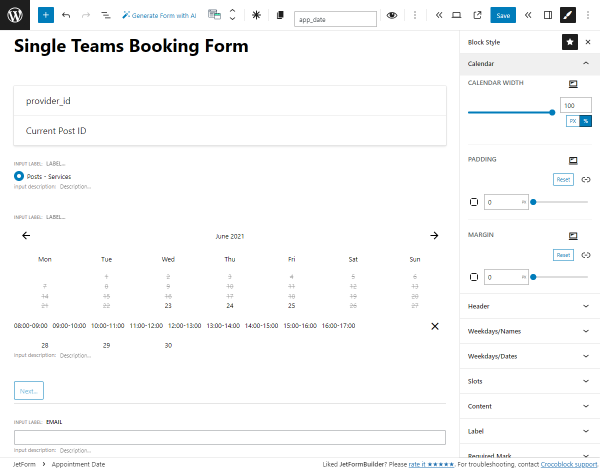
The form fields can also be edited with the JetStyleManager plugin. For example, for the Appointment Date block, we hit the “pencil” icon, open the Calendar tab, and set the CALENDAR WIDTH to “100” %.
Checking the Result
Placing the form on the Single page
If you haven’t placed the form yet, proceed to the Static page or Single Provider or Service template, depending on the form. For example, we opened the Single Provider template in the WordPress block editor.
Before the form, you can add a title and description with the Heading and Paragraph blocks.
Find the JetForm widget/block/element in the search bar and drag and drop it to the page.
Select the created form in the CHOOSE FORM drop-down list.
For an in-depth understanding of the JetForm settings, read the Displaying a JetFormBuilder Form in Any Page Builder tutorial.
Once the page customization is completed, click the “Save” button.
Proceeding to the front end
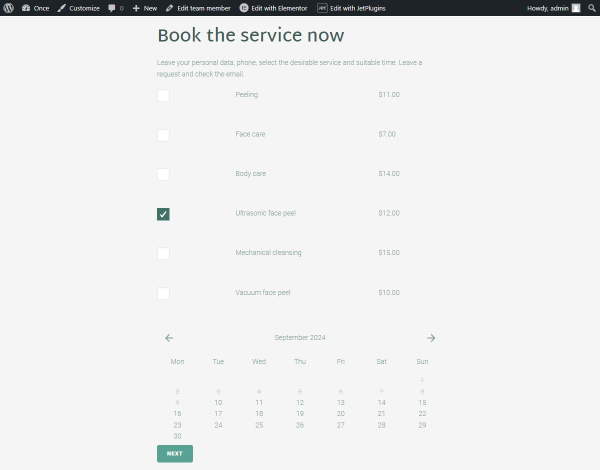
Now, you can proceed to the front end to check if the Check mark widget/block/element works correctly by ticking one or several options.
That’s all. Now you know how to create a custom item template with the Check mark block to use it in the appointment booking forms created with the JetAppointment, JetEngine, and JetFormBuilder plugins for the WordPress website.