This settings section allows you to define some general layout and appearance features. They are set for the whole form, which means they will be valid for all the fields you add to the form.
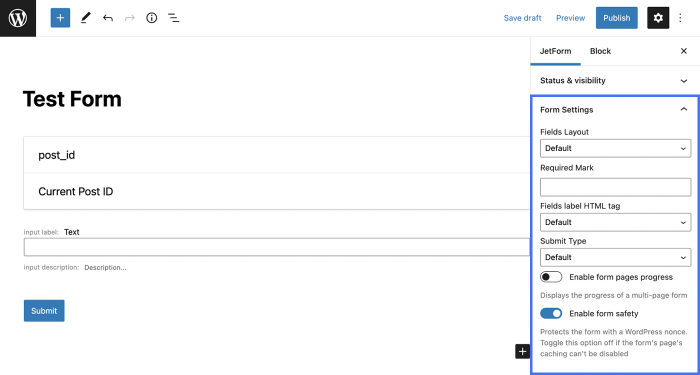
Settings
It defines how the field bar and the field label correspond to each other.
- Column – the label is placed over the field bar;
- Row – the label is placed in one row with the bar, to the left.
Required Mark
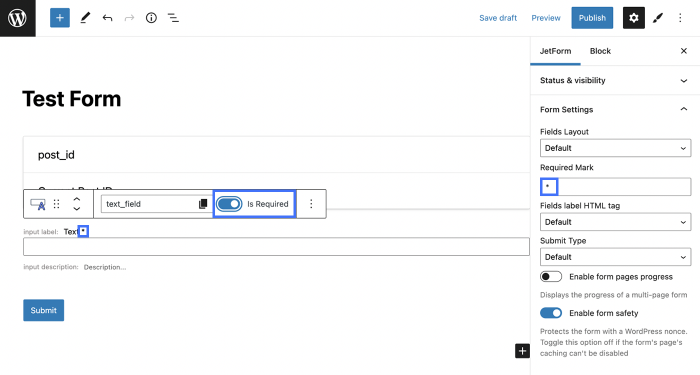
The fields with the “required” mark are the ones that the user can’t leave empty. They won’t be able to submit the form without filling in those fields. If you want to make the field required, turn on the Is Required toggle in the top options panel. In that case, you will be able to set the appearance of the “required” mark in the Required Mark bar.
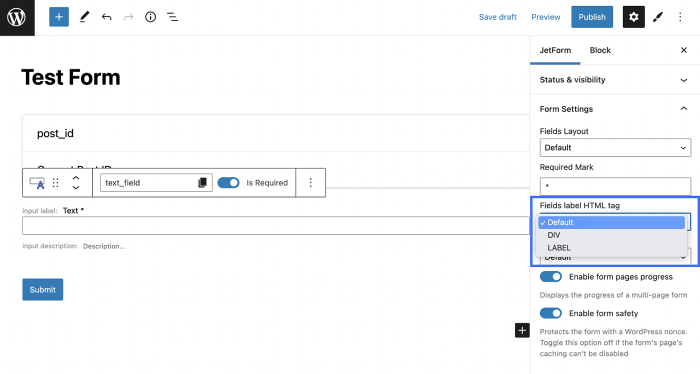
Fields Label HTML Tag
The <label> tag is used to specify a label for an <input> element of the form. It adds a label to a form control such as text, password, email, text area, etc.
Fields Label HTML Tag can be set to DIV or LABEL. These are field name wrappers, and <label> can provide focus on the Text, Number, Textarea fields, and the other default form elements. When the “Default” option is selected, Fields Label HTML Tag will be set to DIV.
Submit Type
In this drop-down menu, you can choose how the page will behave after the user hits the “Submit” button.
- Page Reload – the page will be reloaded;
- AJAX – the page won’t be reloaded because the data was transferred without interrupting its work.
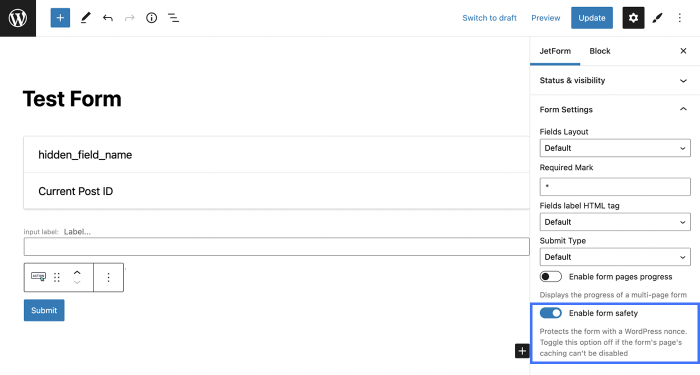
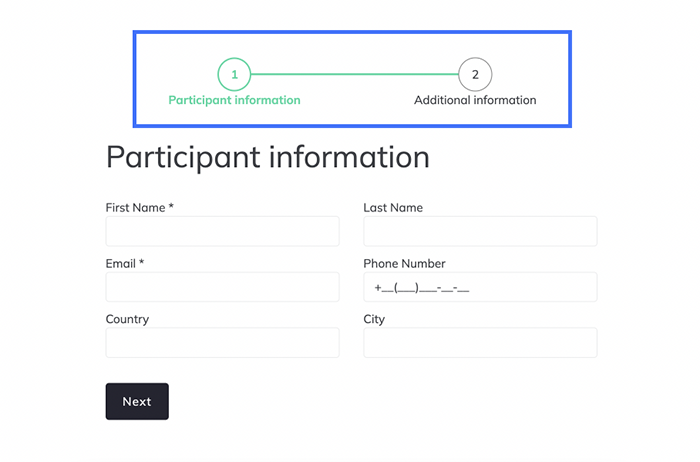
Enable form pages progress
This toggle can be useful if you divide the form into several parts using the Form Break Field. In that case, if you enable this toggle, the form progress bar will be added above. It will show the user the part of the form they are currently on. Here’s what it will look like by default on the front end:
Enable Form Safety
This option is used when there are form caching or conflict issues. It protects the form with a WordPress nonce. Toggle this option off if the form page’s caching can’t be disabled.