
Post-Submit Actions Conditions

By default, all the Post-Submit Actions will be performed after the user clicks on the “Submit” button. However, you can set some conditions.
After clicking on the “Conditions” button, you can choose the form field and set the value to compare. The conditional block will take the value from the chosen field, compare it with the one you set according to the operator, and perform the Post-Submit Action only if the comparison was “true”.
Controls
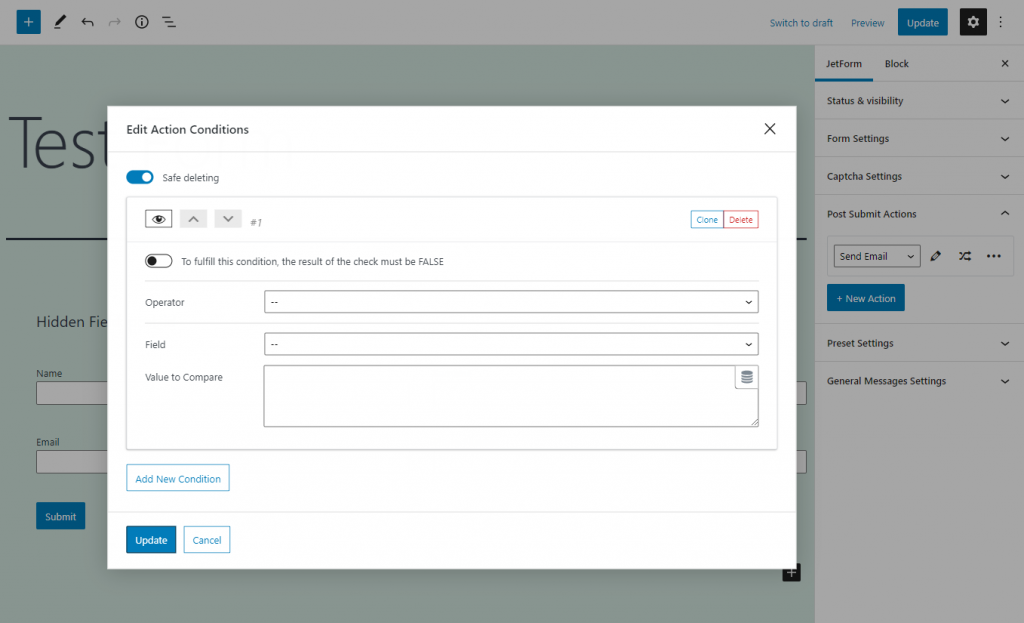
- Safe deleting. This toggle is enabled by default. When it is on, it prevents you from deleting any of the conditional rules accidentally. After clicking on the “Delete” button, you will see a message that asks you to confirm deleting. If this toggle is turned off, the conditional rule will be deleted without any notifications;
- “Show/Hide” button. The button with a cross-shaped icon on it simply hides or unfolds the conditional rule tile. It doesn’t affect the settings in the tile;
- “Up/Down” buttons. These buttons are placed next to the “Show/Hide” button and have the up and down arrows on them. Clicking on those buttons moves the conditional rule tile upwards or downwards. It is used for navigation purposes only, these buttons don’t affect the work of the conditional block;
- “Clone” button. Creates a copy of the conditional rule tile;
- “Delete” button. Erases the conditional rule tile;
- To fulfill this condition, the result of the check must be FALSE. Normally, the condition works if the result of values comparison is “true”. By enabling this toggle you make it vice versa;
“Add New Condition” button. Click this button to add a new conditional rule to the Conditional Logic window list.
Settings
In this drop-down menu, you choose how the value from the form field and the one you will put to the Value to Compare field will be compared.
- Equal. The Post-Submit Action will be performed if the value in the chosen field will be equal to the one you place into the Value to Compare text area;
- Greater/Less than. The result will be considered “true” if the value in the chosen field will be greater/less than the one you type into the Value to Compare field;
- Between. This operator checks if the value in the form field falls into the range you set in the Value to Compare text area. The range is set from the smallest number to the biggest and must be separated by commas, like that – 1,8”. The first and last numbers count, so if the value in the form field will be equal to 1, 2, 3, 4, 5, 6, 7, or 8 – the result of the comparison will be “true”;
- In the list. A special operator for the Radio, Select, and Checkbox form fields. If the user chooses the option, the value of which is equal to the value you put to the Value to Compare field, the Post-Submit Action will be performed;
Contain text. This one works with the Text and Textarea form fields. You can insert any value to the Value to Compare field, be it text or numbers, and if the user types the same value into the chosen field – the result will be considered “true”.
Field
Here you can choose one of the fields that you’ve already added to the form. All of them, named by their labels, are listed in this menu. The conditional block will take a value from this field and compare it with the one you put to the Value to Compare field.
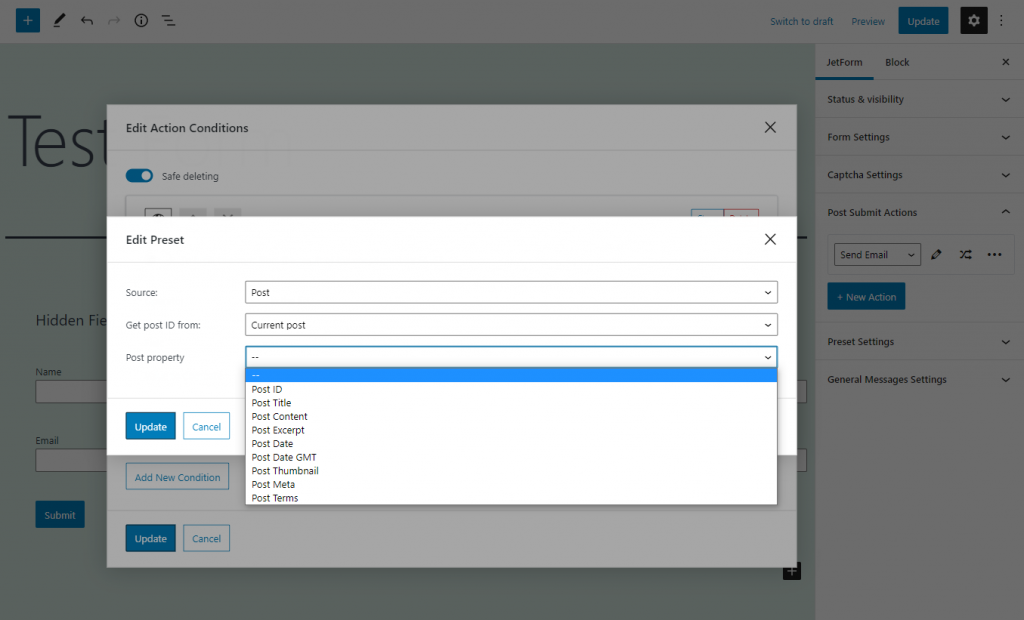
Value to Compare
This is a text area where you place the value that will be compared with the value from the chosen field. It can be both text, symbols, and numbers. Besides that, you can fill this field dynamically with the value from some posts or user’s meta fields. To do it, click on the button with a cylinder-shaped icon in the right upper corner of the field. You will be offered to choose the Source, specify where to take the data from (Get post ID from), and choose the meta field to take the information from (Post property).

When you are done setting a conditional rule, click the “Update” button at the bottom of the Conditional Logic window.