Stripe Payment Form with JetFormBuilder PRO Addon
Create a Stripe payment form with the help of one of the JetFormBuilder PRO addons, Stripe Payments.
- What Stripe Payments PRO Addon Does
- How to Create a Stripe Payment Form
- Add the Form to a Page in Elementor
- Add the Form Block in Gutenberg
- Complete the Form
What Stripe Payments PRO Addon Does
Stripe Payments is a JetFormBuilder addon that links JetFormBuilder and JetEngine forms to Stripe’s software, allowing you to carry out any payments online via Stripe Gateway.
With the help of this addon, your clients will be able to pay for product orders, all sorts of specialty services, tickets to various events, and so on. Stripe Payments will also come in handy if you offer booking and rental services.
Addon Functionality:
- Stripe Gateway
- AJAX redirect to Checkout
- Actions before & after payment
How to Create a Stripe Payment Form
Before we begin, make sure you have the following plugins installed and activated:
- JetFormBuilder — build a form, edit the post-submit actions, and add a CAPTCHA if needed;
- JetEngine — create a CPT, add custom meta fields and taxonomies;
- Elementor free — add the created form into the editor to finalize the customization and style up the page. Alternatively, you can use Gutenberg block editor; it is fully compatible with the JetFormBuilder plugin.
1. Add Custom Post Type
Proceed to the WordPress Dashboard > JetEngine > Post Types directory. Add a new custom post type by pushing the “Add New” button or open one of the previously created CPTs.

Once you open the custom post type editor and adjust the General Settings, scroll down to the Meta fields tab.
As your form will include fields for completing, some of them will repeat the CPT meta fields you edit here. That’s why you need to set up the potential form fields.
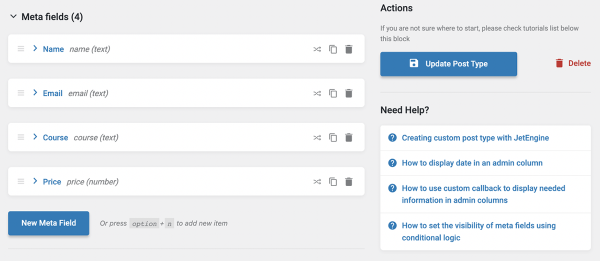
After implementing the changes, press the “Add/Update Post Type” button.
2. Create New Form
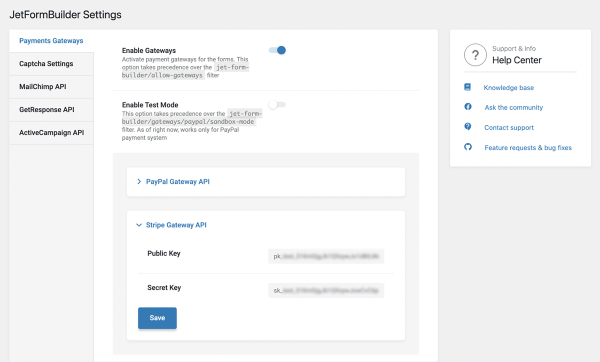
Before we start, let’s check the Payments Gateways settings by navigating to WordPress Dashboard > JetFormBuilder > Settings.
Here you can activate the Enable Gateways toggle to have the possibility to work with payments.
The following Stripe Gateway API section includes two Public Key and Secret Key fields, which should be completed with the corresponding data from your Stripe account.
Press the “Save” button after you fill in all the fields.
The following form will allow the user to register and enroll in an online course.
Go to WordPress Dashboard > JetFormBuilder > Add New.
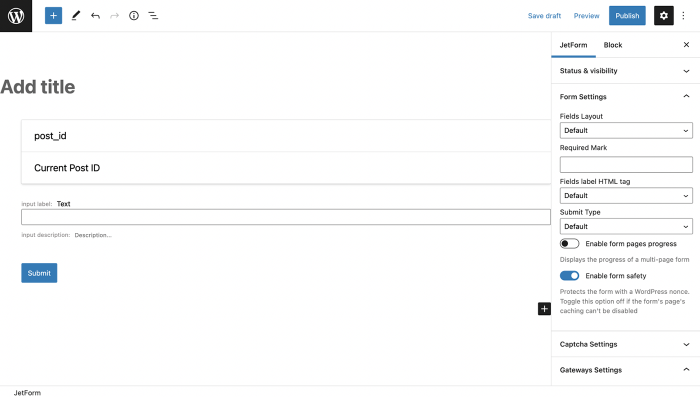
Give a title to the form and move on to the default Text Field.
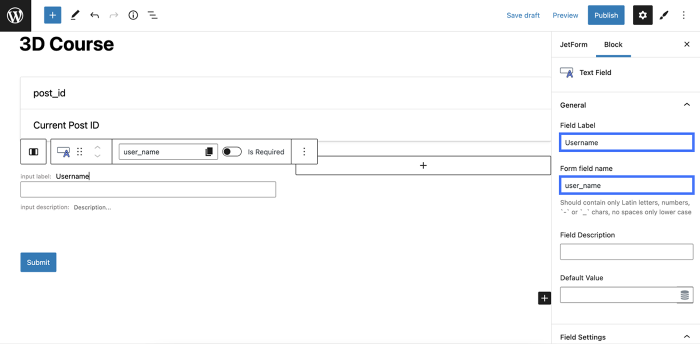
Change the Field Label and Form field name values to “Username” and “user_name” accordingly.
Hit the plus-shaped button to add one more Text Field block for email.
Fill in the Field Label and Form field name accordingly, and don’t forget to select the right field type in the Field Settings.
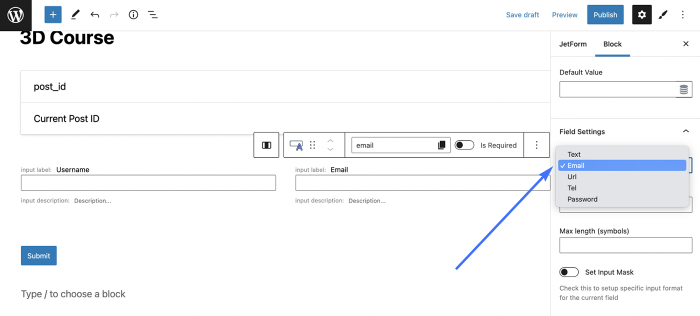
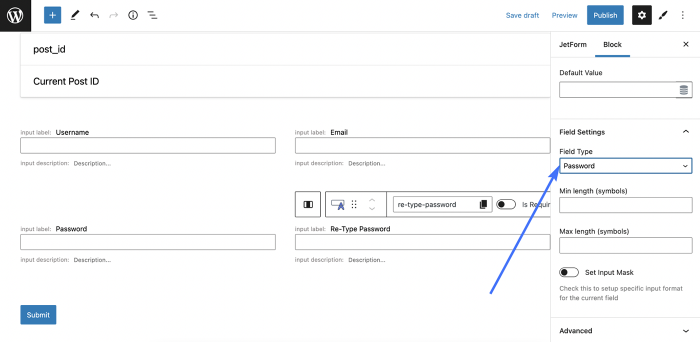
There will be two more fields for the password; however, you are free to add any field you want.
To store the price for this particular course and allow the form to carry out the payment, we need to create a field for the price.
To do it, click on the “Add Block” button and select a Hidden Field. Change the Form field name to “price” and set its value to the “Manual Input” in the Field Settings.
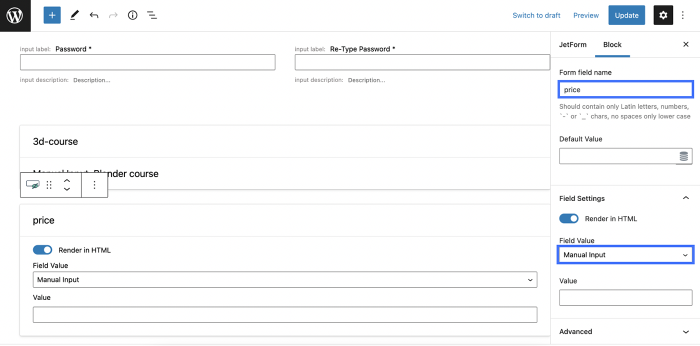
Enter the needed price in the Value field bar.
By the way, you can make the price field more secure by turning off the Render in HTML option. This way, a Hidden field will be invisible in the HTML markup.
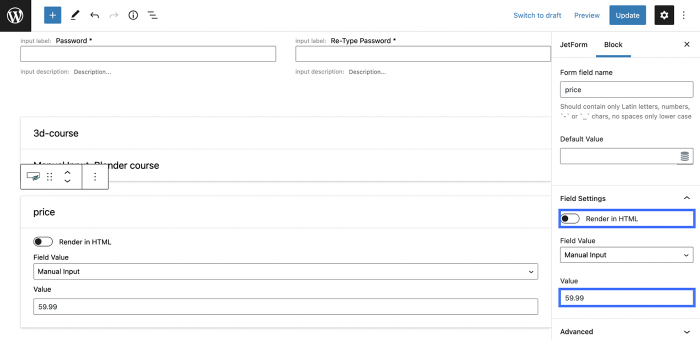
Finally, change the button label, and let’s proceed to the form settings.
3. Set Up Post-Submit Actions
Open the JetForm tab and scroll down to the Gateways Settings section. Check the Stripe Checkout radio button.
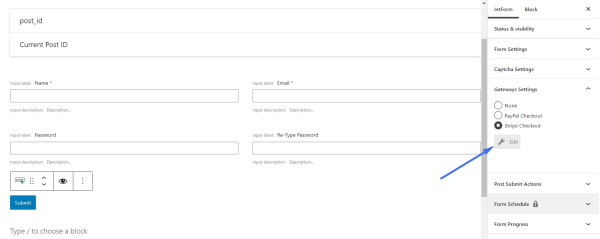
Proceed to the Post-Submit Actions section and unfold it. Now, you can add post-submit actions to the form. For example, you could add the Insert/Update Post action to create a new post.
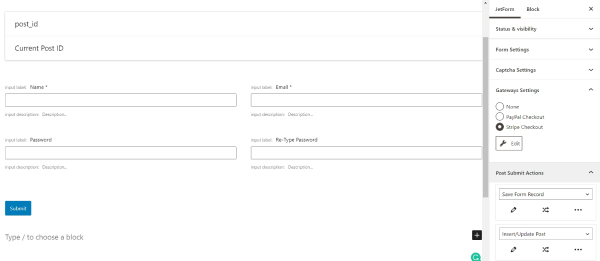
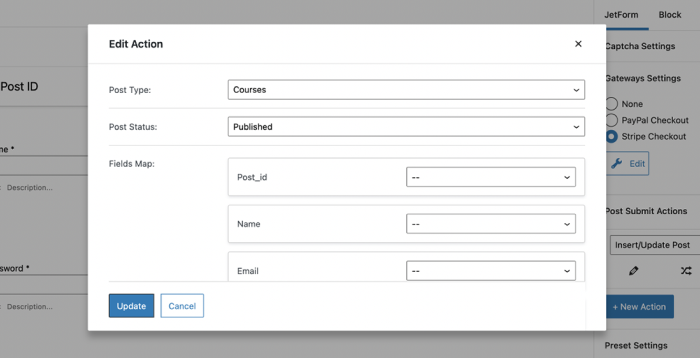
Click on the “Edit Action” button. In the Post Type field, select the custom post type you’ve previously created and set the Post Status to “Published.” You will find more information on this action in the “Insert/Update Post” action tutorial.
Don’t forget to hit the “Update” button before closing the window.
If you want to allow the users to register on the website, add the Register User action and set it up.
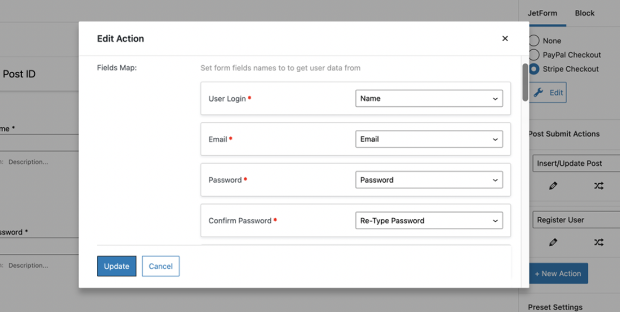
Add other actions by clicking the “New Action” button if needed and go back to the Gateways Settings section.
Now we can press the “Edit” button under the “Stripe Checkout” option and find out about all the fields we need to complete in the Stripe Checkout Settings.
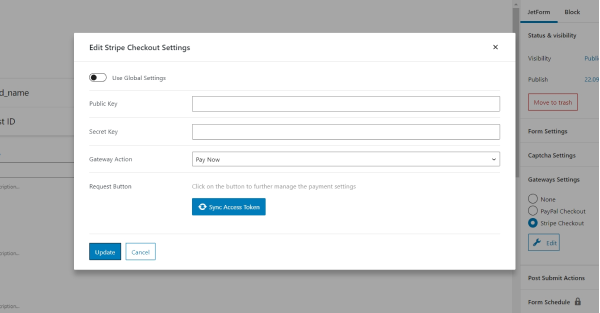
- Use Global Settings — toggle it on to pull out the Public Key and Secret Key if you have entered this information in the JetFormBuilder > Settings > Payments Gateways directory;
- Public Key — complete this field with the Client ID that you can find in your PayPal account;
- Secret Key — fill in the Secret Key attached to your PayPal account;
- Gateway Action — here, you can choose the payment scenario. Select the “Pay Now” action to enable further settings.
To further manage the Stripe payment settings, click the “Sync Access Token” button. Once the Access Token is updated, you will get access to more gateway settings.
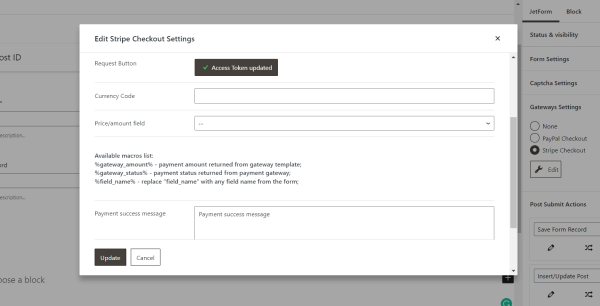
- Currency Code — add the needed global currency code.
- Price/amount field — you can choose a form field price from the fields list here.
Lastly, adjust the Payment success/failed messages and update the settings to save all the completed data.
4. Set Up Action Events
Now, it is time to configure the scenario that will be performed before payment is processed, on successful payment and the failed payment. To do this, we need to give the post-submit actions certain Events.
For example, you can choose to create a post before the payment is processed, register the user after successful payment, and send an email if the payment failed.
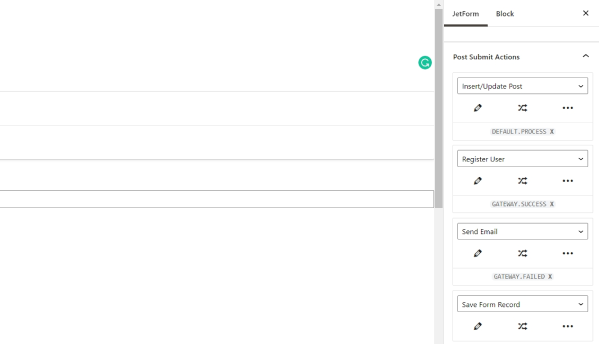
Click on the “Edit Conditions and Events” button to add action events under the needed post-submit action.
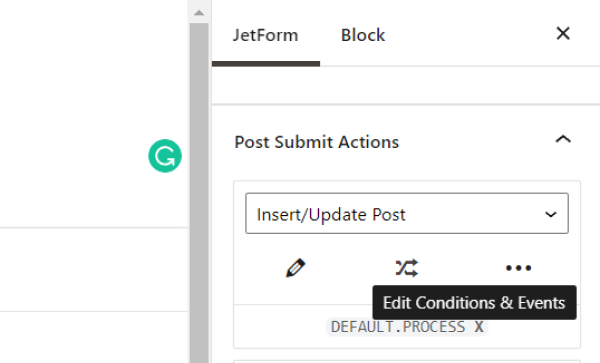
In the popup, proceed to the Events Match tab. Select one or several events from the dropdown.
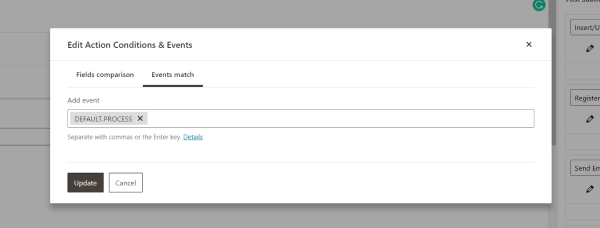
- DEFAULT.PROCESS – this is the moment when actions are processed. The current event will trigger the post-submit action before the payment gateway.
- BAD.REQUEST – this event is executed after request processing in case some of the fields in the form return errors. For example, the action will be triggered if the user uploads a file to the Media field in the wrong format or if the user exceeds the allowed number of files to upload. This event bypasses the DEFAULT.PROCESS event.
- DEFAULT.REQUIRED – this event is executed in any case. It is the last triggered event before the form response is submitted. The event runs even in case some of the other post-submit actions are not processed successfully. Note: if you set the DEFAULT.REQUIRED event to several actions and one of your actions is the Store Form Record action, make sure to put the Store Form Record action the last in the row.
- GATEWAY.SUCCESS – this one is executed after the user passes the checkout on the side of the payment system; if a payment is successful, the action will be triggered.
- GATEWAY.FAILED – It is performed when the user returns from the checkout page of the payment system without making a payment.
Note that the Store Form Record action does not require any Event.
Now that you have added Events to the post-submit actions, don’t forget to make the necessary fields in the form required.
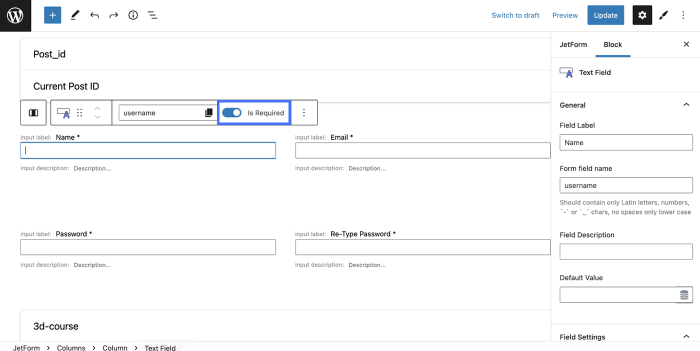
Push the “Publish/Update” button on the top of the form to publish the final result.
Add the Form to a Page in Elementor
Now decide where you want to place the newly built form. In the described case, we will place the form on a separate page.
So, we navigate to WordPress Dashboard > Pages. Open an existing page or create a new one and edit it with Elementor.
Customize it according to your needs and, right in the editor, look for the JetForm widget. Select the form you have just created in the Choose Form field.
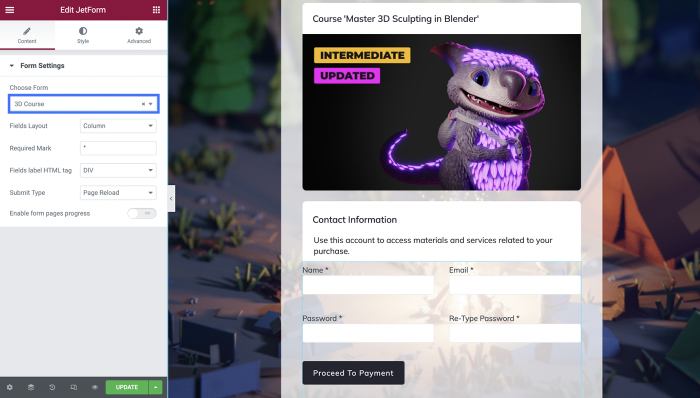
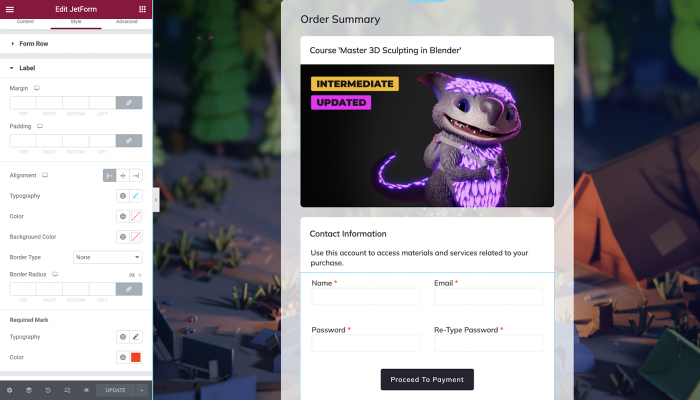
Proceed to the next tab and style the form, so it matches your website’s design.
Add the Form Block in Gutenberg
JetFormBuilder works not only with the Elementor page builder. This plugin allows adding the form block using Gutenberg as well.
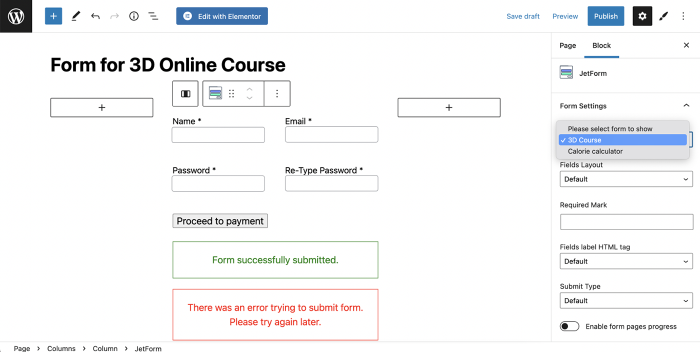
Open the page in the default WordPress Editor and add a JetForm block.
Complete the Form
Open the page where you have placed the form on the front end.
As you can see, the page looks right as we adjusted. Complete the fields and press the button you have set as a submit one.
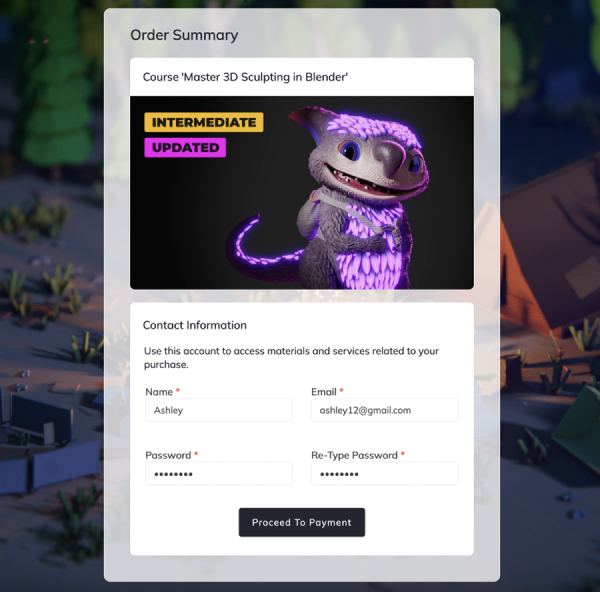
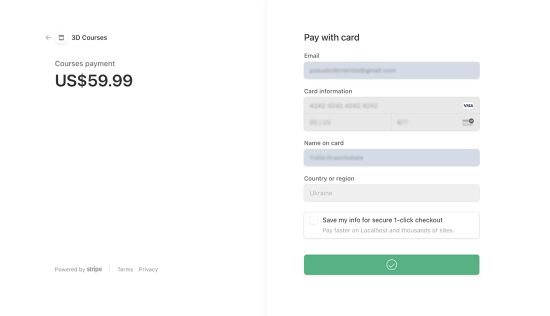
Once the obligatory fields are completed correctly, the submitted form will redirect you to the Stripe payment page.
Here the user can fill in all the details needed for successful payment.
Now you know how to adjust the form with the convenient Stripe payment using the JetFormBuilder plugin.