How to Enable Saving Progress for Multi-Step Forms
With the Save Form Progress Addon from the JetFormBuilder WordPress plugin, you can activate the form progress saving mode. So even if the form was accidentally closed, all the entered data will be saved. This solution is suitable for very long forms and makes the multi-step form more user-friendly.
Table of Contents:
- Set Up and Activate the Addon
- Create a Form
- Set the Post Submit Actions
- Enable the Saving Form Progress Mode
- Add the Form to a Page
- Check the Result
Set Up and Activate the Addon
To install the add-on:
- Go to WordPress Dashboard > JetFormBuilder > Addons tab and find the Save Form Progress addon in the All Available Addons section.
- Press the “Install Addon” button, and once installed, it will appear in the Your Installed Addons section.
- Click the “Activate Addon” button.

Create a Form
Navigate to the WordPress Dashboard > JetFormBuilder > Add New tab to create a new form.
The new form will be opened in the Gutenberg block editor.
Press the “Start from scratch” button in the Welcome block to create your custom form.
The Welcome block will be closed, and the Hidden Field, the Text Field, and the Action Button will be added by default.
Type the form’s name instead of the “Add title” placeholder. Also, check how to build forms from the Form Creation tutorial.
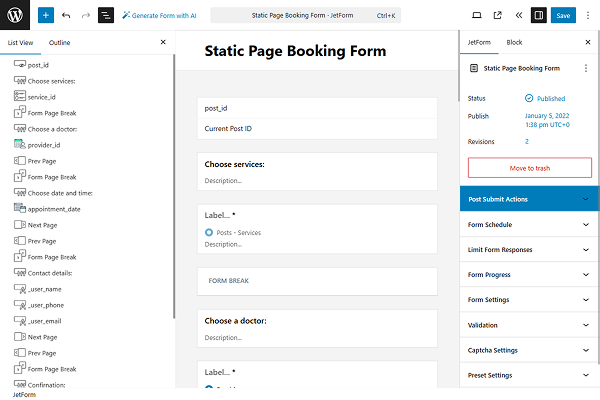
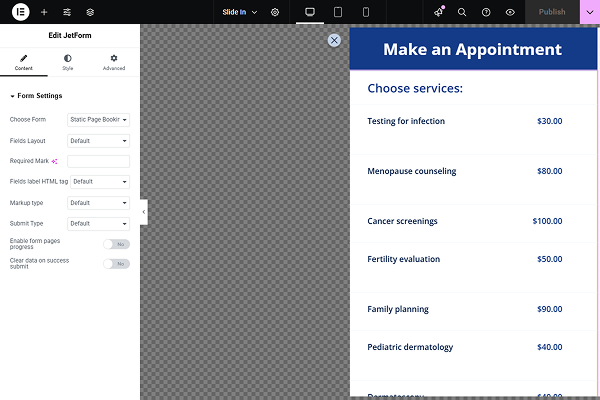
In this case, we created a multi-step form for inserting an appointment. The form contains five steps: selecting a service, choosing a provider, picking the date and time for the appointment, providing contact details, and confirming the appointment. These steps are divided by Form Page Breaks.
Set the Post Submit Actions
Navigate to the JetForm settings tab and open the Post Submit Actions tab.
Save Form Record
The “Save Form Record” Post Submit Action is set by default. We did not delete this action to collect and manage data via the JetFormBuilder dashboard on the Form Records Page.
Insert appointment
The “Insert appointment” Post Submit Action allows one to create an appointment entry in the corresponding section: WordPress Dashboard > Appointments > Appointments.
To edit the form submit action, hover over it and click the “pencil” icon.
In the Edit Insert appointment pop-up, you need to map the fields that correspond to your form.
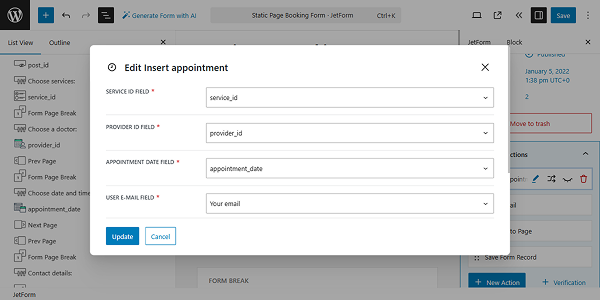
When done, click “Update” to save or “Cancel” to discard settings.
Redirect to Page
The “Redirect to Page” Post Submit Action redirects the user to a “Thank you” or “Success” page upon completing the form. For this, you should create a separate page if you don’t have one.
For our use case, we’ve created a “Thank you” page that users will see after clicking on the “Submit” button.
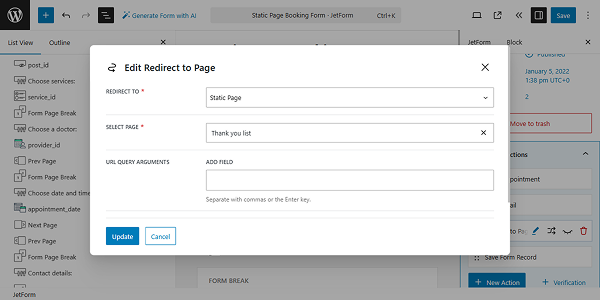
When done, click “Update” to save or “Cancel” to discard settings.
Send Email
The “Send Email” Post Submit Action allows sending a confirmation email of one’s appointment. So the message will be sent to the email address put in the form’s field.
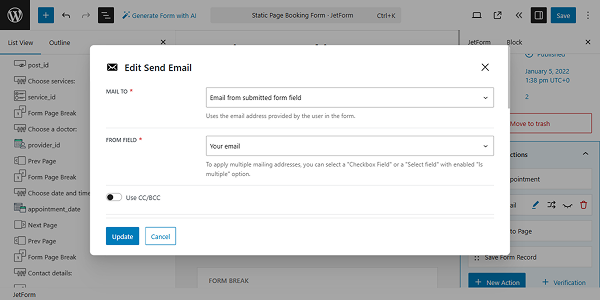
Click “Update” to save or “Cancel” to discard settings once you are ready with the settings.
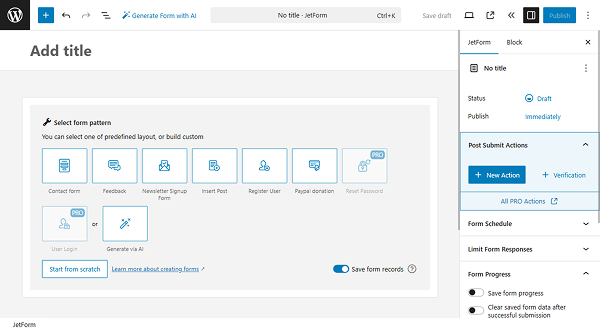
Enable the Saving Form Progress Mode
After installing the addon, in the JetForm settings tab, the Form Progress tab appeared.
There are two toggles in the tab:
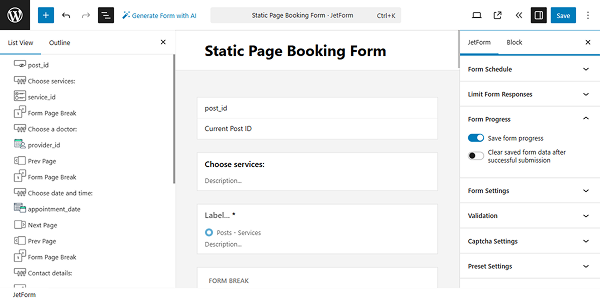
- The Save form progress toggle allows you to enable/disable the functionality of the Save Form Progress addon. Switch it ON to activate the form progress saving mode.
- The Clear saved form data after successful submission switcher allows to keep/discard the data put into the form field after the form is submitted. In this case, we kept the toggle OFF to allow users to book new appointments more easily.
Add the Form to a Page
Following the How to Set Up a WordPress Pop-up Form tutorial, we added the form to the pop-up, which is placed on the home page.
Check the Result
Let’s proceed to the frontend and check how it works. We open the form in a pop-up and fill out three form steps.
Now, we close the pop-up with the form to check the details on the doctor’s page. Come back to the home page and open the pop-up. We can continue filling the form fields, with no need to start from scratch.
We can finish filling out the form and submit it.
That’s it. Now you know how to autosave the form progress and inputted data if the filling process is interrupted with the help of the Safe Form Progress Addon from the JetFormBuilder WordPress plugin.