How to Set Recurring Stripe Payments in a WordPress Form
The Stripe Payments add-on for JetFormBuilder links forms to Stripe‘s software to facilitate online payments via the Stripe Gateway (including subscriptions, recurring payments, and setting payment dates). It provides an AJAX redirect to the checkout page and enables specific actions before and after payments.
- Install the Add-on
- Create a Product
- Obtain API Keys in the Stripe Account
- Configure the JetFormBuilder Settings
- Create the Content Visible After Payment
- Build the Registration and Subscription Forms
- Test the Flow
In this tutorial, we consider creating recurring payments using Stripe’s “Sandbox” mode. This mode simulates transactions during payment processing without real payments.
Here, we exemplify the use of the embedded Stripe Payments add-on’s specific events, which trigger the corresponding Post Submit Actions based on the payment status.
In particular, after registering on a site, a user can pay for a subscription to access the specific content. In turn, the content will be visible if the subscription is renewed. For more details, watch the How to Set Up Recurring Stripe Payments in WordPress Forms video.
To implement this functionality, install the Stripe Payments add-on and the JetFormBuilder plugin, and activate the Dynamic Visibility Module of the JetEngine plugin.
What Stripe Payments PRO Add-on Does
The Stripe Payments add-on is a PRO add-on for the JetFormBuilder plugin.
The add-on integrates pre-created Stripe subscriptions to forms and manages payment settings. It also transfers payments based on Stripe subscription settings (pricing plans, billing cycles, trial periods, subscription quantities, etc.). The add-on aggregates and manages subscription data through one dashboard.
The Stripe Payments add-on for JetFormBuilder provides the following specific events: STRIPE.SUBSCRIPTION.CANCEL, STRIPE.SUBSCRIPTION.EXPIRED, STRIPE.SUBSCRIPTION.SUSPENDED, STRIPE.SUBSCRIPTION.REACTIVATED, and STRIPE.RENEWAL.PAYMENT.
These events trigger specific Post Submit Actions based on the corresponding payment status.
For example, if the subscription has expired or been cancelled, some content on the site can be blocked. Watch the How to Set Up Recurring Stripe Payments in WordPress Forms video tutorial for more details.
Add-on functionality includes:
- Seamless integration — links forms and the Stripe payment system;
- Different types of payments — supports recurrent payments and one-time payments;
- Convenient subscription and payment dashboards — allow viewing and editing subscription details (subscribers, billing cycle, status) and payment details (payer, payment shipping, dates, gross sums) through the dashboard;
- Action Events — applies different actions as form settings (events) instead of the callbacks as PHP functions;
- Stripe events — the specific Post Submit Actions that trigger actions based on the payment status;
- Usability — applies PayPal gateway actions, syncs Access Token data, adds quantity fields, uses redirects, and creates custom payment success/failure messages.
Install the Add-on
Head to WordPress Dashboard > JetFormBuilder > Addons. Among the available items, find the Stripe Payments add-on and press the “Install Addon” button.
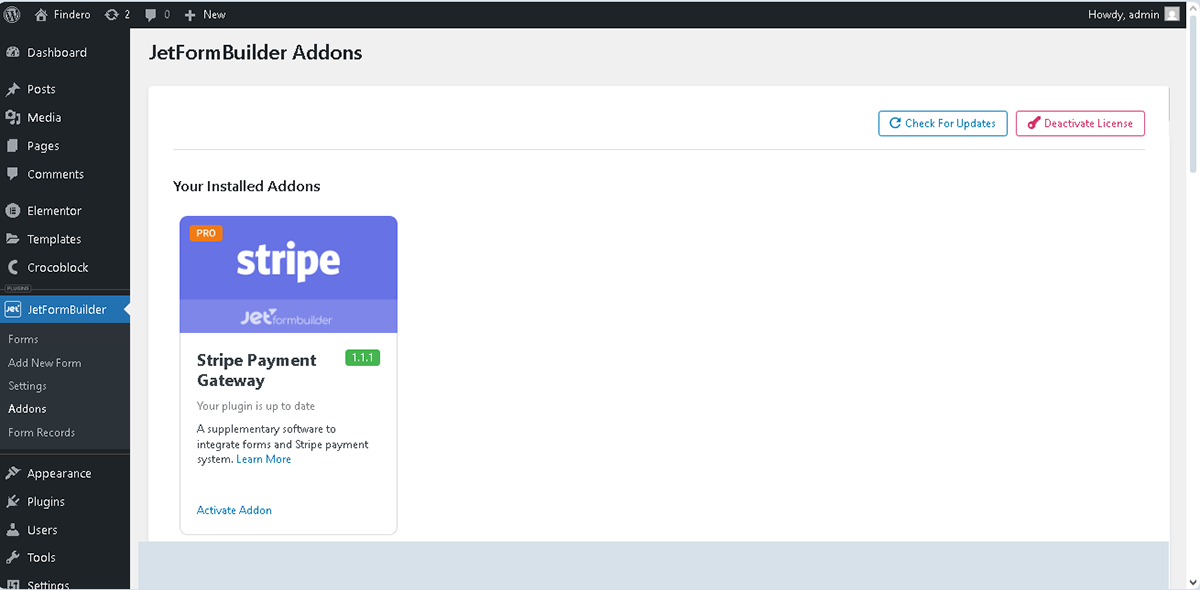
Next, go to WordPress Dashboard > Plugins and find the installed add-on. Hit the “Activate” button.

Also, you can install and activate this add-on as any other WordPress plugin. Read a detailed tutorial to go through the installation process.
Create a Product
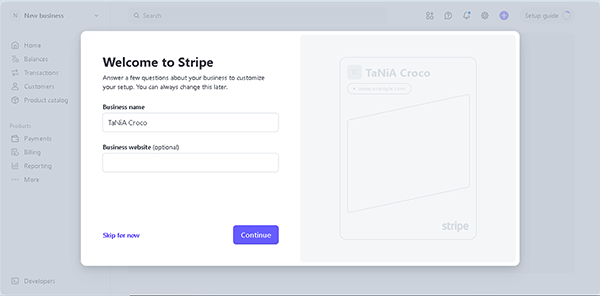
Initially, log in to your Stripe Account or create a new one. Here, the Welcome to Stripe pop-up will be opened. You can skip it or complete all necessary steps.
Then, you will be redirected to the Stripe Dashboard, and the “Sandbox“ mode will be set by default.
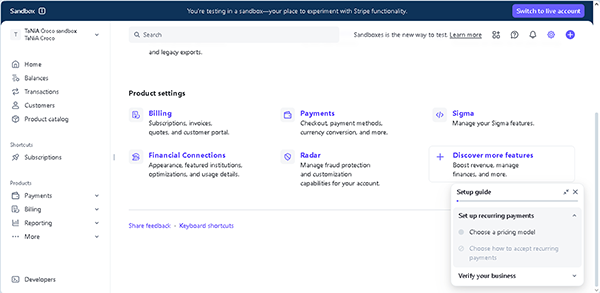
Also, you can switch the “Sandbox“ to “Live“ mode or vice versa by clicking the “Switch to live account“ button in the top right corner of the page.
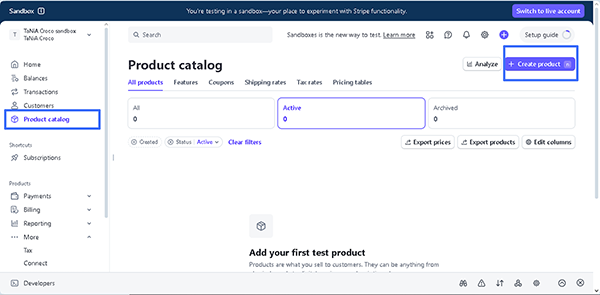
Next, navigate to the Stripe Dashboard > Product catalog tab and click the “Create product” button in the top-right corner.
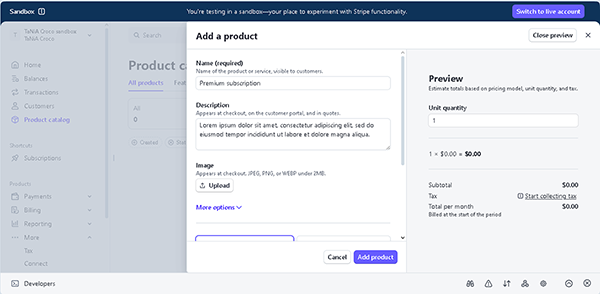
After pressing this button, the Add a product pop-up will be unrolled. Here, fill out the Name (required) field and, if needed, other fields (e.g., Description, Image).
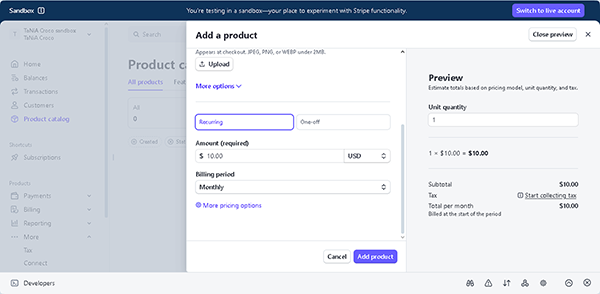
After that, scroll the pop-up down to the More options section. Here, set the “Recurring” option in the drop-down list, enter the product price in the “Amount (required)“ field, and select the currency. Then, choose the Billing period (e.g., “Monthly” or “Yearly)”). Finally, press the “Add product” button.
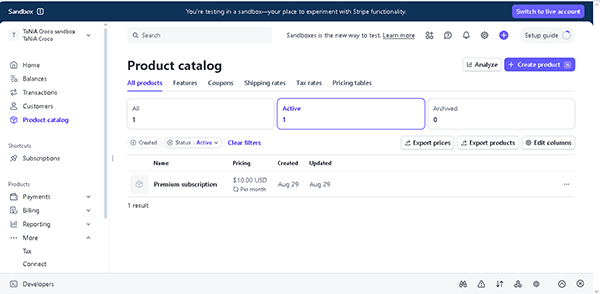
In the next step, you will be redirected to the Stripe Dashboard > Product catalog tab, where all added products are listed.
Obtain API Keys in the Stripe Account
Next, move to the Stripe Dashboard > Developers > API keys tab.

Here, the generated API keys will be shown.
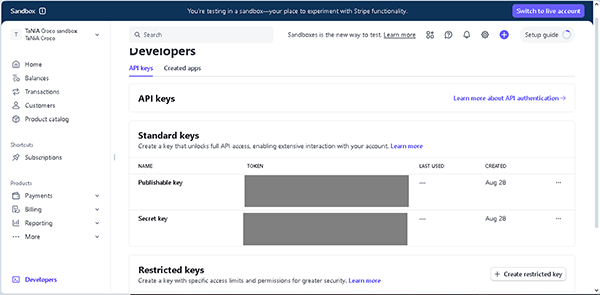
Copy the keys from the Publishable key and Secret key fields.
Configure the JetFormBuilder Settings
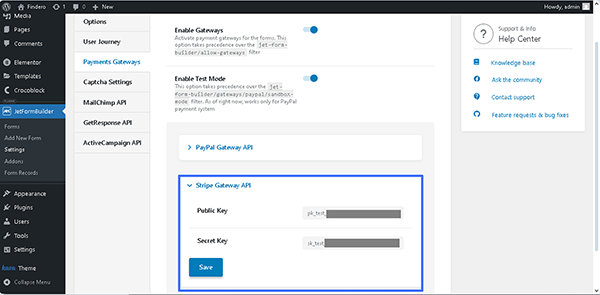
Before building the form, ensure Stripe gateways are activated on your website. Open the WordPress Dashboard > JetFormBuilder > Settings page and check the Payments Gateways settings.
Toggle the Enable Gateways switcher. Optionally, enable the Enable Test Mode switcher if you test with your Stripe account in the “Sandbox” mode. Insert the copied data from the Stripe Dashboard > Developers > API Keys Publishable key and Secret key fields to the WordPress Dashboard > JetFormBuilder > Settings Public Key and Secret Key fields.
Finally, hit the “Save” button.
Create the Content Visible After Payment
Create a CPT
In this section, we create a Custom Post Type (CPT) with a Radio, Checkbox, Switcher, or Select meta field that has two options: whether this post is visible when the subscription is not renewed.
More details on adding meta fields can be found in the How to Add Custom Meta Fields to WordPress Post via Meta Boxes tutorial.
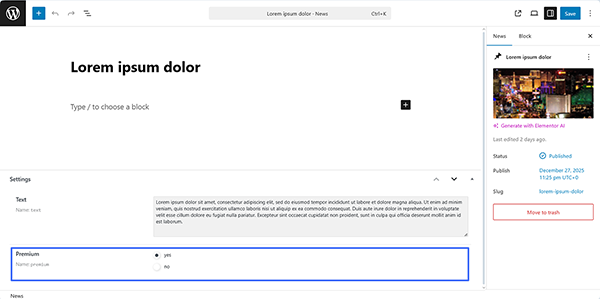
In this case, we create the “News” CPT with the “Premium” Radio Field, which has two possible options 一 “yes” and “no”. These options control whether the post is visible to site visitors: if the “yes” option is set, the CPT post will be visible only to subscribers.
After that, we fill out the CPT posts with the corresponding data.
Build a query
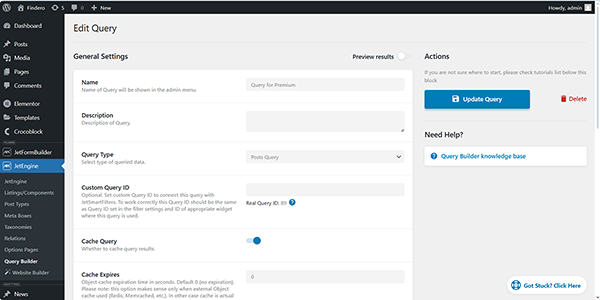
In the next step, move to the WordPress Dashboard > JetEngine > Query Builder tab and create a “Posts Query” query with the following settings: first, insert the Name of the query (here, the “Query for Premium”) and set the “Posts Query” Query Type.
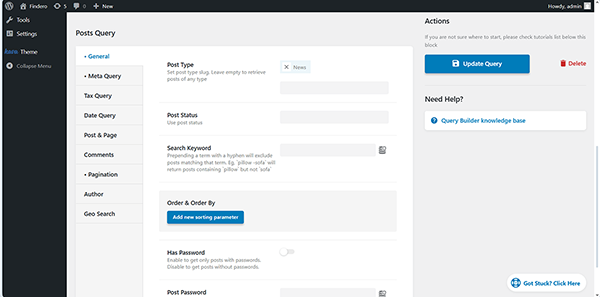
Next, move to the Posts Query section and specify the needed CPT in the Post Type field (here, the “News” CPT) of the General tab.
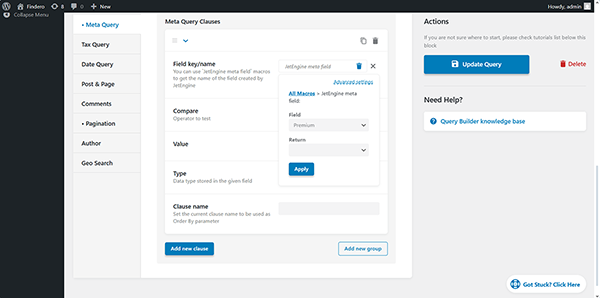
Then, unroll the Meta Query tab and press the “Add new clause” button. After that, click the “Dynamic Tag” icon in the Field key/name field. Here, select the “JetEngine meta field” macro from the list, choose the needed meta field (here, “Premium”) in the Field drop-down, and save the changes by pressing the “Apply” button.
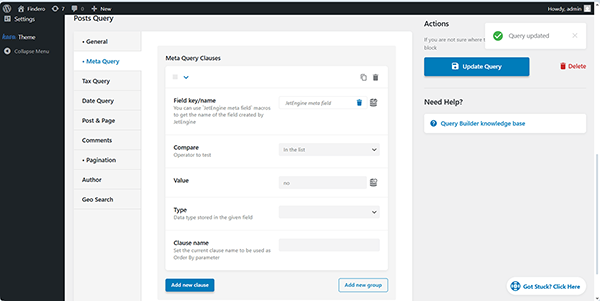
In the last step, set the “Like” or “In the list” Compare operator and insert the “no” Value, which means that only non-premium CPT posts will be shown.
Finally, if required, limit the number of posts displayed per page in the Posts Per Page field in the Pagination tab, then save the query.
In addition, read the JetEngine Query Actions for JetFormBuilder article to learn how to connect custom queries made with JetEngine’s Query Builder with forms.
Build a listing item
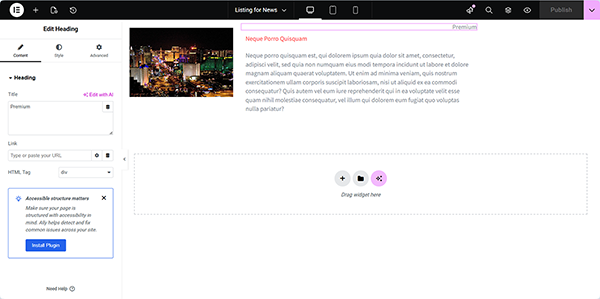
Proceed to the WordPress Dashboard > JetEngine > Listings/Components tab to create a Listing Item. Display the needed meta fields via the Dynamic Field, Dynamic Image, or other widgets. In particular, we add the Heading widget to indicate the premium posts.
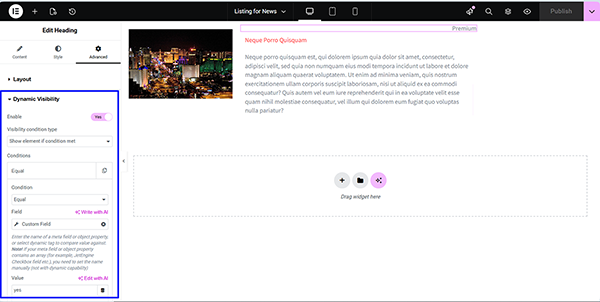
Next, apply the Dynamic Visibility conditions to this widget: move to the Advanced tab, open the Dynamic Visibility block, and enable the corresponding toggle.
Here, set the “Show element if condition met” Visibility condition type. After that, select the following settings in the Conditions fields: “Equal” Condition, press the “Dynamic tag” icon, then choose the required Custom Field (here, “Premium”), and insert the “yes” Value of this field to specify that only specific posts should be shown (the “Premium” posts in this case).
Finally, publish the Listing Item.
Add the listings on a page
In this section, we add two Listing Grids to a page to display listings with different rules for showing items: the first shows only non-premium posts, and the second shows all posts.
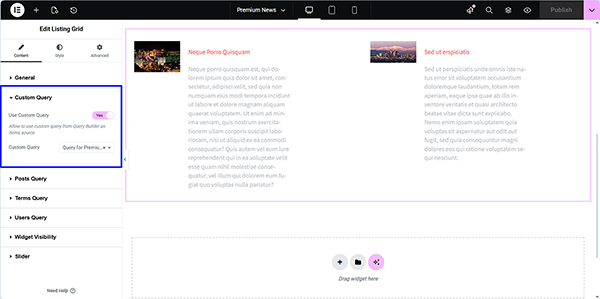
First, open a page in your preferred editor and insert the first Listing Grid. We use Elementor and the Listing Grid widget correspondingly.
Then, after assigning the required listing, open the Custom Query tab, unroll it, enable the Use Custom Query toggle, and select the created query in the Custom Query drop-down.
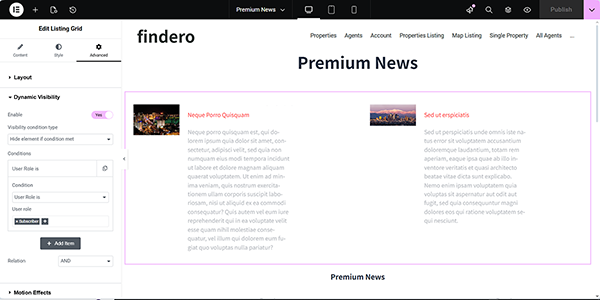
After that, open the Advanced tab, then the Dynamic Visibility block, and enable the corresponding toggle.
Here, set the “Hide element if condition met” Visibility condition type and select the “User Role is” Condition, and “Subscriber” User role.
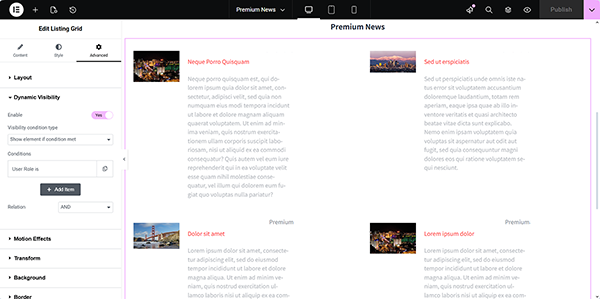
Next, insert the second Listing Grid widget on the page and display the same listing via it. Then, open the Advanced tab, then the Dynamic Visibility block, and enable the corresponding toggle.
Here, set the “Show element if condition met” Visibility condition type and select the “User Role is” Condition, and the “Subscriber” User role.
Build the Registration and Subscription Forms
In this case, the functionality is implemented via two forms 一 one for registration of the user and the second for subscription to the premium news. Also, you can combine the registration and login forms as described in the How to Set Registration and Login in One Form Using Render States tutorial.
Build the registration form
Go to WordPress Dashboard > JetFormBuilder > Add New Form. The form will be opened in the Block Editor (Gutenberg).
Select the needed pre-built form in the Welcome block or build the form from scratch.
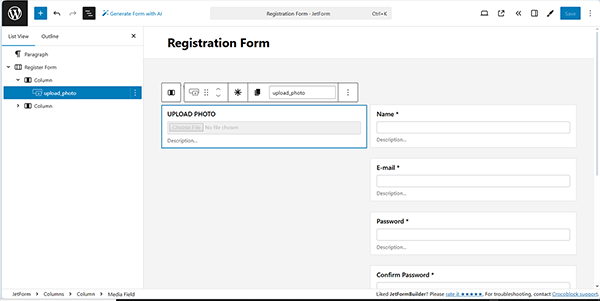
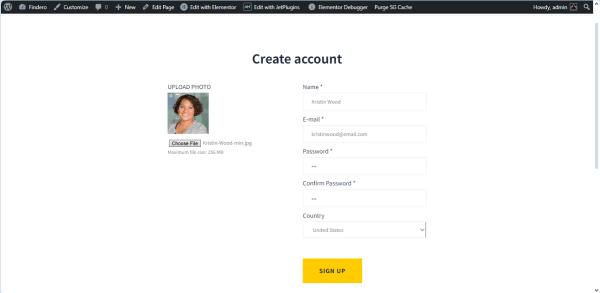
In this case, we type the form’s name (the “Registration Form” text), press the “Start from scratch” button, and create a form with the Text Fields, Media Field, Radio Field, and Action Button.
This form creation tutorial explains how to build forms from scratch.
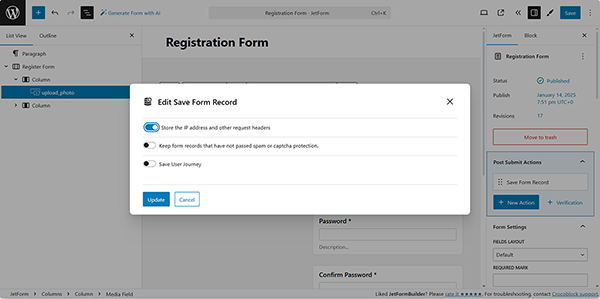
In the next step, navigate to the Post Submit Actions tab. Press the “+ New Action” button and select the “Save Form Record” Post Submit Action in the newly appearing Add new action window. If the “Save Form Record” action is set by default, press the “pencil” icon to configure its settings.
After that, activate a required toggle, for example, the Store the IP address and other request headers toggle to save the user’s IP address in the Edit Save Form Record window.
Also, you can save the data from this Post Submit Action to Google Sheets, as the How to Save Form Records to Google Sheets tutorial explains.
Click the “Update” button.
After that, we add the “Register User” Post Submit Action since the form is intended to manage the subscribers.
To provide a one-time payment using the Stripe gateway and configure the specific Post Submit Actions, read the Stripe Payment Form with JetFormBuilder PRO Addon tutorial.
In the Edit Register User pop-up, we assign the corresponding FIELDS MAP fields to the form’s block fields.
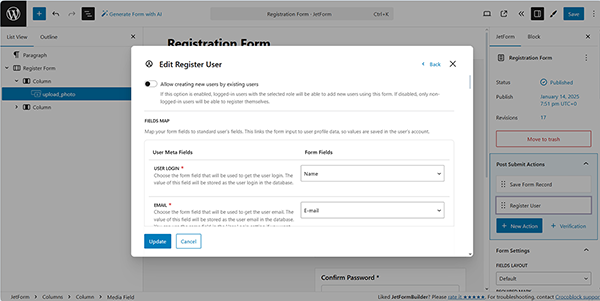
Read the Register Form tutorial to learn how to build register forms and manage their settings.
After that, we scroll the pop-up down, set the “Contributor” USER ROLE, and enable the Log In User after Register toggle.
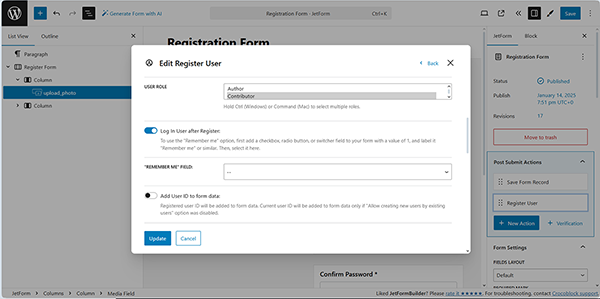
Once completed, press the “Update” button to close the pop-up.
The next step is configuring the Action Events. Navigate to the Post Submit Actions tab of the form settings and select the action you need from the corresponding drop-down menu.
Hover over the action and press the crossed arrows-shaped button to open the Edit Action Conditions & Events pop-up window. Here, select the Events match tab and choose the “DEFAULT.PROCESS” option from the ADD EVENT drop-down menu.
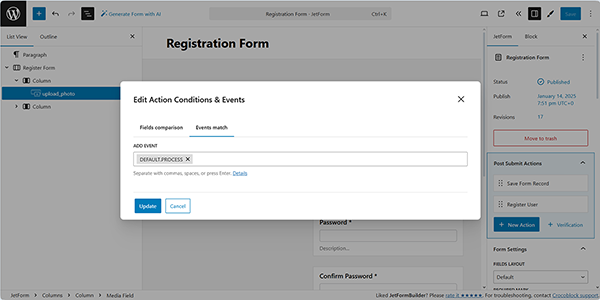
Press the “Update” button. That’s it for the registration form; now, you can hit the “Publish” button.
Build the subscription form
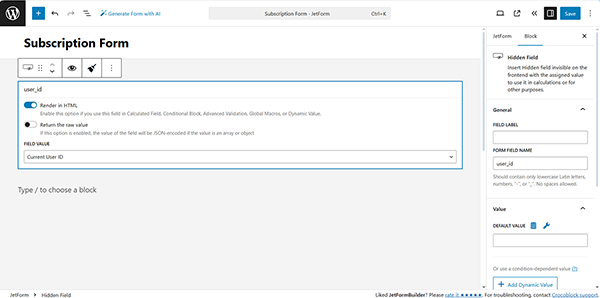
We build this form from scratch. Here, we add the Hidden Field and set the “Current User ID” FIELD VALUE.
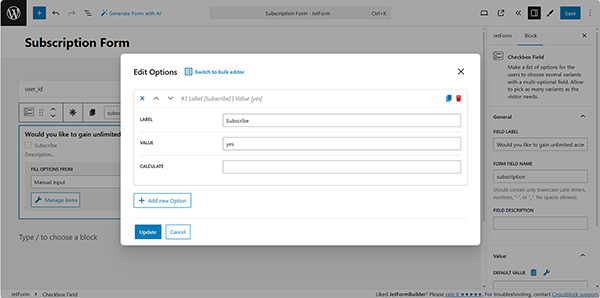
Next, we insert the Checkbox Field, type “Subscribe” as the LABEL, and set the “yes” VALUE.
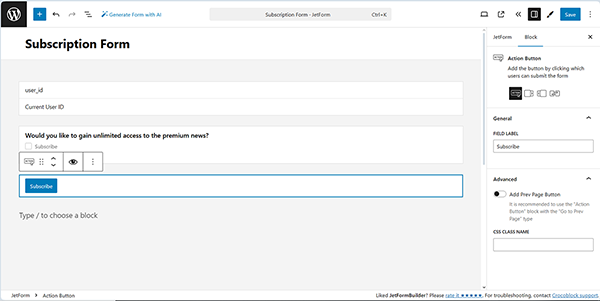
The last field is the Action Button, whose text we change to “Subscribe”.
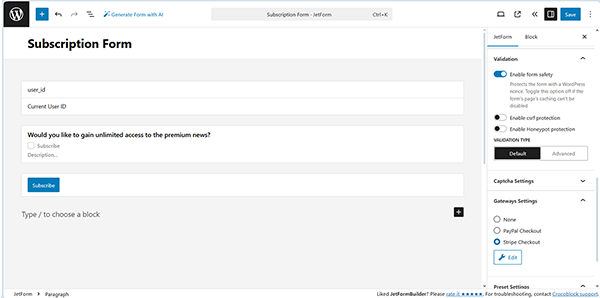
The next step is configuring the Stripe checkout settings. In this step, scroll down to the Gateways Settings section in the JetForm settings.
Enable the Stripe Checkout option and click the “Edit” button below to access the settings.
After that, the Edit Stripe Checkout Settings pop-up will be opened.
In this pop-up, you can add the API Keys to the specific form, in particular by pasting them into the PUBLIC KEY and SECRET KEY fields. In this case, we enable the Use Global Settings toggle to inherit the Public Key and Secret Key that we entered earlier in the JetFormBuilder settings.
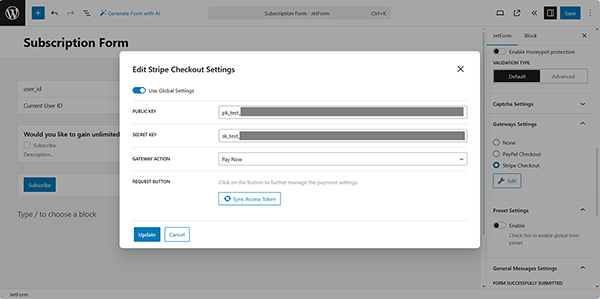
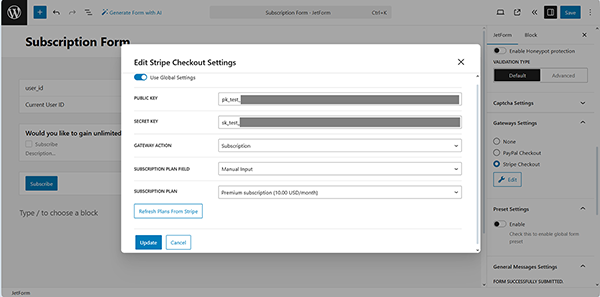
After that, push the “Sync Access Token” button to synchronize the data. Once the synchronization is successfully updated, the “Refresh Plans From Stripe” button will appear.
Then, set the “Subscription” in the GATEWAY ACTION drop-down list and choose the “Manual Input” in the SUBSCRIPTION PLAN FIELD. Since we created only one subscription plan, it will be added automatically. Otherwise, select the needed one in the SUBSCRIPTION PLAN drop-down list.
In the next step, navigate to the Post Submit Actions tab. Press the “+ New Action” button and select the “Update User” Post Submit Action. In the newly appeared pop-up, assign the “User ID (will update the user)” option to the form’s Checkbox Field and set the “Subscriber” USER ROLE.
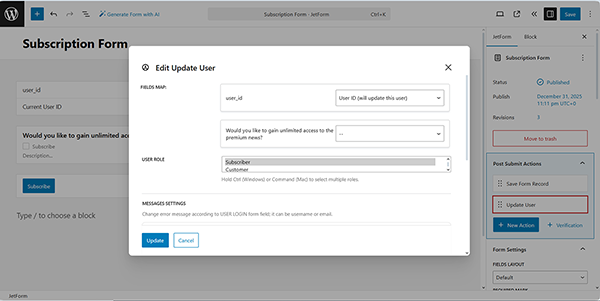
Press the “Update” button to close the pop-up.
After that, move to the “Update User” Post Submit Action for configuring the Action Events.
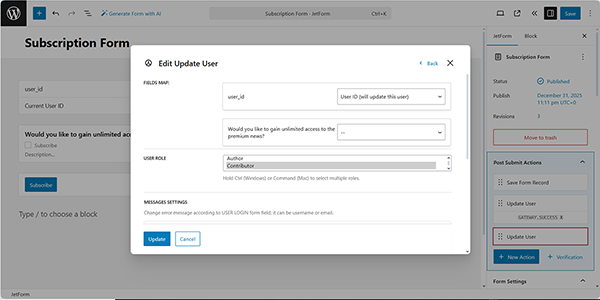
Set the condition: hover over the action and press the “crossed arrows” button to open the Edit Action Conditions & Events pop-up window. Here, select the Events match tab and choose the “GATEWAY.SUCCESS” option from the ADD EVENT drop-down menu to enable the “Register User” Post Submit Action after the payment system verifies the payment.

Next, insert the second “Update User” Post Submit Action, assign the “User ID (will update the user)” option to the form’s Checkbox Field, and set the “Contributor” USER ROLE, which allows seeing the nonpremium content.
Press the “Update” button to close the pop-up.
After that, move to the “Update User” Post Submit Action for configuring the Action Events.
Next, set the condition: hover over the action and press the crossed arrows-shaped button to open the Edit Action Conditions & Events pop-up window. Here, select the Events Match tab and choose the “STRIPE.RENEWAL.PAYMENT” option from the ADD EVENT drop-down menu.

Press the “Update” button. That’s it for the forms; now, you can hit the “Publish” button.
Place the forms on the page
Return to the page where you have previously inserted two Listing Grid widgets and place the created forms one under another via the JetForm widget.

Read the Displaying a JetFormBuilder Form in Any Page Builder tutorial to learn how to add the JetForm widget/block/element in Elementor, Block Editor, and the Bricks theme.
Test the Flow
If you are logged in, log out of the site. Then, move to the front end, complete the form with the required information, and submit it by pressing the “SIGN UP” button.
After submitting the form, you will be returned to the same page that will display the subscription form and the listing of non-premium news.
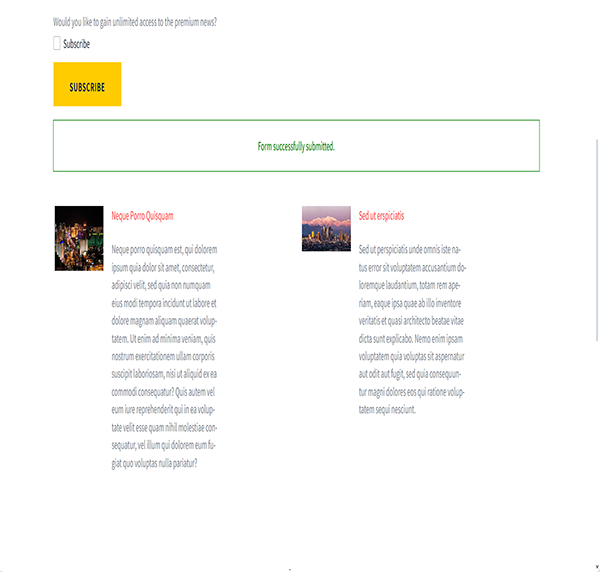
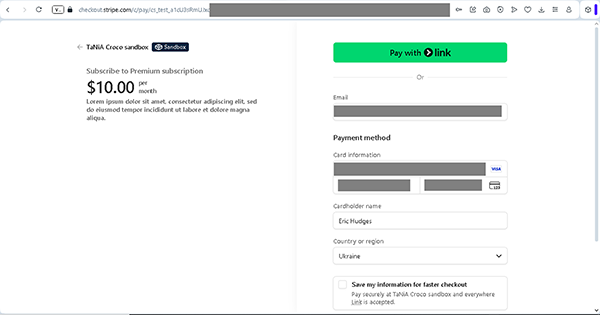
Here, after ticking the corresponding answer and pressing the “SUBSCRIBE” button, users will be redirected to the Stripe checkout page.
Now, log in to your account and select the bank card, if needed.
Press the “Continue” button.
Fill out the fields and scroll down the page. Finally, click the “Subscribe” button.
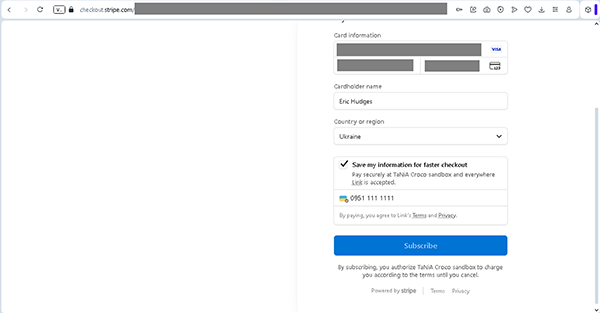
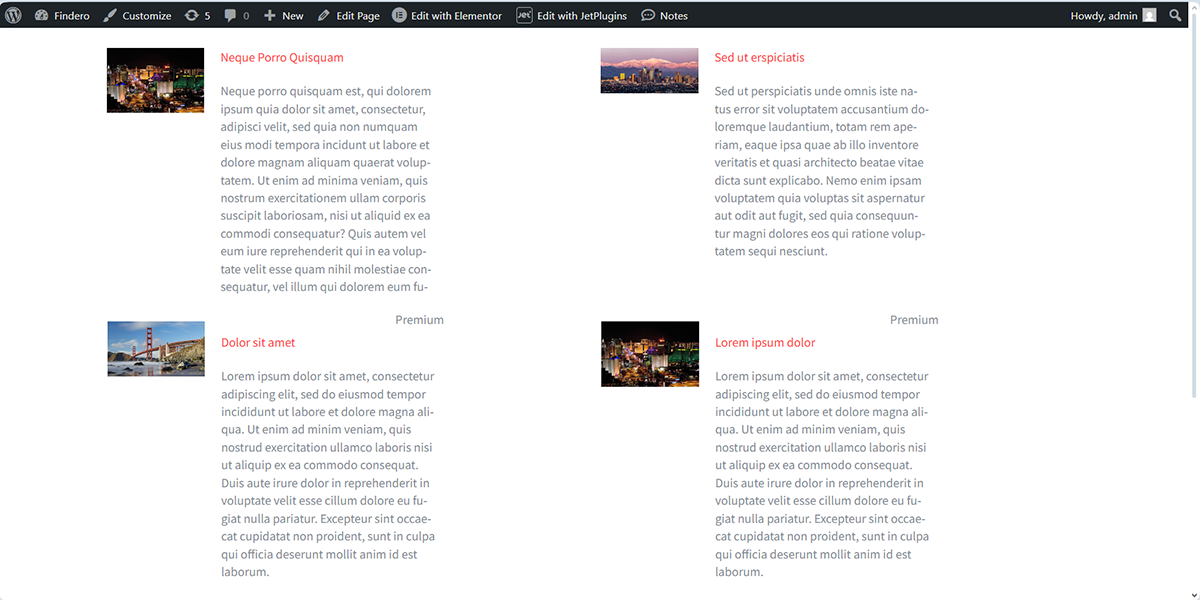
After that, you will be redirected to the site’s page without registration forms. Here, only the listing that includes premium news will be displayed.
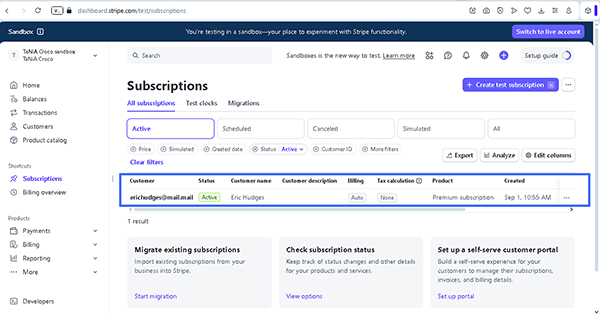
Then, return to the Stripe account and navigate to the Stripe Dashboard > Subscriptions tab to check whether the subscription has been added.
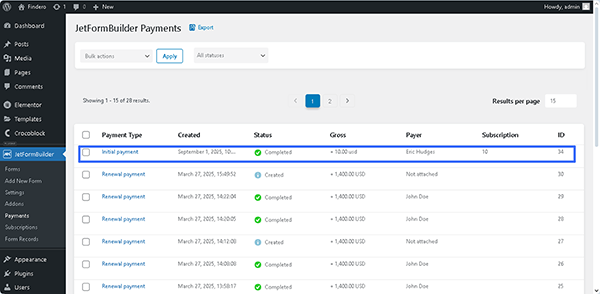
Also, the payment data will be collected in the WordPress Dashboard > JetFormBuilder > Payments tab.
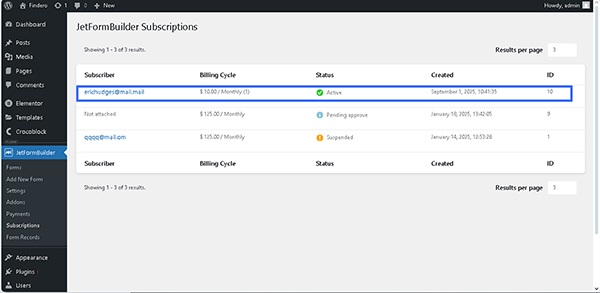
The subscription data will be displayed in the WordPress Dashboard > JetFormBuilder > Subscriptions tab.
That’s it; now you know how to use the JetFormBuilder PRO add-on on WordPress websites for configuring recurring payments.