How to Set Up the Reset Password Field
With the User Login Action Addon from the JetFormBuilder WordPress plugin, you can not only identify registered users and let them log into the system, but also reset their passwords, according to the validation rules.
Table of Contents:
- Install and Activate the User Login Action Addon
- Creating a New Form
- Building a Login Form
- Building a Reset Password Form
- Setting Up the Advanced Validation Rules for the Password Field
- Adding a Button to Switch Between Forms
- Adjusting Post Submit Actions
- Adding the Form to a Login Page
- Checking the Result on the Frontend
Installing and Activating the User Login Action Addon
To install the add-on:
- Go to WordPress Dashboard > JetFormBuilder > Addons tab and find the User Login Action addon in the All Available Addons section.
- Press the “Install Addon” button, and once installed, it will appear in the Your Installed Addons section.
- Click the “Activate Addon” button.

Creating a New Form
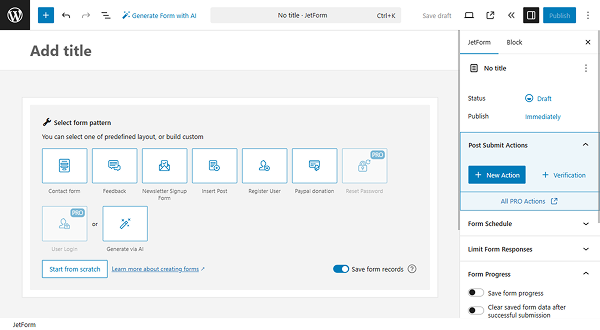
In this case, we built the form from scratch. Navigate to the WordPress Dashboard > JetFormBuilder > Add New tab to create a new form.
The new form will be opened in the Gutenberg block editor.
Press the “Start from scratch” button in the Welcome block to create your custom form.
The Welcome block will be closed, and the Hidden Field, the Text Field, and the Action Button will be added by default.
Type the form’s name instead of the “Add title” placeholder. Also, check how to build forms from the Form Creation tutorial.
Building a Login Form
In this case, we started with the creation of a Login Form part.
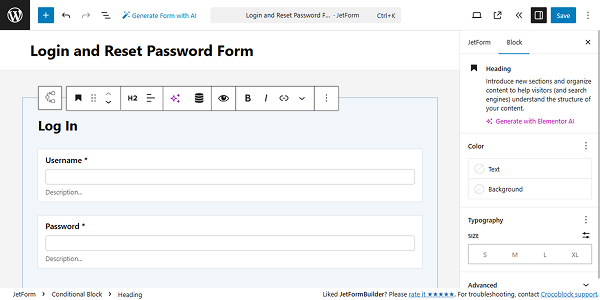
First of all, add the Conditional Block. Inside the block, we added a Heading Field and two Text Fields — one for the username and the second one for the password. In the Heading field, we typed “Log In”.
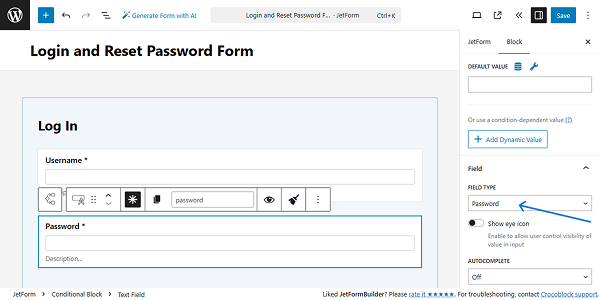
In the settings of the “Password” field, in the right-side tab, select the “Password” FIELD TYPE.
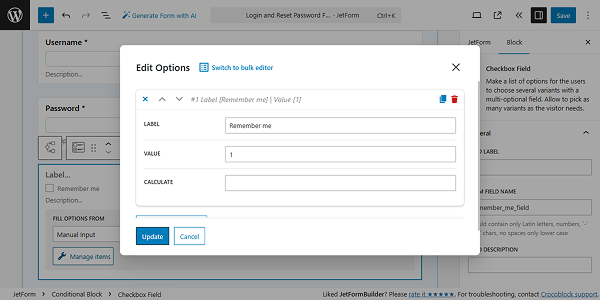
Also, we added the Checkbox Field with the “Remember me” option.
Then, we added the Action Button and changed its label to “Log In”.
Render state for login form
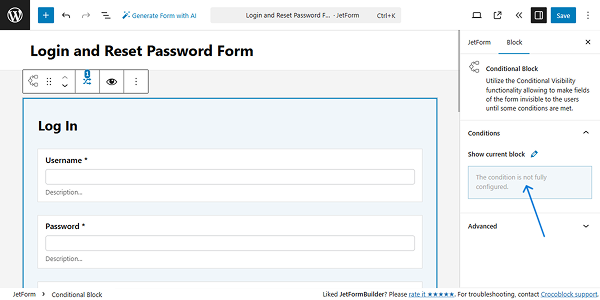
Now, let’s set up the Render State for the Login Form. Click the Conditional block, and on the right side, you will see the block’s settings.
Under the Show current block label, you see that you have no conditions set for this block. Once you hover over the blue box, you can click the “Add new” button.
In the newly appeared pop-up, select the “Show if…” option from the WHICH FUNCTION NEED EXECUTE? dropdown. Choose the “Is render state” option for the OPERATOR field. Then, pick the “DEFAULT.STATE” for the RENDER STATE.
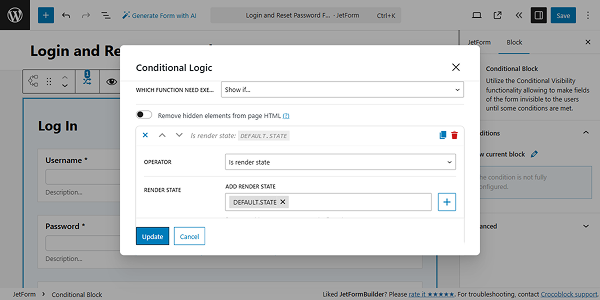
Click the “Update” button.
Building a Reset Password Form
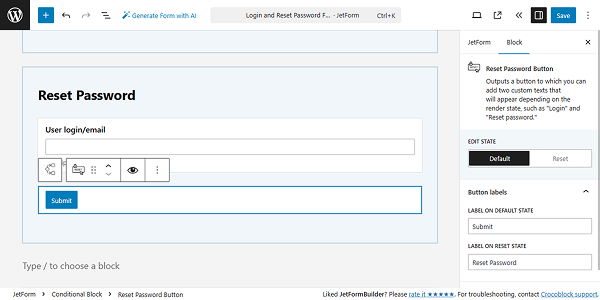
Add one more Conditional Block. Inside this block, we added the Heading field as well and typed “Reset Password” in it.
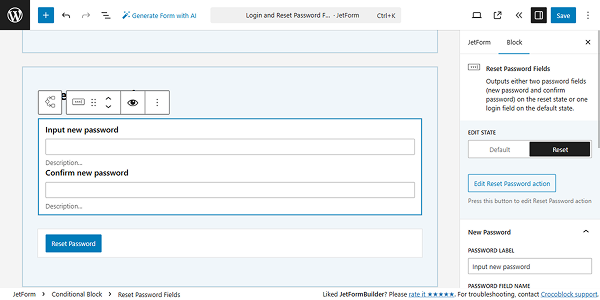
Add the Reset Password Fields and Reset Password Button blocks.
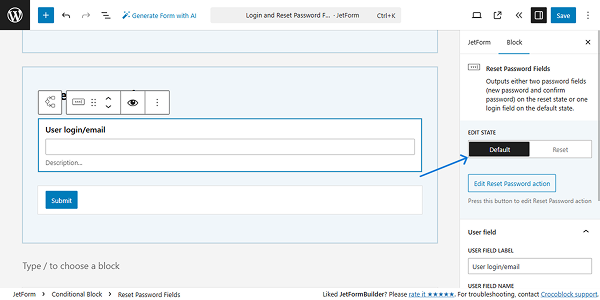
The Add New Password and Confirm New Password fields are set in the form by default.
To find them, proceed to the right-side settings tab of the Reset Password Fields block. There is a switcher with two states: Default and Reset.
Once you switch to the Reset state, you see the Input new password and Confirm new password fields as well as a new button that allows one to reset the password.
This way you can customize the fields’ and the button’s labels if needed.
Note that the “Reset State” fields will not be visible to the users until they follow the link provided in the email.
Render state for reset password form
The Render State should be set up for the Reset Password Form as well. Click the Conditional block, and click the “Add new” button under the Show current block label.
In the newly appeared pop-up, select the “Show if…” option from the WHICH FUNCTION NEED EXECUTE? dropdown. Choose the “Is render state” option in the OPERATOR field.
Then, select a different Render State. In our case, we clicked the “+” icon and added custom “DEFAULT.STATE.2” RENDER STATE. Also, we added the “RESET.PASSWORD” state from the dropdown.
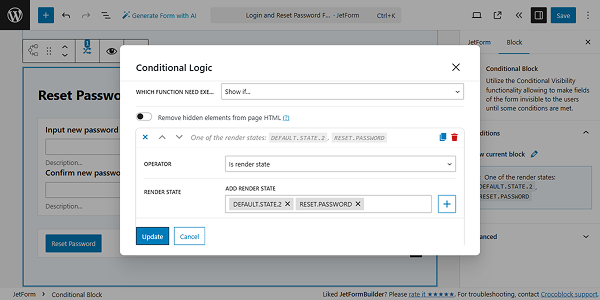
Click the “Update” button once you are ready.
Setting Up the Advanced Validation Rules for the Password Field
In this case, we need to ensure that the password the user uses is secure and does not repeat the old one. To achieve this, we used the Advanced Validation for the fields.
Click the “Three Dots” icon of the Reset Password Fields block and press the “Group” option.
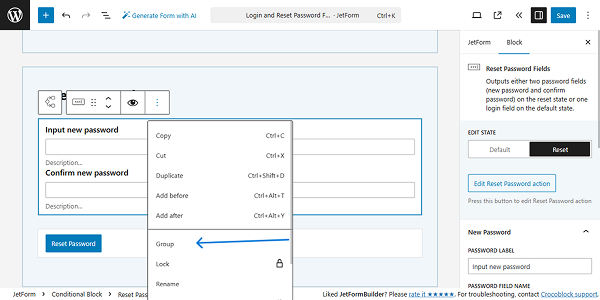
Now, you can modify each field of the Reset Password group separately. You can also define your own rules for the Add Password and Confirm Password fields of the Reset Password group.
In the settings of the block, scroll down to the Validation tab and switch to the Advanced mode, and click the “Add New” button.
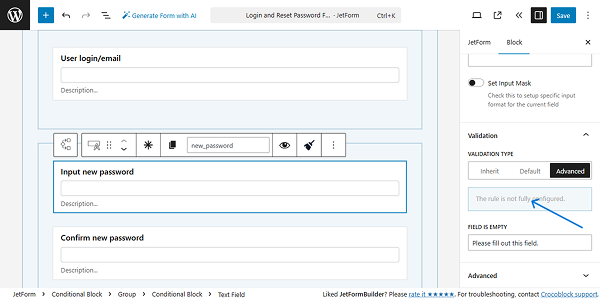
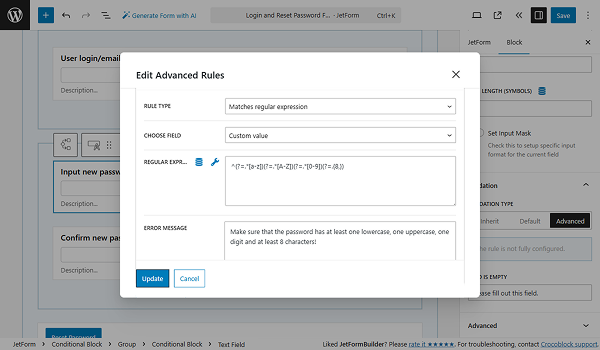
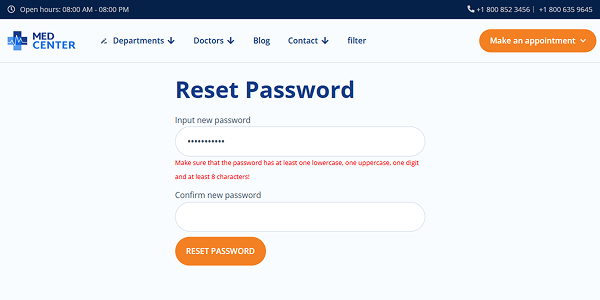
We need the password to contain at least one lowercase letter, one uppercase letter, one digit, and at least 8 characters. So we selected the “Matches regular expression” option from the RULE TYPE dropdown. Keep the “Custom field” option for the CHOOSE FIELD input. In the REGULAR EXPRESSION field, we put the following value:
^(?=.*[a-z])(?=.*[A-Z])(?=.*[0-9])(?=.{8,})Then, the desired ERROR MESSAGE can be set.
To add one more rule, click the “Add Rule” button. Now, select the “Server-Side callback” RULE TYPE. Pick the “Compare with Current User Password” option from the CHOOSE CALLBACK dropdown. Put the needed ERROR MESSAGE.
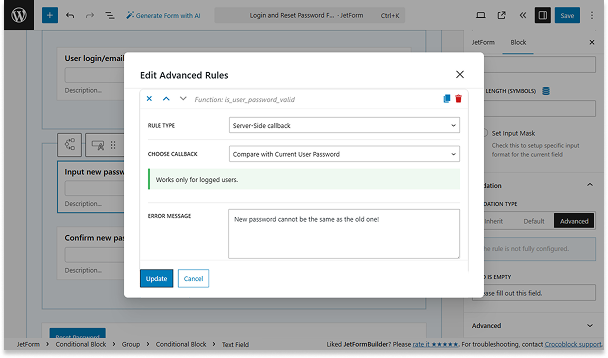
Click the “Update” button once you are ready.
Adding a Button to Switch Between Forms
To make sure that the user is able to switch between the forms, proceed to the Login Form block and add one more Action Button. Select the Change Render State button type.
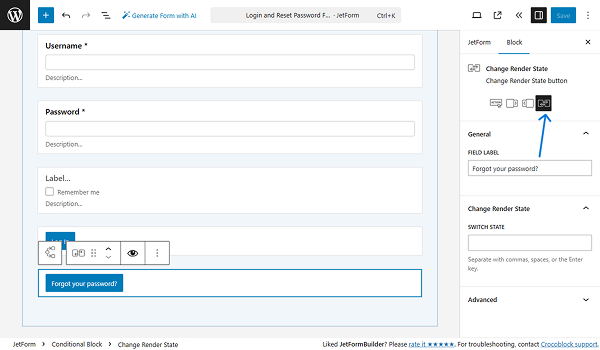
We changed the button’s label to “Forgot your password?”.
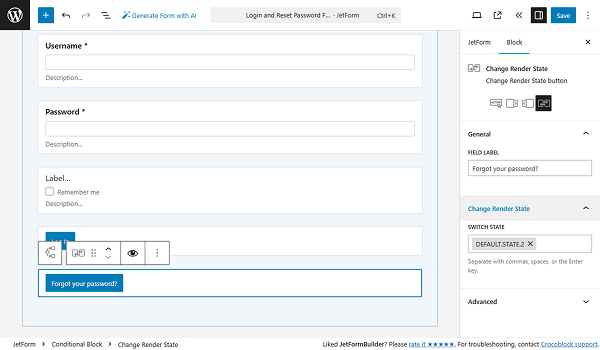
In the SWITCH STATE field, put the state assigned to the Reset Password block – “DEFAULT.STATE.2” in our case.
Now, let’s proceed to the Reset Password block and do the same: add the Action Button with the Change Render State button type. In the SWITCH STATE field, put the state assigned to the Login block – “DEFAULT.STATE” here.
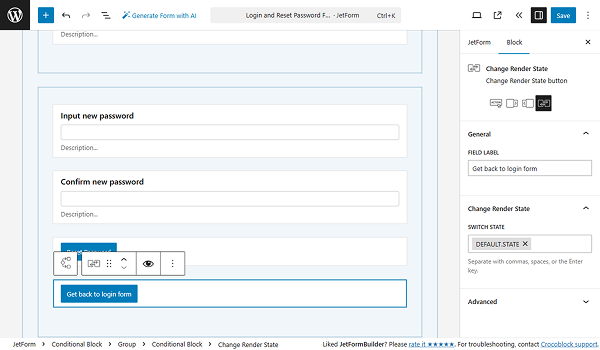
We changed the button’s label to “Get back to login form”.
Adjusting Post Submit Actions
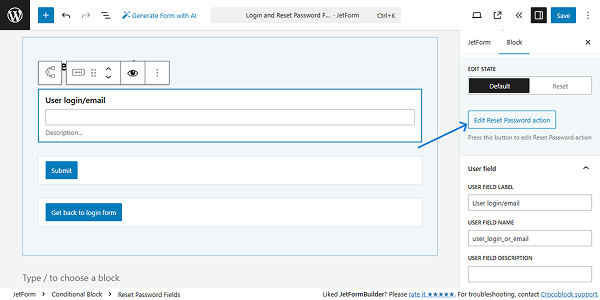
To make the form work properly, we need to set the Post Submit Actions. Once the reset Password Fields block is added, the “Reset
Password Post Submit” action will be added automatically. To access the action settings, click the “Edit Reset Password action” button under the states’ switcher.
All the needed fields are already pre-filled, so you do not need to fill them manually. You can customize the messages for the PASSWORD MISMATCH and INCORRECT LOGIN/EMAIL.
This action sends a standard email to reset the password by default. If you need to customize this email, enable the Add custom reset password email toggle. This step is optional.
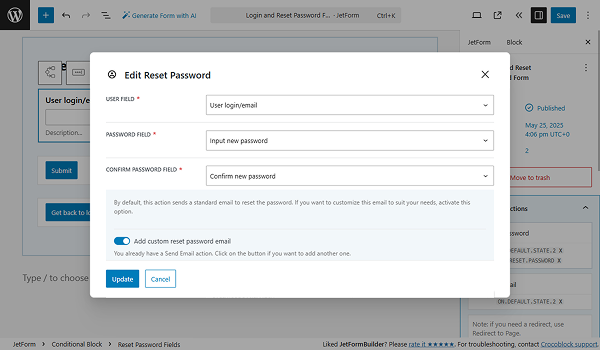
If you apply any changes, click the “Update” button once you are ready with the settings.
In our case, we added the “Send Email” action. Once this action is activated, you are redirected to the JetForm > Post Submit Actions tab. Here you see that the “Reset Password” and “Send Email” actions are already added. You can edit them by clicking the pencil-shaped icon.
We need to add the “User Login” and “Redirect to Page” actions as well.
The “Save Form Record” Post Submit Action is set by default. We did not delete this action to collect and manage data via the JetFormBuilder dashboard on the Form Records Page.
Setting up events for actions
To make sure that the form does not execute all the actions at once, we need to assign Post Submit Actions with Events. Events define when a specific action is executed.
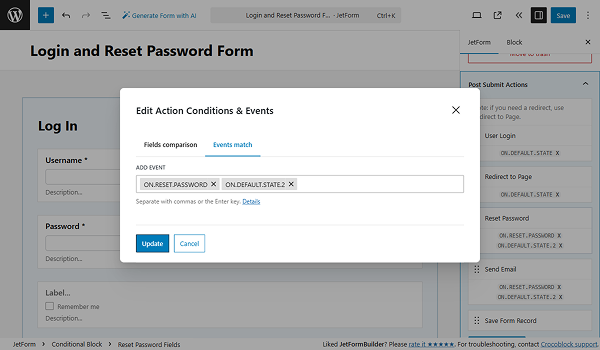
Click the “Edit Conditions & Events” button under the first action, “User Login.”

Inside the Edit Action Conditions & Events pop-up, switch to the Events match tab and assign the “ON.DEFAULT.STATE” event (ADD EVENT field).
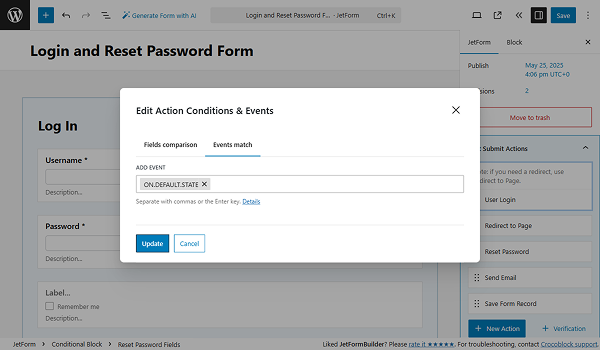
Click the “Update” button.
The same event we set for the “Redirect to Page” action.
For the “Reset Password” and “Send Email” actions, we set the “ON.DEFAULT.STATE.2” and “ON.RESET.PASSWORD” events.
Press the “Update” button once you are ready.
Once you are ready with the settings, click “Publish/Update” to create the form. The configuration part is complete.
Adding the Form to a Login Page
Now, proceed to the Login page and use the JetForm widget (in Elementor), JetForm block (in Block Editor), or JetForm element (in Bricks).
From the Choose Form drop-down list, select the built form. Learn about other settings from the JetForm Overview.
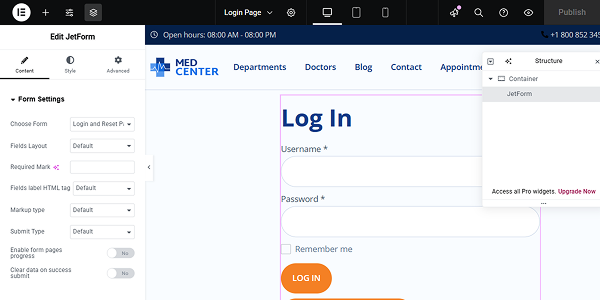
We placed our form on the page edited in Elementor. To display the form on other page builders, check our guide on How to Display a Form on the Front End.
Apply the desired style settings and click the “Publish” button.
Checking the Result on the Frontend
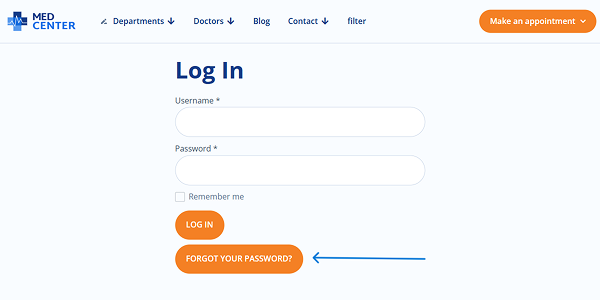
Open the Login page where the form is located on the front end. Only the first part — the Login form — should be visible. To switch to the Reset Password form, click the “Forgot your password?” — the Change Render State button.
Now, the Reset Password form is displayed.
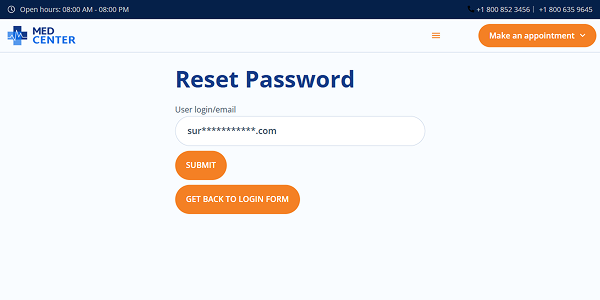
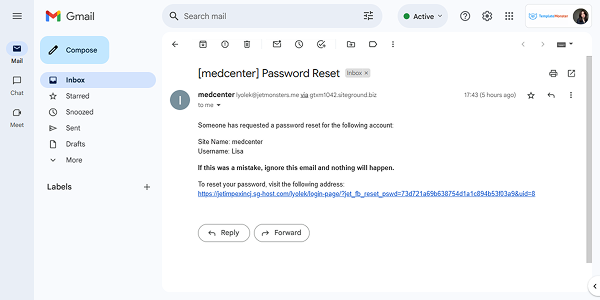
We put the email address in the User login/email field and click the “Submit” button. The form is successfully submitted, and if we check our inbox, we see that we got the email message with the link for resetting the password.
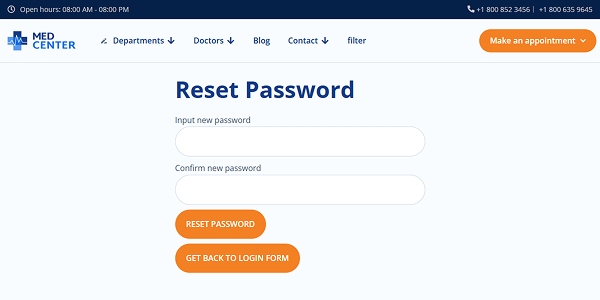
Click the link, and we are redirected to the Reset Password page with two fields.
Let’s see how the validation rules work. Type some password and see that it cannot be applied until all the requirements are completed.
Finally, when we try to log in with the Login form, we can do it successfully.
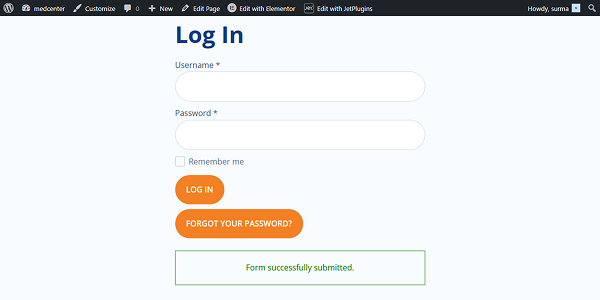
After that, we are redirected to the Account Page.

Now you know how to reset the password according to the validation rules with the help of the User Login Action Addon from the JetFormBuilder WordPress plugin.