JetFormBuilder‘s Calculated Field allows you to create formulas that perform calculations based on user input. This tutorial will demonstrate how to effectively use Hidden and Repeater Fields with a Calculated Field to enhance your forms.

Contents

Calculated and Hidden Fields

A Hidden Field in JetFormBuilder lets you include values in your formula that are not visible to the user. It is useful for incorporating values such as tax or fees that should be included in calculations but not displayed.

For example, if you’re building a form for a rental site, you might need to calculate the total price based on the number of visitors, the price per room, and an additional tax. You can use a Hidden Field to store the tax value and include it in the total price calculation.

Here’s how you can set it up.

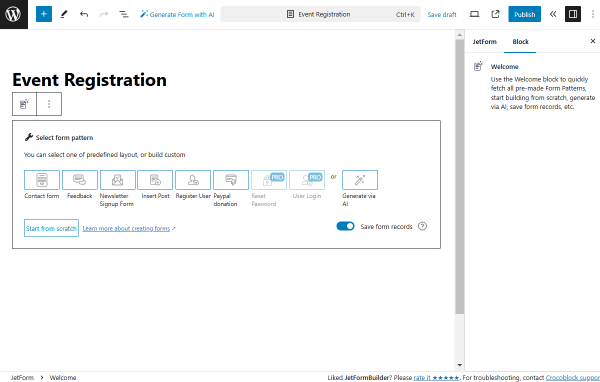
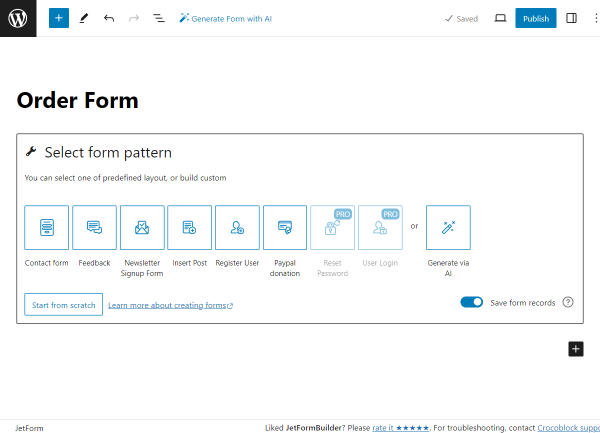
Create a form with the necessary set of fields

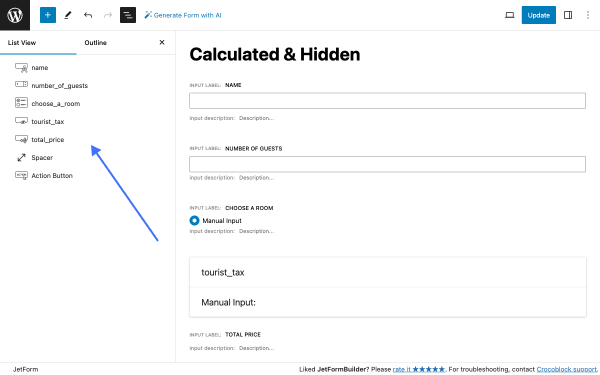
Go to WordPress Dashboard > JetFormBuilder > Add New, assign the form a title, and add the following fields: 

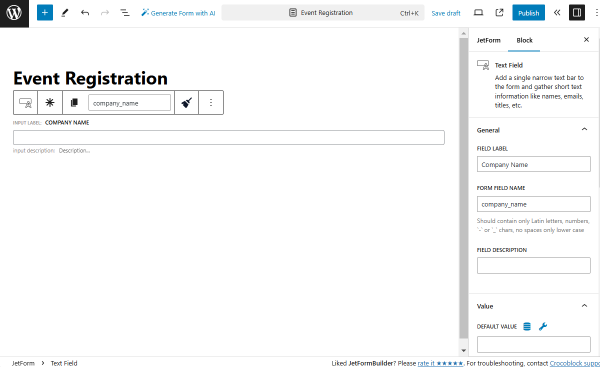
  • Text Field (for the name of the user);
  • Number Field (for the number of guests);
  • Radio Field (for the price of rooms);
  • Hidden Field (for the tax value);
  • Calculated Field (for the formula).

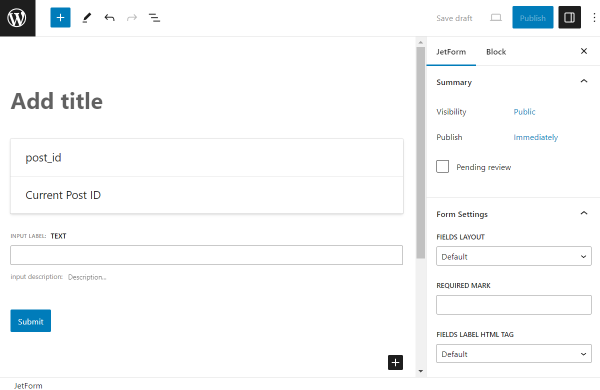
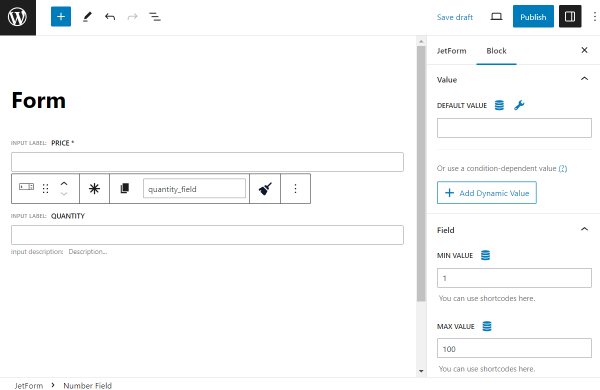
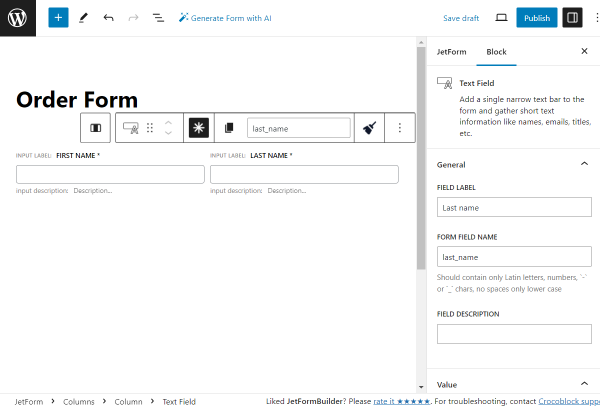
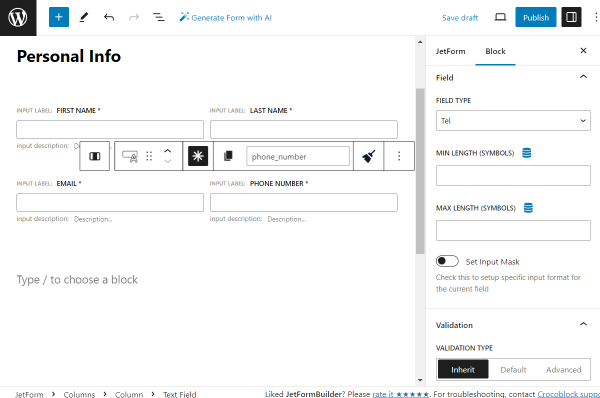
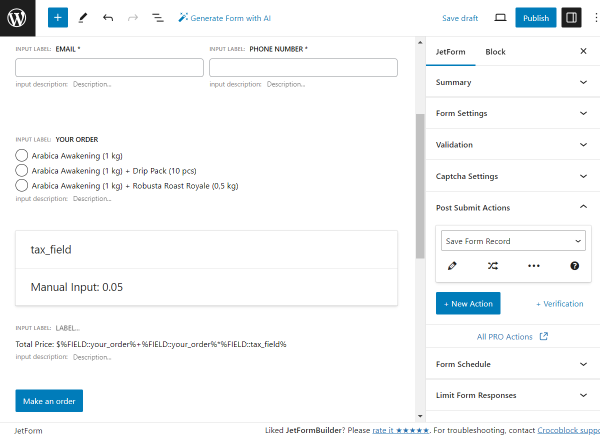
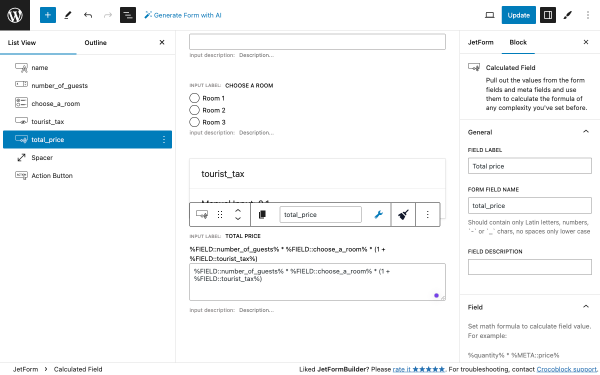
Here is how these fields will appear in the JetFormBuilder editor.

jetformbuilder form fields

Now, let’s fine-tune the fields. 
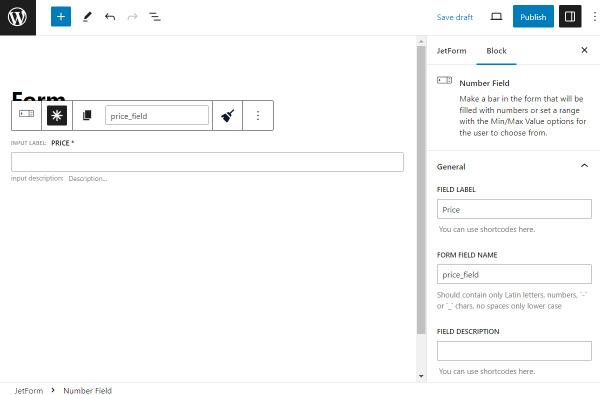
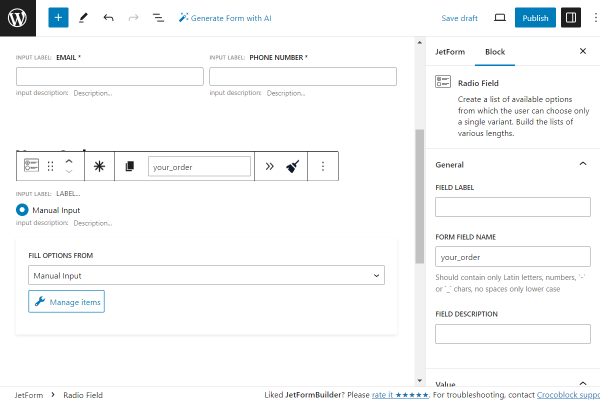
Radio field

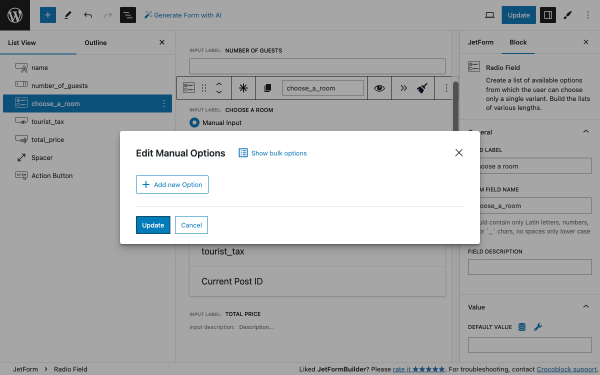
Let’s add corresponding FIELD LABEL (“Choose a room”) and FORM FIELD NAME (“choose_a_room”) values.

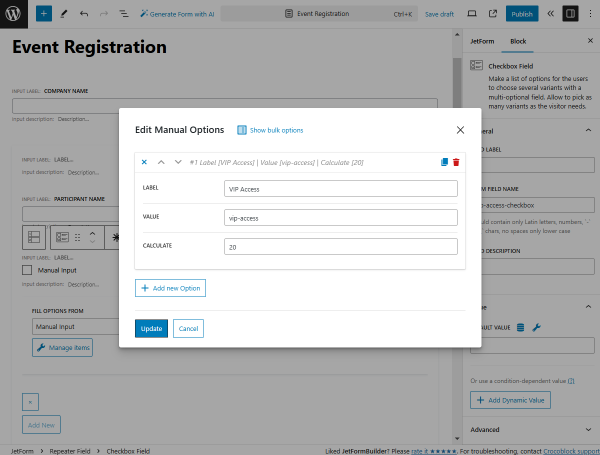
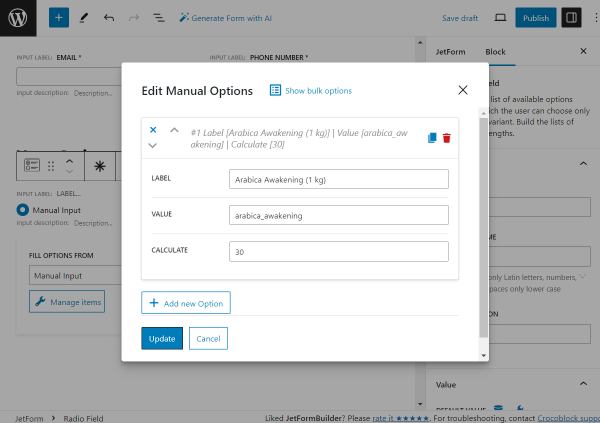
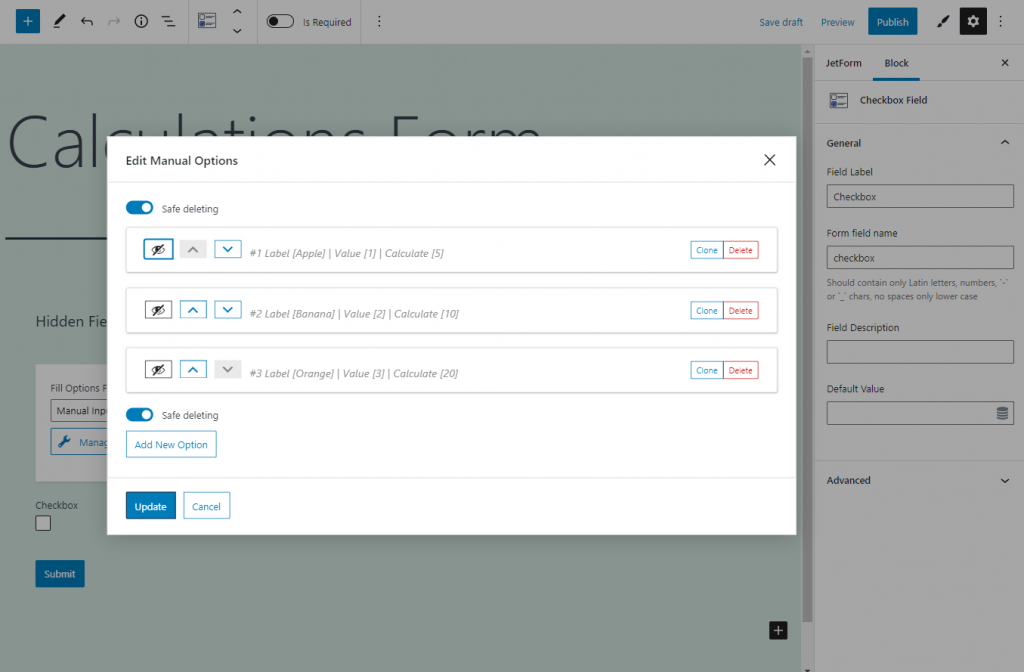
Then, pick “Manual Input” from the dropdown menu and click the “Manage Items” button. At the next stage, you can create several options, each corresponding to a radio button. To add a new option, you need to click the button, “Add new Option.” If you need to add more options, you need to use the same button.

radio field adding manual options

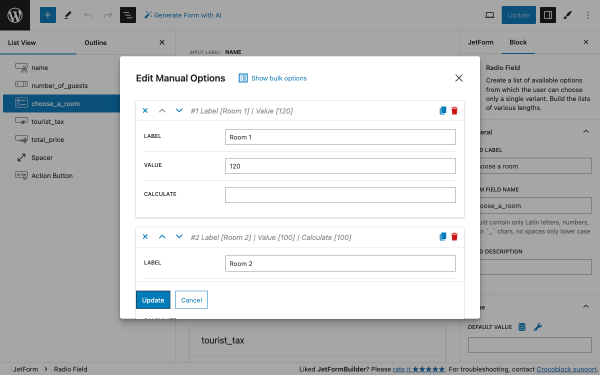
The item LABEL should match the room title. Enter the price per visitor in the VALUE field.
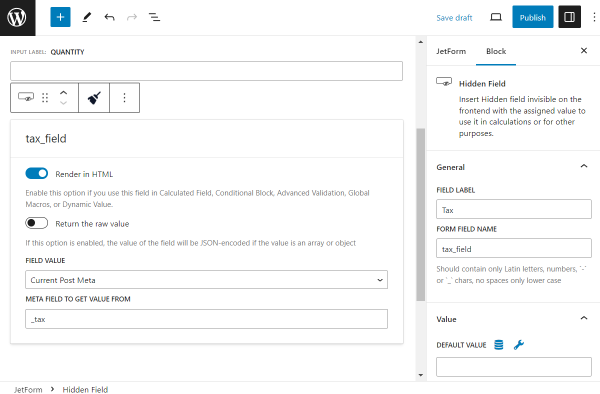
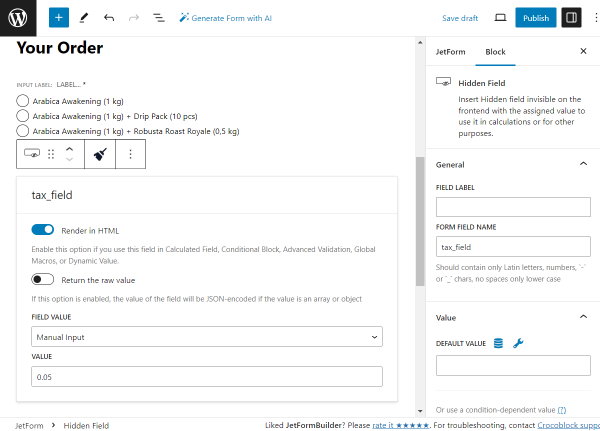
radio field editing manual options

Hidden field

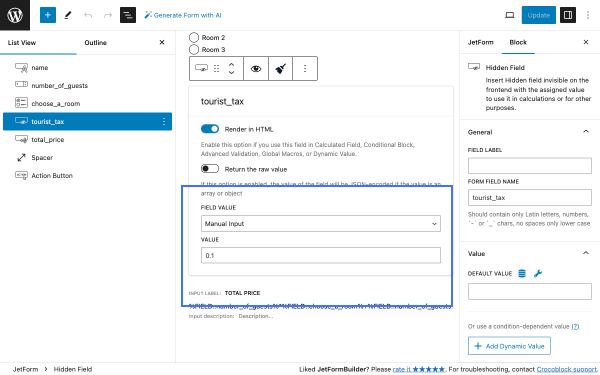
Let’s add a corresponding FORM FIELD NAME — “tourist_tax.”

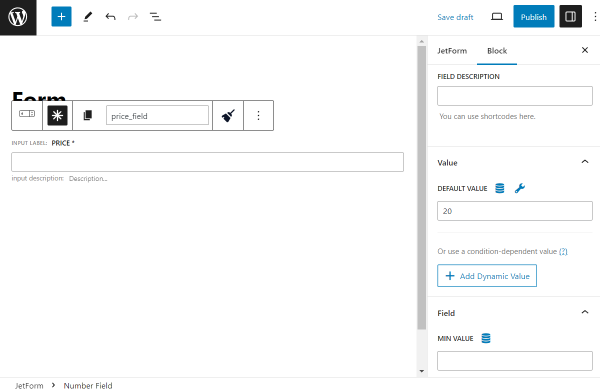
In this case scenario, our Hidden Field will contain the tourist tax needed to calculate the total amount. We will use the 10% tax amount, so in the dropdown, you should choose “Manual Input” and enter the value “0.1”.
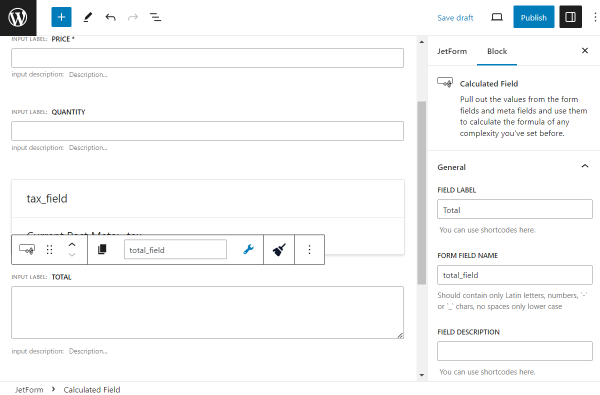
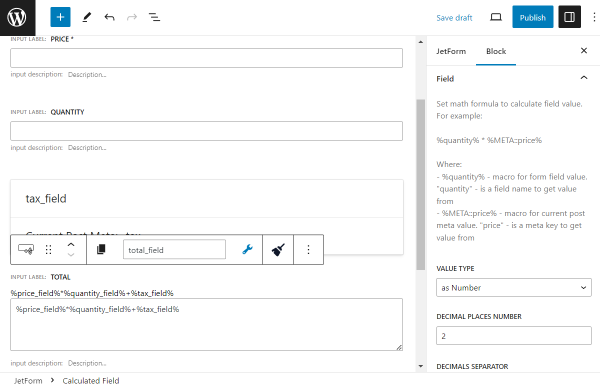
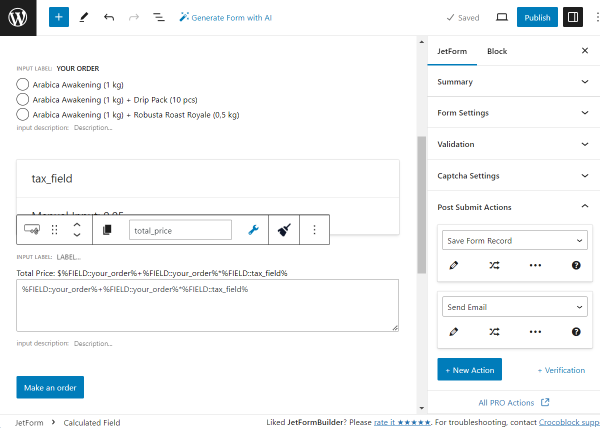
hidden field adding manual input value

Calculated field

Now, let’s add the formula to the Calculated Field. Our formula contains three values: 

  • number of guests;
  • price of the room;
  • amount of tax.

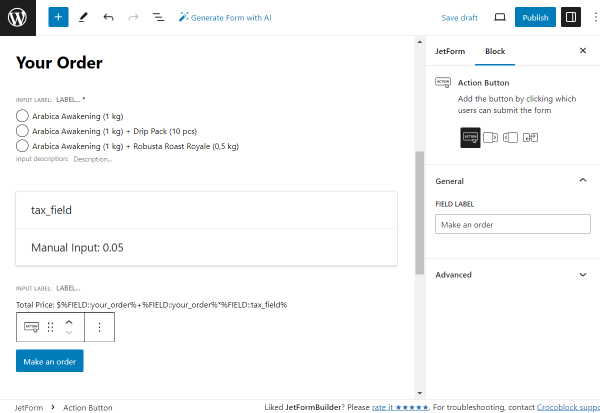
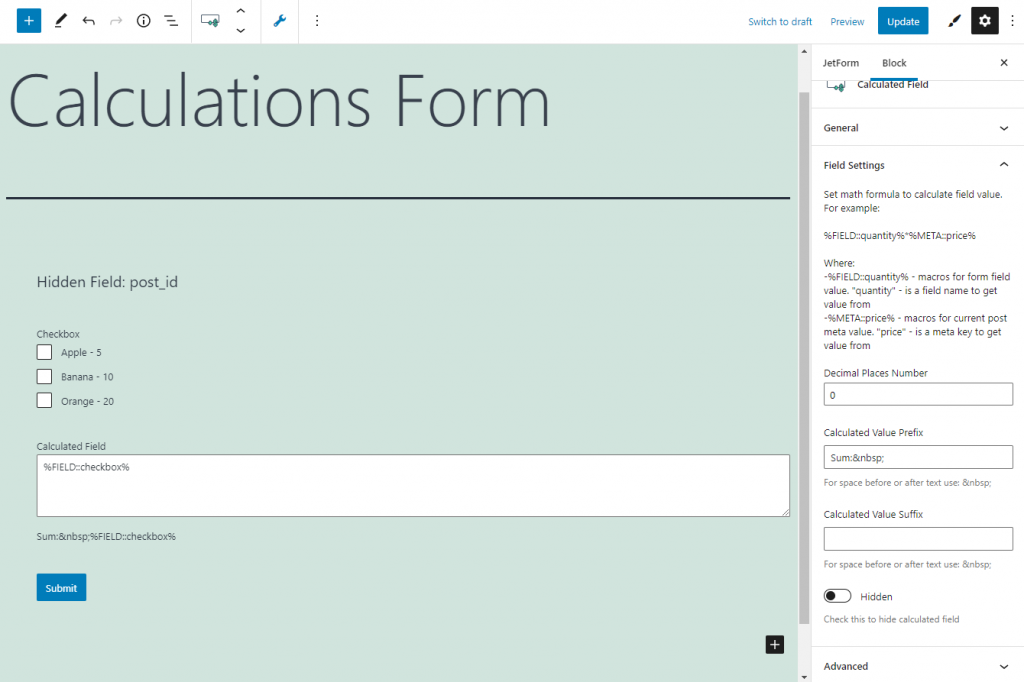
We need to multiply the number of guests by the room’s price and then add the tax deducted from that amount. For our formula, we’ll use the corresponding form field names with a macro %FIELD::example_field_name%; that’s what the final formula looks like: 

%FIELD::number_of_guests% * %FIELD::choose_a_room% * (1 + %FIELD::tourist_tax%)

Add this formula to the Calculated Field.

adding formula to the calculated field

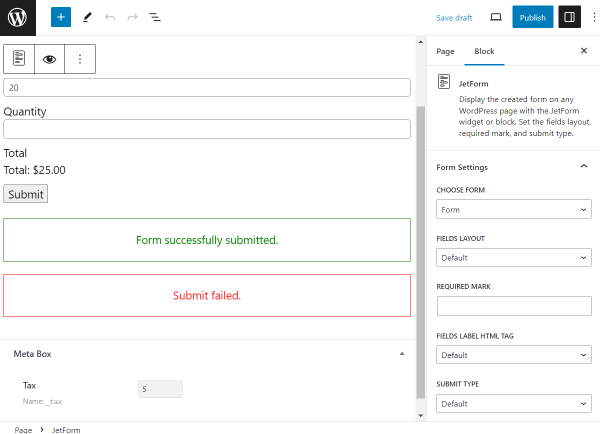
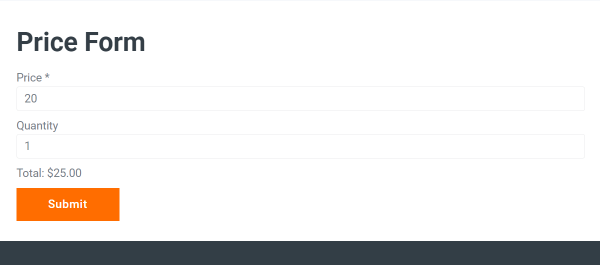
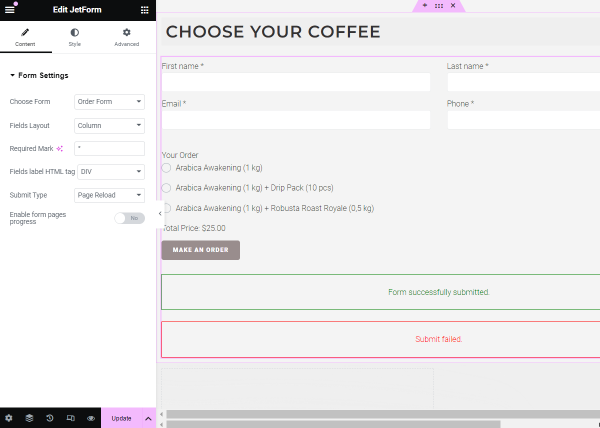
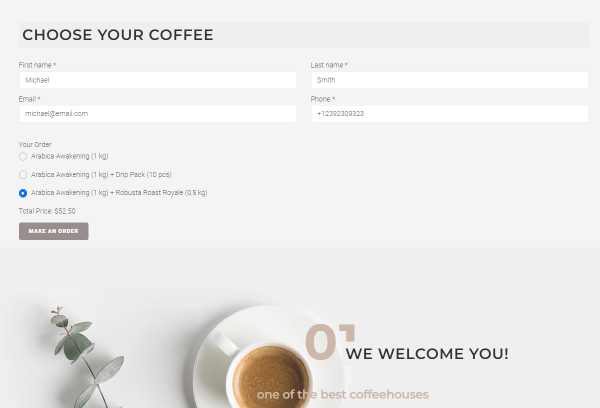
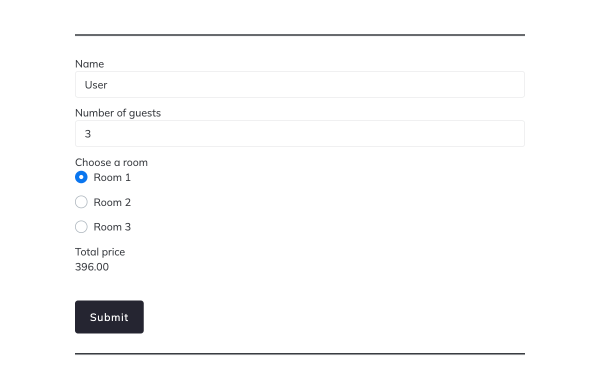
Now, let’s see the result on the front end.
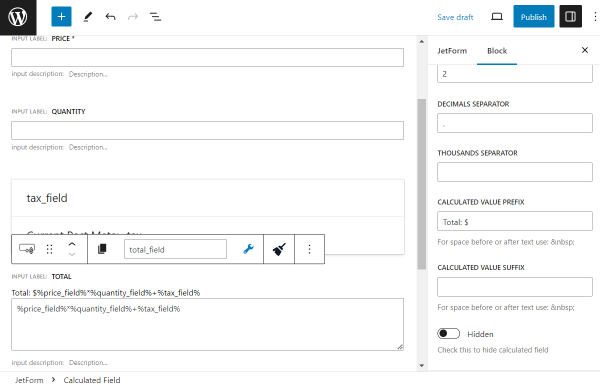
form with calculated and hidden fields

Additional styles

To customize the appearance of your JetFormBuilder form fields, you can use the JetStyleManager plugin. Using this plugin, you can apply extra styles without writing custom CSS. 

Access the JetStyleManager plugin’s customization options by clicking the “brush” icon alongside the “Update” button on any form field.

jetstylemanager customization fields

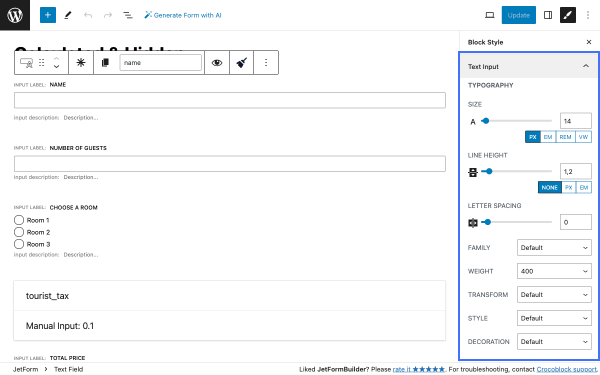
Your form’s font, margins, colors, and other aspects can be customized.

Calculated and Repeater Fields

Repeater and Calculated Fields can be combined in a few different ways. Let’s take a closer look at each of them.

Calculated field outside Repeater

In this case scenario, the Calculated Field counts the number of repeater items you’ve added. For example, we’ll put the guests’ names in the Repeater Field.

Adding a Calculated Field after the Repeater Field and using the repeater’s FORM FIELD NAME in the formula (%FIELD::guests_name%) will do the math.

You can also use the same logic to create more complicated form calculations.

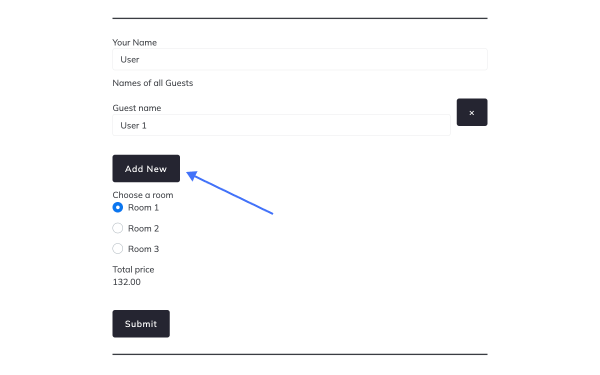
In this part of the tutorial, we will continue with the form from the previous part. From the front-end perspective, a Repeater Field with the guest’s name appears when the user hits “Add New.”

repeater field button

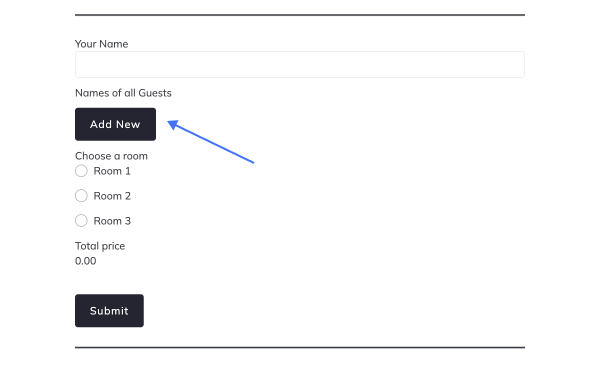
Afterward, the Calculated Field multiplies the number of added visitors by the price of the chosen room, adds the tax amount, and you will get the total price.

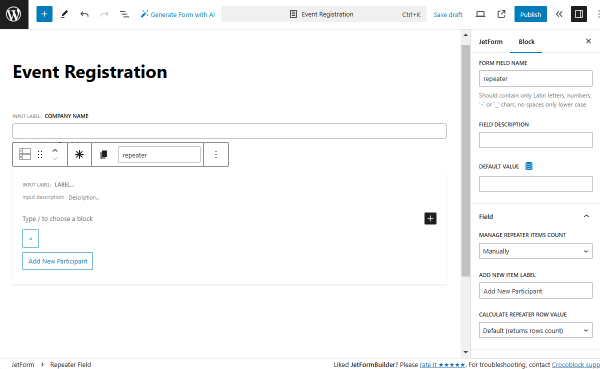
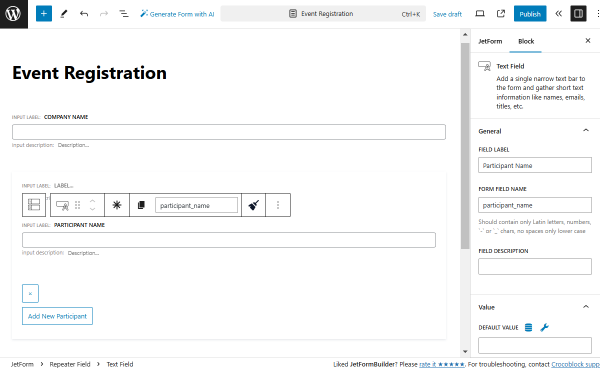
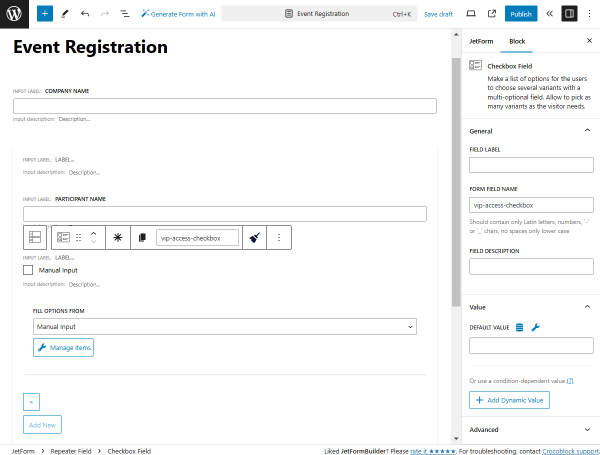
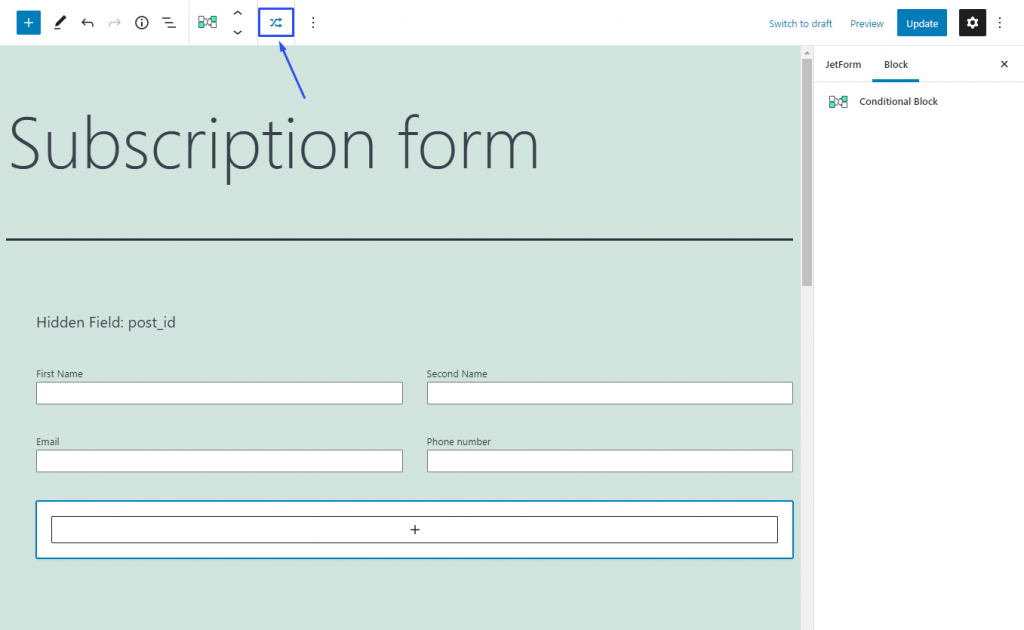
Now, we’ll show you how to add the repeater field. You can add the repeater block to your form by clicking on the block inserter and typing “repeater” in the search bar. This field is a container that you can fill with all possible form fields available in the JetFormBuilder plugin. Nesting Repeater Field blocks within each other should be avoided.

adding text field to the repeater field

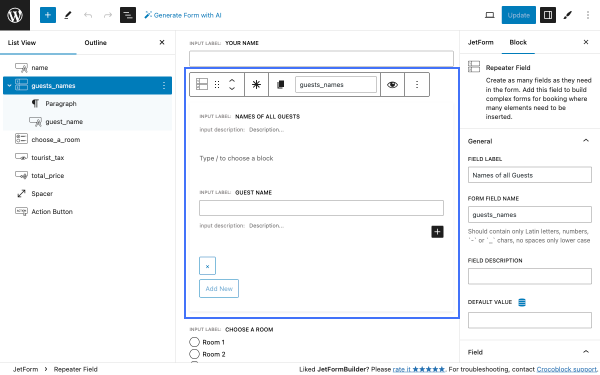
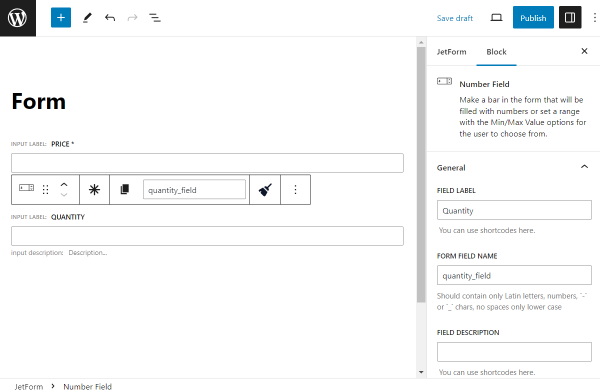
You can add any number of Text Field blocks within the repeater by clicking on the “+.” It is possible to add any other type of block to the Repeater Field. However, we do not recommend doing so because overcomplicating the logic may lead to unpredictable results.

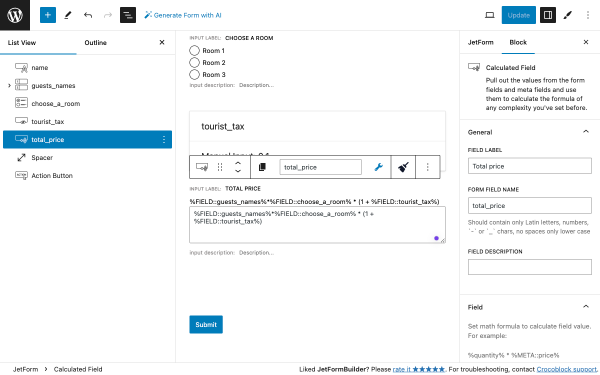
Now, let’s adjust the formula to get correct calculations in the Calculated Field. As in the previous case, the formula logic is the same:

%FIELD::guests_names%*%FIELD::choose_a_room% * (1 + %FIELD::tourist_tax%)

adding formula to the calculated field

Let’s see the result on the front end.

form with calculated field outside repeater result

Calculated field inside Repeater

The second option is to put the Calculated Field inside the repeater. The Calculated Field will count each item separately.

We’ll use the previous registration form as an example, but we’ll make some changes.

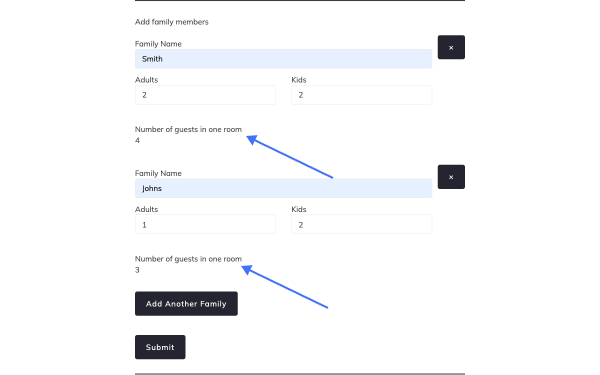
This time, we will have two Number Fields inside the repeater (“Adults” and “Children”). When the user sets the number of adults and kids, the repeater will calculate the total number of guests.

Here’s the structure of the fields:

  • Repeater Field:
    • three Text Fields (a family name, how many adults, and how many kids);
    • Calculated Field (to count the number of adults and kids).
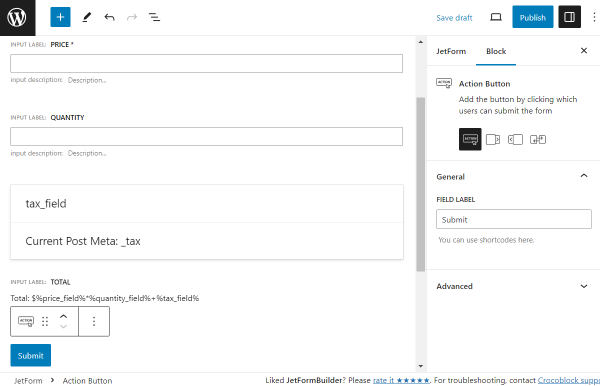
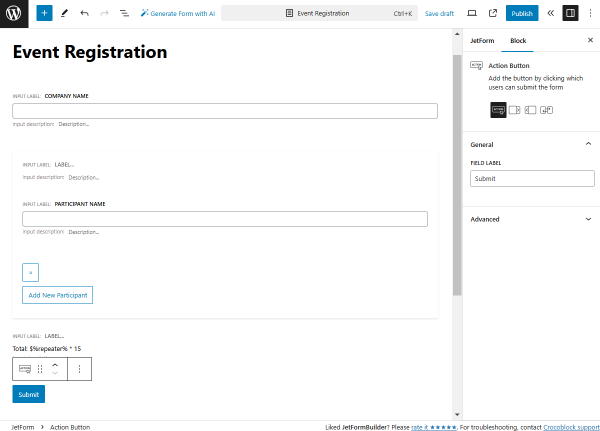
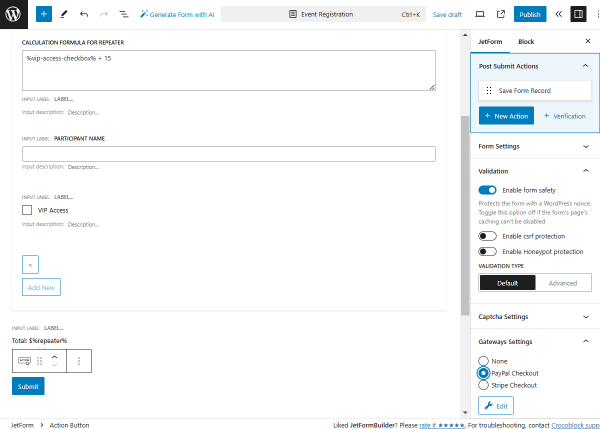
  • Action Button.
adding formula to the calculated field

For this calculation, the formula is as follows:

%FIELD::adults%+%FIELD::kids% 

Let’s see the result on the front end.

form with calculated field inside repeater result

Calculated field inside and outside Repeater

As in the previous steps, we’ll use the same form to show how it works. Fields in this form are getting more complex, so here’s the final set for this form:

  • Repeater Field:
    • “Family name” (Text Field);
    • “Adults / Kids” (Number Fields;
    • Calculated Field (counts all adults and kids);
  • Calculated Field (counts the overall number of all adults and kids within repeaters);
  • Radio Field (with choice of rooms);
  • Hidden Field (tourist tax);
  • Calculated Field (counts total price based on the formula).

As you can see in this form, all Calculated Fields are interconnected to generate the total price. Now, let’s see how we can do that. 

First, we need to make some minor tweaks to the Repeater Field

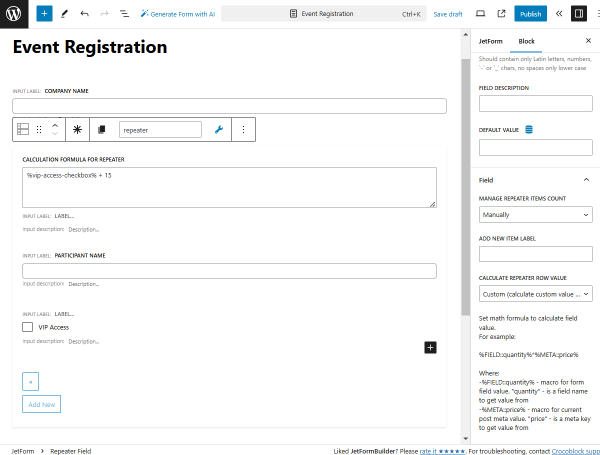
Go to the Block settings tab of the Repeater Field and select the “Custom (calculate a custom value for each row)” option in the CALCULATE REPEATER ROW VALUE field (can be found in the Field tab).

adding formula to the repeater field

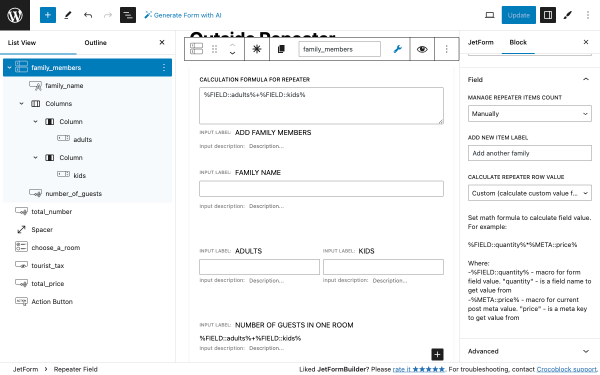
When you make this alteration, a formula field (CALCULATION FORMULA FOR REPEATER) will appear on top of your Repeater Field. We will use it to count the overall number of adults and children within a family.

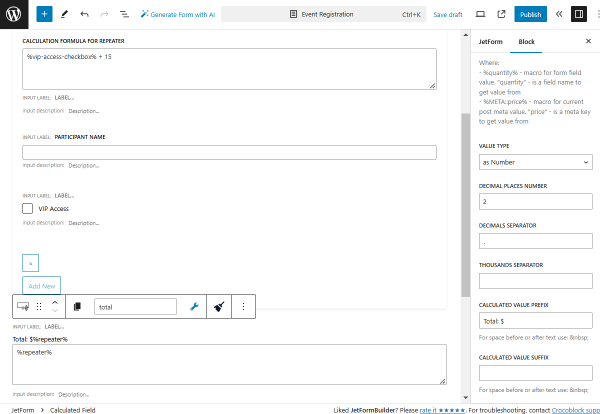
In this repeater, the FORM FIELD NAME is “family_members”; we’ll use it in the Calculated Field formula to count the overall number of guests:

%FIELD::family_members%.

adding formula to the calculated field

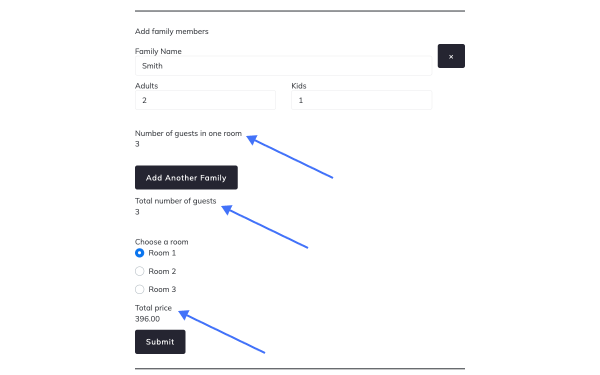
The TOTAL NUMBER OF GUESTS field will count all adults and kids in all repeater fields you will add.

The last major alteration is the final formula that counts the overall price of the room. 

Here, we need to multiply the Repeater Field by the “choose_a_room” field, then add “tourist_tax” deducted from the previous amount, and here’s the final formula: 

%FIELD::family_members%*%FIELD::choose_a_room%  * (1 + %FIELD::tourist_tax%).

Let’s check the result on the front end.

form with calculated field inside and outside repeater result

That is it; now you know how to make simple calculations using Hidden, Repeater, and Calculated Fields with the help of the JetFormBuilder plugin for WordPress websites.

This tutorial describes an application of the Hidden and Calculated field types in JetFormBuilder Forms to calculate values using formulas.

Hidden and Calculated Field Types

Let’s clear up what the Hidden Field means. In fact, the name speaks for itself. This field can contain the value that will not be visible on the front but can be used for calculations.

Calculated Field helps you make any calculations using math formulas based on macros and display the result on the front end. You can take the values for the formulas either from meta fields created previously for your custom post or from the fields filled on the front end by users.

NOTE

If you take the value of the Hidden Field for the formula, be aware that it is attached to some meta field. The formula will work correctly only on those pages or posts where that meta field is added. For instance, the JetEngine’s meta fields can be used.

Let’s consider an example of using these fields. We’ll create a short form for a product purchase.

Build a Form

Initially, go to WordPress Dashboard > JetFormBuilder > Add New to build a form.

We delete all the default fields to build a form from scratch.

primary form view

Primarily, we add a Number Field to display the product’s price. Complete its FIELD LABEL and FORM FIELD NAME fields.

We also set this field as required by pushing the asterisk-shaped button above the field.

price field

Then, we scroll down to the Value tab and set the DEFAULT VALUE to “20,” the value that will be set as default in this Number Field when opening the form. 

Feel free to manually set any needed value here or push the “Dynamic Content Tag” button to see the available options for dynamic data pulling.

default value

Then, we place one more Number Field in the editor. This time, it will be called “Quantity” and will let users pick the number of the needed items.

Here, we complete the FIELD LABEL and FORM FIELD NAME fields as well.

quantity field

Also, we complete the MIN VALUE and MAX VALUE fields in the Field tab with the numbers that will limit the entered quantity.

min and max value

Now, we add the Hidden Field. In this tutorial, we’ll create a field for tax, which will be further added to the final price so that visitors won’t see the “Tax” field separately on the front end, but its value will be used in the formula calculating the “Total Price.”

Initially, we complete the FIELD LABEL and FORM FIELD NAME fields.

Next, we select the “Current Post Meta” as the FIELD VALUE option and input the meta field name ID into META FIELD TO GET VALUE FROM.

tax field

This value stands for pulling data from the meta field. 

It can be filled in by opening the post editor of the post type to which the meta field is attached. In the given case, we use JetEngine’s meta box attached to the default WordPress “Pages.”

tax field for the page

Now, back in the form, we add a Calculated Field to see how the Hidden Field can be used with it. 

This field’s purpose is to calculate the total price of the product, including tax. 

So, complete the FIELD LABEL and FORM FIELD NAME fields of this Calculated Field.

calculated field

Right in the Calculated Field, we should input a math formula, which will further calculate the product’s total price depending on the quantity a visitor selects and the tax.

calculated field value

In this particular case for our tutorial, the calculation formula consists of product quantity multiplied by the product price plus tax:

%price_field%*%quantity_field%+%tax_field%

where %tax_field% is a Hidden Field.

NOTE

The formula will work correctly only if you use the fields with number values.

Also, we set the CALCULATED VALUE PREFIX in the Field tab. It will be displayed on the front end later.

calculated value prefix

The last field we added is called Action Button, and it will serve as the submit button for the form.

When your form is ready, click the “Publish” button.

action button block

Add a Form to the Page

Go to the page editor where you want to place the form. It can be either Gutenberg, Elementor, or Bricks page builders.

Find the JetForm block/widget/element and place it on the page.

Once the page is customized, press the “Publish/Update” button to save the result.

form in gutenberg

Check the Form on the Front End

Open the page on the front end to see the form in work.

price form on the front end

In our case, the “Price” and “Quantity” fields are visible, and the “Tax” field is not; however, in the total calculation formula, its value is considered.

We can describe it as a math formula:

20 (“Price”) * 1 (“Quantity”) + 5 (“Tax” (Hidden Field)) = 25

If a visitor changes “Quantity,” the formula still calculates the total price considering the “Tax” value.

price form in action

That’s all. Now you know how to use Hidden and Calculated Field types to create formulas based on the values from the JetFormBuilder form fields on your WordPress website.

From this tutorial, you will find out how to combine the Repeater Field and Calculated Field to create a form that will calculate values correctly.

Table of Contents:

There are two ways the WordPress form Repeater Field value can be used in the formula of Calculated Field — as a row count and as a custom calculated value. You can choose how to use it in the CALCULATE REPEATER ROW VALUE drop-down list of the Field settings menu section.

In this tutorial, we will build two forms with each type of calculation, both of which will be used for the event registration. So, let’s walk through the form creation process.

Default (returns row count)

Head to WordPress Dashboard > JetFormBuilder > Add New.

Name the form. In our case, it’s “Event Registration.”

Add fields

First, we delete the Welcome block added by default to build a form from scratch.

welcome block in the form

The first field we add to the form is a Text Field named “Company Name.” We don’t alter the settings, leaving them default.

company name text field

Next, we add a Repeater Field

This time, we leave the FIELD LABEL empty and only complete the FORM FIELD NAME with the “repeater” value.

In the Field tab, we set the “Add New Participant” ADD NEW ITEM LABEL and leave the “Default (returns rows count)” option in the CALCULATE REPEATER ROW VALUE field.

This way, the calculation will be made based on the number of repeater fields.

repeater field in the form

Inside the added Repeater Field, we put a Text Field with the “Participant Name” FIELD LABEL.

participant name text field

Next, outside the Repeater Field, we add a Calculated Field with the following value:

%repeater% * 15

where the “%repeater%” value is the FORM FIELD NAME of the Repeater Field and “15” is the price of the ticket to the event per person.

Also, we add a “Total: $” value in the CALCULATED VALUE PREFIX field.

total calculated field from the first form

The final field we add to the form is the Action Button

We don’t change the settings for this field.

action button in the first form

Adjust post submit actions and payment gateways

Next, we want to customize the post submit actions and attach the payment system to the form. 

To do this, first, move to the Post Submit Actions section of the JetForm tab and press the “+ New Action” button. Then, select the needed action. For instance, we pick the “Save Form Record” action to save the form submissions on the Form Records page of JetFormBuilder.

After that, we open the Gateways Settings tab and pick the “PayPal Checkout” option.

To customize its settings, press the “Edit” button.

post submit actions and gateways settings

In the opened pop-up, we activate the Use Global Settings toggle to pull the CLIENT ID and SECRET KEY values from the global settings.

We leave the default “Pay Now” GATEWAY ACTION and click the “Sync Access Token” button.

Then, complete the CURRENCY CODE field; in our case, it is set to “USD”, and select the Calculated Field name as the PRICE/AMOUNT FIELD.

To save the settings, press the “Update” button.

Then, click the “Publish” button to save the form.

edit paypal checkout settings popup for the first form

Place form on the page

Head to the page/template where you want to place the form. In our case, it will be the “Registration Page,” so we go to WordPress Dashboard > Pages > Add New Page to create a page in the Elementor editor.

We fill the page with content and place a JetForm widget on the page.

In the widget’s settings, pick a just-built form in the Choose Form selector and customize other settings if desired.

Once the page is ready, press the “Publish” button.

the first form in elementor

Check the result

Head to the just-edited page at the front end and complete the form. 

You will observe how the price is changing with every new participant added with the “Add New Participant” button.

Submit the form to check if the form is working correctly.

the first form on the front end

Now, let’s check the WordPress Dashboard > JetFormBuilder > Form Records directory. Here, if the first form was submitted correctly, the form record will be displayed in the list.

Click the “View” button to check the details.

jetformbuilder form records

Once done, the page with the form records will be opened.

the first form record

Also, proceed to WordPress Dashboard > JetFormBuilder > Payments page to check the information about the transaction made during the form submission.

Find the corresponding payment and press the “View” button that appears when hovering over the item.

jetformbuilder payments

When the payment page is opened, you can check the info on payer information, related form record, and other payment details.

the first form payment

Custom (calculate custom value for each row)

Now, let’s build a second form with a different calculation type; this time, it will be custom.

Add fields

For this form, we also add a “Company Name” Text Field and a Repeater Field with the “repeater” FORM FIELD NAME.

Inside the Repeater Field, we add a “Participant Name” Text Field. 

Then, we add the Checkbox Field in the Repeater Field and set its FORM FIELD NAME to “vip-access-checkbox”.

Next, we leave the default “Manual Input” option and press the “Manage items” button to add field options.

checkbox field

Click the “+ Add new Option” button.

Here, we set the “VIP Access” LABEL and the “vip-access” VALUE.

In the CALCULATE field, we put the “20” value to make it a price for VIP access to the event.

In case you want to add more options, click the “+ Add new Option”.

To save the settings, press the “Update” button.

edit manual options popup

Now, click on the Repeater Field to open its settings. 

Open the Field tab and pick the “Custom (calculate custom value for each row)” option in the CALCULATE REPEATER ROW VALUE field.

Now, the CALCULATION FORMULA FOR REPEATER appears in the Repeater Field. We put the following formula in this field:

%vip-access-checkbox% + 15

where the “%vip-access-checkbox%” is the FORM FIELD NAME of the Checkbox Field and the “15” value is the intended price of the event ticket.

calculation formula for repeater field

Next, we add the Calculated Field; now, it is placed outside the Repeater Field.

Inside this field, we put the “%repeater%” value, which is the FORM FIELD NAME of the added Repeater Field.

In the Calculated Field settings, we also complete the CALCULATED VALUE PREFIX field with the “Total: $” value.

calculated field of the second form

Ultimately, we add an Action Button to the form.

Adjust post submit actions and payment gateways

As for the Post Submit Actions and Payment Gateways, we adjust them just as we did for the first form.

action button, post submit actions, and gateways settings for the second form

Publish the form by pressing the corresponding button.

Place form on the page

Proceed to the page where you want to add a form and place the JetForm widget/block/element on the page.

Pick the just-built form in the Choose Form selector. 

Work on other settings if needed and press the “Publish” button to save the page.

the second form in elementor

Check the result

Head to the front end to check the form. There, complete the form to see that the total sum is calculated correctly.

the second form on the front end

Now, you can check the WordPress Dashboard > JetFormBuilder > Form Records directory to see if the data was saved after the form submission.

Click the “View” button next to the needed form record and check the saved information.

the second form record

Also, you can check if the payment after the form submission was made successfully in the WordPress Dashboard > JetFormBuilder > Payments directory. To do so, click the “View” button next to the needed payment.

On the opened page, you will see the payment details.

the second form payment

That’s all; now you know how to use the Repeater Field with the Calculated Field available with the JetFormBuilder plugin for your WordPress website.

The value of the Hidden Field can be used in the formula of the Calculated Field just as the value of any other field. However, the fact that this field is invisible to the user gives you an opportunity to add some values secretly. For example, with the help of the Hidden Field, you could add taxes to the “Total Price” formula.

Let’s assume we are creating an order form. The user can choose items, and you want to show the total price of the order, including taxes.

Create a Form

Proceed to WordPress Dashboard > JetFormBuilder > Add New to build a new form.

Give a title to the form. At first, you will see the Welcome block. Now, we click the “Start from scratch” button to build a custom form.

welcome block in the form

We add two Columns and four Text Fields inside them to get the basic information about a user: “First Name,” “Last Name,” “Email,” and “Phone Number.”

The settings for the “First Name” and “Last Name” fields are left by default, and only the FIELD LABEL and FORM FIELD NAME are completed.

NOTE

The FORM FIELD NAME should include only lowercase Latin letters, numbers, and “-” or “_” characters.

We also make these fields obligatory for completion by pushing the “asterisk” symbol above the field.

first and last name text fields

We set the “Email” FIELD TYPE for the “Email” field and the “Tel” field type for the “Phone Number” field, correspondingly.

We also make these fields obligatory for completion.

text fields

Then, create a field with options that will have different values. In the described case, a Radio Field

Press the “Manage items” button to add the radio options.

radio field

Click the “Add new Option” button in the opened pop-up.

Complete the LABEL, VALUE, and CALCULATE fields for the radio option. 

When you need to add a new item, press the “Add new Option” button and complete the fields for all the radio options. 

Once all the needed options are added, press the “Update” button.

radio field option

Now, we add the Hidden Field and set its FORM FIELD NAME to “tax_field”. 

Let’s assume that you want to set 5% of the item’s price as a tax. So, the VALUE should be set to “0.05.”

hidden tax field

The following block we add is the Calculated Field (with a “total_price” FORM FIELD NAME). 

The total price of the item will be the price plus 5% of the price for taxes. That’s why the Calculated Field formula will look like that:

%FIELD::your_order%+%FIELD::your_order%*%FIELD::tax_field%

Let’s also add a Calculated Value Prefix so that the user will understand that the calculated number is the total price.

calculated field

Add the Action Button to the page and change the default LABEL if desired.

We change the default “Submit” to “Make an order” button.

action button

Adjust Post Submit Actions

You can also set the Post Submit Actions in the corresponding section of the JetForm tab. 

For instance, we leave the default “Save Form Record” action to save the form completion results in the WordPress Dashboard > JetFormBuilder > Form Records directory.

save form record action

Also, we push the “New Action” button and pick the “Send Email” action from the list.

Then, we press the “pencil” icon to adjust the settings.

post submit actions

Adjust an action according to your needs. For instance, we have set the following message as a CONTENT:

“Hi!

You have a new order on your website.

Details:

Full name: %first_name% %last_name% 

Email: %email%

Phone number: %phone%  

Order: %your_order% 

Total price: %total_price%”

send email action pop-up

You can adjust other post submit actions if needed.

Also, check an article on How to Configure Payment Gateways

Once the changes are made, press the “Publish” button to save the form.

Add the Form to the Page

Head to the page where you want to place the form. For instance, we go to WordPress Dashboard > Pages and open the already existing page.

The JetForm can be added to Block Editor, Elementor, or Bricks-edited pages/templates. In the given case, we open the page in the Elementor editor.

Find and place the JetForm widget/block/element on the page.

Select the just-created form in the Choose Form dropdown menu.

Adjust the further settings of the JetForm if needed. 

You can also add other content to the page, and once it is ready, press the “Publish/Update” button.

jetform in elementor

Check the Result

Open the page with the form on the front end and complete the fields. 

You can observe that depending on the selected option in the Radio Field, the total price below changes.

After the fields are completed, we press the “Make an order” button.

form on the front end

Let’s check if the post submit actions added earlier have worked.

We have adjusted the email sending. Let’s check the admin email.

So, the email with the completed info has been sent to the admin mailbox.

email with order details

Then, we go to WordPress Dashboard > JetFormBuilder > Form Records

Here, all the form records should be stored. We check the last one by hovering over the record and pushing the “View” button.

jetformbuilder form records directory

On the opened form record page, we can see info on all the completed form fields.

form record details

If we scroll down a little, we see that the information on the successful email sending is also here, in the Actions Log section.

actions log tab

That’s all about creating a form with Radio, Hidden, and Calculated Fields, which are available with the JetFormBuilder plugin for WordPress.

As in every multi-choice field, the Checkbox Field creates a list of options, and each of those options can have different values. The difference is that the user can select not one but several variants. Still, the value of the Checkbox Field can be used in the formula of Calculated Field.The values you type into the Calculated bar will be used in the formula.

editing options for checkbox and calculated fields

If you use the macro code of the Checkbox Field in the formula, it will insert the sum of values selected by the user.

calculated checkbox form look on the frontend

Here’s how it will look like on the frontend: