How to Send an Email with Appointment Details
The tutorial focuses on using macros within the “Send Email” Post Submit Actions for sending emails with appointment details. Therefore, it is assumed that the JetAppointment settings are configured. Read the Appointment Workflows Overview to learn more about configuring the appointments’ workflows according to your needs.
Preliminary Preparations
Additionally, an appointment form should be created in advance (e.g., a static form, a service appointment form, or a provider appointment form).
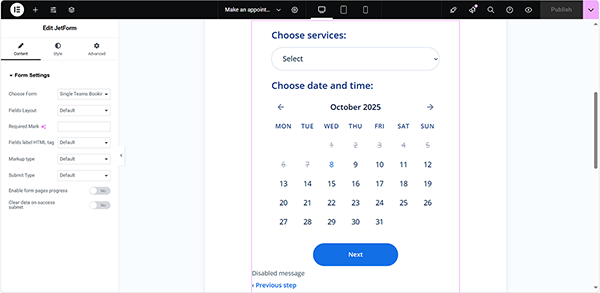
In this case, we built a multi-stepped form to be added to the provider’s single page and used the following fields:
- Radio Field to display a list of services;
- Appointment Date block that adds an appointment calendar;
- Text Fields to enter users’ data;
- Action Button block to add the submit button.
In addition, we use macros in this form.

Also, look through the How to Create Appointment Booking Forms and How to Set Appointment Booking Forms to learn how to create appointment booking forms, manage their settings, and add to Custom Post Types (CPT), posts, pages, and/or archive pages using JetPlugins.
Next, we set the “Insert appointment” Post Submit Action and “Redirect to page” Post Submit Actions. Details on creating forms, configuring the Post Submit Actions, and managing the appointment workflow can be found in the JetFormBuilder Appointment Forms and Steps to Create Them article.
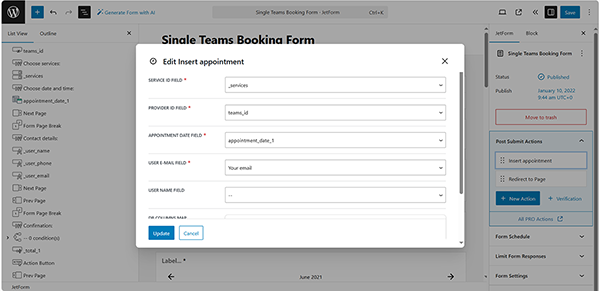
In particular, we fill out the Edit Insert appointment pop-up’s fields to be used for executing the Post Submit Action:
- “_services” Radio Field in the SERVICE ID FIELD;
- “_teams_ID” Hidden Field in the PROVIDER ID FIELD;
- “appointment_date_1” Appointment Date in the APPOINTMENT DATE FIELD;
- “Your email” Text Field in the USER E-MAIL FIELD.
Once completed, press the “Update” button.
Configure the “Send Email” Post Submit Actions
First, press the “+ New Action” button and choose “Send Email” in the newly appeared Add new action pop-up.
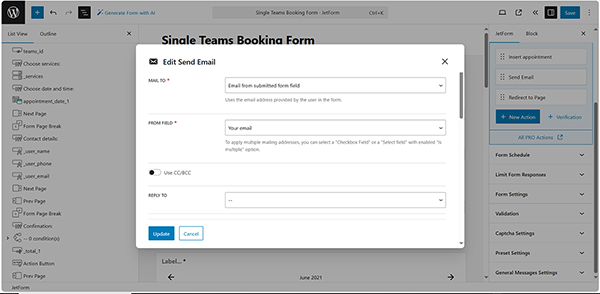
Next, select the needed options in the Edit Send Email pop-up. Here, we fill out the required pop-up fields:
- Set the “Email from submitted field” option in the MAIL TO drop-down list;
- Choose the needed form’s field in the FROM FIELD drop-down.
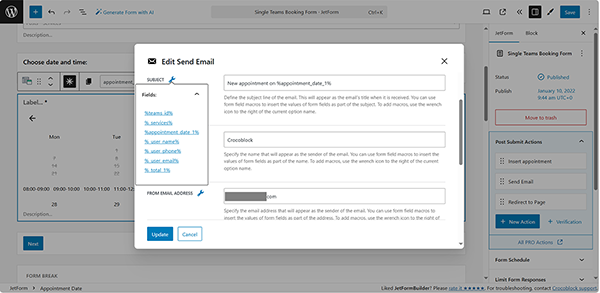
Next, scroll the pop-up down to the fields that envisage applying macros, e.g., SUBJECT, NAME, and FROM MAIL ADDRESS.
For more details on specific macro usage, refer to the Macros in Date, Time, and Datetime Fields tutorial.
Here, click the “wrench” icon to display the list of form fields, from which you can insert data into the required pop-up field:
- “appointment_date_1” Appointment Date in the SUBJECT field;
- “Your email” Text Field in the FROM EMAIL ADDRESS field.
In the last stage, we scroll the pop-up down to the CONTENT TYPE drop-down list, where we set the “HTML” option to insert the needed text into the newly appeared CONTENT field.
Also, the following macros are available for the JetAppointment plugin:
- %service_title% and %provider_title% — to retrieve the name of the appointment service and name of the appointment provider, respectively;
- %post-field|post_title_by_id% — to retrieve the post title; here, the ‘post-field’ should be replaced with the name of your form field;
- %service_link% and %provider_link% — to display the link to the appointment service and to the appointment provider;
- %appointment_start% and %appointment_end% — to show the date and time the appointment starts and ends. Learn more from the Customizing the Time and Date Format article;
- %user_local_time% and %user_local_date% — to show the time and date of the appointment in the user’s timezone if timezone management is enabled;
- %appointment_price% — to display the individual price of the appointment booked;
- %appointments_list% and %appointments_list_end% — macros that display a list of booked appointments if the Multi Booking is enabled in the WordPress Dashboard > Crocoblock > JetAppointments > Working Hours tab. Use macros and text in between to display the booking information, for example:
%appointmens_list%
Appointment Start: %appointment_start|format_date(F j, Y g:i)%
Appointment End: %appointment_end|format_date(g:i)%
%appointmens_list_end%
- %appointment_meta|_cancel_url% — displays the cancel link.
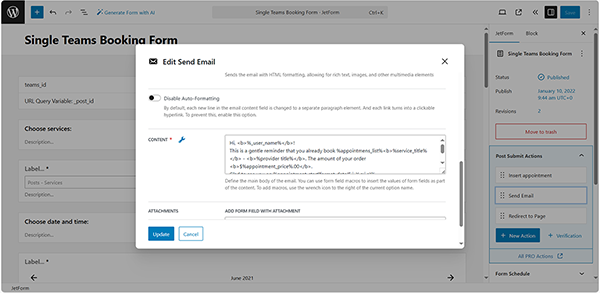
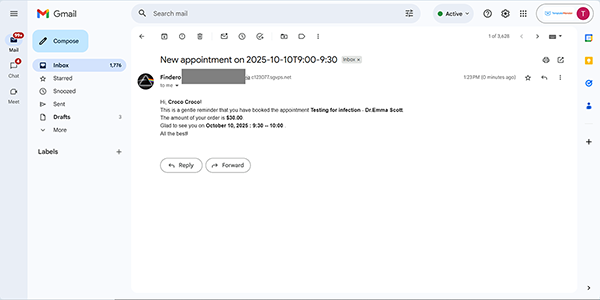
Therefore, the text we enter in the CONTENT field looks as follows:
Hi, <b>%_user_name%</b>!
This is a gentle reminder that you have booked the appointment <b> %service_title%</b> – <b>%provider_title%</b>.
The amount of your order <b>$%appointment_price%.00</b>.
Glad to see you on %appointment_start|format_date(F j, Y g:i a)% — %appointment_end|format_date(g:i a)% .nn%appointmens_list_end%.
All the best!
In this text, we use the data from the inserted “Name” Text Field to greet the client, along with the entered data from the “Select a Doctor” and “Select a Service” Radio Fields. Additionally, we utilize the %appointment_start% and %appointment_end% macros to display the corresponding date and time, setting the required format, and incorporate specific HTML tags.
Finally, press the pop-up’s “Update” button and save the form.
Test the Flow
Add the form to a page, post, or single page in an editor you prefer. Here, we use Elementor and use the JetForm widget to display it.
Next, follow the front-end and fill out the form’s fields.
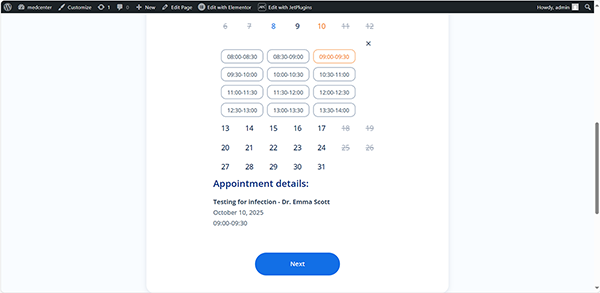
After submitting the form, check if you have received a letter in your mailbox.
That’s it. Now you know how to configure macros within the “Send Email” Post Submit Actions for sending emails with appointment details using the JetAppointment and JetFormBuilder plugins for WordPress.