PayPal WordPress Form
The PayPal payment form is a useful functionality that can be added to WordPress websites for small e-commerce projects or mixed projects that combine content and e-commerce.
With this form, the complex functionality of WooCommerce is not required. So, let’s find out more about the PayPal payment form, which is suitable for small online stores, and build one selling services or products.
Contents:
- Why You Need a WordPress PayPal Form
- Top WordPress PayPal Form Features
- WordPress PayPal Form Structure
- How to Create a WordPress Custom PayPal Form
- WordPress PayPal Form Pro Features
Why You Need a WordPress PayPal Form
PayPal is one of the most popular payment services worldwide. Integrating PayPal into your project can be beneficial, as it can help to capture a larger share of payments.
Adding a PayPal form to a WordPress website does not require an additional plugin.
With JetFormBuilder, you can set up a PayPal form to start collecting payments.
JetFormBuilder also supports PayPal Recurring Payments and Stripe Payments, making it a versatile tool for processing different types of payments.
Top WordPress PayPal Form Features
- Configure the actions that are performed after a successful payment. For example, a PDF with an invoice will only be sent to the user after successful payment. This allows you to automate document delivery and reduce manual work;
- Track all transactions and view payment statistics with the Payments section of JetFormBuilder. This is convenient for analyzing financial data and controlling income;
- Add Conditional Logic to the payment form. This allows you to customize the form to respond to user actions. For example, you can show or hide certain form fields depending on the options you choose;
- Calculate the total amount automatically based on the options selected in the form. This feature can be used in forms where the user can select various additional services or products, and you need to update the total cost dynamically.
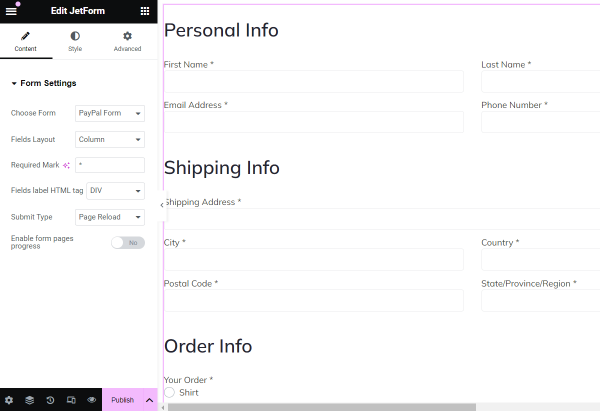
WordPress PayPal Form Structure
Step 1 — Personal Info
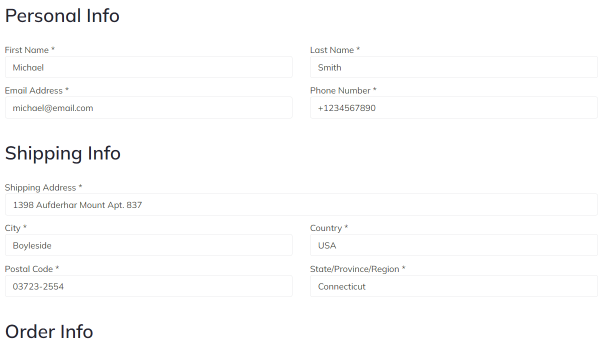
- First Name and Last Name. Text Fields to find out the user’s name;
- Email Address. A Text Field with the “Email” FIELD TYPE to get the email where the offer will be sent;
- Phone Number. A Text Field with the “Tel” FIELD TYPE in case you need the user’s phone number. For instance, to set the SMS marketing.
Step 2 — Shipping Info
- Shipping Address. A Text Field for the address where the order will be shipped;
- City, Country, Postal Code, State/Province/Region. Text Fields that specify the address with additional information.
Step 3 — Order Info
- Your Order. A Radio Field where the item for order can be selected;
- Quantity. A Number Field indicating the quantity of the ordered item.
Step 4 — Extra Info
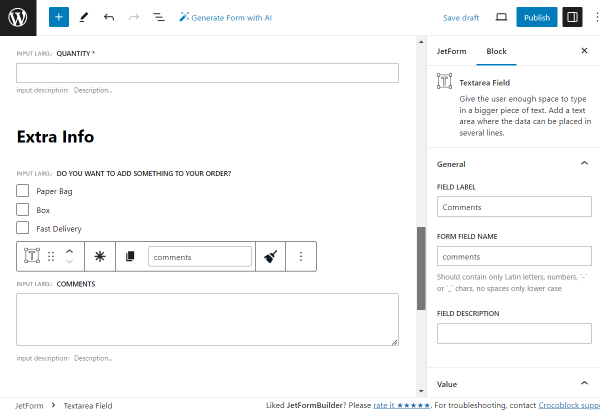
- Do you want to add something to your order? A Checkbox Field with additional items/services that can be added to the order;
- Comments. A Textarea Field where a customer can leave their comments;
- Total. A Calculated Field for the total price calculations.
How to Create a WordPress Custom PayPal Form
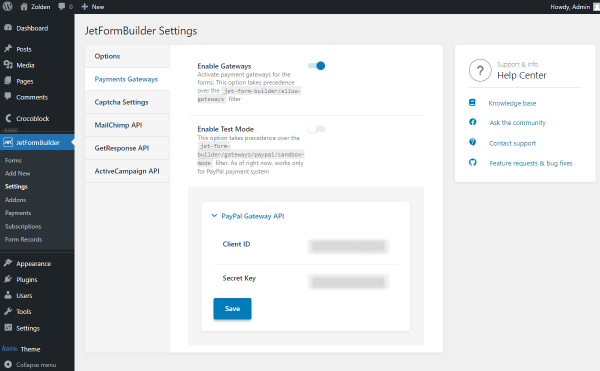
Initially, you should check the settings to adjust PayPal if you have not done so already. So, proceed to WordPress Dashboard > JetFormBuilder > Settings and open the Payments Gateways tab.
Make sure that the Enable Gateways toggle is activated.
Then, complete the Client ID and Secret Key fields. This information can be found in your PayPal account dashboard.
Don’t forget to press the “Save” button.
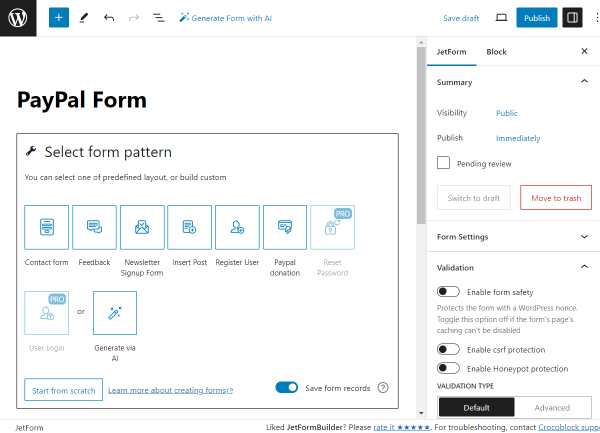
To build a WordPress PayPal form, navigate to WordPress Dashboard > JetFormBuilder > Add New.
Type in the title of the form.
At first, the Welcome block is added to the form by default. Push the “Start from scratch” button to build a brand-new form. Or, press the “Generate via AI” button to create a form based on your request.
Initially, we push the “Start from scratch” button and delete three fields added by default.
The first block in the form will be the “Personal Info” Heading.
Then, we add two columns. In the first one, we put the Text Field with the “First Name” FIELD LABEL.
We also press the “asterisk” button above the field to make this field required for completion.
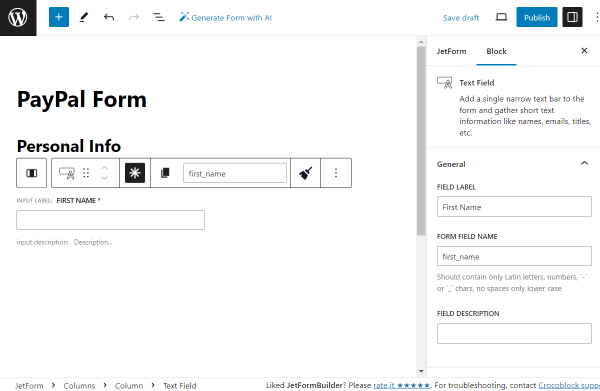
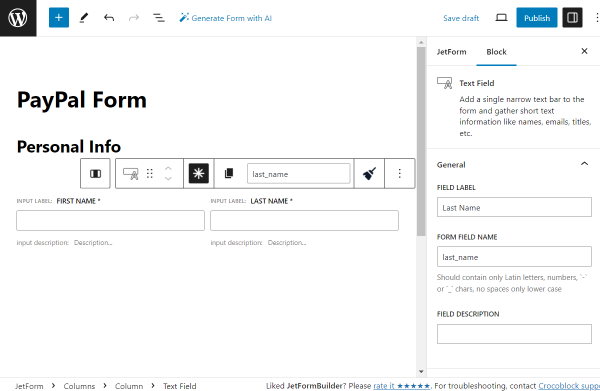
In the second column, we add one more required Text Field indicating the “Last Name.”
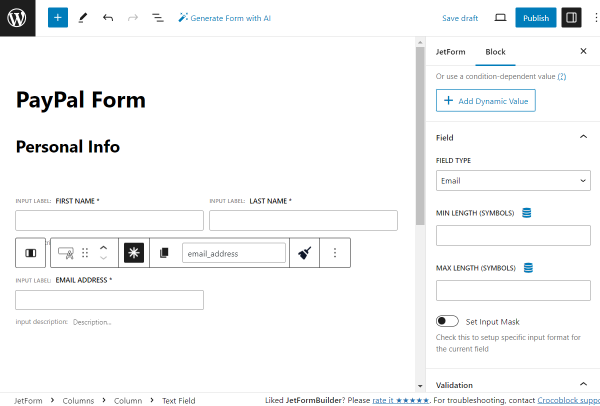
Returning to the first column, we add one more required Text Field, “Email Address.”
Also, set the FIELD TYPE to “Email”.
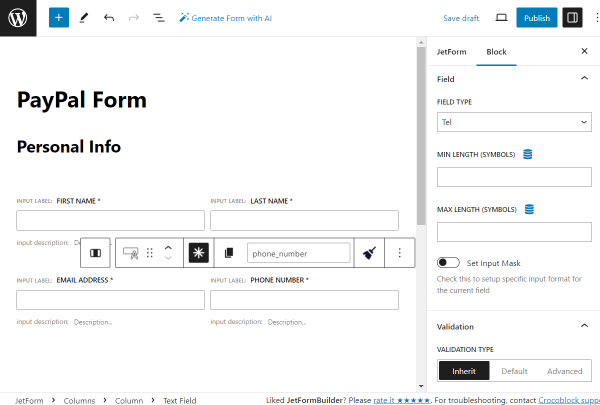
In the second column, we place one more required Text Field, named “Phone Number” this time. So, the FIELD TYPE should be set to “Tel” this time.
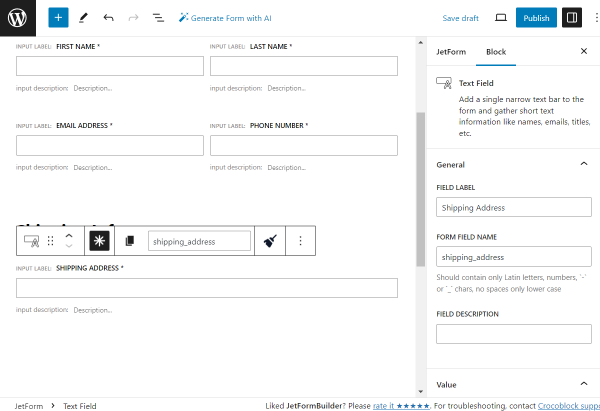
Then, we add one more Heading, “Shipping Info.”
After this, we add the required Text Field. This field will contain the shipping address.
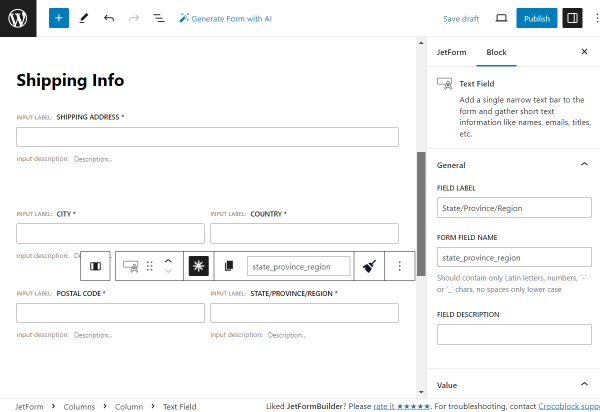
You can create several address fields and make them required to ensure the shipping address is complete.
For instance, we add the required “City,” “Country,” “Postal Code,” and “State/Province/Region” Text Fields.
The following Heading is “Order Info.”
The first field in this section will be the Radio Field called “Your Order.”
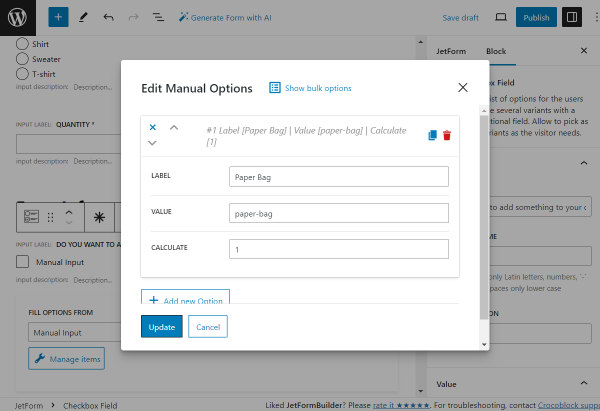
In our case, the FILL OPTIONS FROM field is set to “Manual Input.” If you also pick this option, press the “Manage items” button to manually add options to the field.
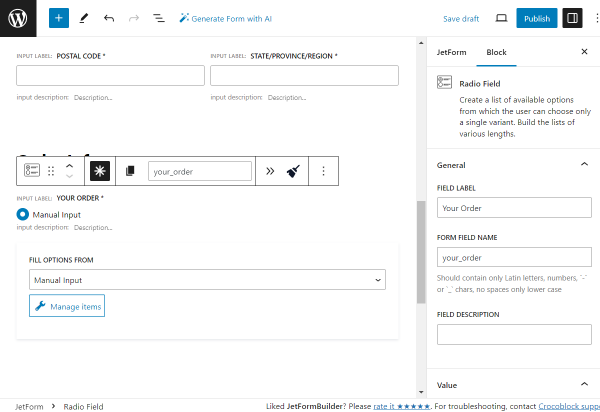
Add all the needed options by pressing the “Add new Option” button whenever you want to add a new option to the radio.
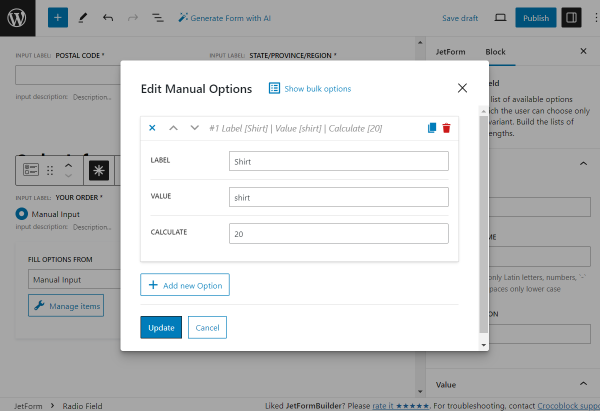
For instance, the first option in the given case has the “Shirt” LABEL, the “shirt” VALUE, and the “20” value set in the CALCULATE field.
“20” in this field indicates the value that will be used for total price computation in the Calculated Field.
After you add all options, press the “Update” button.
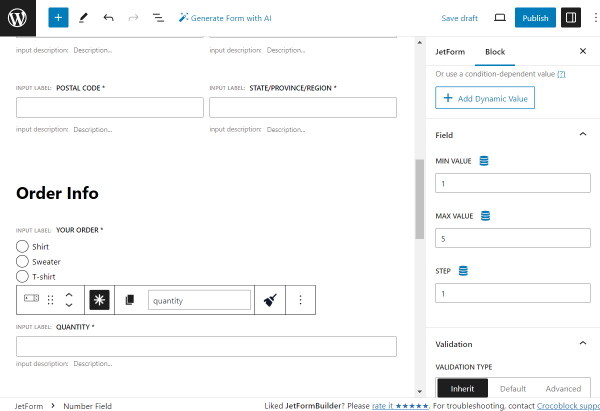
The following is the required Number Field indicating “Quantity.”
In the Field settings, we set the “1” MIN VALUE, “5” MAX VALUE, and “1” STEP value.
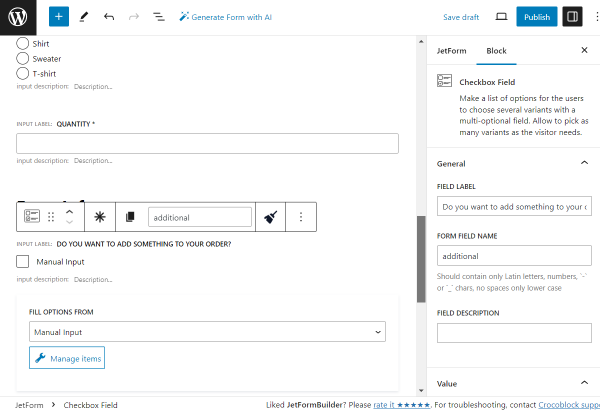
One more section will be separated by a Heading, which is called “Extra Info.”
The next field here is a “Do you want to add something to your order?” Checkbox Field.
Then, we set FILL OPTIONS FROM to “Manual input” and click the “Manage items” button.
Here, we set three options. The flow is the same as for the Radio Field mentioned above.
Once all the needed options are added, press the “Update” button to return to the form.
The following field to be added is the Textarea Field called “Comments,” which will be optional for completion.
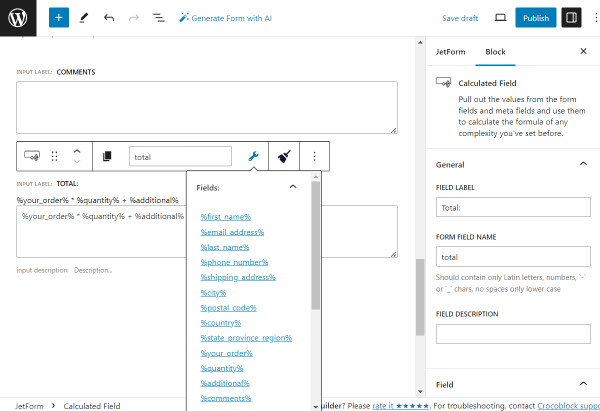
To finalize the form, we add the “Total:” Calculated Field and add the following values inside:
%your_order% * %quantity% + %additional%
All of the values presented here are the FORM FIELD NAMES of the previously added fields; all fields and macros can be found in the drop-down list under the “wrench” icon.
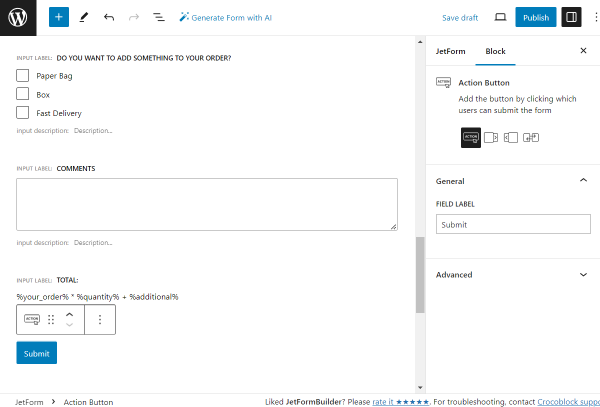
The last field in the form is the Action Button. We leave it as default, but the FIELD LABEL can be changed there if needed.
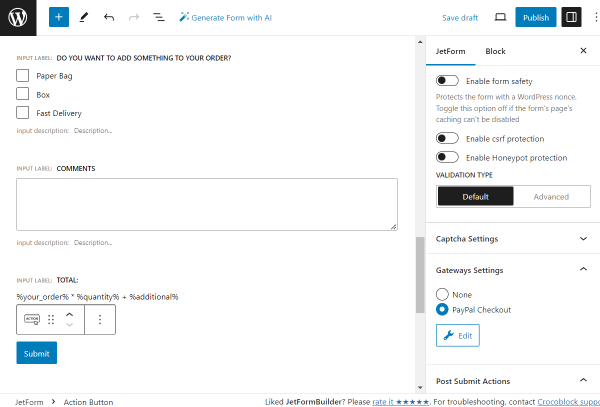
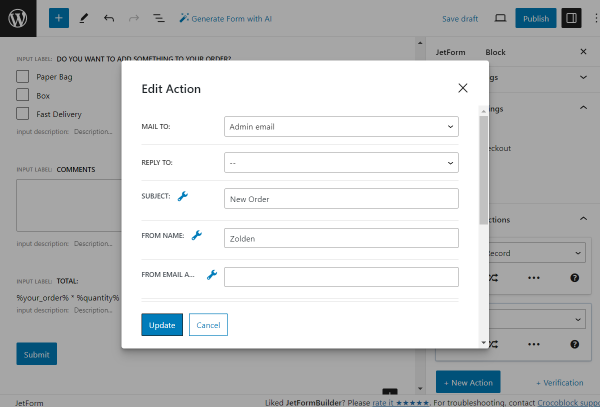
Then, proceed to the JetForm section of the form and open the Gateways Settings tab.
Here, pick the “PayPal Checkout” option and press the “Edit” button to customize the settings.
In the pop-up, you can either activate the Use Global Settings toggle to copy the CLIENT ID and SECRET KEY fields from there or complete these fields manually.
Then, select the preferred GATEWAY ACTION; it can be either the “Pay now” or “Create a subscription” option.
The further settings for these options will appear once you press the “Sync Access Token” button, and the synchronization process will be completed successfully.
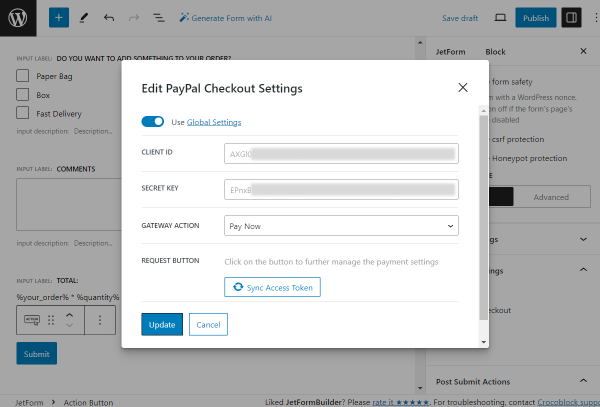
For instance, we leave the default “Pay Now” GATEWAY ACTION.
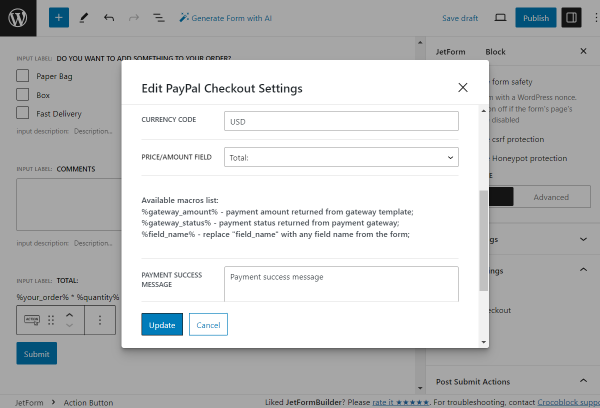
After the synchronization is complete, we adjust the CURRENCY CODE (“USD” in our case) and select our “total” field as the PRICE/AMOUNT FIELD so the price for PayPal transaction will later be taken from this Calculated Field.
You can also customize the following payment messages if desired or leave them as default.
Press the “Update” button to save the changes.
Head to the Post Submit Actions tab. Here, we set the “Save Form Record” action and leave its settings unchanged; with this action, the values entered in the form will be saved to the JetFormBuilder plugin’s Form Records directory.
One more action we add is “Send Email.” It can be edited by pressing the “pencil” button below the option.
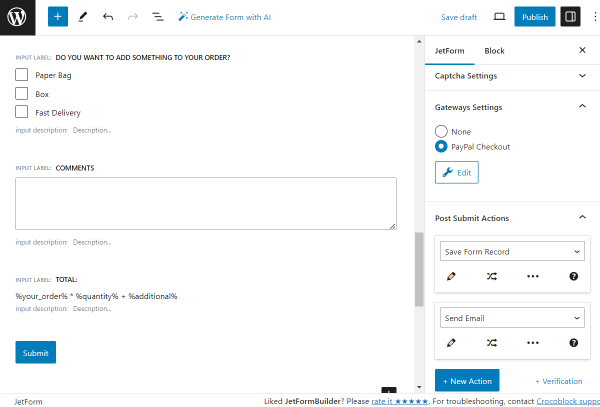
Here, adjust the settings according to your needs. More about the customization of this action can be found in the “Send Email” overview.
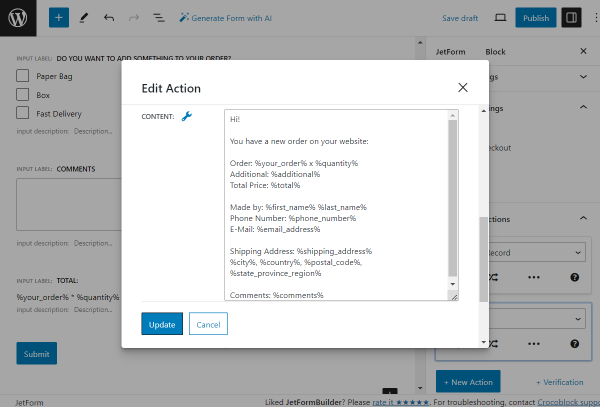
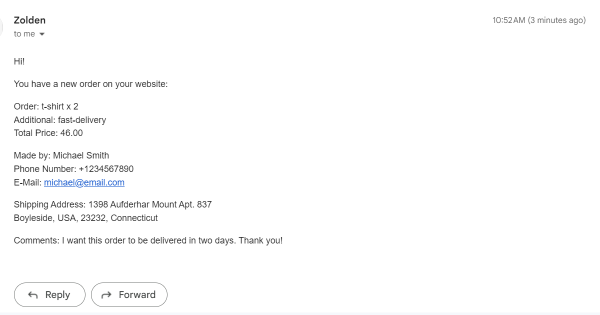
For instance, we added the CONTENT to the sent email based on our form fields.
“Hi!
You have a new order on your website:
Order: %your_order% x %quantity%
Additional: %additional%
Total Price: %total%
Made by: %first_name% %last_name%
Phone Number: %phone_number%
E-Mail: %email_address%
Shipping Address: %shipping_address%
%city%, %country%, %postal_code%, %state_province_region%
Comments: %comments%”
In this message, the fields are presented with macros (based on their FORM FIELD VALUE and put inside two “percent” symbols). This way, the values put in the form will be dynamically pulled to the sent email.
Push the “Update” button to save the action settings.
You can customize the form further if needed. For instance, you can adjust the style settings with the free JetStyleManager plugin.
Once the form is ready, press the “Publish” button.
Let’s add a form to the page/template. For example, we will work with the static page, so we open WordPress Dashboard > Pages and press the “Add New” button.
The form built with JetFormBuilder can be placed on pages/templates built with Elementor, Gutenberg, or Bricks. The JetForm settings in all the available builders are the same.
In our case, we work with Elementor.
Add the additional content to the page if needed. Then, find the JetForm widget/block/element and put it on the page.
Select the just-built form in the corresponding field (Choose Form).
Once you customize all the desired settings, press the “Publish/Update” button.
Head to the front end of the just-edited page. Complete the form and press the “Submit” button.
If everything is completed correctly, you will be redirected to the PayPal page, where you can complete the transaction.
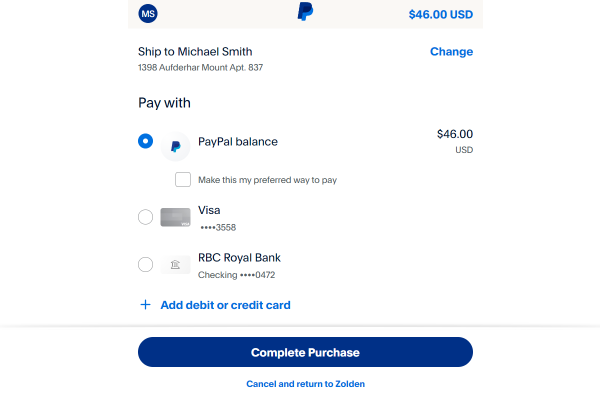
Once the transaction is done, the form should be fully submitted.
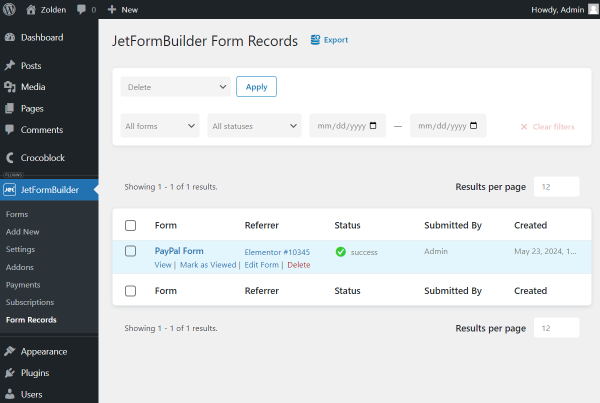
You can also check WordPress Dashboard > JetFormBuilder > Form Records if the corresponding action was set previously.
There, you can find the information on the available form records.
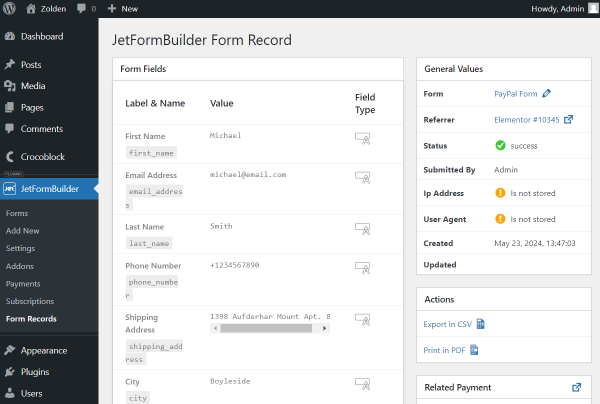
To see the full information, hover over the needed record and push the “View” button.
There, you can check the information about the completed fields in the form.
Also, as we have added the “Send Email” action, we receive an email containing the necessary information from the completed form.
The final step is to check the WordPress Dashboard > JetFormBuilder > Payments directory.
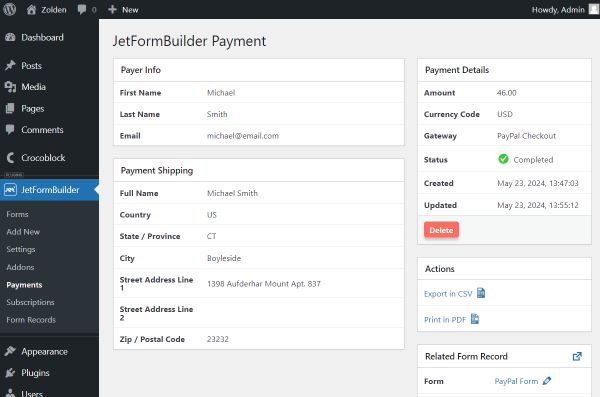
Hover over the needed transaction and click the “View” button.
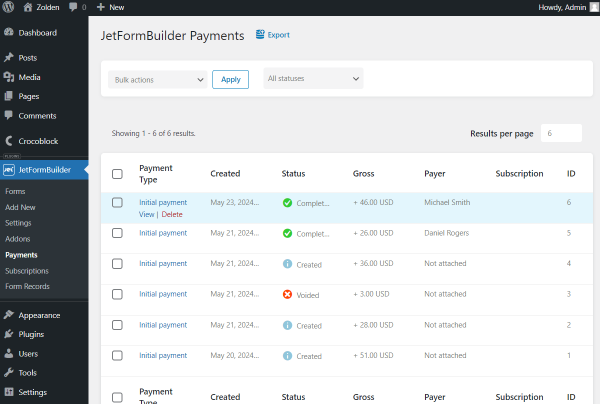
Here, the information about the transaction can be checked.
That’s all; now you know how to build a PayPal form using the JetFormBuilder plugin for WordPress.