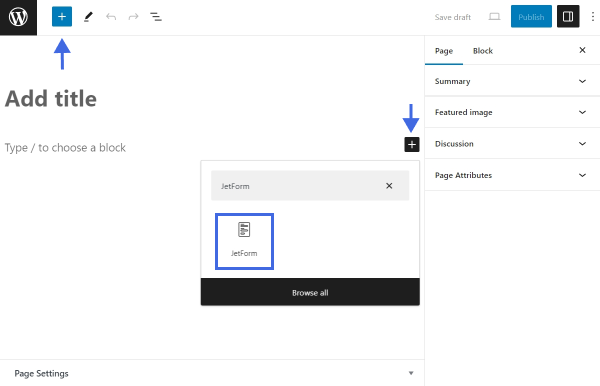
The JetFormBuilder plugin provides the JetForm block for Block Editor, JetForm widget for Elementor, and JetForm element for Bricks Builder to help you display a ready form on the front end. Let’s take a closer look at their settings.
JetForm Block in Block Editor
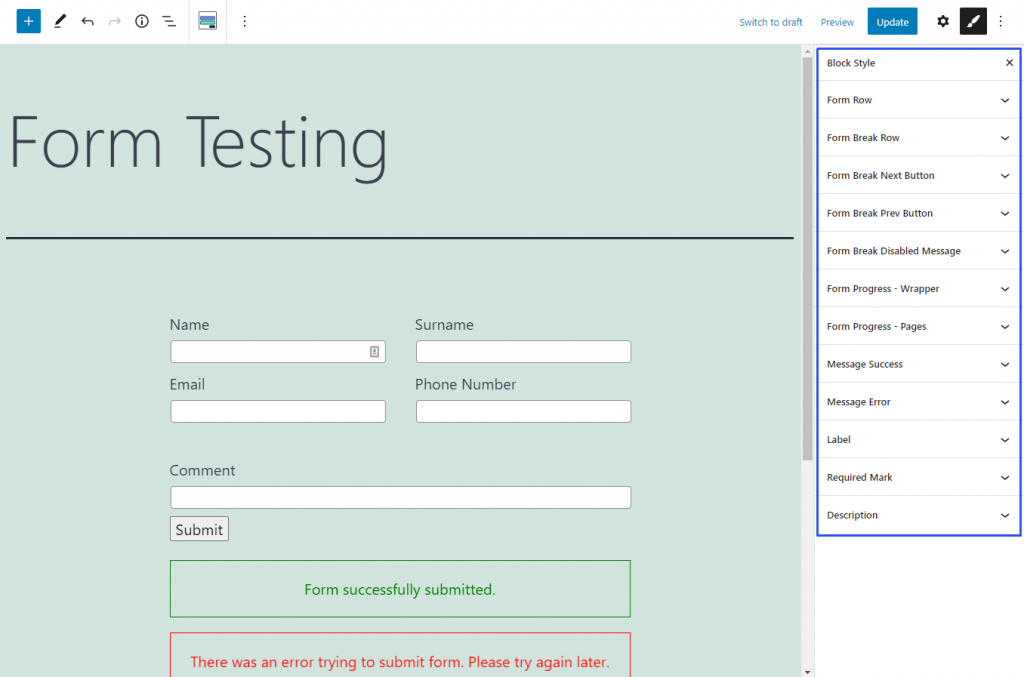
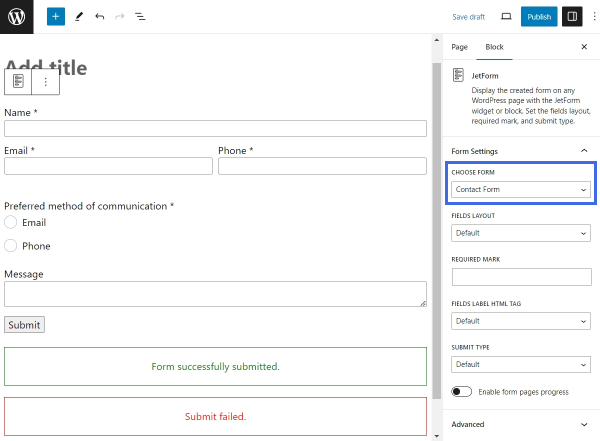
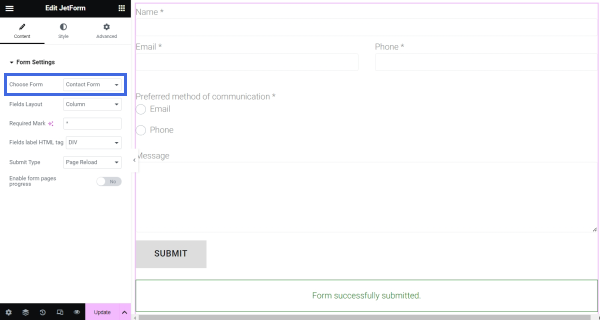
The Form Settings tab of the JetForm block consists of the following options:
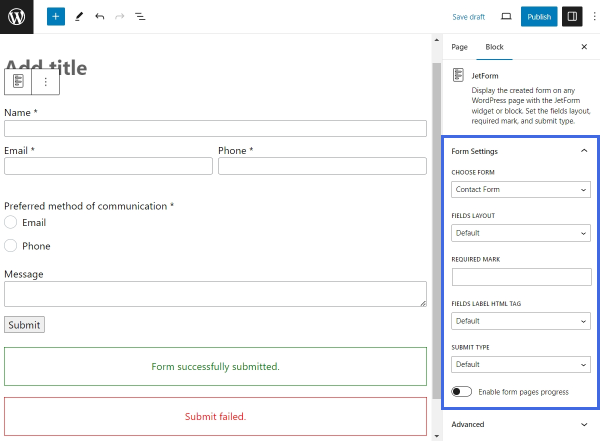
- FIELDS LAYOUT — defines the positioning of the input field and its label. The layout can be set to the default “Column” or the “Row” option. In the first case, the label will be displayed over the input, while in the second one, they will be in the same row;
- REQUIRED MARK — sets a symbol that will mark mandatory fields. The field can be left empty to mark required fields with an asterisk symbol;
- FIELDS LABEL HTML TAG — one can select between “DIV” and “LABEL” HTML tags for the representation of the field label. The default tag is “DIV”;
- SUBMIT TYPE — defines how to process the Post-Submit Actions after the Action Button (formerly Submit Field) is pressed. If the “Page Reload” option is selected, the page will be reloaded after form submission; if “AJAX” is set, the page won’t be reloaded, and the post-submit message will appear immediately;
- Enable form pages progress — this toggle can be enabled to display a progress bar with a step indicator at the top of the form. It is recommended to enable form page progress if the form is divided into several steps with the Form Break Field.
The Advanced tab presents the default WordPress settings:

- BLOCK NAME — sets the block name;
- HTML ANCHOR — allows a text string without spaces. An anchor makes it possible to link a specific section where the current block is located, so when the users follow the URL, the page is scrolled down or up to this block;
- ADDITIONAL CSS CLASS(ES) — here, one can input one or several CSS classes to target the block easily with custom code.
The “Form Block Style Settings” guide explains how to style JetFormBuilder blocks with the help of the JetStyleManager plugin.
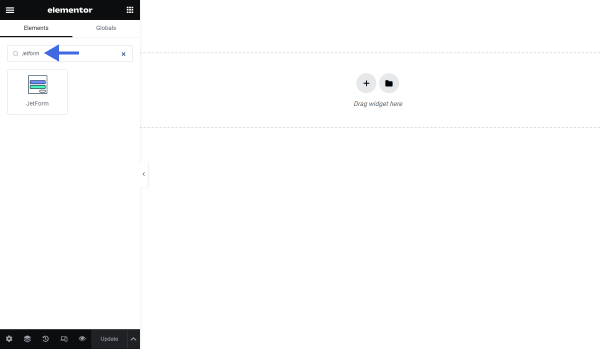
JetForm Widget in Elementor
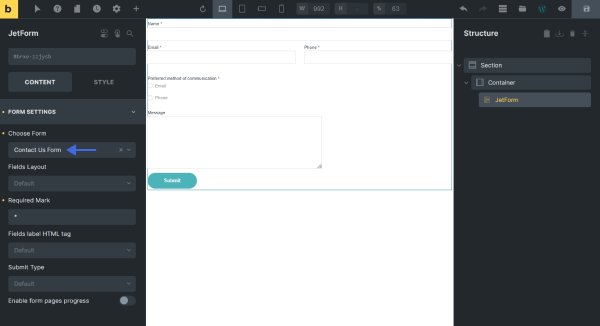
The widget presents a Form Settings tab with a list of settings:
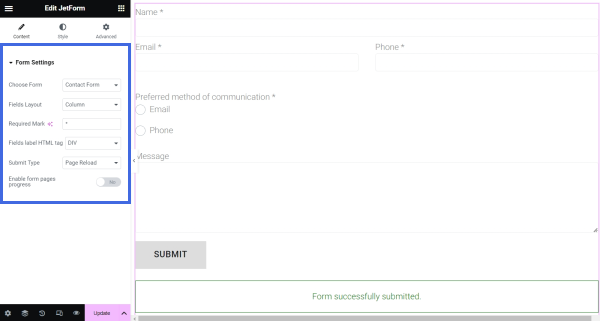
- Choose Form — a drown-down list of form titles. Here, one should select the form to display;
- Fields Layout — defines the positioning of the input field and its label. One can opt for the “Column” layout, the default setting, or choose the “Row” layout. In the first case, the label will appear over the input field, while in the second, they will align within the same row;
- Required Mark — sets the symbol to indicate mandatory fields. By default, required fields are marked with an asterisk symbol;
- Fields label HTML tag — one can select between “DIV” and “LABEL” HTML tags to represent the field label. The default tag is “LABEL;”
- Submit Type — the “Page Reload” option makes the page reload after form submission, and the “AJAX” option prevents page reloading;
- Enable form pages progress — shows a progress bar featuring a step indicator at the top of the form. Enabling form page progress is appropriate if the form is segmented into multiple steps using the Form Break Field.
JetForm Element in Bricks Builder
The FORM SETTINGS toggle unfolds the following settings:

- Choose Form — here, one should select the title of the form, which should be displayed;
- Fields Layout — defines how the input field and its label will be positioned. The “Column” layout is the default option, which makes the field label display over the input field. The “Row” option aligns them within the same row;
- Required Mark — in this field, one can specify a symbol to mark the required fields in the form. By default, required fields are marked with an asterisk symbol;
- Fields label HTML tag — the HTML tag, which will represent the field label — “DIV” or “LABEL.” The default tag is “LABEL”;
- Submit Type — defines the behavior of the form after the Action Button (formerly Submit Field) is clicked. The “Page Reload” option reloads the page after form submission, and the “AJAX” option prevents page reloading;
- Enable form pages progress — shows a progress bar with a step indicator at the top of the form. Enabling form page progress is recommended for multi-step forms that use the Form Break Field.
That’s all about the JetForm settings available with the JetFormBuilder plugin for your WordPress website.