How to Display a Repeater Field with Custom Markup
In this guide, we will show you how to display JetFormBuilder Repeater Field values in the Fields Preview block using custom markup.
This tutorial covers JetFormBuilder repeater custom markup and explains how to build a JetFormBuilder repeater field template for displaying dynamic data.
Table of contents:
The Fields Preview block allows displaying dynamic values from form fields before submission. It supports macros that output user-entered data, including complex fields like Repeaters.
By combining macros with custom HTML markup, you can fully control how repeater items are displayed — for example, as a table, list, or custom layout.
This approach is useful for building a repeater table layout JetFormBuilder, repeater list layout JetFormBuilder, or any custom html for Repeater Field output.
You will learn how to display repeater field values in JetFormBuilder using custom HTML markup inside the Fields Preview block.
In this tutorial, we will cover:
- how to create a repeater field with sub-fields;
- how to build a custom layout (table/list) for repeater items;
- how to use macros to output dynamic field values;
- how to control when the preview appears using conditional logic.
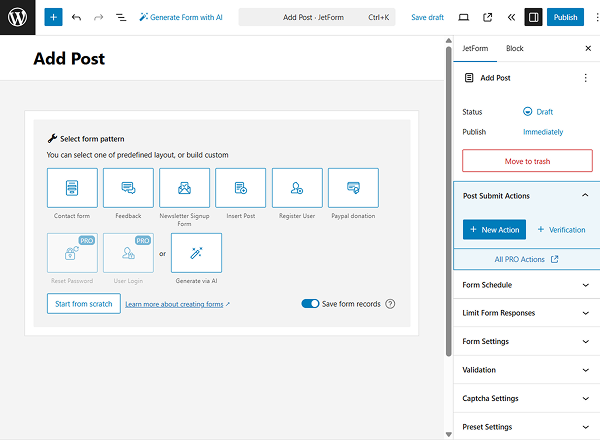
Create a Form
Let’s add a form in the WordPress Dashboard > JetFormBuilder > Add New Form directory.
Name a form. In our example, we use the “Add Post” title.
Every form includes a Welcome block at first. We delete it to have an empty form.
Now, we will build a form by adding the fields to it. Feel free to complete your form with the needed fields as well.
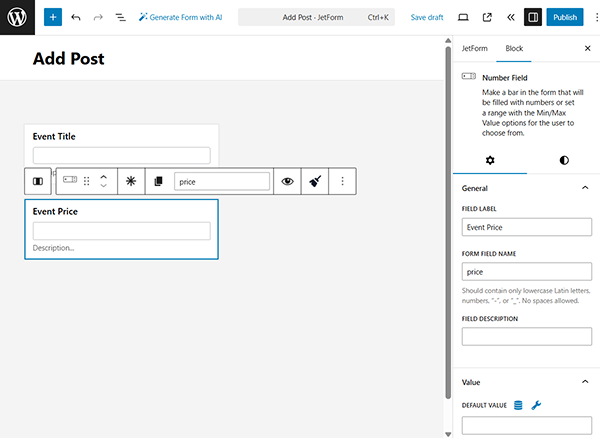
Initially, we add a two-column layout.
In the first column, we add a Text Field with the “Event Title” FIELD LABEL and “post_title” FORM FIELD NAME. We don’t alter other field settings and move to the next field.

The second field we add to the form is a Number Field. We name it “Event Price.” As for the FORM FIELD NAME, we complete it with the “price” value.
In the Field tab, we set the “0” MIN VALUE so users can complete the field with only non-negative values.
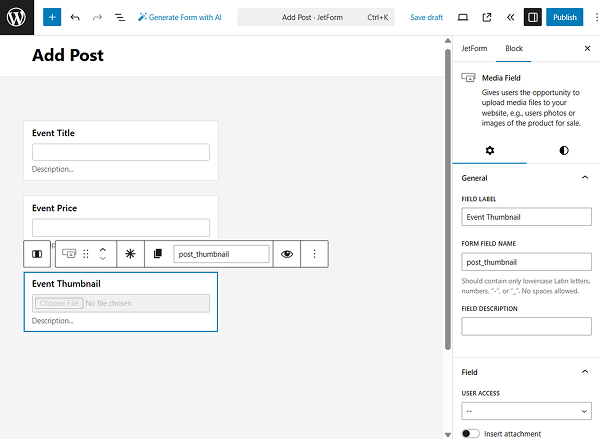
Next, we add a Media Field that will let users upload the event thumbnail image. In this case, the FORM FIELD NAME is set to “post_thumbnail”.
We don’t change other settings of this field.
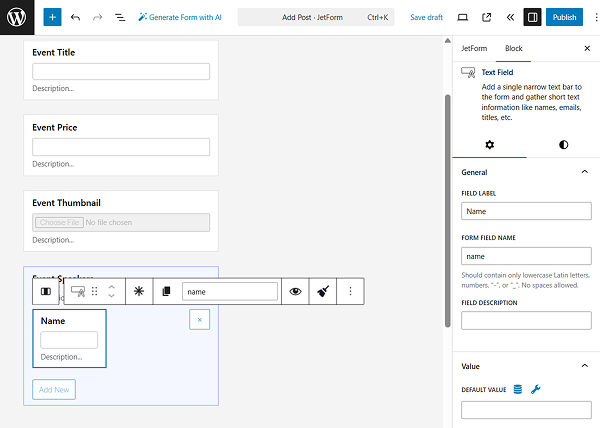
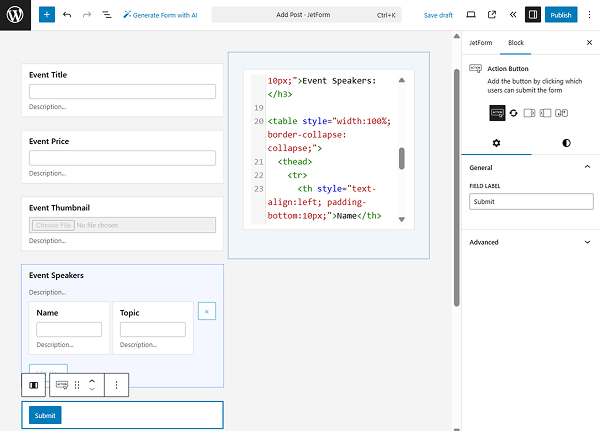
After that, we add a Repeater Field with the “Event Speakers” FIELD LABEL and “event_speakers” FORM FIELD NAME and move on to adding the necessary sub-fields.
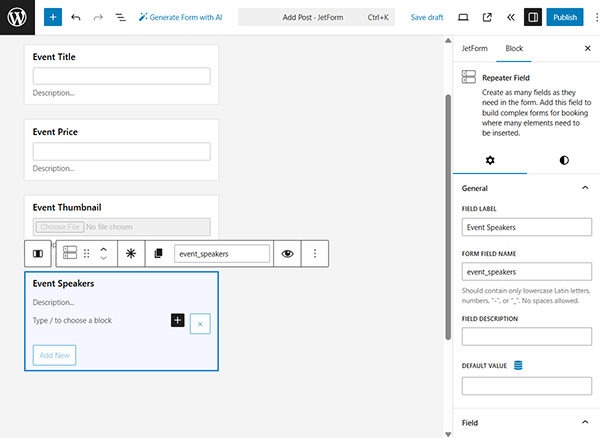
We add Columns to display the content of the repeater in two columns.
For example, the first column of the repeater can contain the “Name” Text Field.
The second column of the repeater contains the “Topic” Text Field in our case.
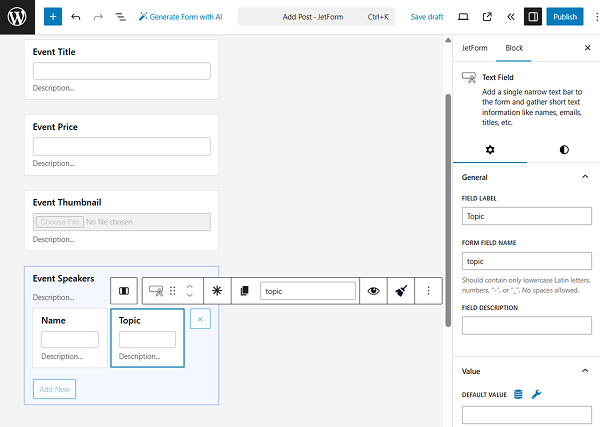
After adding all the needed fields to the repeater, we proceed to the second column of the form.
Here, we add a Conditional Block in order to set the conditions under which the Fields Preview block and its info will appear.
Press the “crossed arrows” button to edit the conditions of the fields that will be added inside the Conditional Block.

In the Conditional Logic pop-up, we select the “Show if…” option in the WHICH FUNCTION NEED EXECUTE? field and press the “Add Condition” button.
We select the “Event Price” FIELD and “Not empty” OPERATOR.
This way, the Fields Preview block that we will add to the Conditional Block will be displayed only when the “Event Price” Number Field is completed in the form.
You can set other conditions if needed or skip adding the Conditional Block if you want to display the Fields Preview block right away.
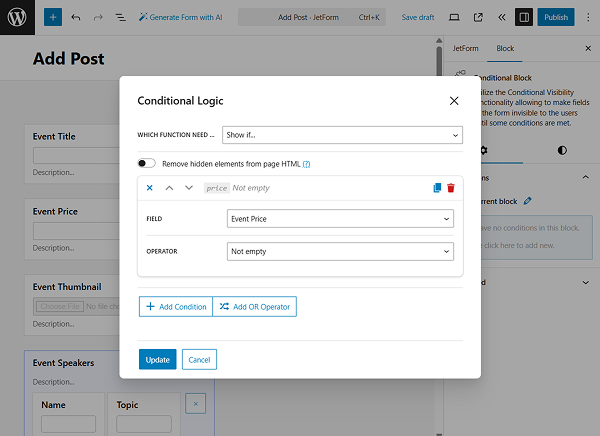
Don’t forget to press the “Update” button when changes are made to the conditional logic.
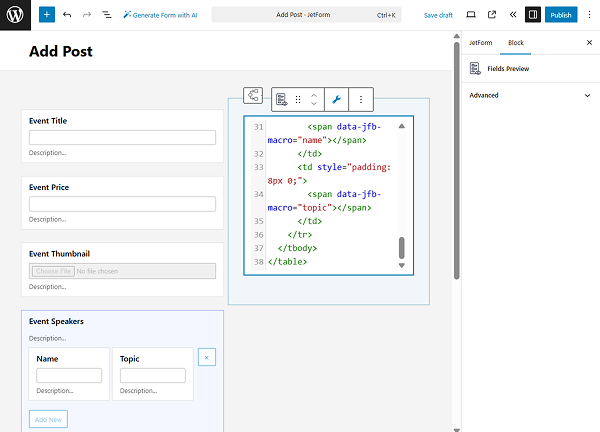
Insert the Fields Preview block into the Conditional Block area.
In the Fields Preview block, you can paste HTML markup into the field area. Click the “macros” button to add the needed macro to the markup if needed. Macros are added using the ‘data-jfb-macro’ attribute and allow displaying dynamic field values.
You can write the markup in the Fields Preview block using standard HTML and enhance it with JetFormBuilder macros. Use any HTML structure (divs, tables, lists) to control the layout of the repeater output.
For example, we add the following code:
<div style="display:flex; align-items: center; gap: 50px;">
  <div data-jfb-macro="post_thumbnail"></div>
  <div>
    <h1 data-jfb-macro="post_title"></h1>
    <div>
      <b>$<span data-jfb-macro="price"></span></b>
    </div>
	</div>
</div>
<h3>Event Speakers:</h3>
<table>
  <thead>
    <tr>
      <td>
        <b>Name</b>
      </td>
      <td>
        <b>Topic</b>
      </td>
    </tr>
  </thead>
  <tbody data-jfb-macro="event_speakers">
    <tr>
      <th style="text-align:left;">
        <span data-jfb-macro="name"></span>
      </th>
      <td>
        <span data-jfb-macro="topic"></span>
      </td>
    </tr>
  </tbody>
</table>
Where:
- “post_title” outputs the “Event Title”;
- “price” outputs the “Event Price”;
- “event_speakers” loops repeater items;
- “name” and “topic” display sub-fields inside the repeater.
This example demonstrates how to build a repeater field with custom list or table markup in JetFormBuilder.
Returning to the first column, add the Action Button to allow users to submit the form.
Add the needed Post Submit Actions, work on the style settings of the fields if needed, and save the form when ready.
Add the Form to a Page
Now, go to the page where you want to place the form. The page can be edited with the help of Elementor, Gutenberg (Block editor), or Bricks. For example, we use Elementor.
Add the JetForm widget/block/element to it. Select the built form in the Choose Form dropdown and work on the other settings if needed.
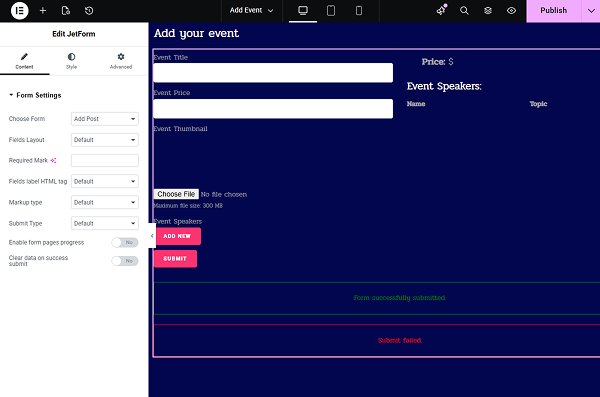
Style up the page and save it when ready.
Check the Result
Now, open the page you just created on the front end. Start completing the form.
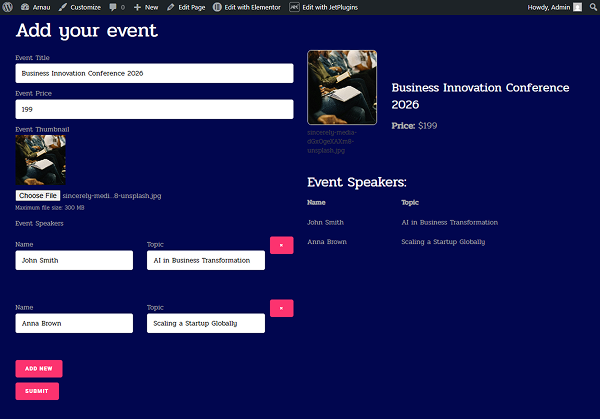
As we have set the conditions for the Fields Preview to appear only when the “Event Price” field is completed, when you enter some information in the mentioned field, the Fields Preview block will appear. It will first contain only the labels.
However, when you add at least one repeater item and complete it with data, this information will be displayed as well. In our case, in the form of a two-column table.
FAQ
Create a Repeater Field, add sub-fields, insert a Fields Preview block, and write HTML markup using macros. Use a table or list structure to format the output.
Use the Fields Preview block and define your own HTML layout. Insert macros via the ‘data-jfb-macro’ attribute to output dynamic values.
Wrap a container (like a table body or div) with a repeater macro and place sub-field macros inside it. Each repeater item will follow the defined structure.
Yes, you can use HTML tables in the Fields Preview block and populate rows dynamically using repeater macros.
That’s all; now you know how to add a repeater field with custom markup with the help of the JetFormBuilder plugin for WordPress websites.