How to Use Both Paypal and Stripe Payment Methods in a Form
Learn how to combine the JetFormBuilder multiple payment gateways in a form to let users select the preferred payment method (PayPal and Stripe in one form) before submitting.
To provide this functionality, the PayPal Recurring Payments and Stripe Payments & Subscriptions add-ons for JetFormBuilder should be installed and activated.
Also, in this tutorial, we focus mainly on the multiple gateway settings and the allowance to choose the payment method. Therefore, steps such as obtaining API keys, JetFormBuilder setting configuration, adding the gateway functionality to a specific form, etc., should be performed first, as described in the How to Enable and Set Up Payment Gateways tutorial.

Build a Form
Next, create a form with the needed fields or select a previously built one using a form’s layout or the Welcome block.
In this case, we build a subscription form with the Text Fields, the Checkbox Field, and the Action Button.
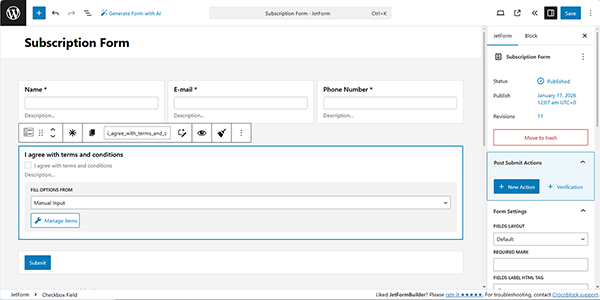
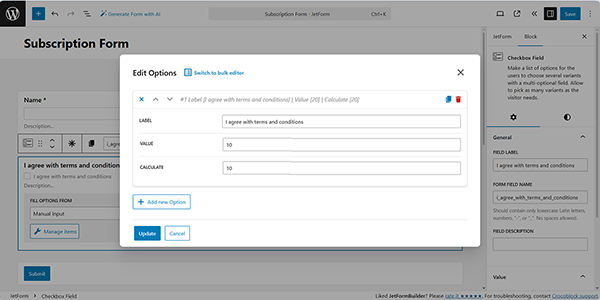
Since the form will be used for payments, we set the Checkbox Field as the data source when configuring the payment settings in the Edit PayPal Checkout Settings and Edit Stripe Checkout Settings pop-ups. In particular, we select the “Manual Input” option in the FILL OPTIONS FROM drop-down, press the “Manage Items” button, and enter the required price in the VALUE field of the Checkbox Field’s Edit Options pop-up.
If needed, you can build a more detailed form, for example, as described in the How to Create a Subscription Registration Form tutorial. In addition, you can add specific fields, for example, to sign the form using the Signature Field, as the Quick Way to Collect Digital Signatures Using JetFormBuilder article explains.
Configure the Gateway Settings
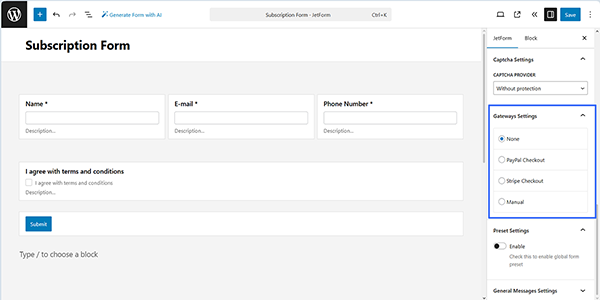
Then, move to the JetForm > Gateway Settings section and unroll it. The block contains a radio with the gateway options: “None” (default option), “PayPal Checkout,” “Stripe Checkout,” and “Manual.”
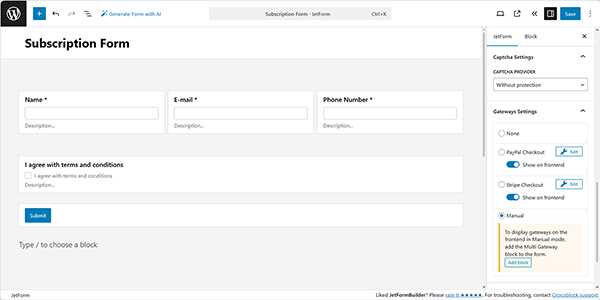
In this section, to allow users to select the needed gateway, pick the “Manual” option. Next, the PayPal Checkout and Stripe Checkout sub-menus will be unrolled. Here, enable both Show on frontend toggles and click the “Edit” buttons to open the corresponding settings.
Next, the checkout settings pop-ups will appear.
In these pop-ups, we enable the Use Global Settings toggle to automatically fill out the CLIENT ID and SECRET KEY fields.
Next, we select the GATEWAY ACTION scenario (we set the “Pay Now” option), and press the Sync Access Token button near the REQUEST BUTTON field.
Then, we set the CURRENCY CODE and choose the form field representing the final price for the rendered service in the pop-up’s PRICE/AMOUNT FIELD (here, we choose the form’s Checkbox Field).
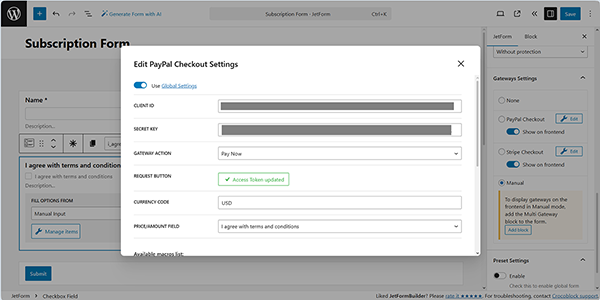
Then, scroll the pop-ups down and save the changes.
Read the How to Create a Stripe Payment Form Using Pro Addon and How to Store PayPal Payments in Custom Database Tables tutorials to learn how to configure these settings, add the specific subscriptions to forms, manage subscriptions, keep them up to date, and track all payments.
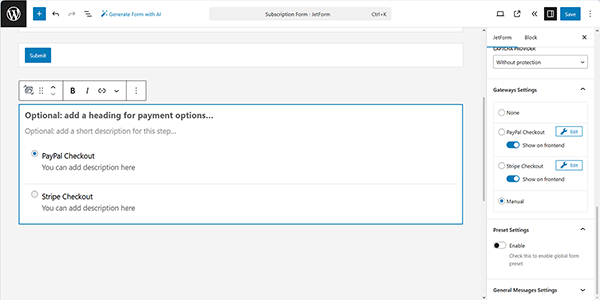
Once the settings for both gateways are configured, press the “Add block” button below the “Manual” option to add the Payment Gateway field block to the form automatically to add the Stripe and PayPal checkout in a single form.
Also, you can find this JetFormBuilder payment methods block in the search bar and drag-n-drop where needed.
Adjust the Post Submit Settings
In the last step, add the Post Submit Actions. For example, you can “Send Email,” “Register User,” “Send SMS After Submission,” or use the WooCommerce Cart & Checkout Action add-on to create a checkout page.
Since you are applying two payment methods, you should add Events related to both of them while configuring the Post Submit Actions.
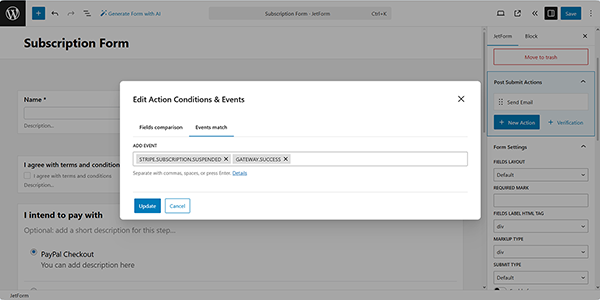
Press the “Edit Conditions and Events” button under the needed Post Submit Action to unroll the pop-up, open the Events match tab, and select the required options in the ADD EVENT drop-down.
For example, you can add the “GATEWAY.SUCCESS” event to the Post Submit Action that will be executed after the user passes the checkout on the side of the payment system; if a payment is successful, the action will be triggered (the event is appropriate for both payment methods). Also, if you deal with subscriptions, add the events corresponding to them, e.g., the “STRIPE.RENEWAL.PAYMENT” for Stripe and “RENEWAL.PAYMENT” for PayPal if the subscription is renewed and paid again.
Also, read the WooCommerce Checkout and Order Form Optimization: The Crocoblock Way article to learn how to customize WooCommerce checkout and order forms with smart UX decisions and Crocoblock tools.
Finally, save the form.
Test the Flow
Create a page in Elementor/Block Editor/Bricks. In the given case, we created the page in Elementor.
Also, check the Displaying a JetFormBuilder Form in Any Page Builder tutorial.
Find the JetForm widget and drag and drop it onto the page. Then, select the just-built form in the Choose Form field.
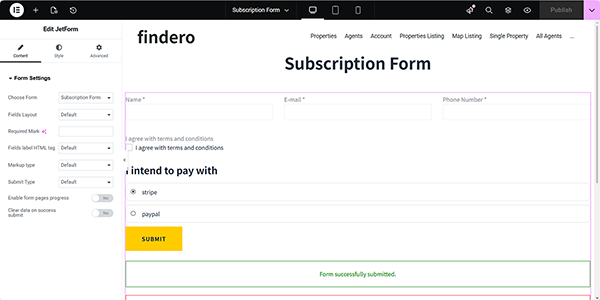
Then, publish the page, and move to the front end to fill in the form.
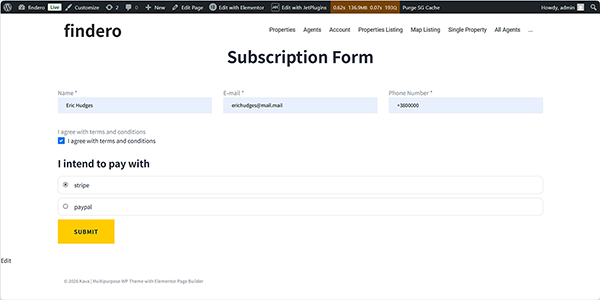
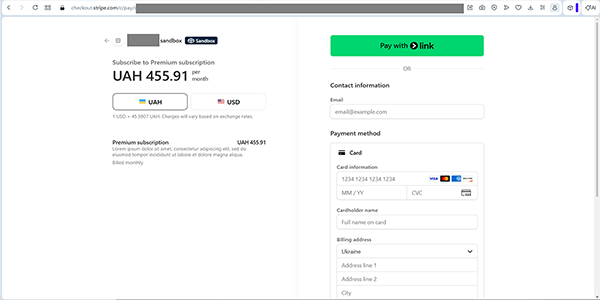
After pressing the “SUBMIT” button, you will be redirected to the Stripe or PayPal checkout page, depending on your choice.
That’s it. Now you know how to add both PayPal and Stripe payment methods to one JetFormBuilder form, configure the payment gateways, and display multiple methods on the frontend to let users select PayPal or Stripe before submitting JetFormBuilder forms on your WordPress site.