How to Set Phone Number Format Based on Selected Country
In this article, we will focus on setting up the Phone Field to get the right format based on the selected country in the form created with the WordPress JetFormBuilder plugin.
With a new Phone Field, you can define the desired format, specify the allowed countries, and style the field according to your needs. Compared to the old “Tel” option for the Text Field Type, the Phone Field becomes separate and offers the advanced settings on the backend and a stylish view on the front end for your WordPress forms created with the JetFormBuilder plugin.
Table of Contents:
Create a Form
First, we navigate to WordPress Dashboard > JetFormBuilder > Add New Form.
Enter the form’s title — in this case, it is “Contact Form”.
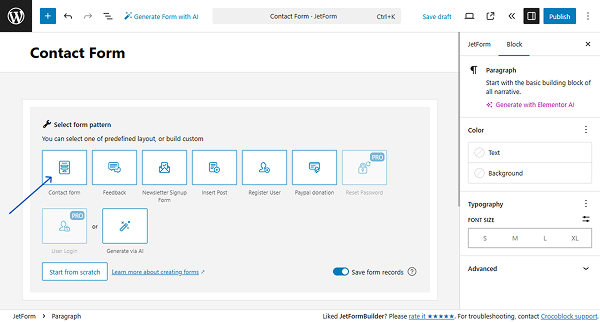
The Welcome block appears by default. From here, you can select a form pattern or generate a form with OpenAI. Otherwise, you can hit the “Start from scratch” button and use the three fields added by default; or, you can delete them to begin anew.
In this case, we select the “Contact Form” pattern out of the offered options.
Phone Field Settings
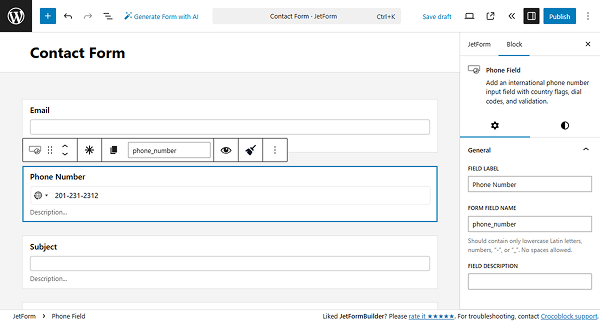
Once you are ready with other fields, add the Phone Field to the form. In the General tab, you can set the FIELD LABEL, FORM FIELD NAME, and FIELD DESCRIPTION.
Proceed to the Field tab — you will find the format settings and rules for the Phone Field.
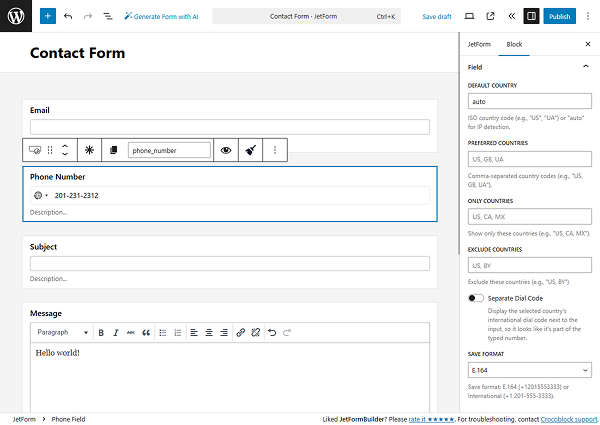
In the DEFAULT COUNTRY field, you can enter the country whose code you want to be displayed by default in the form field. The “auto” option is selected by default, which means that the country will be determined by the user’s IP. Otherwise, you can enter the ISO country code (two uppercase letters of the needed country, e.g., “UA” for Ukraine, “GB” for Great Britain, “US” for the USA, and so on). In this case, we will keep the “auto” option.
The flag of the dedicated country is displayed next to the Phone Field by default.
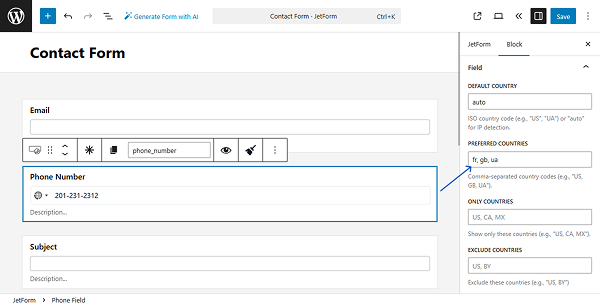
In the PREFERRED COUNTRIES field, you can enter the ISO country codes that you want to appear first in the options list. The countries’ codes should be entered separated by commas. We enter “FR, GB, UA” so France, Great Britain, and Ukraine appear first in the list.
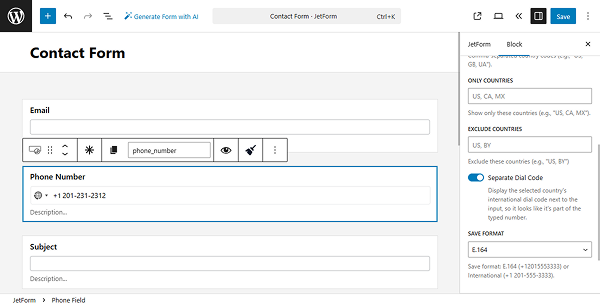
In case you need to limit the countries’ options in the dropdown, enter the ISO codes of the needed countries in the ONLY COUNTRIES field. If you need to hide some countries from the dropdown, enter the ISO codes of these countries in the EXCLUDE COUNTRIES field.
In terms of changing the format, there are two settings for that:
- Separate Dial Code — the toggle allows you to display the international country code separately from the number;
- SAVE FORMAT — is a dropdown with two options for saving the entered phone number:
- E.164 — is the recommended option, which saves the number in the +[country code][number] format using numbers only. For example, “+380991234567”;
- International — is the option that allows you to save the form number in the +[country] [formatted number] format using spaces or hyphens. For example, “+380 99 123 4567”, “+1 201-555-3333”.
In this guide, we enable the SEPARATE DIAL CODE toggle to see the country code separately and keep the “E.164” option for the SAVE FORMAT.
You can also set up the desired REQUIRED FIELD MESSAGE and INVALID PHONE MESSAGE in the Validation Messages section.
The Advanced Settings tab has an additional set of settings for the field. More information about it can be found in the Advanced settings section article.
Once you are ready with the form settings, click the “Publish” button.
Check the Front End
Once the form is added to the needed page, check the front end. On the front end, the Phone Field correctly identifies the country and applies the needed code.
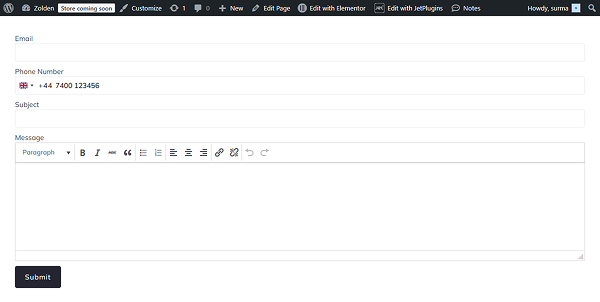
Additionally, as far as we have enabled the Separate Dial Code toggle, the country code is displayed separately. And the number is displayed with no extra symbols, according to the E.164 SAVE FORMAT.
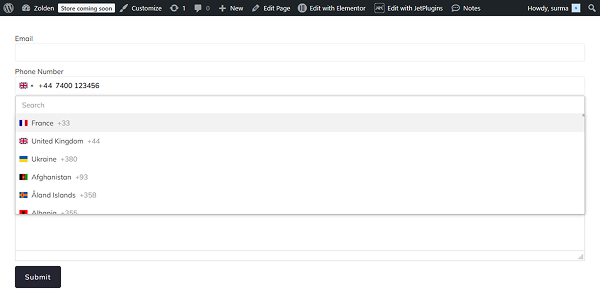
We can also change the country code by clicking the flag icon and searching for the needed country. And as far as we have set France, Great Britain, and Ukraine in the PREFERRED COUNTRIES field, they appear first in the list.
FAQ
By default, the Phone Field uses IP-based detection to automatically select the user’s country. This works when the DEFAULT COUNTRY option is set to “auto.” You can improve accuracy by adding an API token from ipinfo.io.
The recommended format is E.164, as it stores phone numbers in a clean, standardized format (e.g., “+441234567890”). This ensures better compatibility with integrations, validation, and international use.
Yes, you can restrict users by adding specific ISO country codes to the ONLY COUNTRIES field. This ensures that users can only select and enter phone numbers from the allowed countries.
Use the PREFERRED COUNTRIES setting and enter ISO country codes (e.g., “GB, US, CA”). These countries will appear at the top of the dropdown for quicker access.
You can enter the ISO country code (e.g., “GB, US, UA”) in the DEFAULT COUNTRY field. This will override automatic detection and set a fixed country for all users.
Yes. The dedicated Phone Field provides advanced features like country selection, validation, formatting, and improved user experience, which were not available in the basic “Tel” Text Field.
That’s it. Now you know how to set the Phone Field to get the preferred number format according to the country selected with the JetFormBuilder plugin for your WordPress forms.