
Creating a Form with the Calculation of Cat Age Into Human Age and Vice Versa
In this tutorial, we’ll build a form that converts a cat’s age in human years (and vice versa) using JetFormBuilder. You’ll see how Calculated Fields, Conditional Blocks, and Dynamic Values work together to create a fully interactive, no-code calculator.
By the end, you’ll have a working “Cat-to-Human (and Human-to-Cat) Age Calculator” form, ready to download, import into your own WordPress site, and customize.
Contents
- Setting Up The First Block of Columns
- Setting Up The Second Block of Columns
- Checking The Result on The Front-End
Let’s go through the creation process.
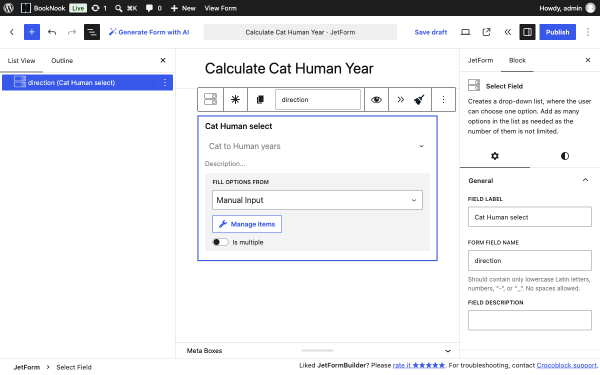
Firstly, add the Select Field, which will determine the direction of how the age is calculated from cat to human age or from human to cat age.
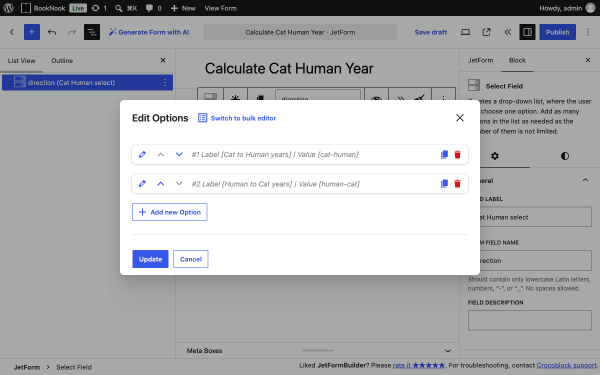
Therefore, we manually added those options to the Select Field.
Setting Up The First Block of Columns
Next, we need to add three columns to the form. Let us see what each column represents.
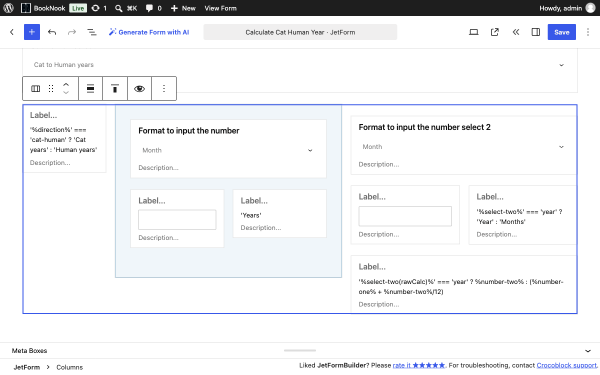
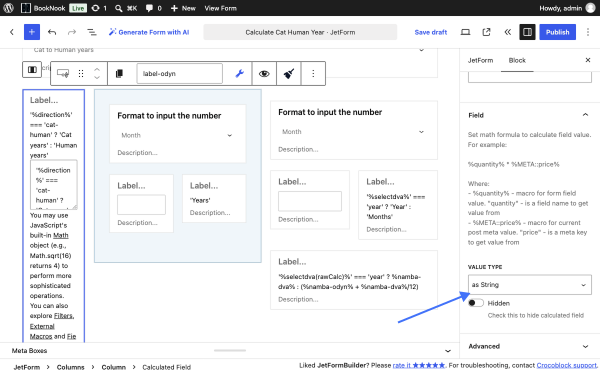
To the first column, we’ve added the Calculated Field with the “as String” Value type. The Calculated Field has such a ternary operator:
'%direction%' === 'cat-human' ? 'Cat years' : 'Human years'It conditionally shows the label based on the option selected in the first Select Field named %direction%.
NOTE!
Find out more about the ternary operator in the How to Use Conditional Formulas in the Calculated Field tutorial.
In the second column, we have the Conditional Block, which consists of several fields and depends on the options of the fields in the third column.
The idea is that the field input for the year value needs to appear in the second column if the respective “Year and Month” option is selected in the Select Field in the third column. In this way, we can create one field for entering a year in the second column and another field for entering a month value in the third column.
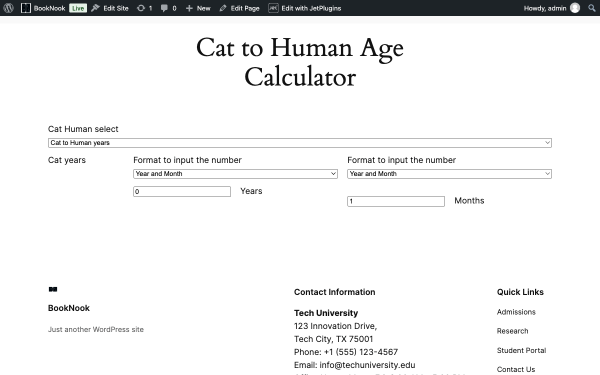
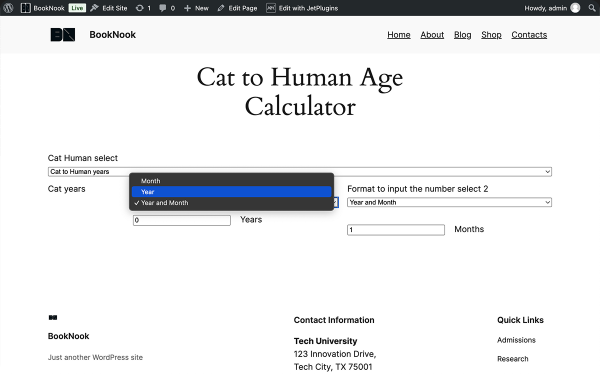
For a better understanding, here is the result on the front end of this part of the form. If the “Year and Month” option is selected in the third column, the input field will appear in the second column for entering the year value. The Select Field with “Year,” “Month,” and “Year and Month” is also added to the second column.
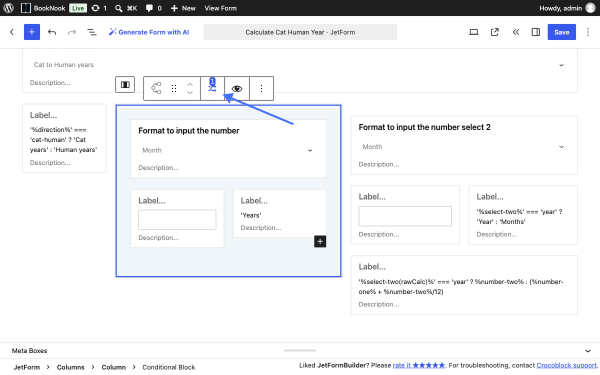
To create such a scenario, we added the following rule to the Conditional Block by clicking the icon highlighted in the screenshot below.
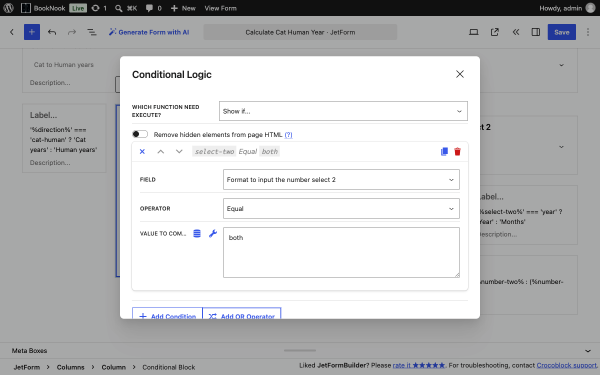
The “Show if” Function is based on the “Format to input the number,” which is the Select Field from the third column in which the user can select which value they want to enter: the age as a month, as a year, or both year and month. The value for the “Year and Month” option is “both,” so we entered it into the Value to compare field.
The first field in the Conditional Block is the Select Field named “select-one.” This Select Field lets users pick year, month, or year and month options like in the Select Field in the third column. This second column will be hidden once the user selects “Year” or “Month” since each option requires only one input field, which will be provided in the third column.
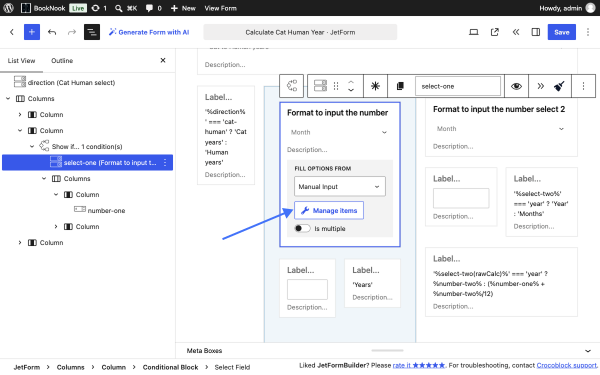
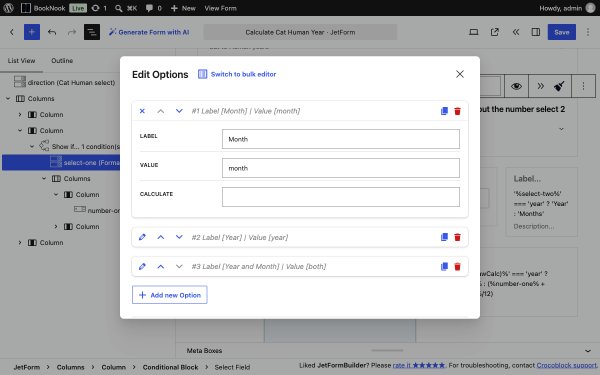
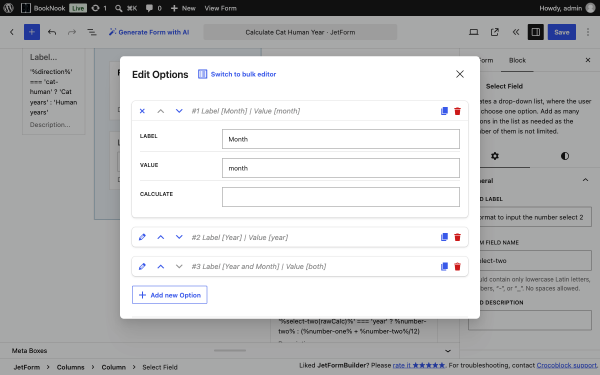
These are the options added to the Select Field in the second column.
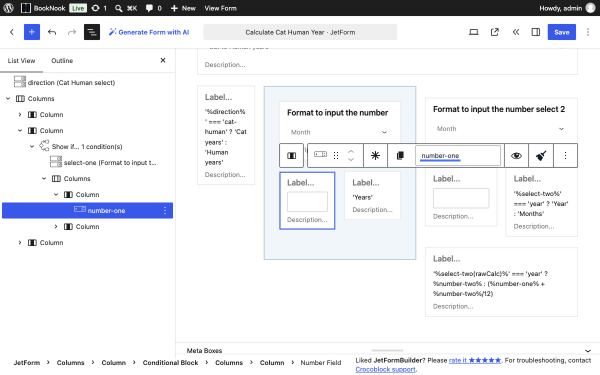
The next field in the second column is the Number Field for inputting the year value.
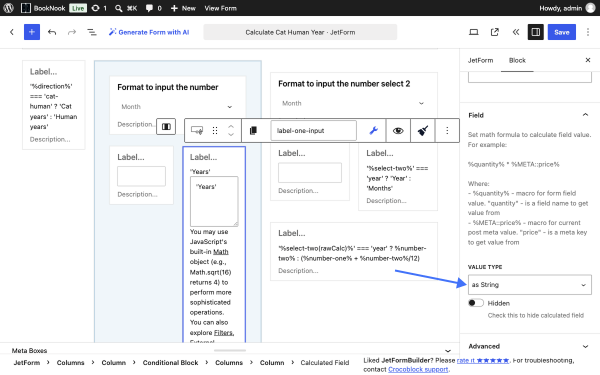
And the Calculated Field in which the “Year” text is inserted to identify that the year value should be entered into the Number Field on the left side.
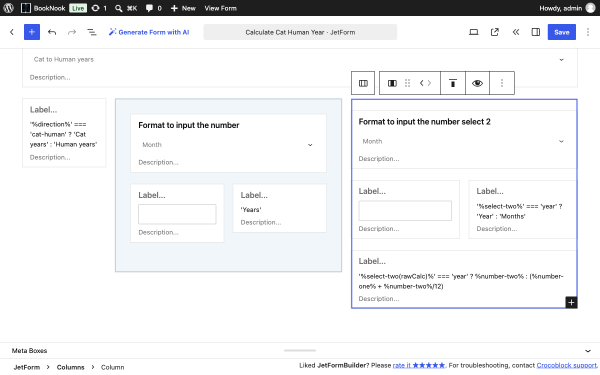
These are not all the settings for these two fields. The other settings depend on the fields in the third column that have not been created yet.
So, these are the fields in the third column. Let us also check the settings of each of them.
The first is the Select Field named “select-two.”
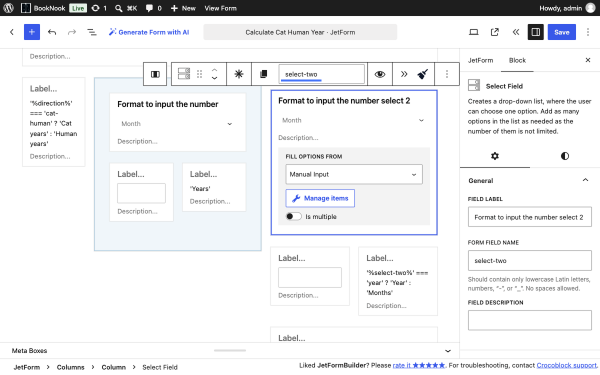
The field has the “Year,” “Month,” and “Year and Month” options, which let users select the input format of the age, whether it is in years, months, or years and months.
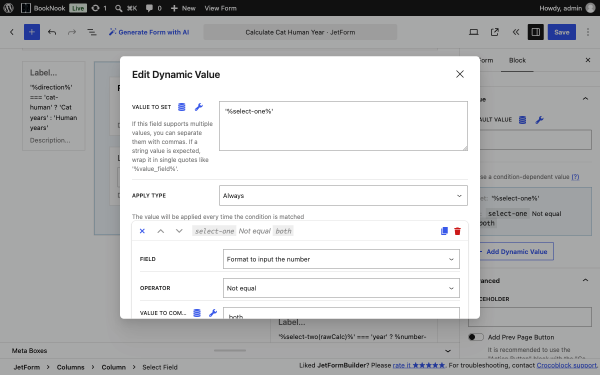
This Select Field also applies the following dynamic value based on the Select Field from the second column. To set it, click the “+ Add Dynamic Value” button.
In the Edit Dynamic Value pop-up, we set the following settings.
In the Value to set field, we entered the Select Field name from the second column wrapped in single quotation marks and percentage signs (‘%select-one%’). This is to get the value from the field dynamically.
The Apply type is set to “Always.”
In the Field drop-down, we picked the label of the same Select Field from the second column, which was entered in the Value to set field.
The Operator is “Not Equal,” and the Value to compare is “both.”
This dynamic value means that the “select-two” Select Field in the third column will automatically get a value selected in the “select-one” field in the second column.
Let us see the result of this dynamic value on the front end to better understand the settings explained previously.
When we pick the “Year and Month” option in the right select field, the same select field automatically appears on the left side, and the input number field for the year value is displayed.
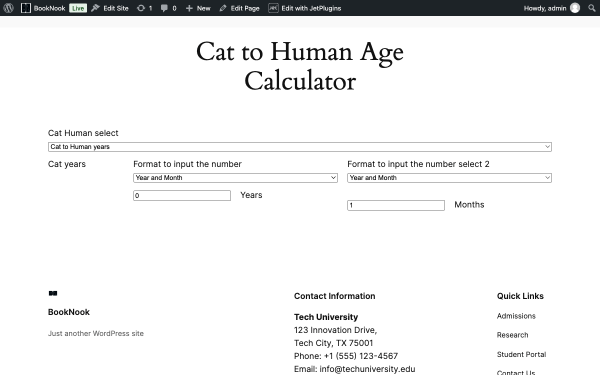
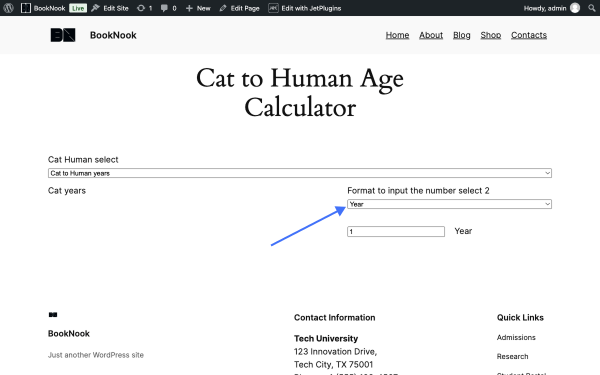
We selected the “Year” option in the left select field.
And the selected value is automatically transferred to the selected field on the right, and the second column with its fields is hidden.
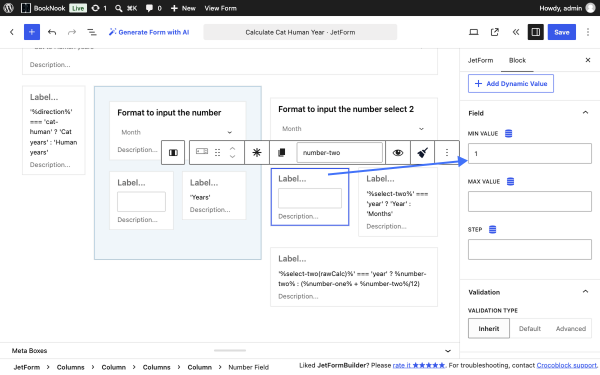
Let us proceed with further settings in the form. The next field added to the third column is the Number Field to accept a year or month value. We also added a “1” Min value to the field to accept only positive numbers starting from one.
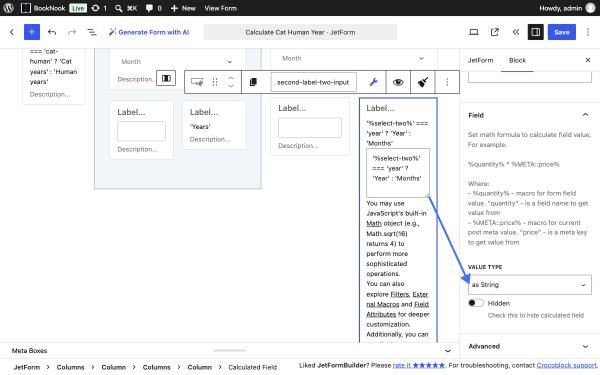
The field on the right of the Number Field is the Calculated Field, which shows the unit that is entered into the Number Field. This Calculated Field is based on the Select Field in which “Year,” “Month,” or “Year and Month” can be selected to display a relevant option.
Its formula is:
'%select-two%' === 'year' ? 'Year' : 'Months' It means showing the “Year” text if the “Year” option is selected in the “select-two” Select Field; otherwise, it displays the “Months” text.
The value type is set to “as String.”
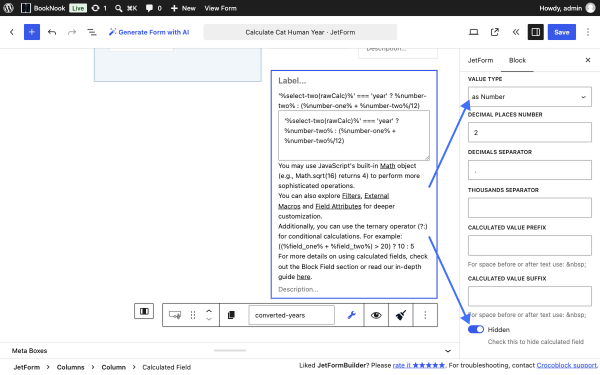
The last field of this third column is the “converted-years” Calculated Field. It has the following formula:
'%select-two(rawCalc)%' === 'year' ? %number-two% : (%number-one% + %number-two%/12)It is used solely for calculating the years if the “Year” option is selected in the “select-two” Select Field from the third column.
NOTE!
The “rawCalc” attribute works only if the JetFormBuilder – additional attributes addon is installed and activated.
As this field is only needed for calculating in year format, this Calculated Field is set to be Hidden. However, its value will be used in other calculations later in the form.
As the setup of fields in the third column is completed, we can return to the fields in the second column and apply the needed dynamic values.
We added the dynamic value to the Select Field in the second column by clicking the “+Add dynamic value” button.
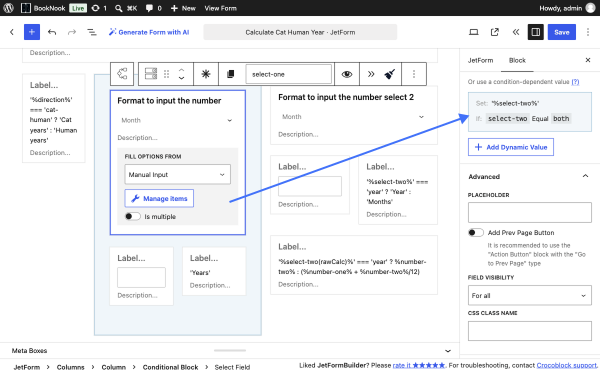
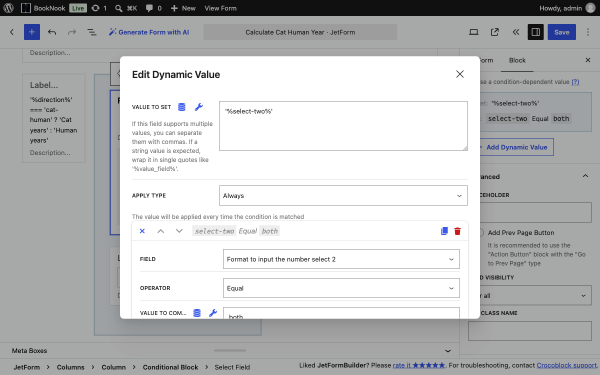
Here are the settings for the Dynamic Value in detail. This dynamic value inserts the value from the “select-two” Select Field in the third column into this Select Field in the second column.
So, we entered the Select Field name wrapped in single quotation marks and percentage signs (‘%selectdwa%’) into the Value to set field, and the Apply type is set to “Always.”
In the Field drop-down, we picked the label of the same Select Field, which was entered into the Value to set field. The Operator is “Equal,” and the Value to compare is “both.”
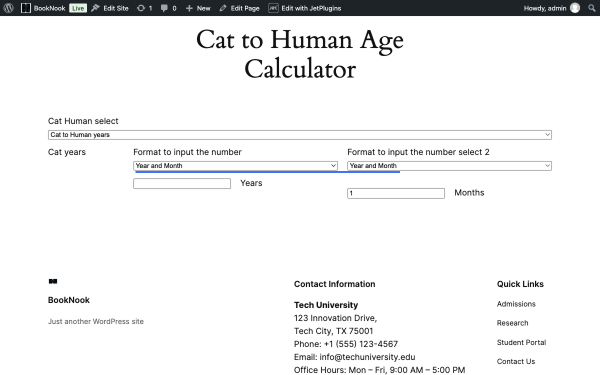
On the front end, it results in the same value in both select fields.
Next, to the Number Field in the second column, we also added the Dynamic Value.
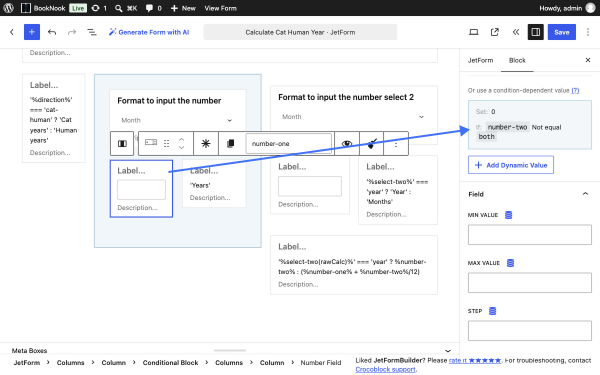
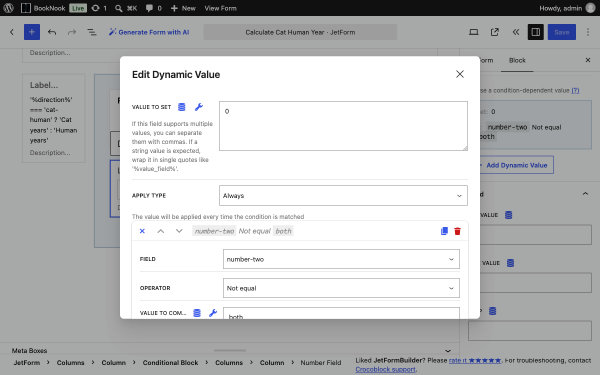
The Edit Dynamic Value pop-up has these settings.
The Value to set is “0”, and the Apply type is “Always.”
The Field has the Select Field label from the third column. It has the same label as the field in the second column, but you can use a unique label to identify the needed field more easily.
The Operator is “Equal,” and the Value to compare is “both,” which is the value of the “Year and Month” option.
The idea is that this Number Field must have “0” as a value if the Select Field in the third column has “Year” or “Month” selected.
Setting Up The Second Block of Columns
Now, we can get to the second set of columns and fields in them. These three columns are used for calculating and displaying the results: the cat or human age.
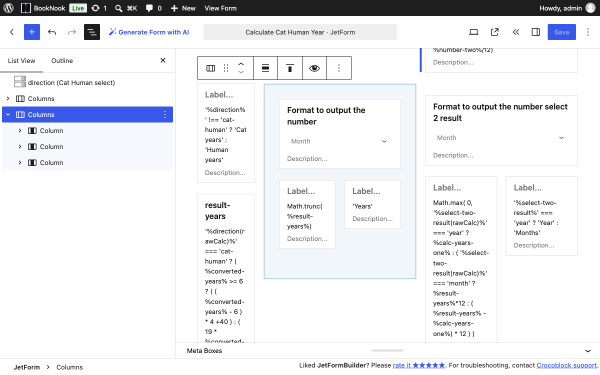
In this set of columns, the first one has these fields.
The “label-two” Calculated Field is used to show the selected direction’s label. The formula is:
'%direction%' !== 'cat-human' ? 'Cat years' : 'Human years' It is based on the very first Select Field in the form, in which users select how the age needs to be calculated: from cat to human or from human to cat.
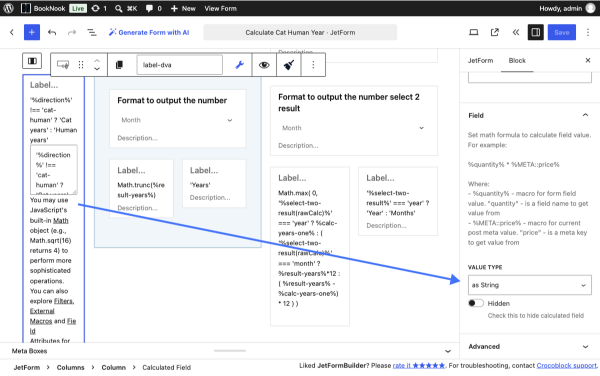
The second Calculated Field in this column calculates the resulting age in years.
We used a formula for calculating the cat-to-human and human-to-cat years found on the Internet and only added our meta field names:
'%direction(rawCalc)%' === 'cat-human' ? ( %converted-years% >= 6 ? ( ( %converted-years% - 6 ) * 4 +40 ) : ( 19 * %converted-years%/3 + 1) ) : ( %converted-years% >= 40 ? ( ( %converted-years% - 40 ) /4 +6 ) : 3* (%converted-years%-1 ) /19 )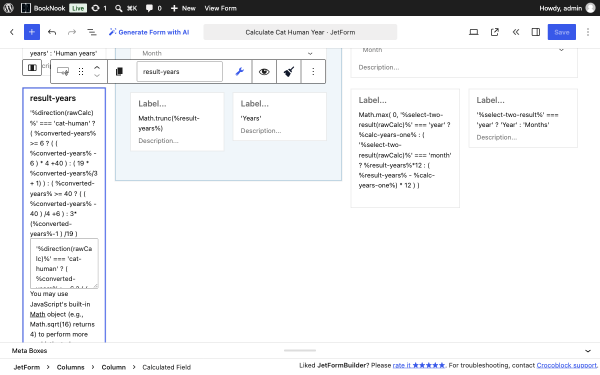
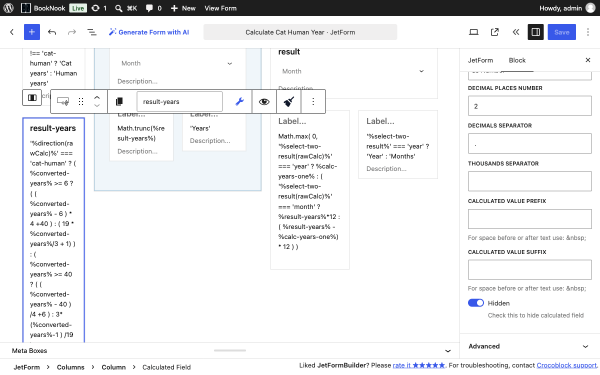
We also switched on the Hidden toggle since this field is only needed for calculating, and its results will be displayed via other fields.
Moving on to the next column, we have the Conditional Block that will show the age in years. The idea is that this block will be displayed if the “Year and Month” option is selected in the field in the third column, so the field in the second column shows the years, and the field in the third column shows the months.
By clicking on the randomize icon, you can add the needed condition. But we will add it later since the field on which the condition is based will be created in the next column.
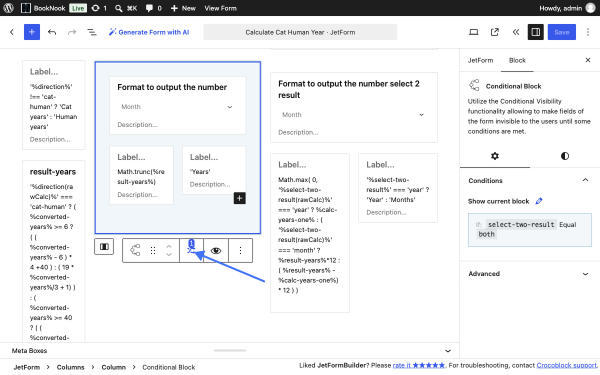
This Conditional Block has the following fields inside.
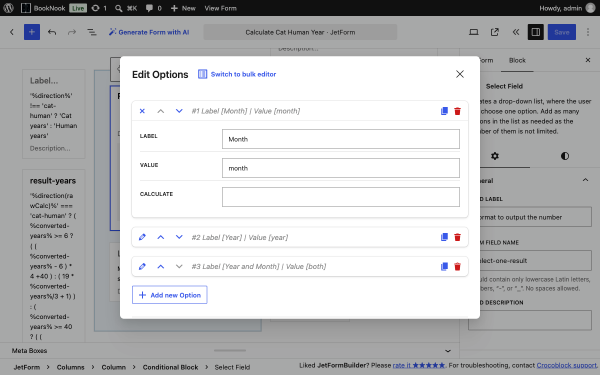
The first one is the “select-one-result” Select Field with the Dynamic Value, which will also be added later.
The options of this field can be configured by clicking on the “Manage Items” button.
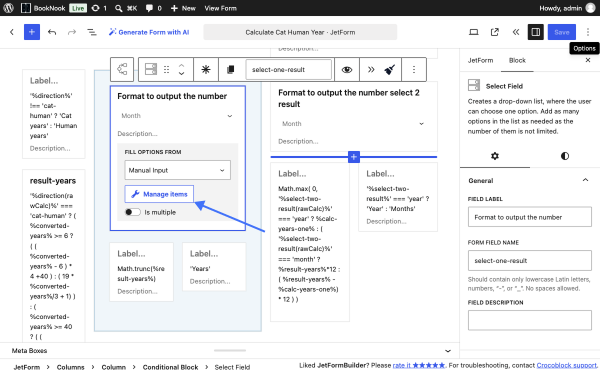
The options of the Select Field are: “Month”, “Year”, “Year and Month”.
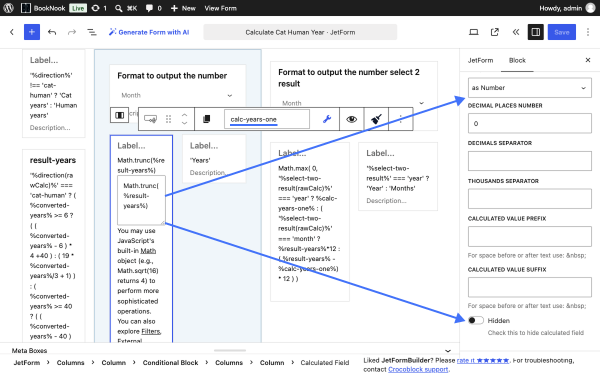
And the next field in this column is the Calculated Field with this formula:
Math.trunc(%result-years%)The “Math.trunc” returns the integer part of a number so that an integer can display the year value. We also set the Value Type to “as Number” and kept the Hidden switcher disabled to make the calculated value visible on the front end.
Let us move on to the fields in the next column.
In the last column of the form, we have the “select-two-result” Select Field with the Dynamic Value.
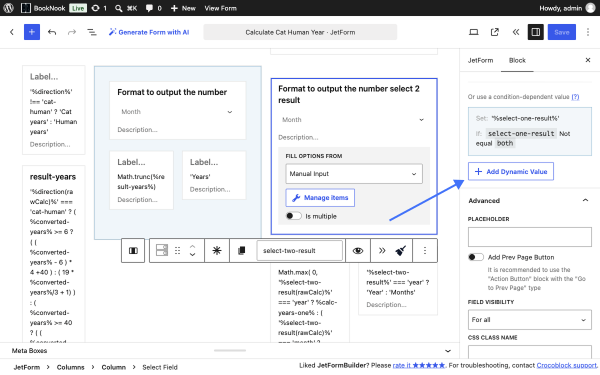
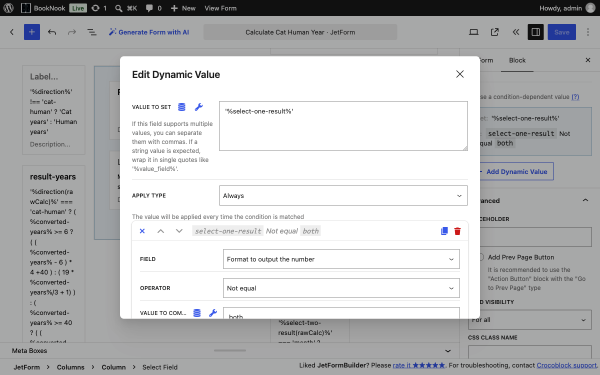
The Dynamic Value is based on the “select-one-result” Select Field from the previous column. This is needed to automatically add a value from the “select-one-result” which was picked into the current ‘select-two-result’ Select Field.
This is why we added ‘%select-two-result%’ into the Value To Set field to pull its value dynamically.
The Apply type is “Always.”
As the Field, we also picked the “select-one-result” Select Field from the previous column. Again, you can write a clearer label for the field to identify it more easily.
The Operator is “Not Equal.”
In the Value to Compare, we entered the “both” value from the “select-one-result” field options.
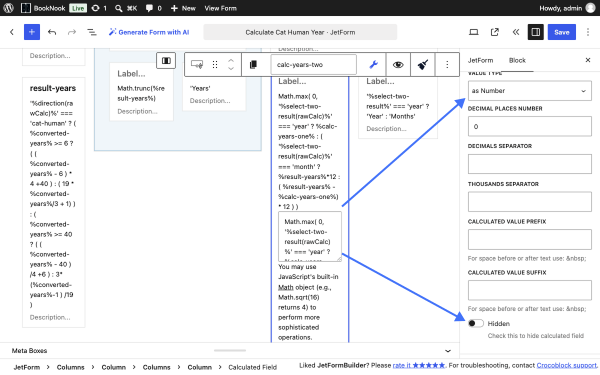
And the following field is the Calculated Field with the formula:
Math.max( 0, '%select-two-result(rawCalc)%' === 'year' ? %calc-years-one% : ( '%select-two-result(rawCalc)%' === 'month' ? %result-years%*12 : ( %result-years% - %calc-years-one%) * 12 ) )The “Math.max” will return the largest value between 0 and the number calculated in the formula.
We set the Value type to “as Number,” and kept the Hidden switcher disabled to show the result of this Calculated Field on the front end.
As the fields in this column are completed, we can return to the fields in the previous column to set up the needed conditions and dynamic values.
Click on the Conditional Block randomize icon to add the condition.
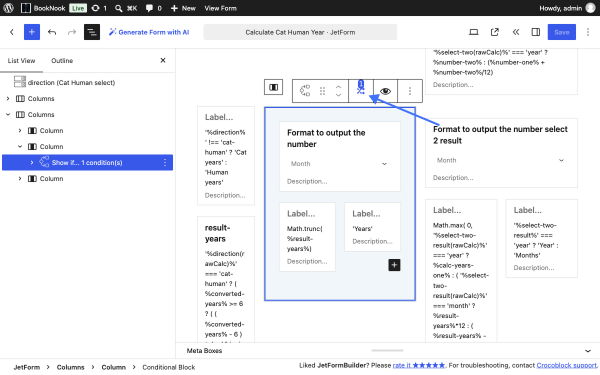
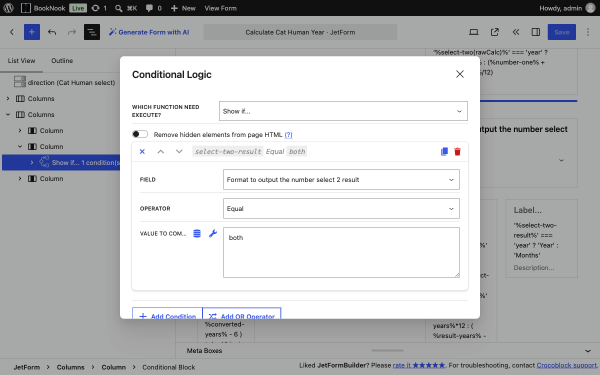
The condition is “Show if,” where the Field is the “select-two-result” from the third column, which has the “Format to output the number” label.
The Operator is “Equal,” and the Value to compare is “both.”
In this way, this column will appear if the “Year and Month” option is selected in the “select-two-result” Select Field.
Next, we need to add the Dynamic Value to the “select-two-result” Select Field.
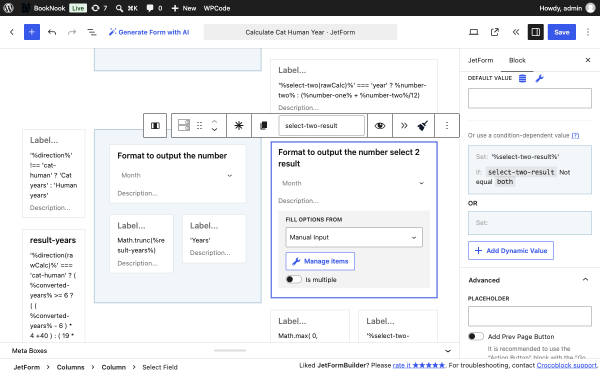
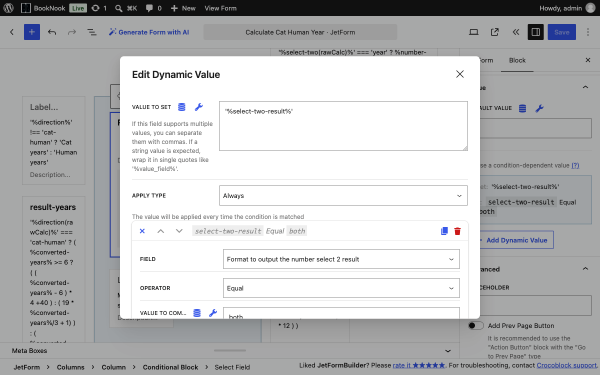
The Dynamic Value is set up the following way.
In the Value to set field, we entered the Select Field name wrapped in single quotation marks and percentage signs (‘%select-two-result%’). This is to get the value from the field dynamically.
The Apply type is “Always.”
We inserted the same “select-two-result” field in the Field with the “Format to output the number” label. The Operator is “Equal,” and the Value to Compare is “both” since it is a value of the “Year and Month” option.
Lastly, we can add the label identifiers for which value is displayed in the results.
We added two columns to the Conditional Block in the second column.
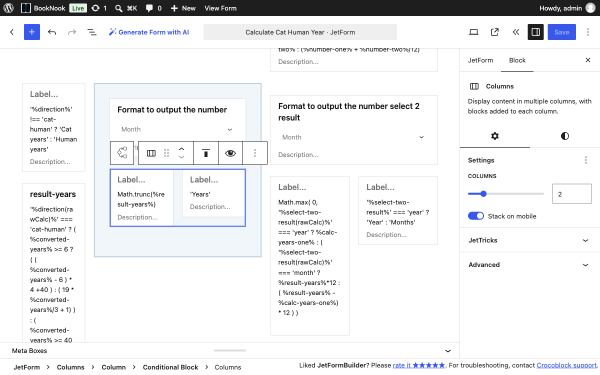
In these columns, we transferred the Calculated Field by dragging it via the dots icon.
And in the second column, we duplicated the Calculated Field with the ‘label-one-input’ label, which displays the label of the field input for a year.
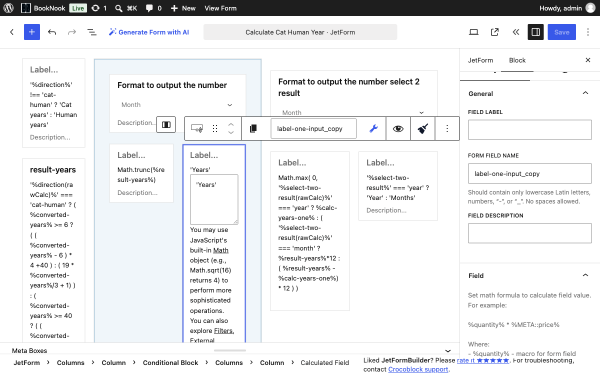
And this is how we created a field for a year in the column that shows the year result.
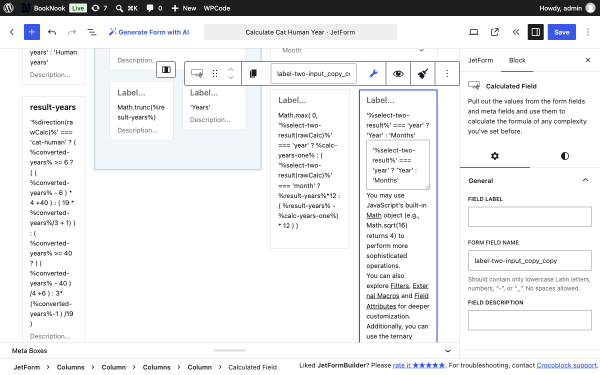
In the same way, we added two columns to the third column, which displays the result. Then, duplicate the Calculated Field and insert it into the third column.
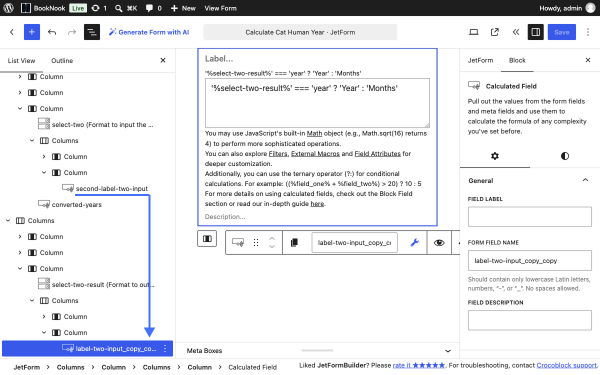
Do not forget to change the field name (“select-two-result,” in our case) so the formula will show the labels based on that field.
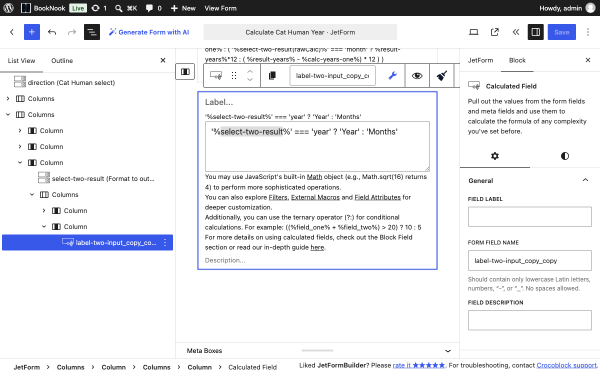
The result of duplicating and dragging the fields is that the results now have the labels for the calculated results.
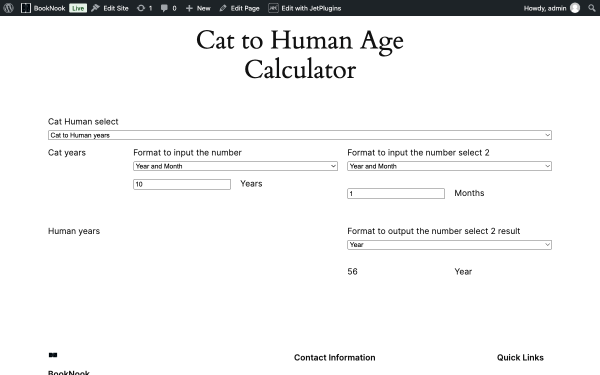
This concerns the form setup for calculating the age of Cat to Human and Human to Cat.
Checking The Result on The Front-End
Now we can add the form to the needed page using the JetForm widget or Form block and save the page by hitting the “Update” button. More details can be found in the Adding the Form Block tutorial.
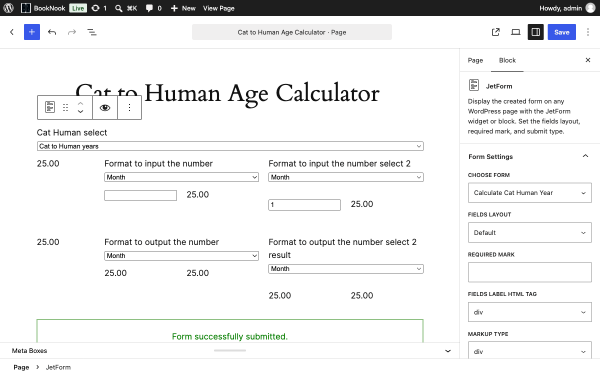
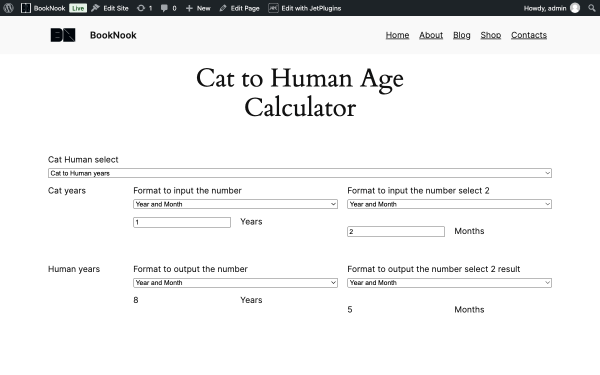
On the front end, we can see the form.
Here, you can download the form and check it on your WordPress website.
For that, proceed to the WordPress Dashboard > JetFormBuilder > Forms tab and press the “Import Form” button. Then, push the “Choose Files” button, upload the form, hit the “Start Import” button, and you’ll move to the form editing page.
That’s all. In this tutorial, we described how to set up a form for the Cat-to-Human age calculation and vice versa. It’s possible with the JetFormBuilder WordPress plugin.