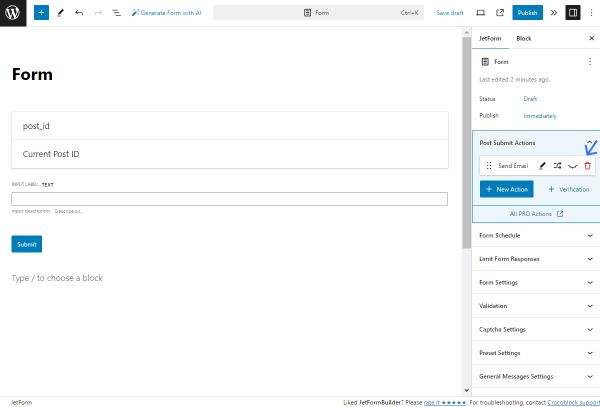
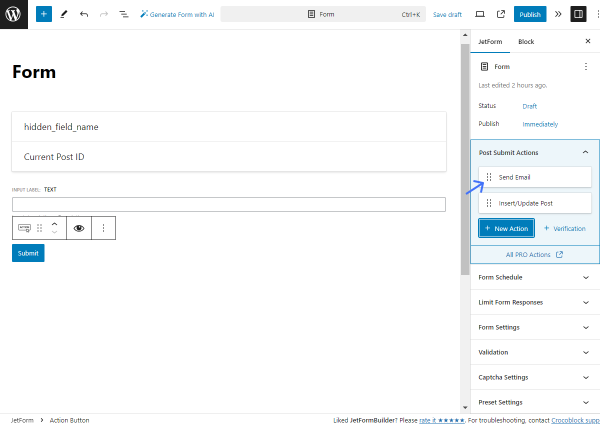
If you want the visitor of your website to see a Thank You page after form submission, you need to set up the Redirect to Page post-submit action.

This guide includes a simple way to redirect a form to a Thank You page and describes how to create a personalized message displayed to the user after the form submission alongside the option to hide a section with the form using the Dynamic Visibility module.

If you’re a fan of visual guides, don’t hesitate to follow our detailed video tutorial. 

Redirect Form to Thank You Page

For this option, you need only the JetFormBuilder plugin installed and activated.

Go to JetFormBuilder > Forms and open the form you want to add a redirect to. 

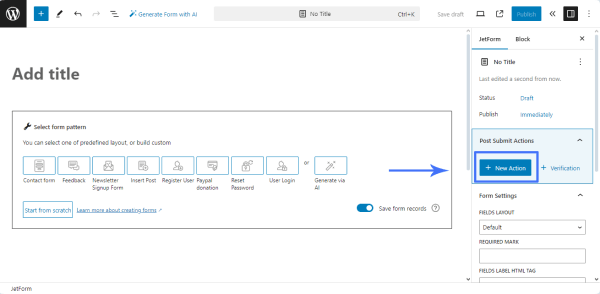
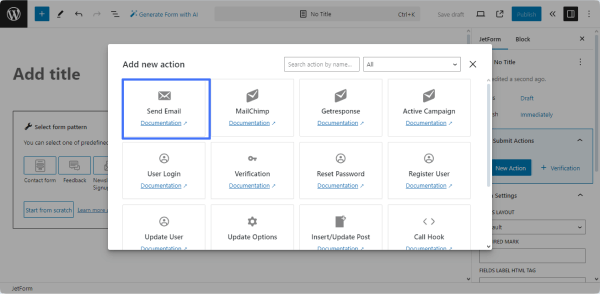
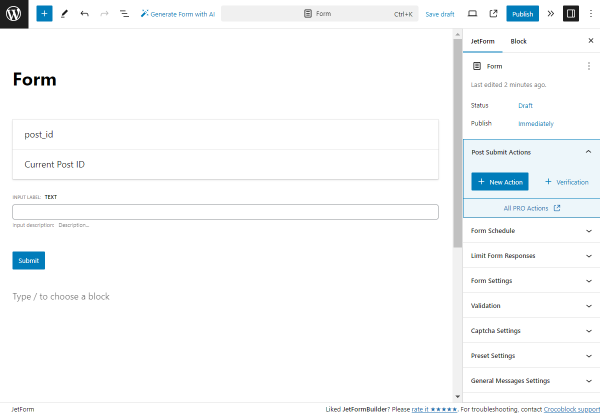
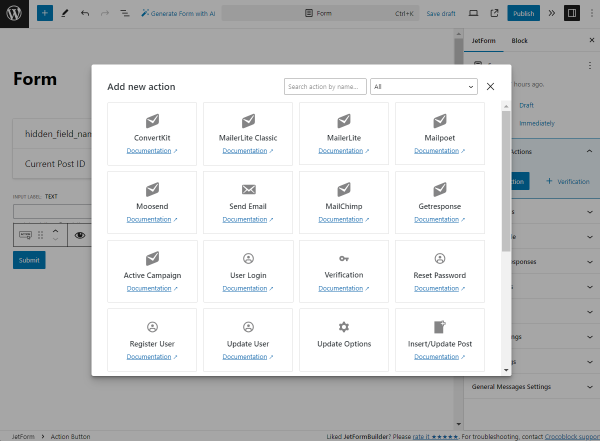
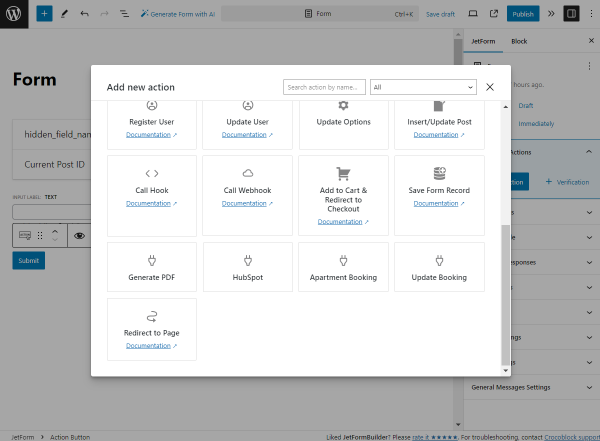
Proceed to the JetForm settings > Post Submit Actions. Add a new action and select “Redirect to Page” from the drop-down menu. 

redirect to page action

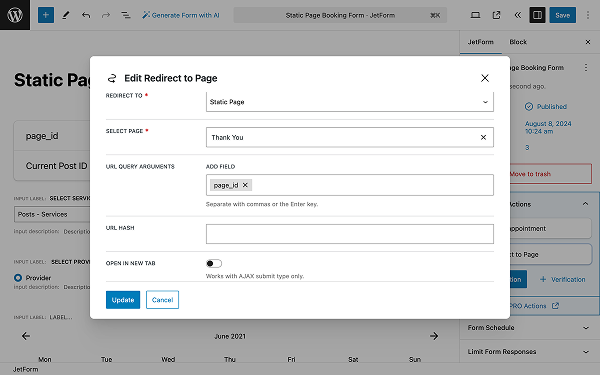
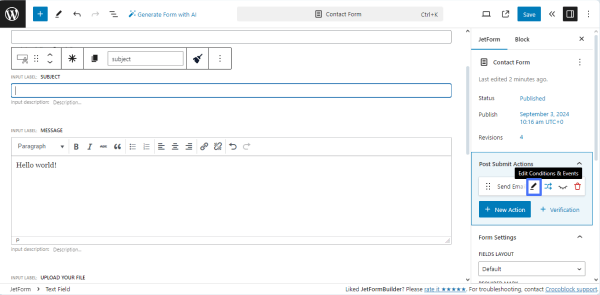
Click on the pencil-shaped button to edit the action and proceed to its settings.

redirect to page settings

In the Redirect to drop-down menu, choose “Static Page” and proceed to the next option, Select page. There will be a list of all the pages you’ve created so far. Select a “Thank you page” option here. 

redirect to the static page

Update the form. The result can be seen in this video

Create Personalized Thank You Message

A personalized thank-you message will display the user’s name previously entered into the form.

Before we start, make sure you have the JetEngine plugin installed and activated since we will be using a CPT, meta fields, and a listing template.

A Custom Post Type contains the list of the meta fields repeated in the form. This way, the form will be saved as a post, and the information the user entered into the form fields will be saved under the appropriate meta fields.

CPT meta field name

That’s why you need to create a meta field called Name and make sure that you have the same Name field in the form.

form field name

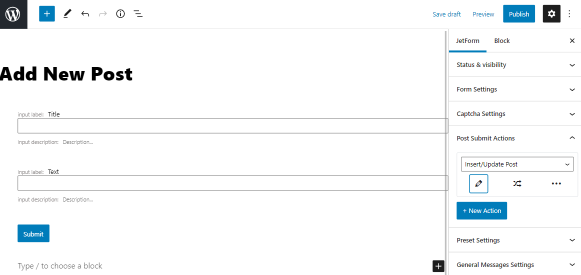
To link the form field with the CPT meta field, you need to set up Insert/Update Post action.

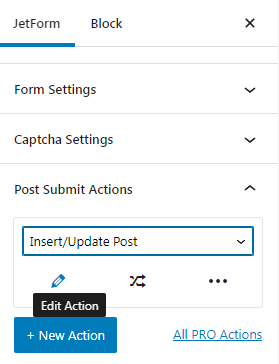
Proceed to the JetForm > Post Submit Actions pathway. Add a new action, select “Insert/Update Post” from the drop-down list, and click on the pencil-shaped button to edit the action. 

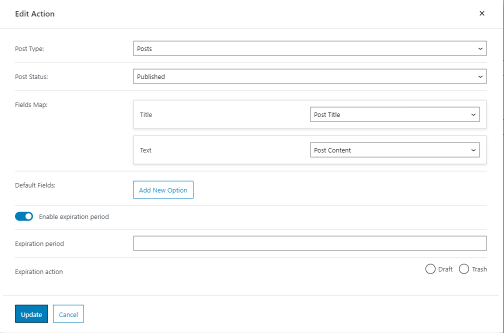
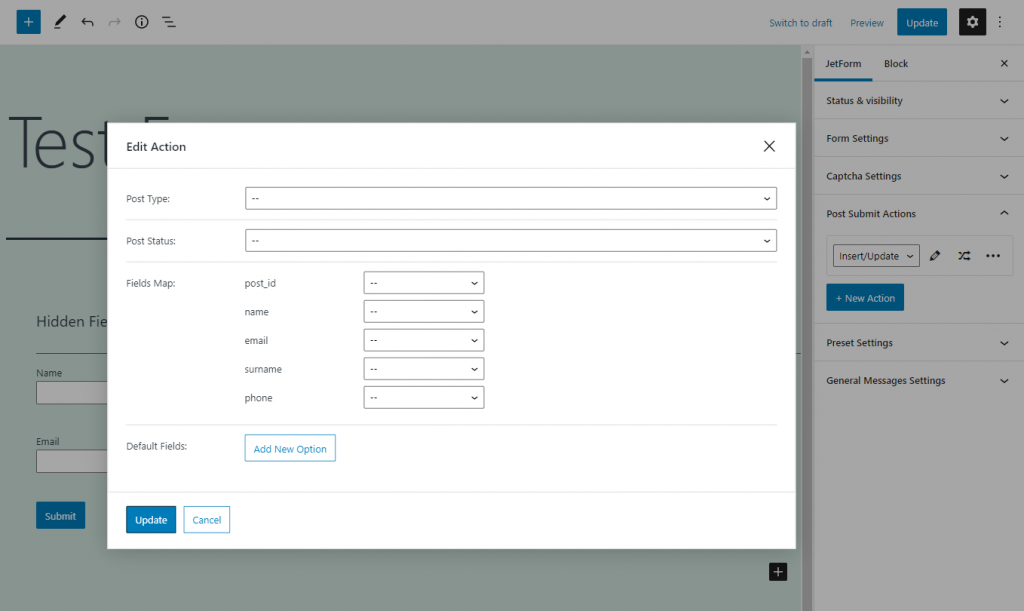
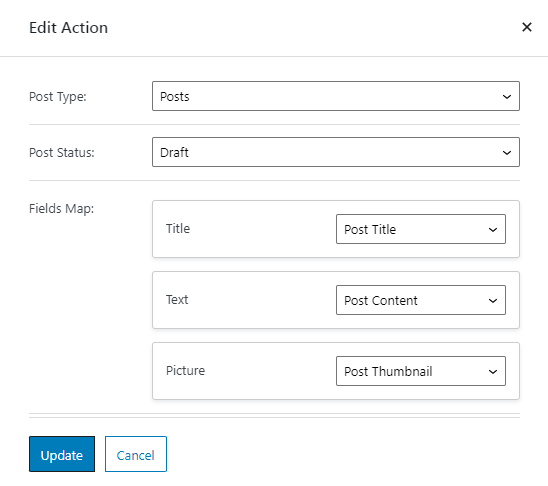
In the Post Type drop-down menu, you will find all types of posts available to you. Select the CPT you’ve previously created. Proceed to the Fields Map and find the Name form field.

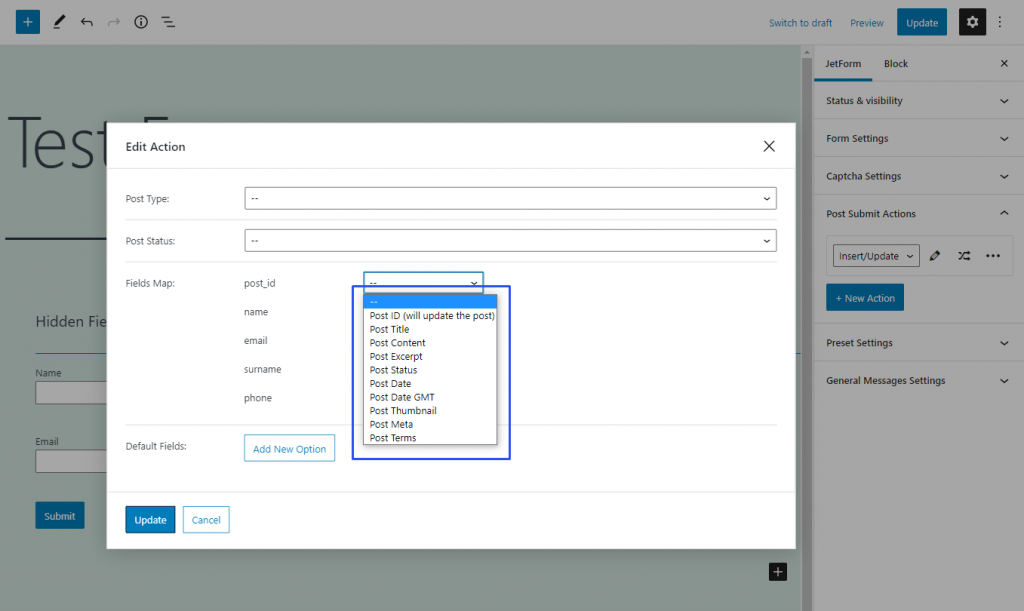
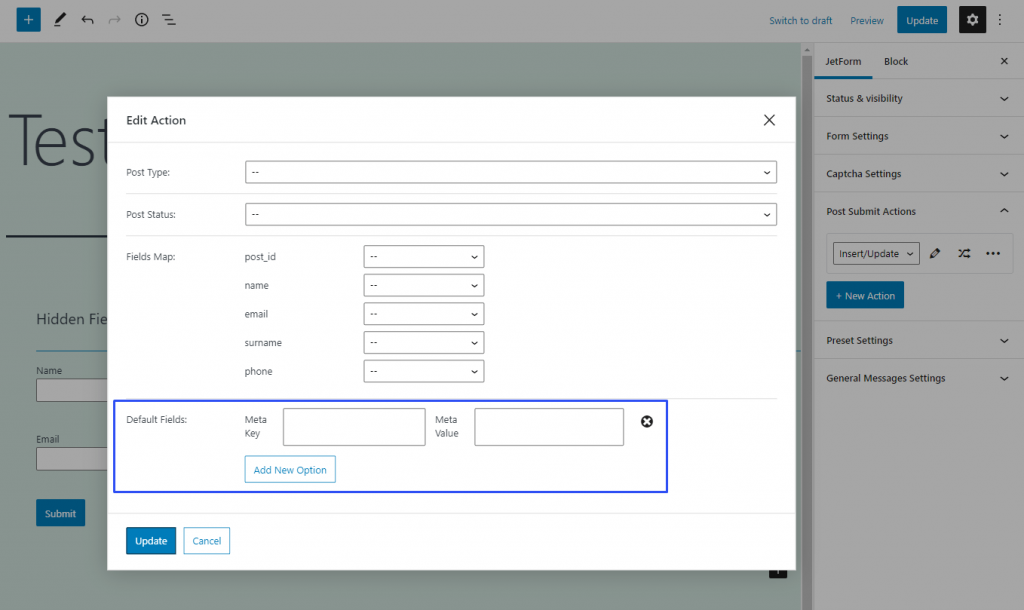
In the drop-down menu next to this field, you need to select the “Post Meta” option and enter the name of the same meta field below.

setting up insert update post action

Update the settings and the form.

Now we need to create a listing template to dynamically pull the content from the back end to the Elementor page builder to display it on the front end.

Go back to WordPress Dashboard > JetEngine > Listings. Create a new listing. Don’t forget to set the listing source to Posts and specify it in the following drop-down menu.

setup listing item

Once you hit the “Create Listing Item” button, you will be redirected to the Elementor page editor. Add a section and apply the Dynamic Field widget.

Under the Content tab, set “Meta Data” as a Source and select the “Name” meta field from the corresponding drop-down list.

dynamic field widget settings

Scroll down the settings and enable Customize field output. In the Field format box, enter the message you want to display on a Thank You page. %s, in this case, will be replaced with the Name field value.

customize field output

Publish the listing template. Now you need to add this listing to the page.

Head back to the WordPress Dashboard > Pages directory and edit the Thank You page with Elementor.

Find the Listing Grid widget in the elements panel and drag it to the page’s section. Choose the listing template you’ve previously created in the Listing drop-down menu. Also, set Columns and Posts number to 1.

listing grid settings

Click on the “Update” button, and here’s the final result.

Hide Form Using Dynamic Visibility

The last option is for those who don’t want to create a separate Thank You page. This way, a form will be hidden after the submission, and a thank-you message will show up.

Before we proceed, go to JetEngine > JetEngine Dashboard and make sure that you have the Dynamic Visibility for Widgets and Sections module enabled.

dynamic visibility module

For this option, we don’t need a redirect to a different page; that’s why go back to the form settings and remove the Redirect to Page post-submit action.

Proceed to the Dashboard > Pages directory. Find the page with the form and edit it with Elementor.

Add the Text Editor widget and enter a message, e.g., “Your request has been successfully submitted.”

message of success

Edit the form and proceed to the Advanced tab. Unfold the Dynamic Visibility section and enable it.

enabling dynamic visibility

Set the Visibility condition type to “Hide this element if condition met” since we need a form to disappear.
To add a new Condition, press the “Add Item” button and select “Equal” from the drop-down list of conditions.

Now edit the Text Editor widget. Proceed to the Advanced tab. Enable Dynamic Visibility and repeat the same steps changing only the Visibility condition type to “Show this element if condition met.”

dynamic visibility condition

For the Field, click on the Dynamic Tags button and choose “Macros” from the list.

dynamic visibility field

Once it’s selected, there will be a small Settings pop-up window with the list of macros. Set it to “Query Variable” and enter ‘status’ to the Variable name field bar.

macros and variable name

Proceed to the Value and enter ‘success’ there.

dynamic visibility value

Now edit the Text Editor widget. Proceed to the Advanced tab. Enable Dynamic Visibility and repeat the same steps changing only the Visibility condition type to “Show this element if condition met.”

thank you message visibility

Update the page and check how it looks on the front end.

The crucial thing to do once the user has registered on the website is to allow them to update their profile. More specifically, it is a way to change a WordPress user role as it gives different access levels to the website. In this tutorial, you will learn how to change the user role thanks to JetFormBuilder forms.

JetFormBuilder forms will help you change the current user role to another one after the form submission. The vital point in this process is Post Submit Actions. Let’s find out what options will be suitable for changing WordPress user roles via a form.

Related Post Submit Actions

The first action that may be helpful is Update User. Apply it to let the user edit their profile. After you select this post submit action, you can set the user role created via the form.

Another relevant post submit action is Register User, which can be used initially to add a new user. However, it is not the only feature of this post submit action. You can also use it to set the role of the newly-added user.

Update User Form

The starting point is creating a form. Go to JetFormBuilder > Add New. The form is not empty by default. There are Hidden, Text, and Submit Fields by default. Delete them or edit if needed.

adding a new jetformbuilder form

Name a form and place all the needed fields to create a WordPress form that will suit you.

update user form

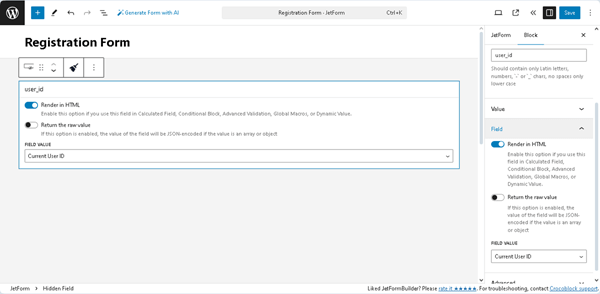
Note that the User ID hidden field is obligatory as you need it for the correct work of the form. To find out the User ID, go to the WordPress Dashboard > Users and hover the mouse over the required user name. A small pop-up window with a user ID will appear.

user id

Head back to the form editor. After customizing the blocks, move on to JetForm Settings > Post Submit Actions. Choose the “Update User” option from the drop-down list and proceed to its editing.

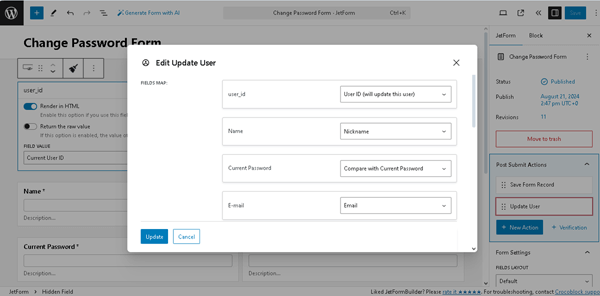
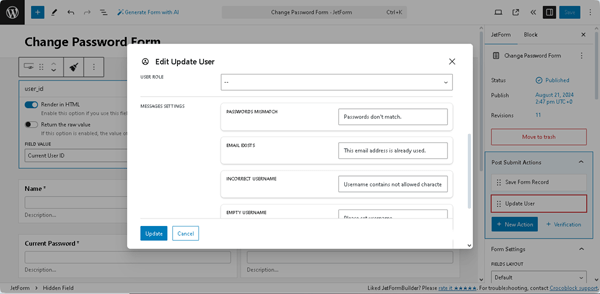
Set the Fields Map values and proceed to the User Role drop-down. Pick the role from those available to you. After selecting the option, adjust the Messages Settings if needed and update the action.

edit update user action

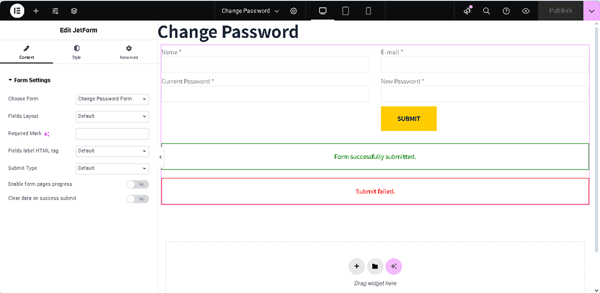
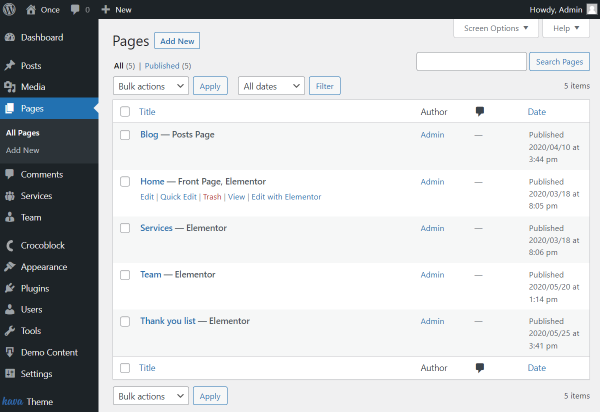
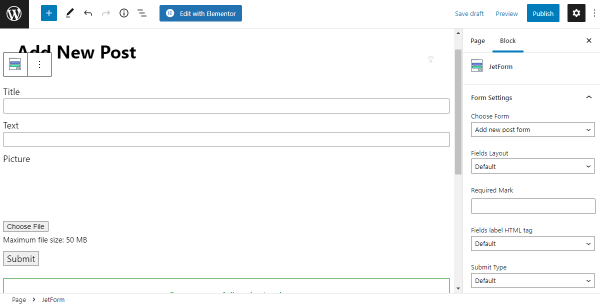
Head to the Pages > Add New and click on the plus-shaped button to add a new block. Find the JetForm block and place it on the page. Configure the JetForm Form Settings.

Adjust other JetForm Settings if desired and click on the “Publish” button. The next step is to place a form on the page.

adding update user form on the gutenberg-edited page
  • Choose Form — select a form you want to be displayed on the page;
  • Fields Layout — choose between “Column” and “Row” options;
  • Required Mark — change the default asterisk symbol that will be shown next to the required field;
  • Submit Type — define whether the page will be reloaded after the form submission or not;
  • Enable form pages progress — toggle to add a step indicator above the form. To configure the steps, use the Form Break Field.

Check Advanced Settings if you want to set the CSS classes or work with the JetStyleManager plugin to customize the form straight in the page editor.

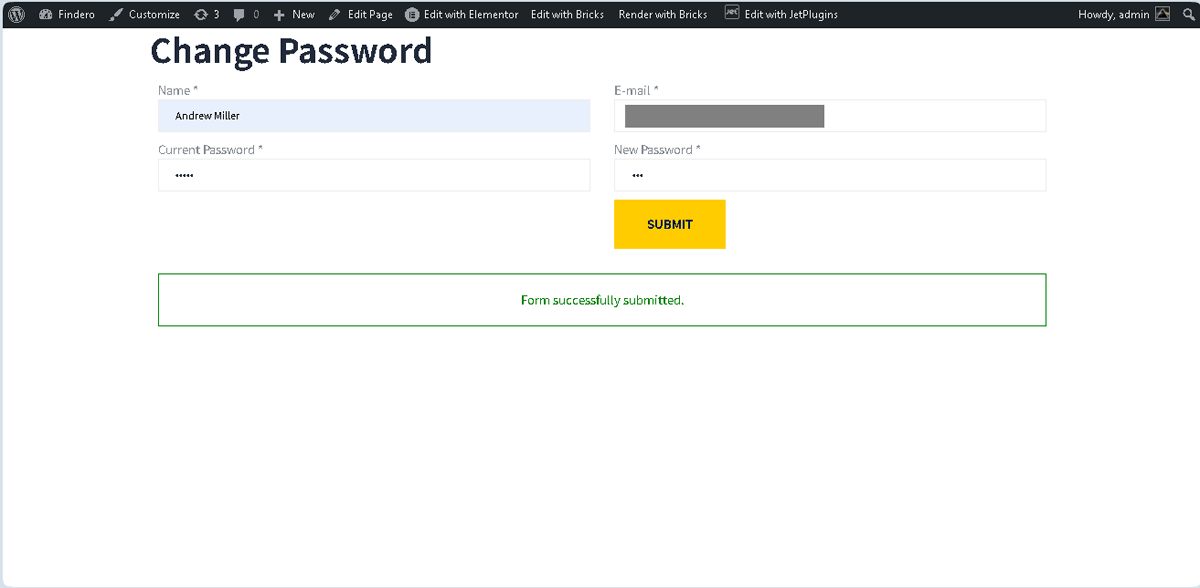
Publish the page once you have finished editing and view it on the front end.

update user form on the front-end

Once you click on the “Submit” button, check the results by navigating to the WordPress Dashboard > Users tab.

users updated user

The WordPress user role has been updated from subscriber to editor.

Register User Form

To add a new user while registration, we need to repeat some initial steps made while creating the Update User Form. Head to JetFormBuilder > Add New.

The form already contains Hidden, Text, and Submit Fields by default. You can delete the fields you don’t need.

adding a new jetformbuilder form

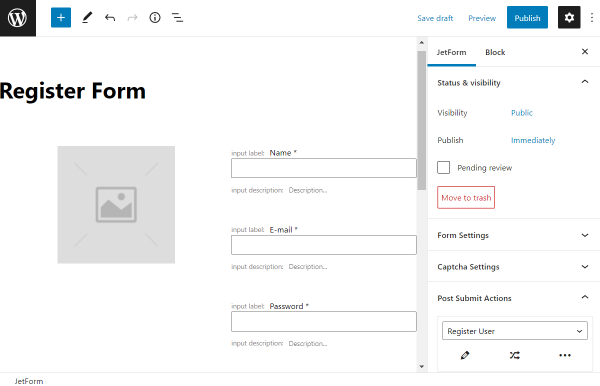
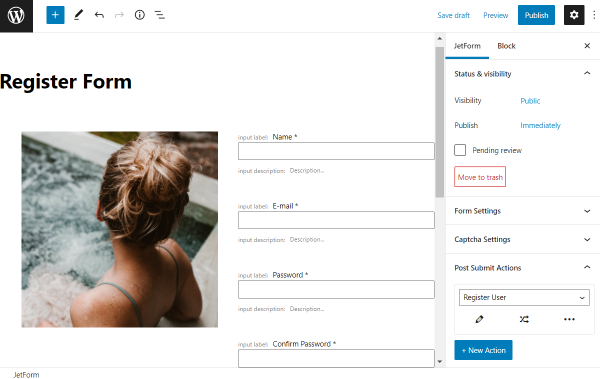
Give a title to the form and pick the needed fields by clicking on the plus-shaped button. Edit them and move on to the JetForm Settings. In the Post Submit Actions tab, choose “Register User.” Open the action editor by pushing the button under the drop-down menu.

register user form

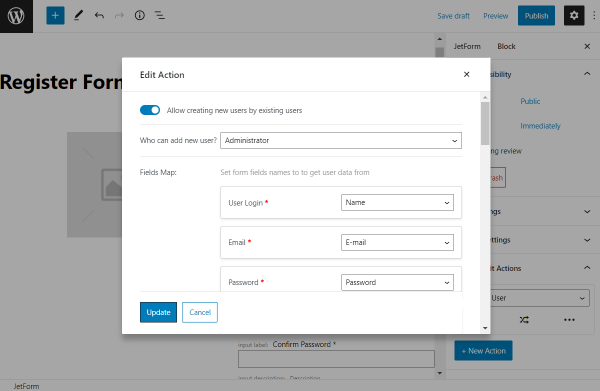
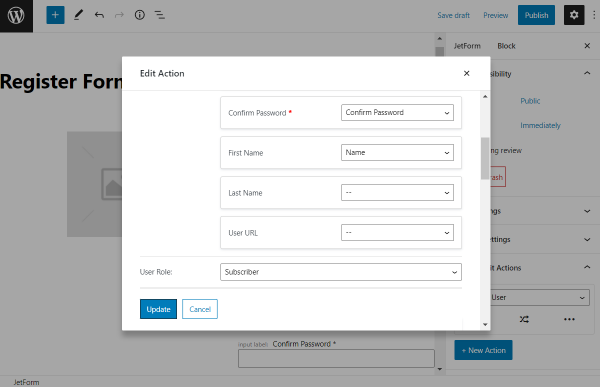
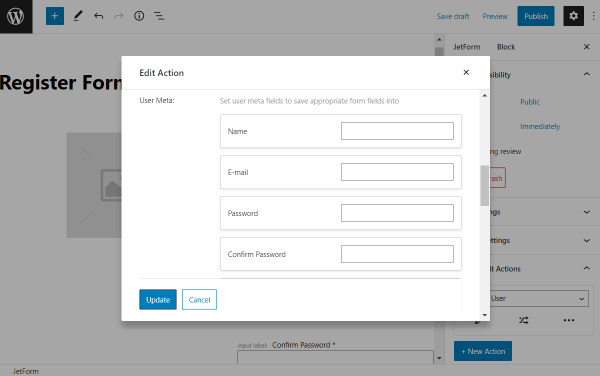
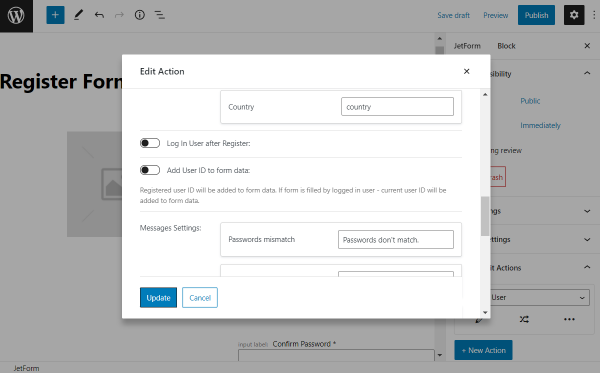
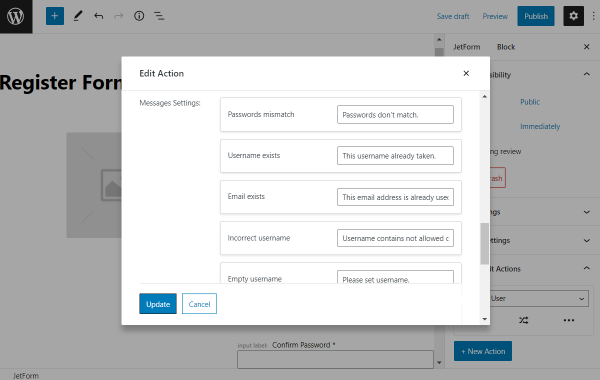
Firstly, you can toggle Allow creating new users by existing users and define who can add a new user. Select the corresponding field options in the Fields Map section and choose the role for a new user. Type in the other fields if needed. However, they are not necessary in this specific case.

edit register user action

Update the action and publish the form if everything is set accordingly. To apply the form to the page, go to Pages > Add New.

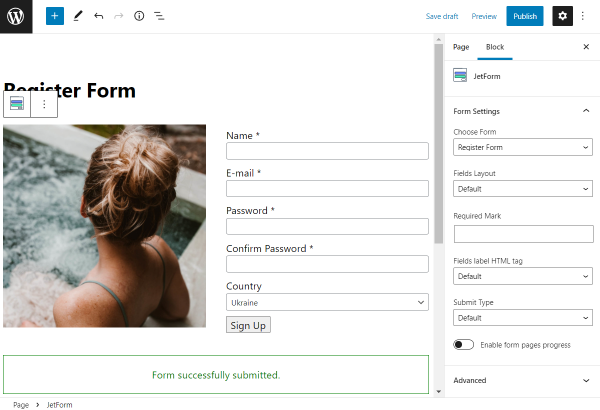
Place the JetForm block on the page and proceed to the JetForm Form Settings.

adding register user form on the gutenberg-edited page
  • Choose Form — pick the newly-created form;
  • Fields Layout — define in which way the field label and its bar will be placed, as “Column” or “Row”;
  • Required Mark — set the symbol displayed next to the required fields;
  • Submit Type — choose between “Page Reload” and “AJAX” options;
  • Enable form pages progress — toggle if you work with Form Break Field and want to apply a step indicator above the form.

Next are Advanced Settings that contain one field where you can put Additional CSS class(es) if needed. You can also use the JetStyleManager plugin to customize the form appearance while editing.

Once you have adjusted the settings, publish the page and check it out. 

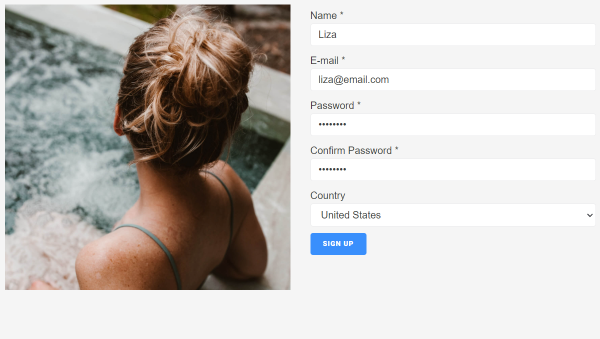
register user form on the front-end

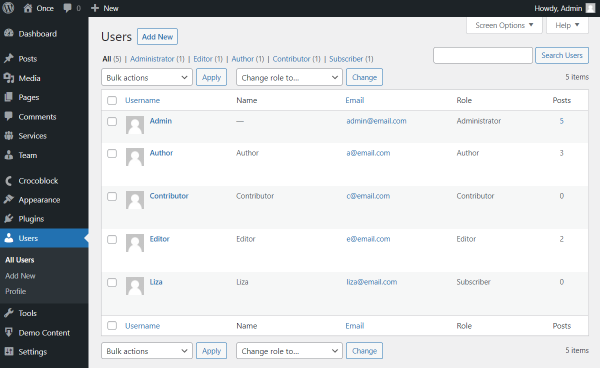
Click on the “Sign Up” button and go to the WordPress Dashboard to check if the user was created. Open Users > All Users.

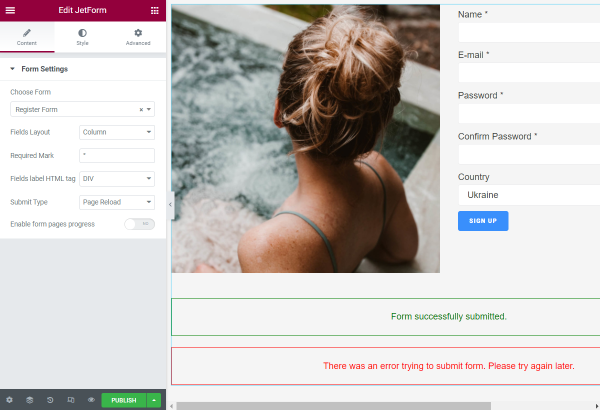
The new user has been created and displayed.

Now you know how to update WordPress user roles via JetFormBuilder forms using the “Update User” and “Register User” post submit actions.

Presently, all the services successfully work with email integration. Nevertheless, the email marketing profit is still questionable. The modern user subscribes to a large number of services and does not continuously check the inbox.

One of the most valuable choices is mass SMS messaging. People open them much more often than constantly sent emails. 

Common SMS Integration Use Cases

Order confirmation

It is widespread that users await the order confirmation. Otherwise, they may become nervous in expectation of the desired email. SMS notifications are displayed without additional settings and don’t confuse the customer.

Appointment reminder

An excellent opportunity not to lose clients is to remind them about their appointment. And it helps to save money because of not missing events.

Vital notifications

There is always something important to say. Do not waste the opportunity to have close contact with the clients and inform them about important news.

Discount programs

Send users discount codes that will activate limited offers. Such a campaign will interest the customers so they will not forget about the products you sell.

All these use cases can be implemented with the help of the steps described below.

Set Messaging Tool with Zapier

Many messaging tools provide website maintenance services. All of them have their exclusive features. However, if you have considered working with Twilio, this guide is for you.

Twilio is believed to be one of the best messaging services, according to Zapier. You can link JetFormBuilder forms to Zapier; read more about it in this overview.

Initially, start with the Twillio registration if you don’t have an account yet. Customize all the settings that will allow you to work with messages. Once you are registered, proceed to Zapier and make a registration there.

Push the “Create Zap” button. 

zapier create zap

Webhooks trigger event

Let’s set a “Webhooks by Zapier” option as the trigger. Note that this action works only with Zapier’s trial period or premium accounts. 

Set “Catch Hook” as the Trigger Event and click on the button to continue.

catch hook trigger event

Copy the Custom Webhook URL for setting an integration between the JetFormBuilder form and Zapier.

set up catch hook trigger

Navigate to JetFormBuilder > Forms. Create or open the form you want to integrate with Twilio Messaging Tool. 

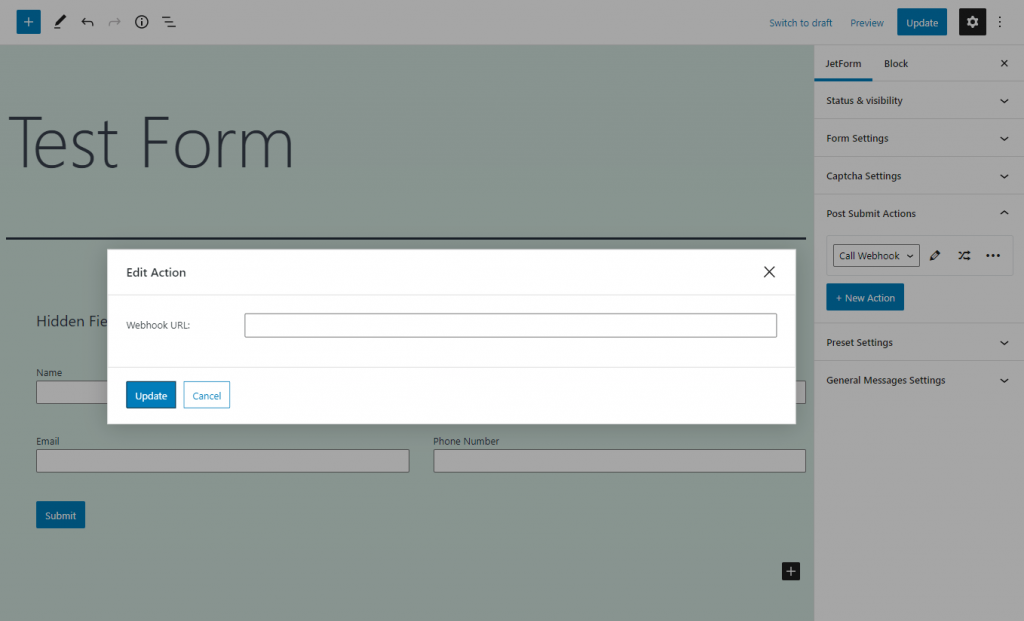
Open JetForm Settings and scroll down to Post-Submit Actions. Choose the “Call Webhook” option for Zapier integration.

order confirmation call webhook post submit action

Paste the Webhook URL and update the form. 

Proceed to the frontend to test the action. Fill in the form and click on the “Submit” button.

order confirmation form on the front-end

Fill in the form and click on the “Submit” button. Come back to Zapier and test the trigger.

test catch hook trigger

“Send Email in Gmail” action event

The following step is choosing the action event. Let’s set a “Send Email in Gmail” action. It is not necessary. However, in this way, you will get notifications about new orders.

send email in gmail action

Select the Gmail account to connect it with Zap. Continue to set up all the required fields to form emails that will be sent to Gmail.

choose account for send email in gmail action

Once the email has been sent, pick the subsequent action event for messaging.

test send email to gmail action

“Send SMS in Twilio” action event

Pick the “Twilio” option from the drop-down list and “Send SMS” as an action event. Click on the button to continue adjusting the settings and connect the Twilio account as you did before with Gmail.

choose send sms in twilio action

Set up the action by filling in the required information.

set up send sms in twilio action

If everything was set successfully, you should get an SMS sent to the number you put in the form.

test twilio action

As you can see, there is additional information before the custom text you have adjusted. It is displayed due to the setting Twilio Trial. However, if you have upgraded the account, there will be no extra notes.

twilio text message confirmation

Turn on Zap once you are ready. JetFormBuilder form integration with Twilio is ready. The message will now be sent every time after the form submission.

Mind that you are also free to use any SMS application that is compatible with Zapier.

Integromat is a free platform that allows you to connect apps (e.g., Gmail) and automate workflows using a no-code visual builder. Let’s find out how to connect a WordPress form to Integromat.

Set Up Integromat and Add Webhook

Sign in or sign up to the Integromat platform. After getting to the My Lab page, go to the Scenarios tab in the left-side menu and click on the “Create a new scenario” button in the upper right corner.

integromat create a new scenario

Hit the big plus button and choose the Webhooks module from the list of tools. A Webhook in web development is a method of augmenting or altering the behavior of a web page or web application with custom callbacks. More about the Custom Webhook you can find out in this Integromat tutorial.

webhooks on the new scenario integromat page

Then you’ll see the list of triggers and actions. You need to choose the Custom webhook option.

custom webhook

Click on the new Webhooks module. Hit the “Add” and “Save” buttons to enter the name for the Webhook.

webhook name addition

After that, you will see the generated link, which you should copy to the clipboard. Then proceed to your WordPress website without closing the Integromat window.

re-determine data structure

Set Up the JetFormBuilder Form

Navigate to WP Dashboard > JetFormBuilder > Forms, find the form you want to connect with Integromat, and change a default “Send Email” Post Type Action to “Call a Webhook.” Click on the “Edit” button and paste the URL address to the field. Update the Post Submit Actions and WordPress form by clicking on the similarly named buttons.

call webhook post submit action

Navigate to the front-end page with that form and submit it. After that, you should see the green note – “Successfully determinated” – in the Webhook. Hit the “OK” button.

Adding Another Module

With the Webhook in the Integromat, you could connect any app to the WordPress form. For example, let’s attach the Gmail app. Hit the “Add anoter module” button, add the Gmail module and then pick the Send an email action.

Click the “Add” button near the Connection bar and connect Integromat to your Gmail account. You also need to define the email address for the letters to be sent To, their Subject, Content, and Attachments. To fill the bars, you can use the data users will put into the form fields; just choose the ID of a particular field. Push the “OK” button.

Gmail connection

If you need to connect two or more modules to the Webhook, use the Router. Click on the wrench icon between the Webhook and Gmail modules and unlink the connection. In the Tools panel, click on the “Flow Control” button. Drag and drop the Router module and connect it with other modules. Now you can add more apps to the Scenario.

router module

To run the activated scenario, you could set up the schedule. Enable the Scheduling toggle at the bottom left corner and push the “Schedule setting” icon. You can read more about it in the Integromat article and choose the most appropriate option.

run the scenario

That’s it. With Integromat,  you can add as many apps as you want to the WordPress form.

Managing the form results can be a challenging task. Though if you work with Zapier and JetFormBuilder, it should be much easier. Let’s find out how to connect WordPress form to Zapier.

Create a Zap

Sign up for a Zapier account or open the one that already exists. Click on the “Make a Zap” button to start working on the connections.
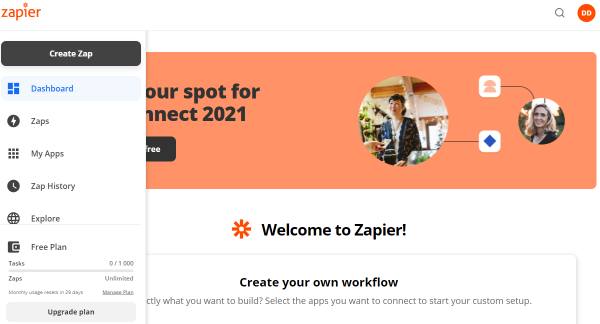
zapier dashboard

Name a Zap, and let’s begin. There are two main steps that define a Zap. Firstly, you need to pick a Trigger Event and then an Action that will be performed.

Choose the first trigger. You can do it by typing its name in the search bar. Add Webhooks by Zapier and choose “Catch Hook” as a Trigger Event. It is essential if you want to connect your form to the Zapier. Click on “Continue.”
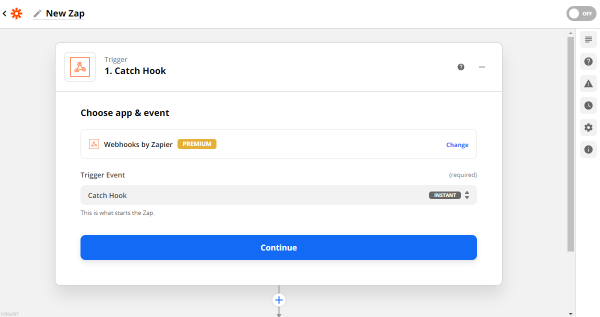
catch hook trigger event

Copy a Custom Webhook URL to conjoin it to the form.
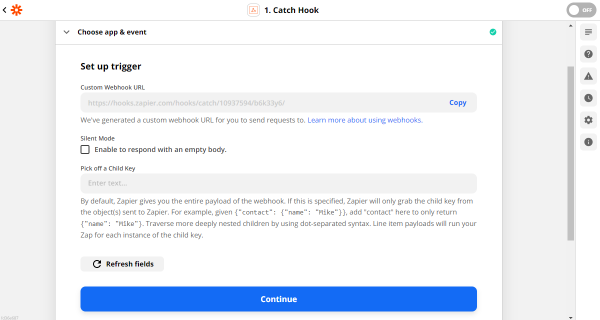
set up catch hook trigger

Connect a Zap to the Form

Navigate to the WP Dashboard > JetFormBuilder > Forms, find the form you want to connect with Zapier, and change a default “Send Email” Post Type Action to “Call a Webhook.” Click on the “Edit” button and paste the URL to the field. Update the Post Submit Actions and WordPress form by clicking on the similarly named buttons.
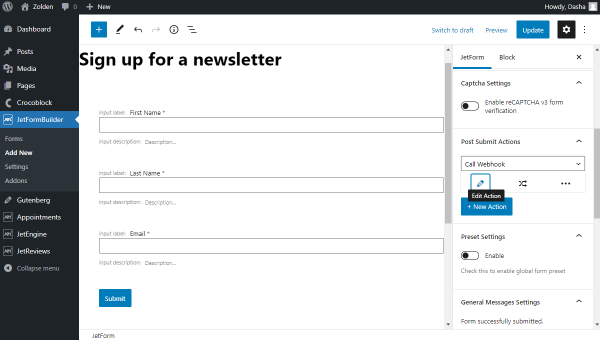
call a webhook post submit action

Add this form to the page if you haven’t done it yet and go to the front-end. Fill in the fields and submit the form. Note that you do this for Zapier integration testing, so type in a valid email to which you have access.
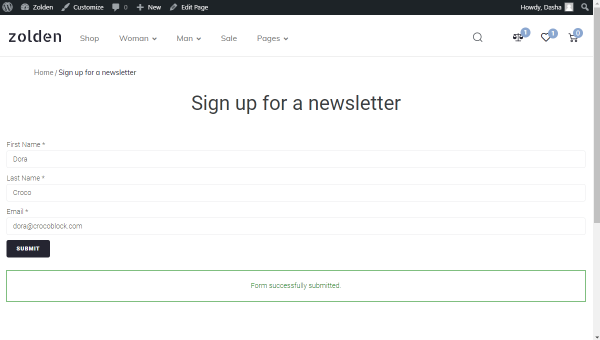
submitting a form front-end test

Go back to the Zap editing. The next step is the Test trigger. That is why we needed to fill in the form.
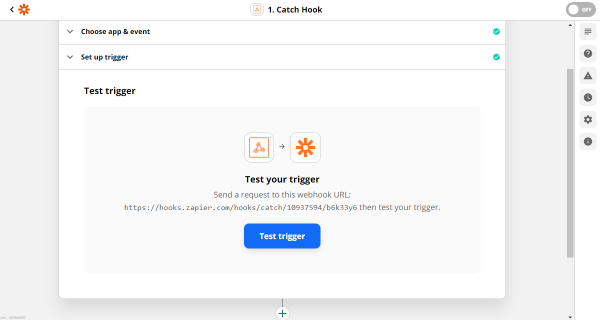
test catch hook trigger

When the connection is established, click on the “Continue” button. Now we have learned how to connect WordPress form to Zapier.

Set an Action

Select the app that will perform an Action. For instance, we will choose Gmail and arrange “Send Email” as an Action Event.
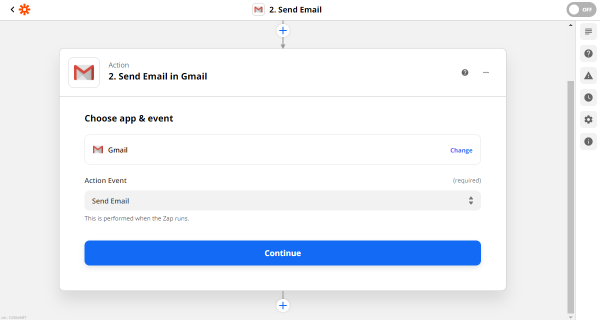
gmail action in zapier

Choose a Gmail account. To link a new Gmail, click on “Connect a new account” and type in all the required credentials.

Then you can set up action by putting all the data about where to send an email, the email address that will send this letter, and other fields like From Name, Reply To, Subject, Body, and so on.
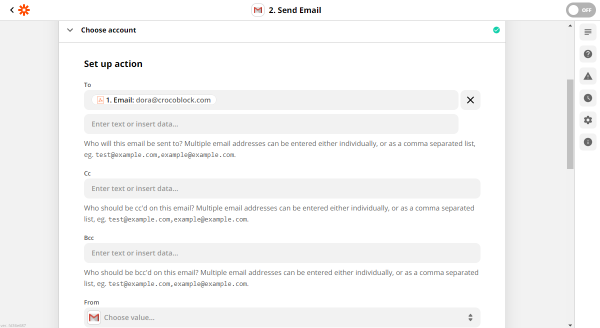
gmail set up action

When the desired fields are input, you can send a test email to check WordPress integration with Zapier in action. You can check this letter on the email you have put in the To field.
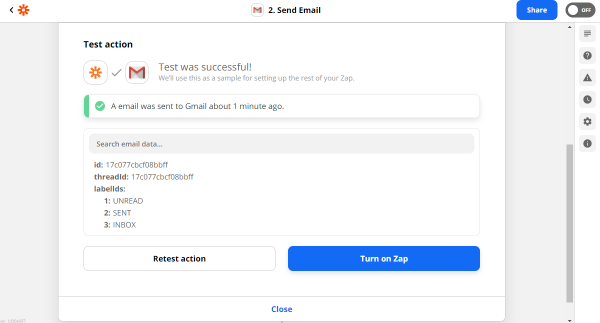
gmail test action

Now just hit “Turn on Zap,” and it is ready. The WordPress integration with Zapier completely works.

However, note that you can add more than one action. So if you want to set some other events, just go back to the Zap editing and choose one more app. 

That is why Zapier integration makes form management simple. For example, you can connect a MailChimp account, work with Google Calendar, or use Google Sheets for better productivity at the same time.

Furthermore, watch our video and learn how to integrate Zapier with the JetEngine forms to create similar form integrations.
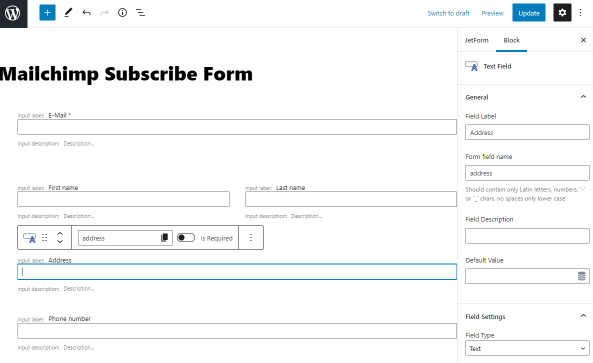
MailChimp is a service that helps you manage email notifications and a list of user emails. With the MailChimp Post Submit Action, you can connect the JetFormBuilder form and the MailChimp service. The data that users insert into the form will be transferred to the application, and you will be able to use it there.
If you still don’t have a MailChimp account, please, feel free to check this tutorial. It provides detailed instructions on creating an account and finding out your MailChimp API key and Audience ID.

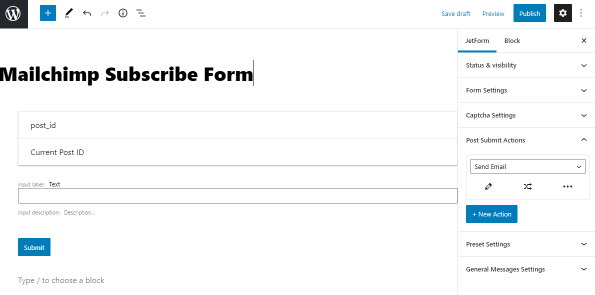
To create a MailChimp Subscribe Form in WordPress, head to JetFormBuilder > Add New. Give a name to the form and delete the default post_id field since we don’t need it.

add a new form

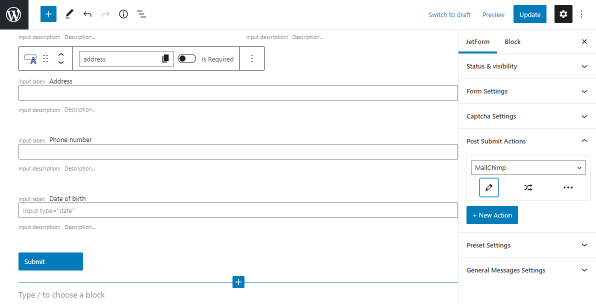
Add new fields manually or use the Subscribe Form Pattern. It is the list of fields that you can create and later connect to the MailChimp:

  • Text Fields:
    • for Email is required;
    • for first\last name, address, phone can be added if you wish;
  • Date Field for date of birth.
create new fields

Then open the JetForm tab and proceed to the Post Submit Actions section. Set the type to MailChimp and click on the “Edit Action” icon.

post submit action mailchimp

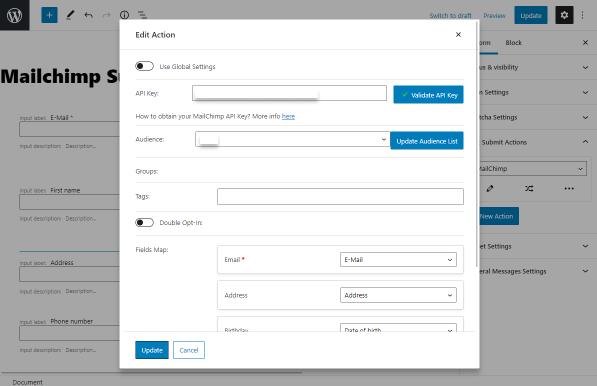
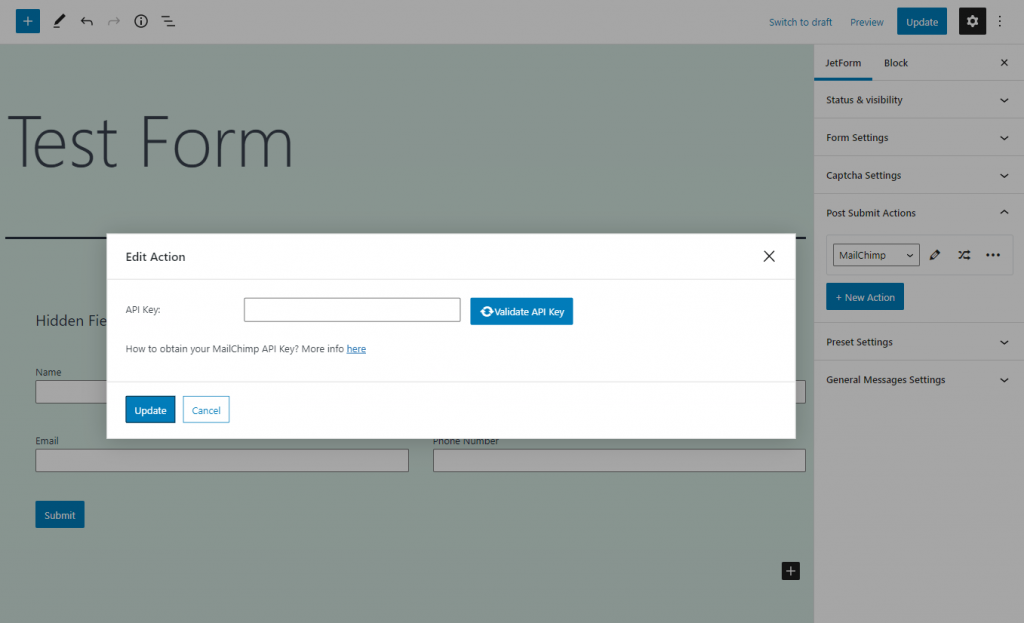
In the newly appeared window, you should input your MailChimp API Key.

edit action window

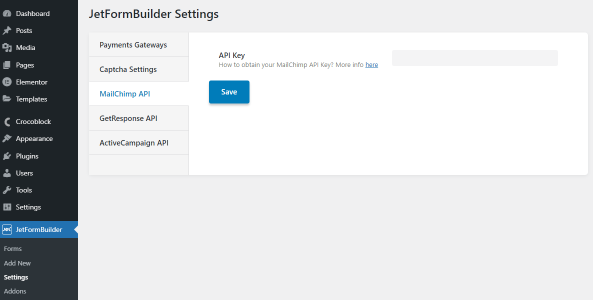
You can paste it manually or enable the Use Global Settings toggle. If you pasted the MailChimp API Key in the JetFormBuilder Settings, it appears automatically. Then hit the “Validate API Key” button.

jetform builder settings

If the operation is successful, you will see the new “Audience” field. Select the Audience name that you have input on the MailChimp website. If you have added another Audience and don’t see it in the list, click on the “Update Audience List” button.

After you set the Audience, more fields will appear:

  • Groups. If you have created them in the Manage contacts tab on the MailChimp website, your groups should appear in this field;
  • Tags. You can input here tags, which you have created on the MailChimp website;
  • Double Opt-in. Enable this toggle in case you want the contacts to receive an opt-in confirmation email when they subscribe to your list;
  • Fields Map. There is a list of fields where users can enter their data, which can be attached to the MailChimp website. In that drop-down, you can choose appropriate fields from the form. The Email field is required.
validate api key

After customizing all settings, “Update” the Edit Action and “Publish” or “Update” the form.

The next step is adding the form to a page. To obtain the information on how to do this, follow this link.

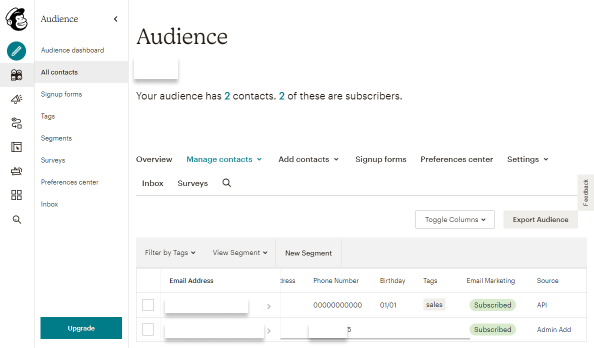
When users subscribe with your form, you can see all information about them on the All contacts tab.

subsribed audience

That’s it. Now the users’ data will be transferred to the MailChimp website.