This overview describes the “Add to Data Store” Post Submit Action settings and how to apply this action to the JetFormBuilder form on the WordPress website.

Table of Contents:

Module Activation

Before starting, one should ensure that the JetEngine plugin is installed and activated on the website and that the “Data Store” module is enabled in its settings. 

To do so, one should navigate to the WordPress Dashboard > JetEngine > JetEngine > Modules tab and check if the Data Stores toggle is enabled in the Default Modules section. 

Once the changes have been made, the “Save” button should be clicked.

data stores module activated

Data Store Creation

Next, the data store should be built. It can be done in the WordPress Dashboard > JetEngine > JetEngine > Data Stores tab.

Here, the “New Store” button should be clicked in order to build a store. More information about the Data Stores settings can be found in the Data Stores Overview.

For example, in this guide, the “Favorite Jobs” data store with the “User Metadata” Store type will be used.

data store creation section

When the data store settings are adjusted, one should click the “Save” button.

Form Creation

To build a form, one should proceed to the WordPress Dashboard > JetFormBuilder > Add New Form.  

After naming the form (here, “Add to Data Store Form”), one will see the Welcome block. If not needed, it can be deleted to build a form from scratch.

add to data store form title

The first field added to the form should be the Hidden Field with the “Current Post ID” FIELD VALUE. One can change the FORM FIELD NAME if needed; we leave it as it is.

post id hidden field in the add to data store form

The following field will be the Action Button, which will serve as the “Add to Likes” button, so the name is changed correspondingly.

add to likes submit button

Next, one should proceed to the JetForm tab and click the “New Action” button.

In the Add new action pop-up, one should search for and click on the “Add to Data Store” action to open its settings.

add to data store action

In the DATA STORES dropdown, the previously built data store should be selected.

the first part of the edit add to data store action pop-up

In the following GET POST ID FROM FIELD dropdown, one should pick the Hidden Field’s name that stores the post ID.

the second part of the edit add to data store action pop-up

When the form is ready, the “Publish” button should be clicked.

Placing the Form on the Page/Template

After that, the built form should be placed on the needed page/template. For example, we place the JetForm widget onto the Single Page template of the Custom Post Type we work with (“Jobs (Vacancies)”).

NOTE

The described functionality is available if the JetThemeCore plugin is installed and activated.

In the JetForm settings, one should select the just-built form in the Choose Form dropdown field and adjust other settings if needed.

jetform widget in the elementor template

When the page/template is ready, one should press the “Publish” button.

Creating the Listing with the Saved Posts

Next, we want to display the jobs that users have liked in the Listing Grid.

So, initially, the listing item should be built in the WordPress Dashboard > JetEngine > Listings/Components directory. 

When the “Add New Item” button is clicked, the Setup Listing Item pop-up appears. Here, we leave the default “Posts” Listing source, select the “Jobs (Vacancies)” CPT in the From post type dropdown list, set the Listing item name, and pick the “Elementor” Listing view.

Once done, the “Create Listing Item” button should be pressed.

setup listing item pop-up

When the listing item editor is opened, it should be filled with content. For example, the listing template we work with contains the Dynamic Image, Dynamic Field, Dynamic Terms, Dynamic Link, and Button widgets.

dynamic link widget in the listing item

When the listing item is completed with data, the “Publish” button should be hit.

Building a Query for the Listing

Now, the query for the built listing should be adjusted with JetEngine’s Query Builder. This query will help to show only the items added to the data store in the listing.

The query can be built in the WordPress Dashboard > JetEngine > Query Builder directory by clicking the “Add New” button.

In the General Settings section, one should complete the Name of the query (here, “Saved jobs”) and select the Query Type. In the described case, we work with the CPT, so the default “Posts Query” type should be left.

query builder general settings section

After setting up the General Settings of the query, one should proceed to the Posts Query.

Here, we select the Post Type we work with and set the Post Status to “Published (publish)”.

query builder general tab

Then, one should open the Post & Page settings tab and click the “Dynamic Tags” button next to the Post In field. 

In the list, one should search for the “Get store” option and click it to open its settings. In the Store field, the needed data store should be selected, and the “Apply” button should be clicked.

query builder post and page tab

Other changes can be applied to the query if needed, and once done, the “Add Query” button should be clicked.

Adding the Listing to the Page/Template

Now, the queried listing should be displayed on the page/template. We want to place it on the user’s account page

So, initially, the Elementor template should be created in WordPress Dashboard > Templates > Saved Templates.

In the opened pop-up, one should select the “Page” option in the Select the type of template you want to work on dropdown and complete its name in the Name your template field.

To proceed to the editor, the “Create Template” button should be clicked.

new elementor template

In Elementor, a Listing Grid widget should be added. 

In the General settings, one should select the Listing previously created. 

Other widget settings should be adjusted as well if needed.

listing grid general tab

Now, it’s time to apply the built query to the listing. It can be done in the Custom Query tab.

Here, the Use Custom Query toggle should be activated. Then, the Custom Query should be selected.

listing grid custom query tab

After all the changes have been made to the template, one should press the “Publish” button.

Now, the built template should be assigned to the user account by following the WordPress Dashboard > JetEngine > Profile Builder > Account Page tab and pressing the “Add New Subpage” button.

Here, the Title and the Slug of the subpage should be completed, and the just-created template should be assigned. Other settings can be adjusted as well, and when ready, the “Save” button should be clicked.

saved jobs account page

Submitting the Form

Everything is ready, so users can proceed to the frontend of any single page and press the “Add to Likes” button.

add to likes form on the front end

Checking the Result

Now, if the user navigates to their Saved Jobs page on the account, the list of the liked jobs will be displayed.

saved jobs in the user account

That’s all about the “Add to Data Store” Post Submit Action available as a part of the JetFormBuilder and JetEngine plugins functionality for WordPress websites.

Learn how to customize the confirmation message in the JetFormBuilder WordPress plugin to match your form’s purpose and branding. This guide will show how to edit the text itself, adjust the design in Elementor, display the message inside a pop-up if needed, and completely hide the default message. Whether you want to modify the wording or change the way the message is presented, you will find practical steps here.

Table of Contents:

Customize the Text of the Confirmation Message

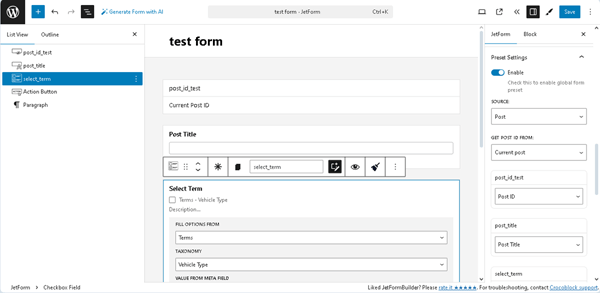
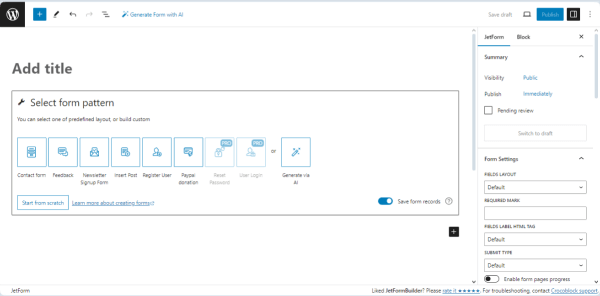
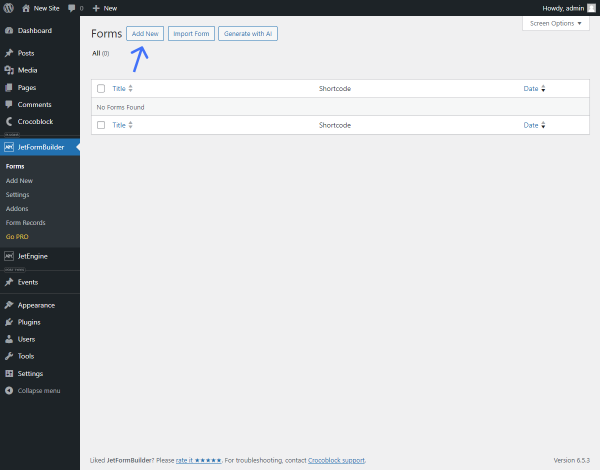
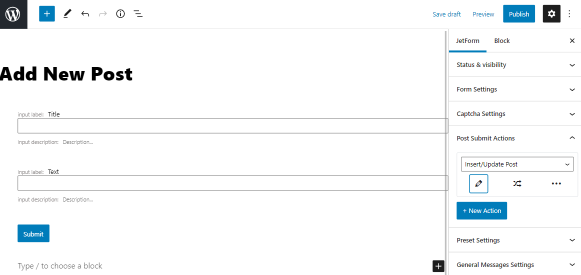
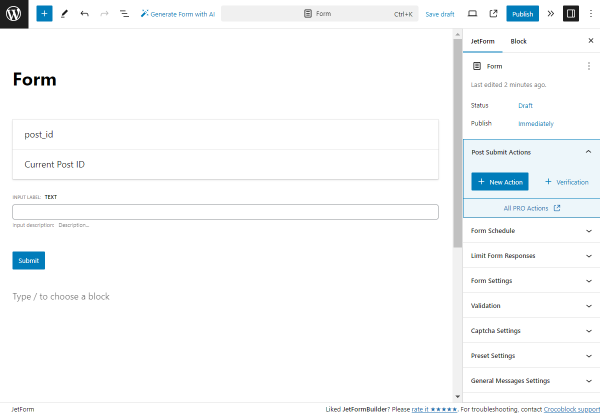
To build a WordPress form, we navigate to WordPress Dashboard > JetFormBuilder > Add New Form

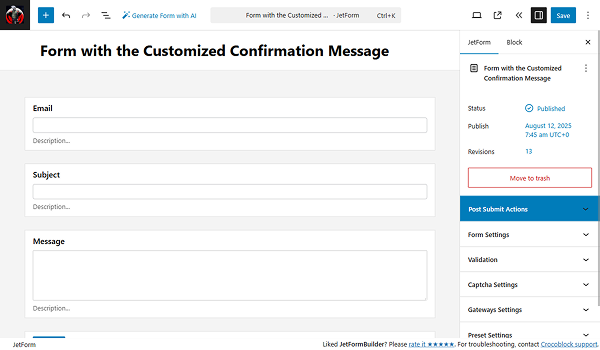
Enter the form’s title.

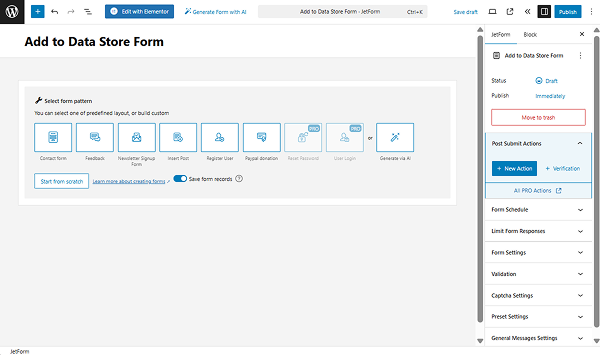
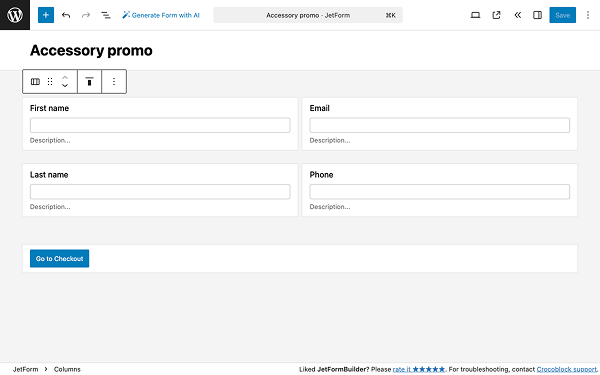
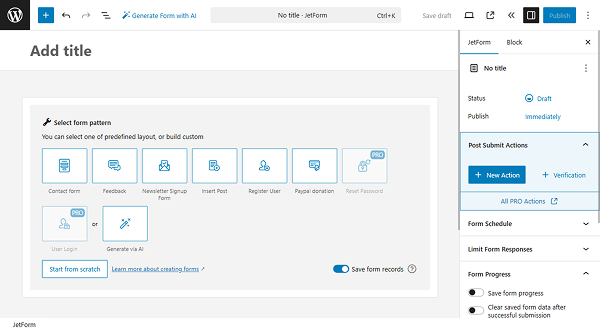
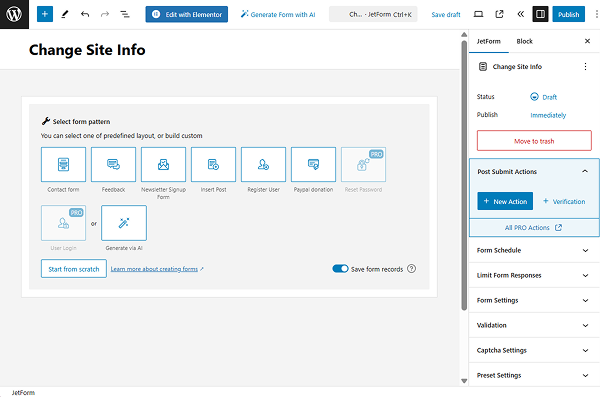
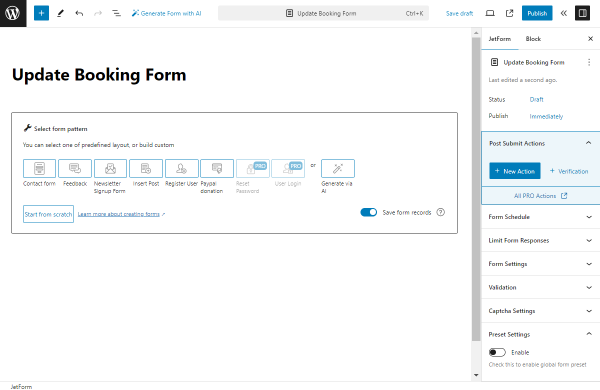
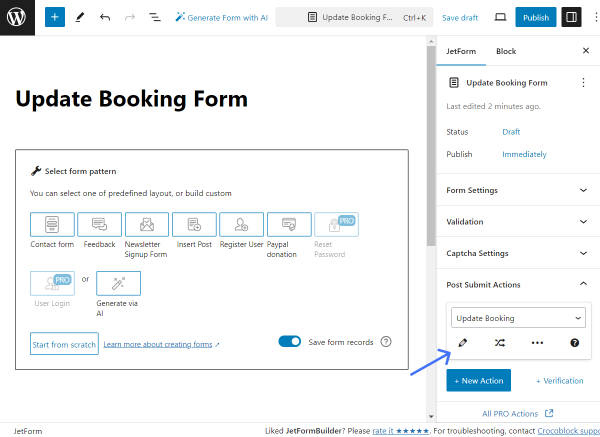
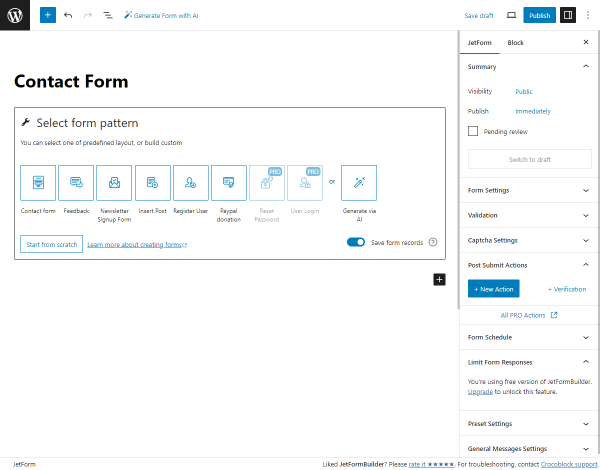
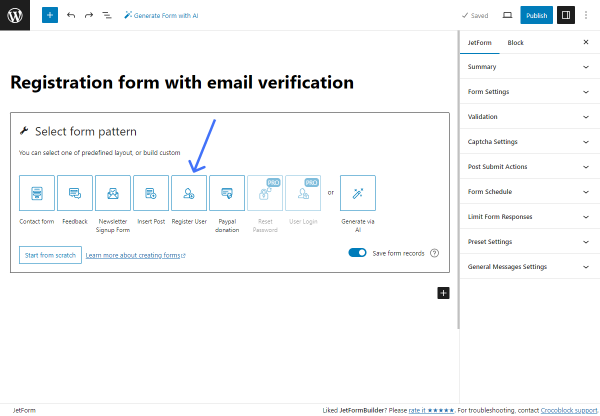
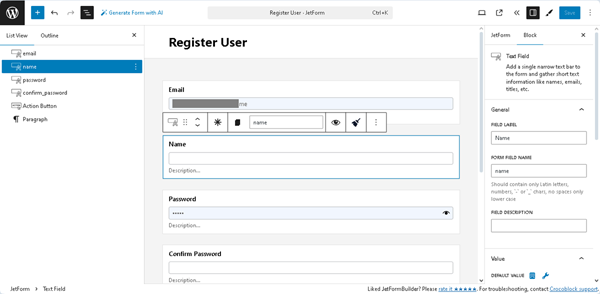
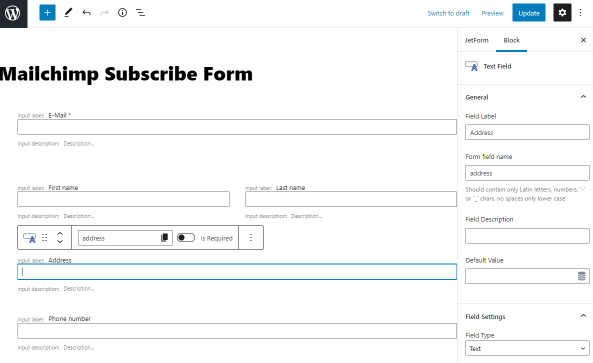
The Welcome block appears by default. From here, you can select a form pattern or generate a form with OpenAI. Otherwise, you can hit the “Start from scratch” button and delete the three fields added by default to begin anew.

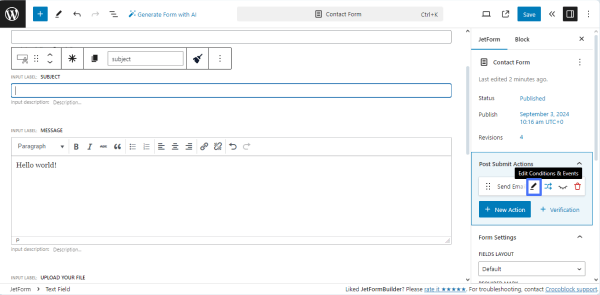
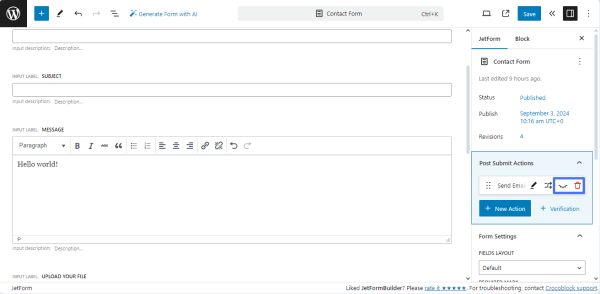
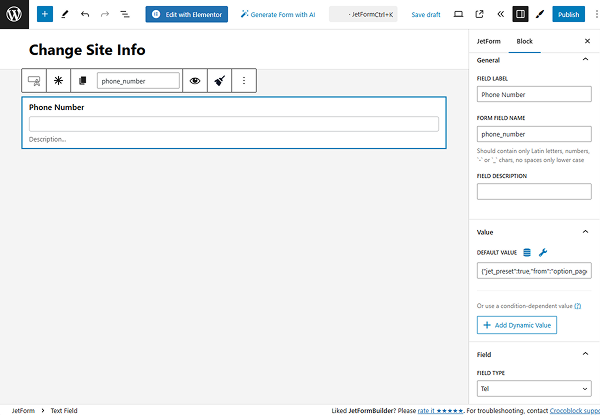
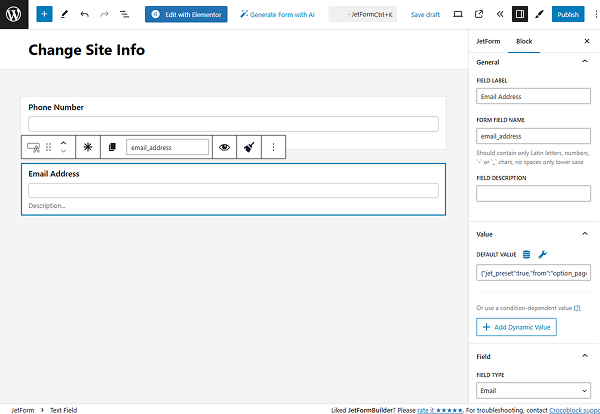
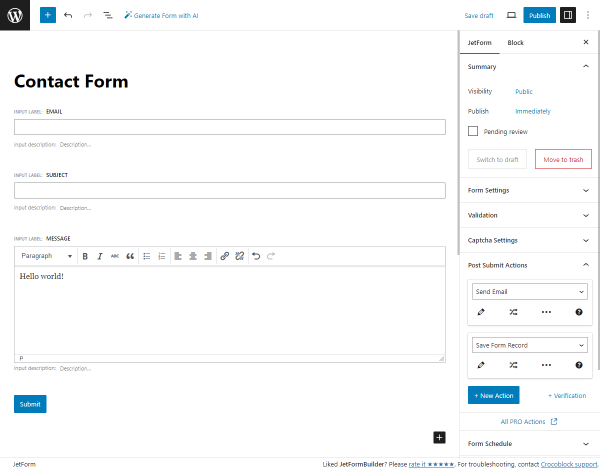
In this case, we select the “Contact Form” pattern. 

contract form added

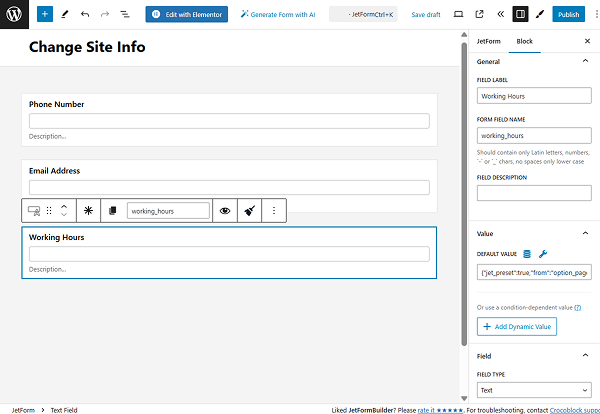
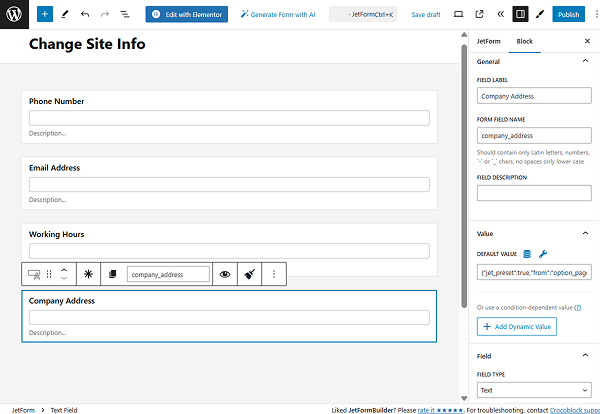
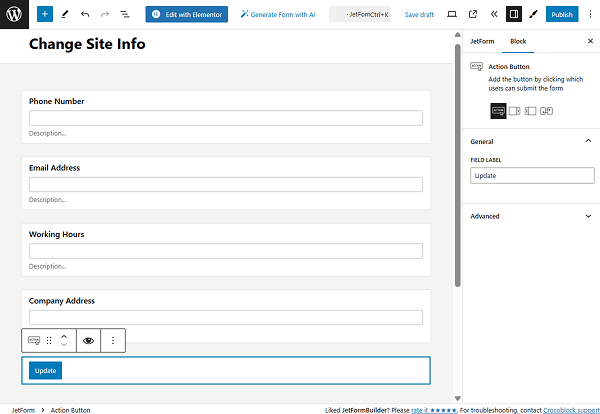
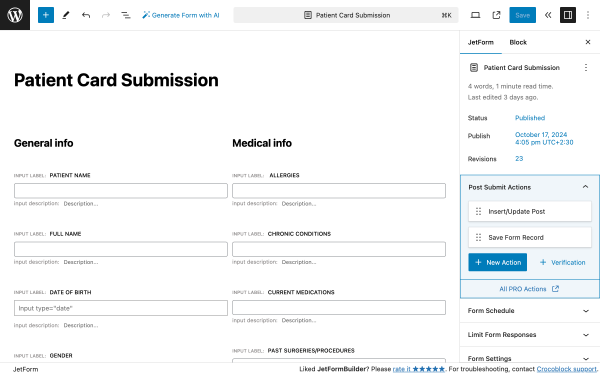
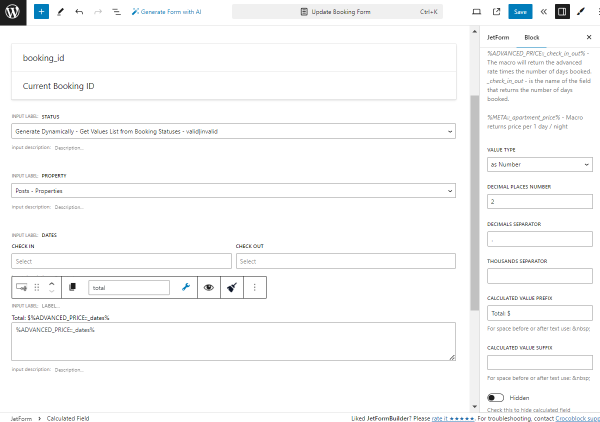
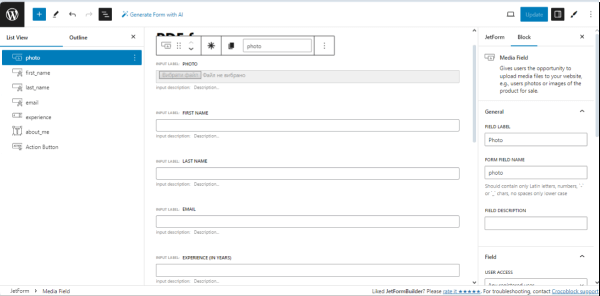
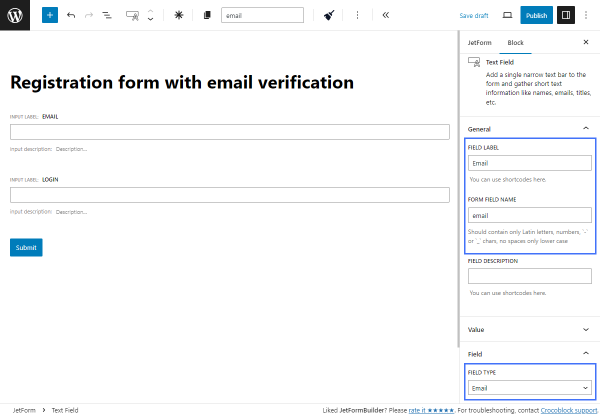
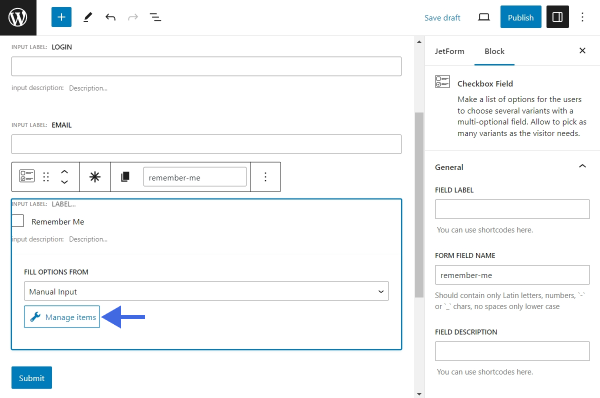
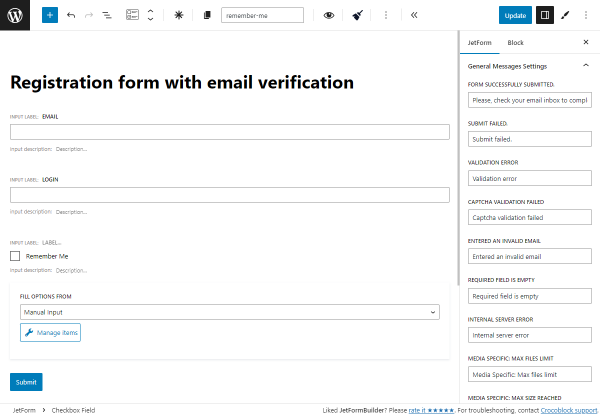
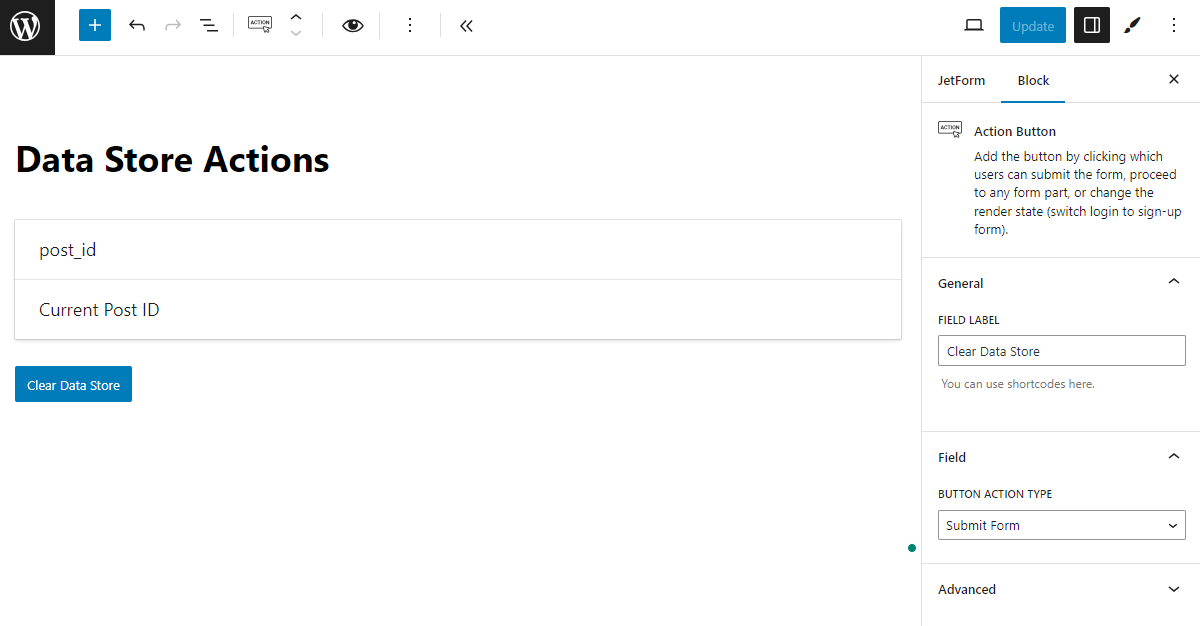
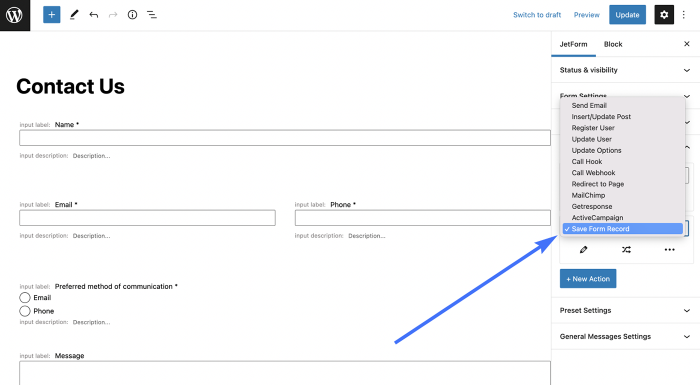
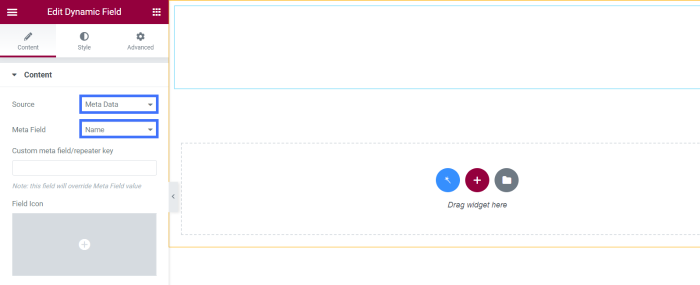
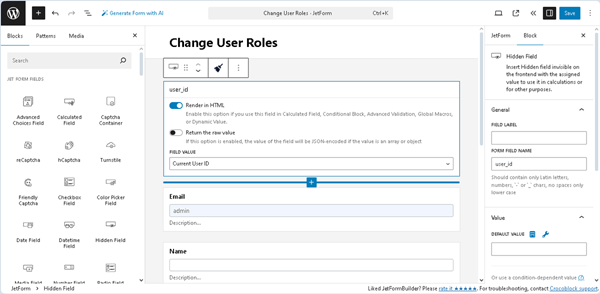
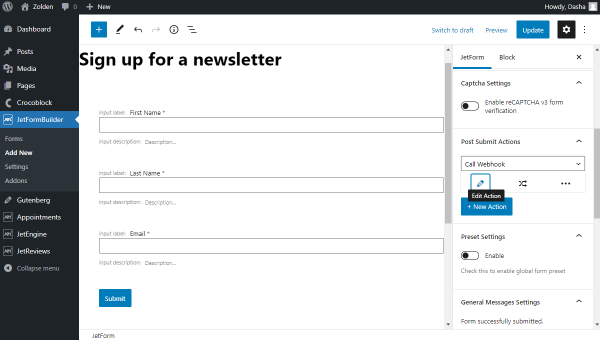
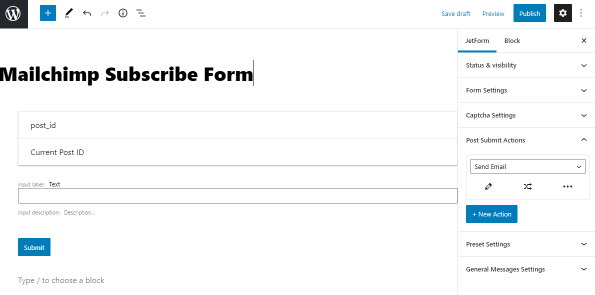
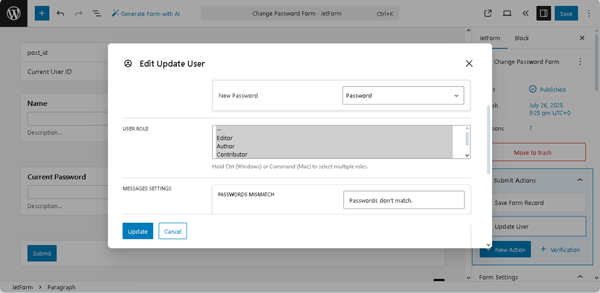
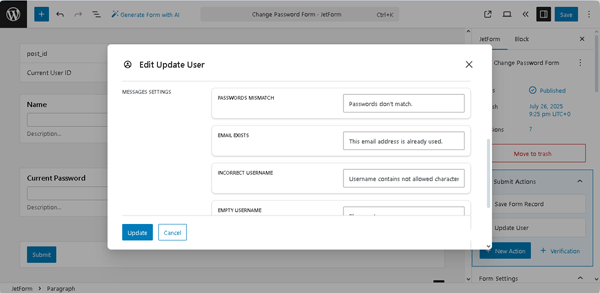
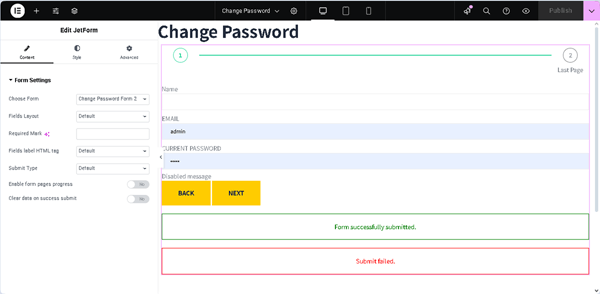
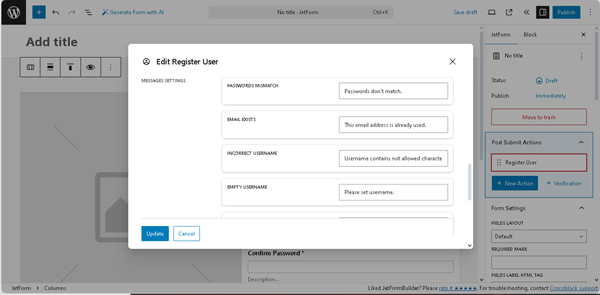
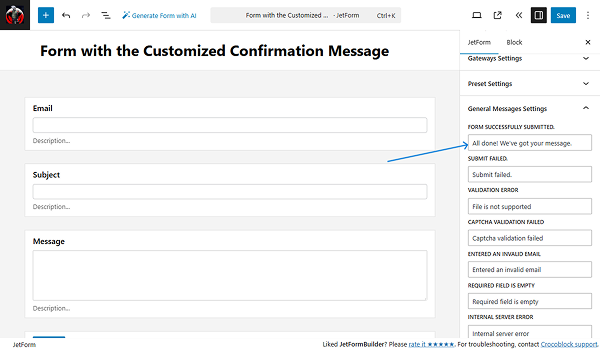
In the right-side settings tab in the General Messages Settings section, you can see the list of all the messages. Here you can set up the desired text for any of them. 

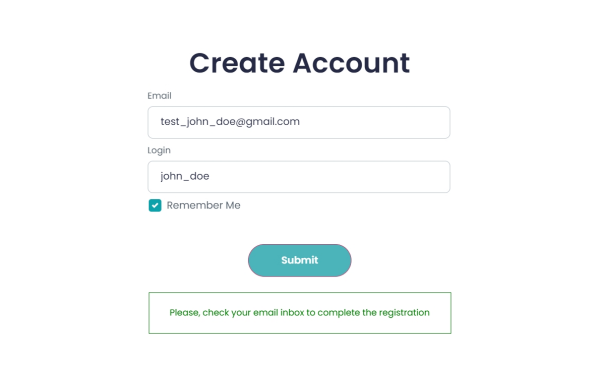
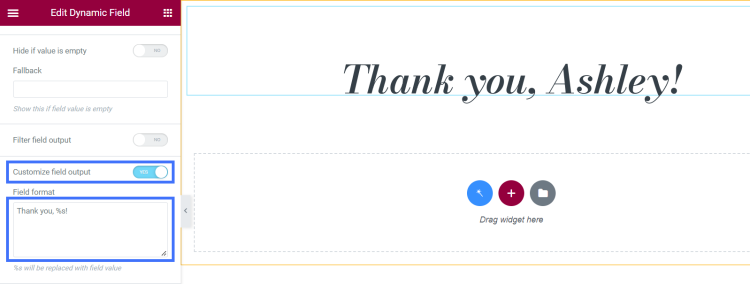
Let’s change the FORM SUCCESSFULLY SUBMITTED message to “All done! We’ve got your message.”

form successfully submitted message is changed

When you set all the needed messages, click the “Save” button. 

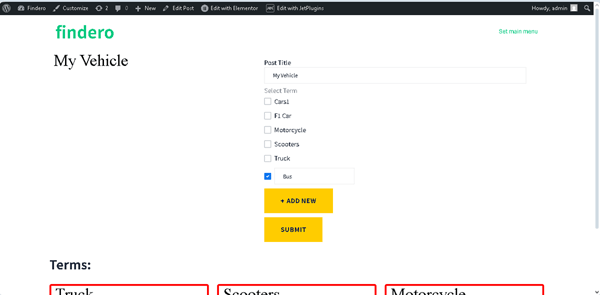
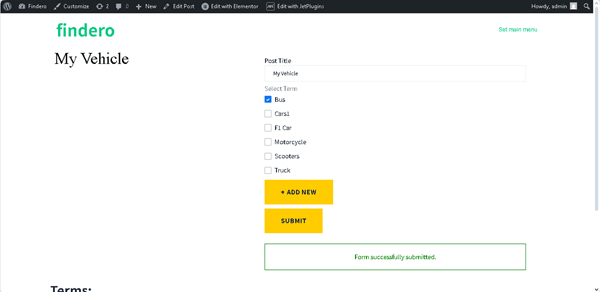
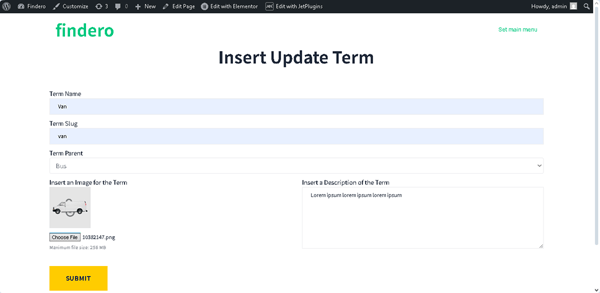
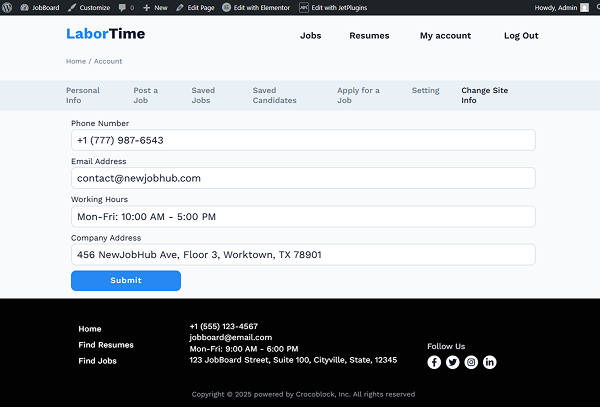
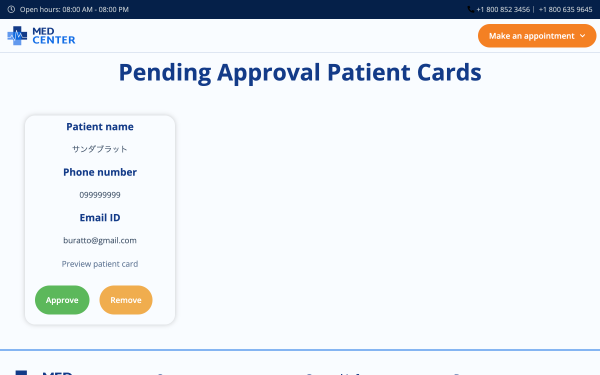
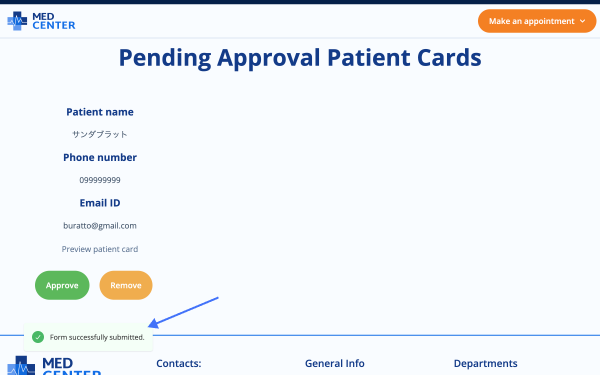
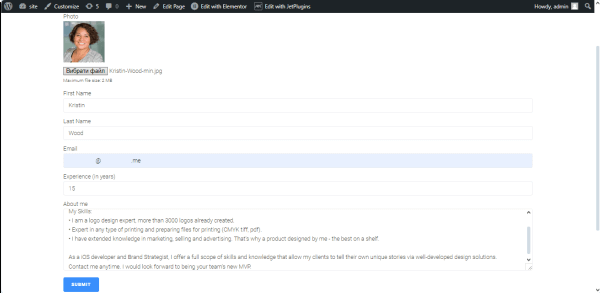
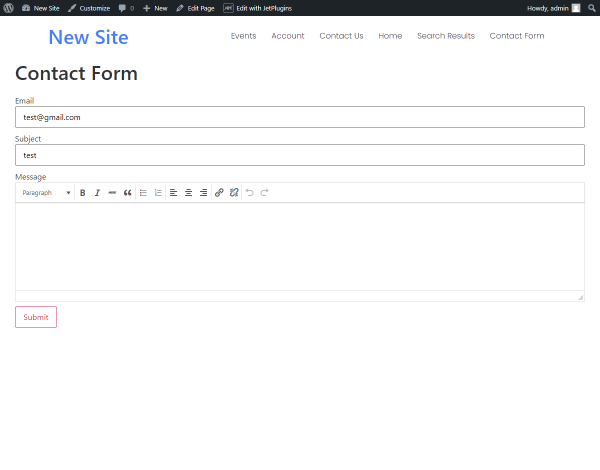
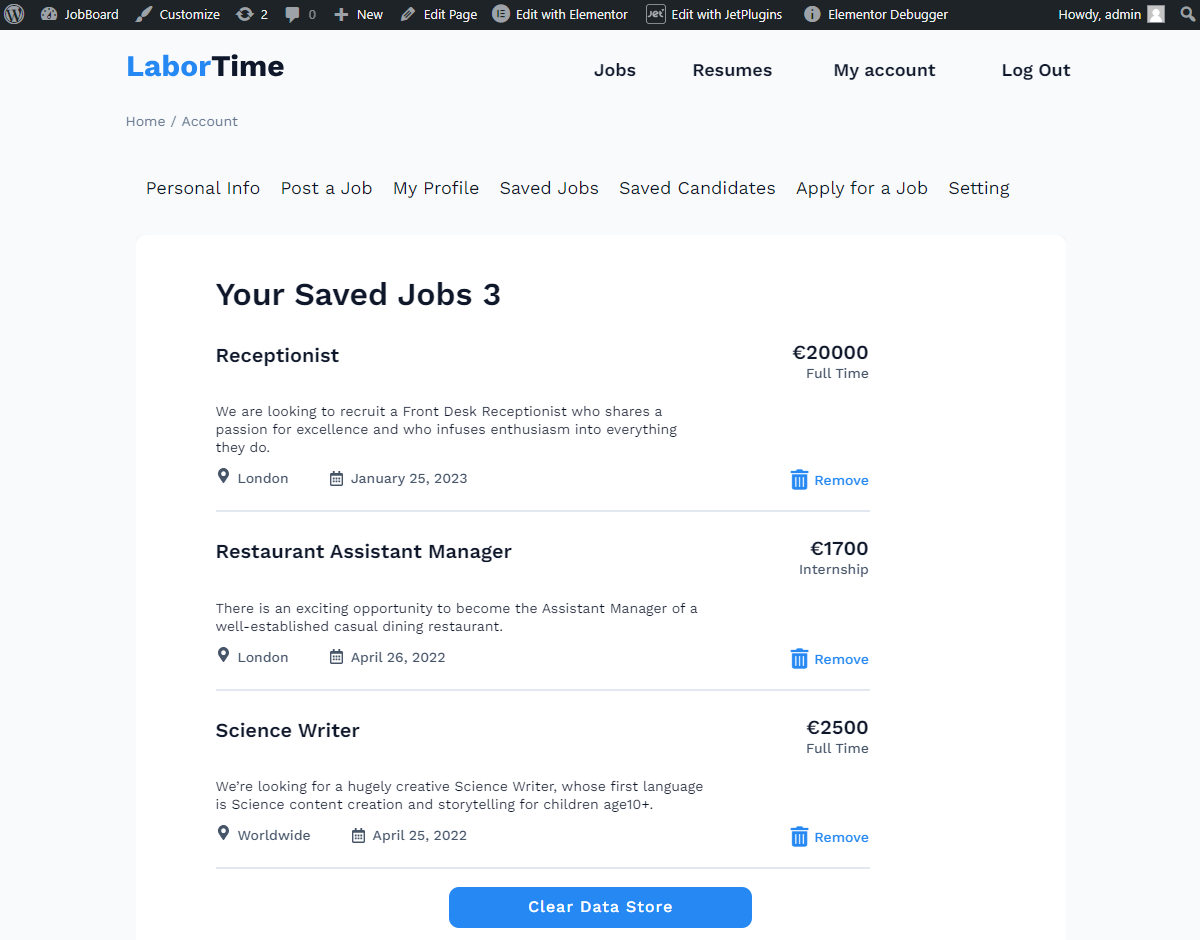
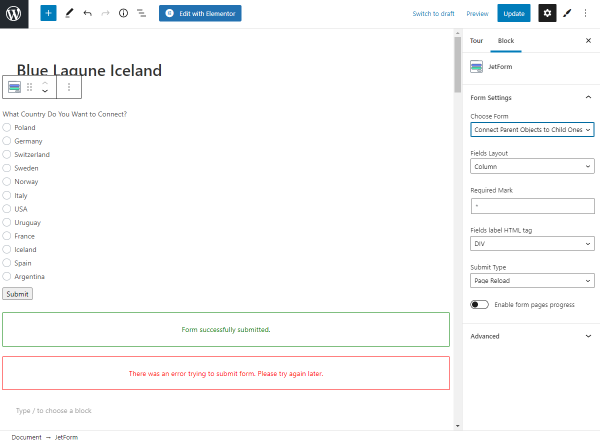
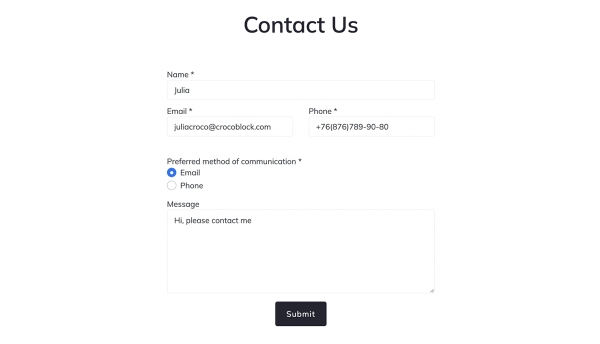
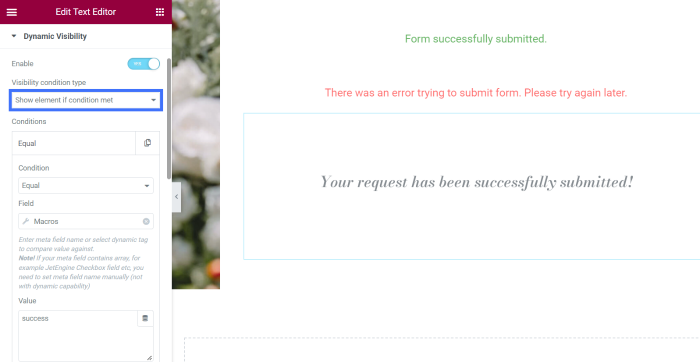
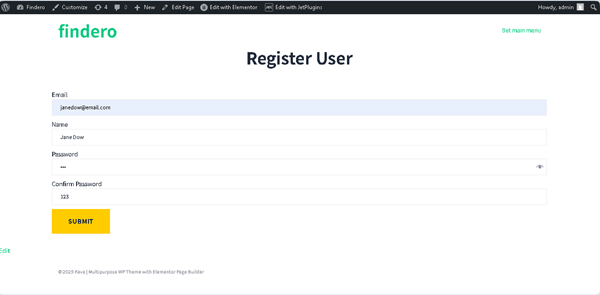
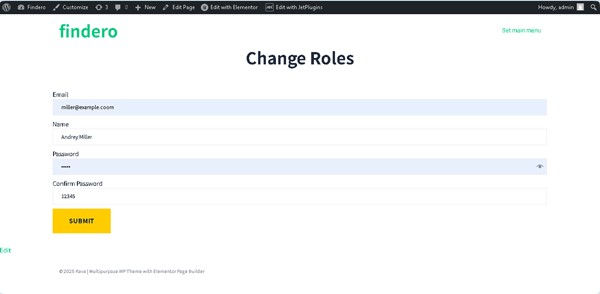
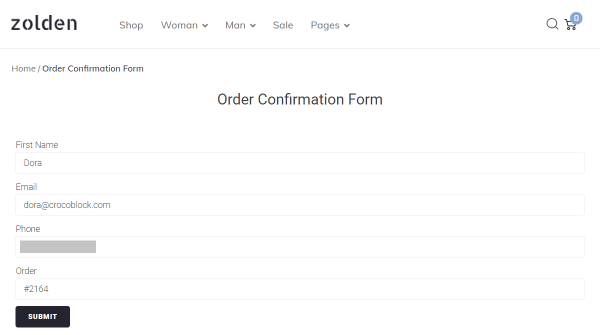
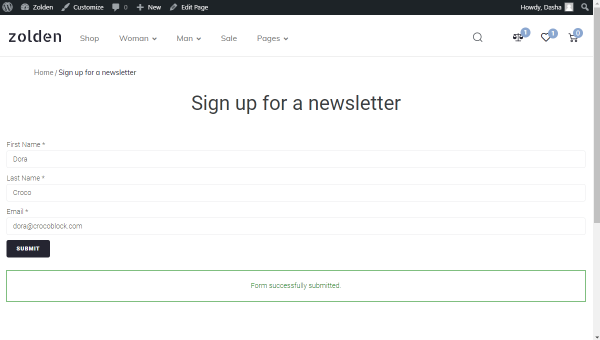
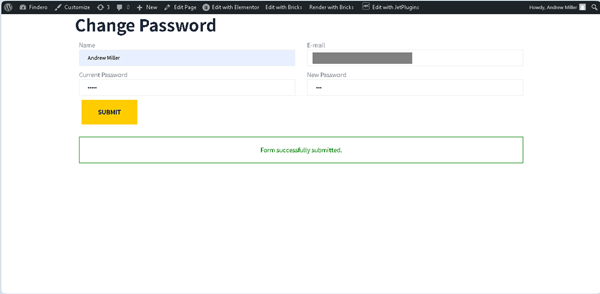
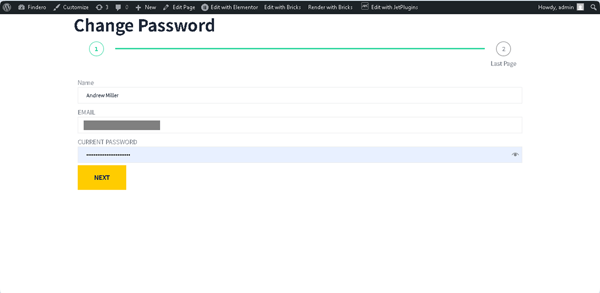
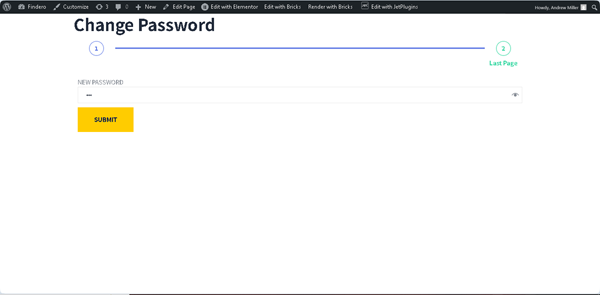
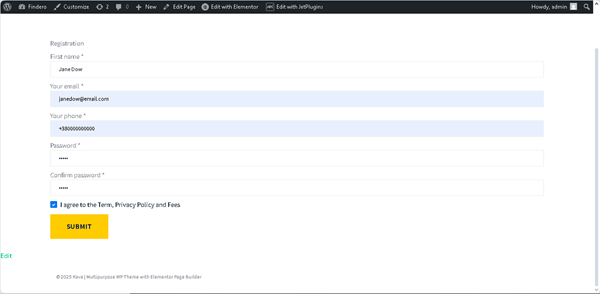
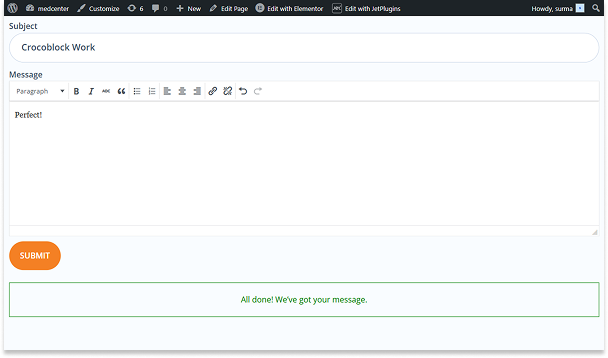
So when you proceed to the front end and submit the form, a different message from the default one will be displayed.

customized confirmation message is displayed on the front end

Customize the Сonfirmation Message Styles in Elementor

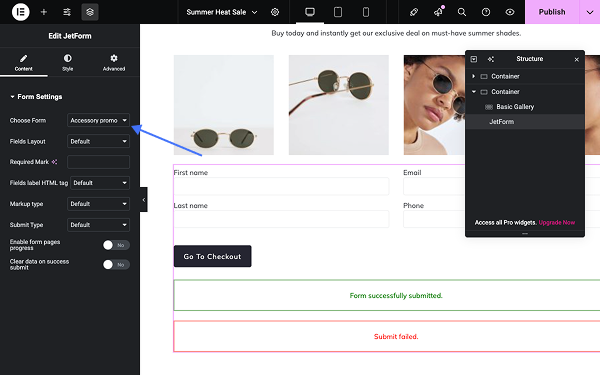
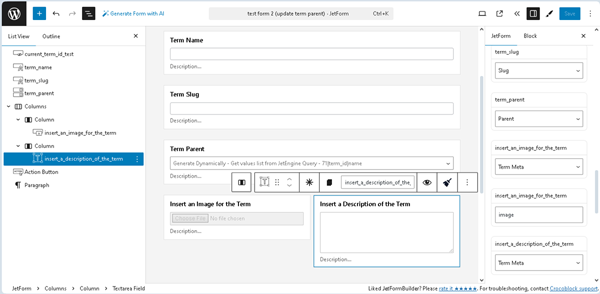
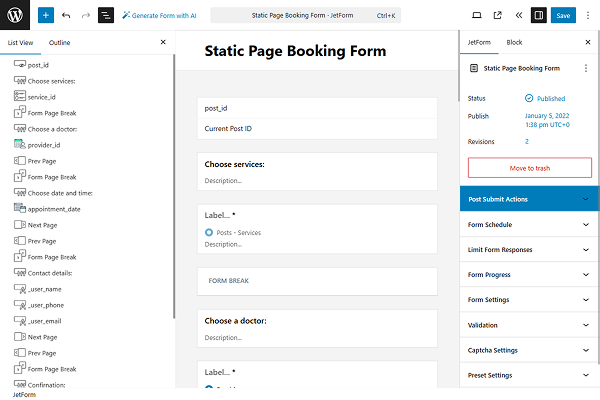
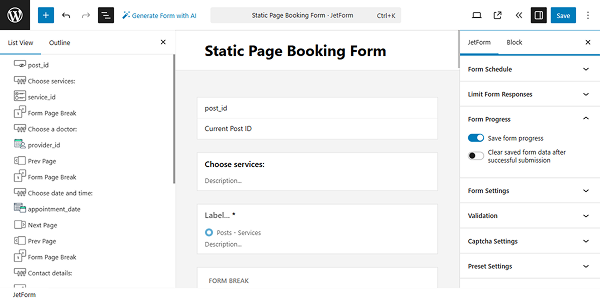
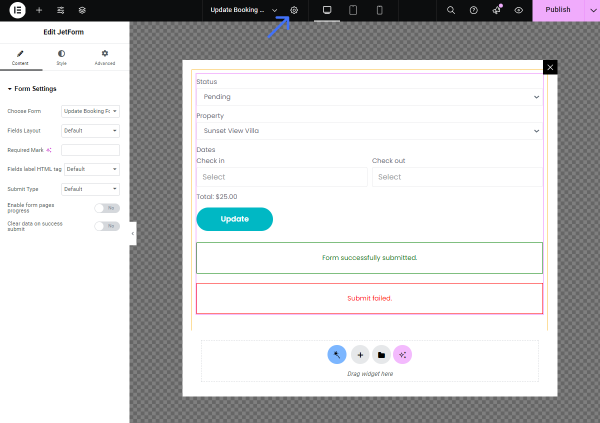
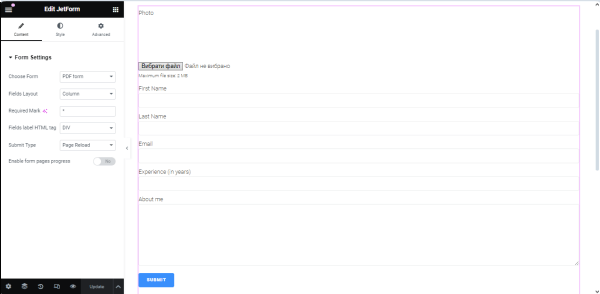
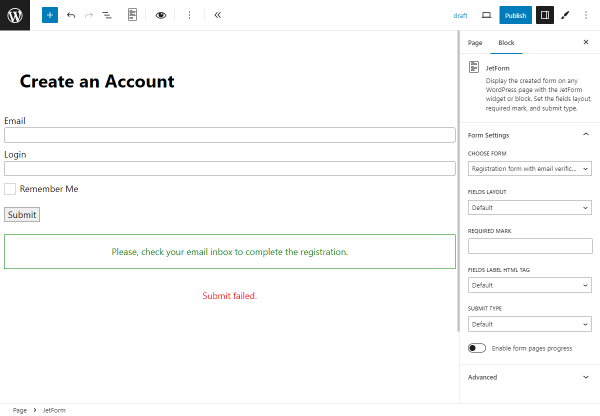
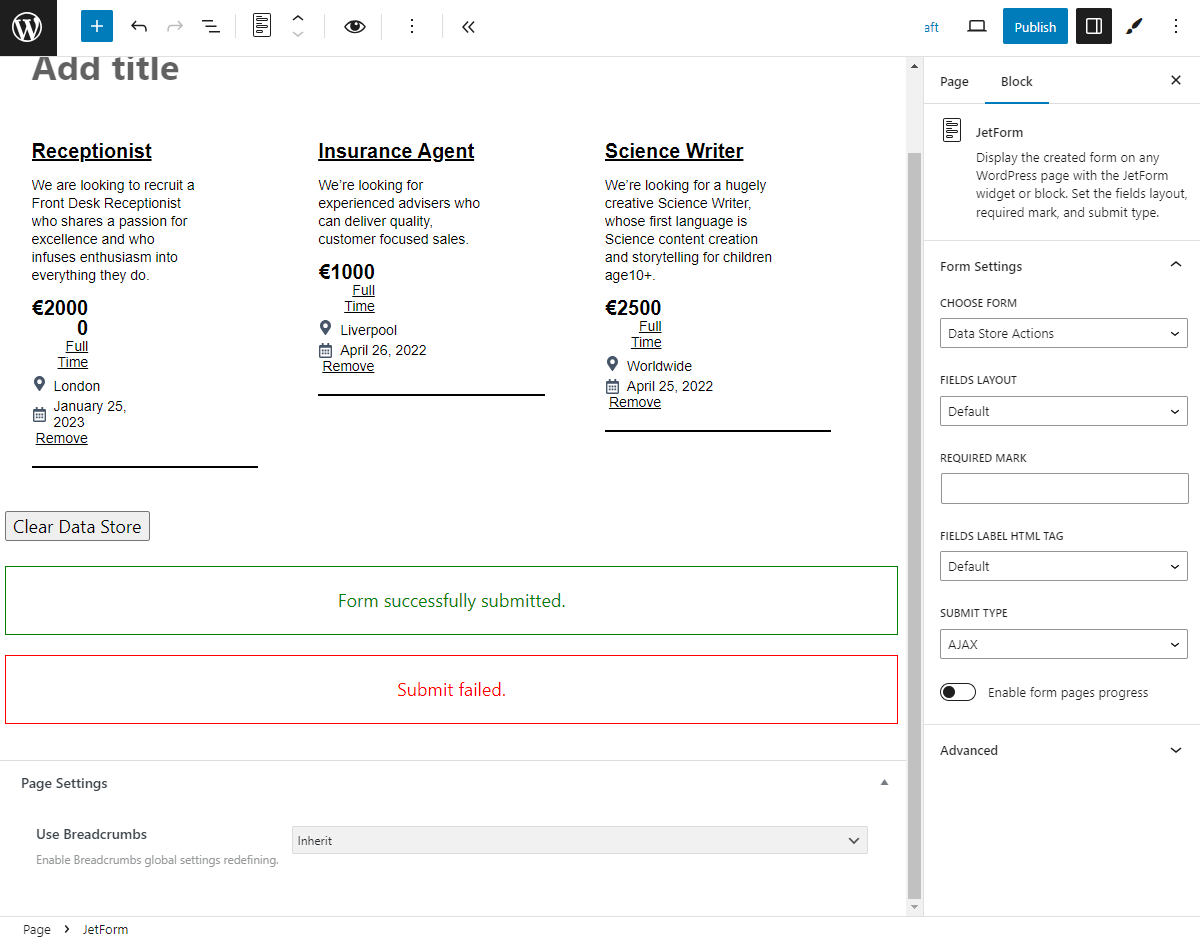
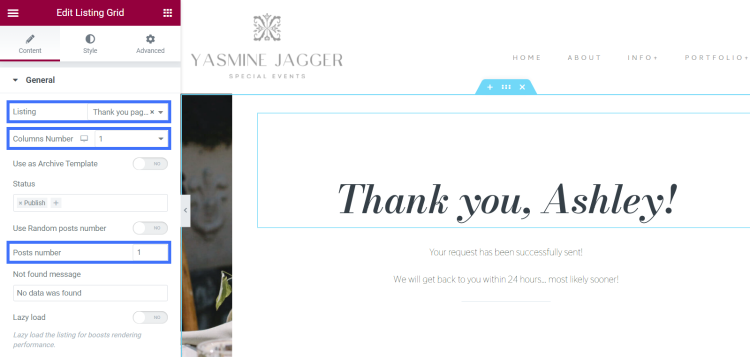
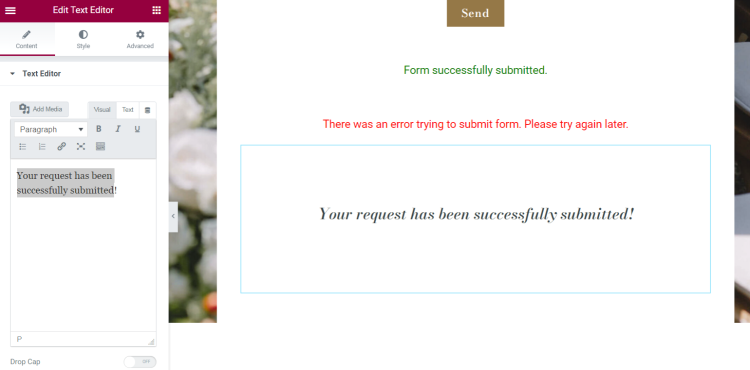
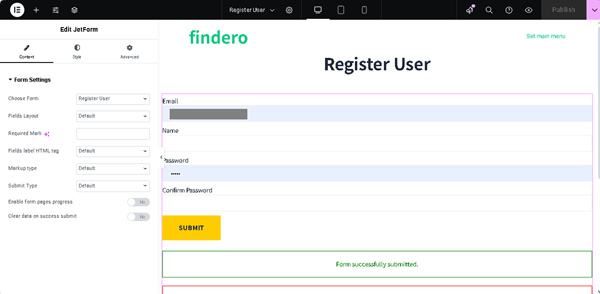
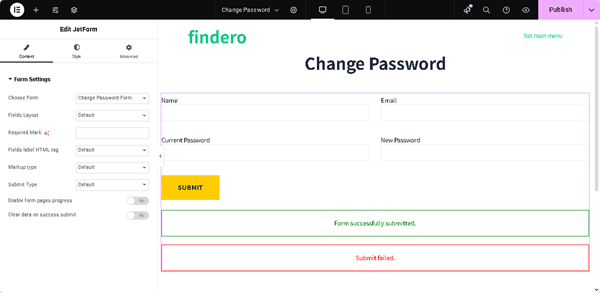
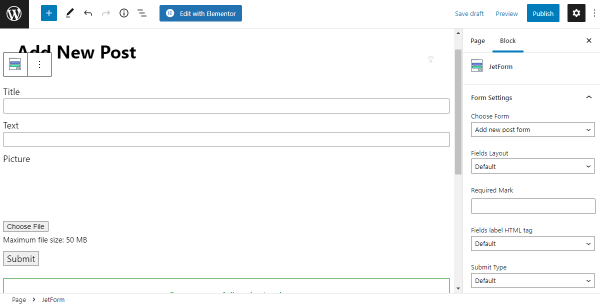
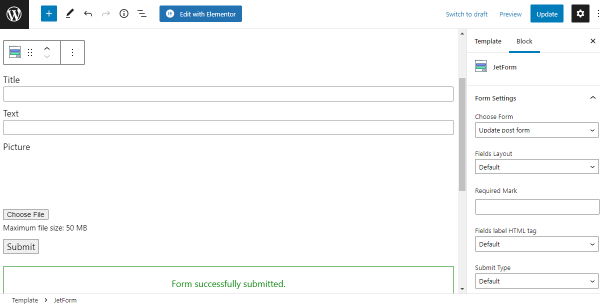
When you add the form to the page, you can style the form and the confirmation messages in particular. 

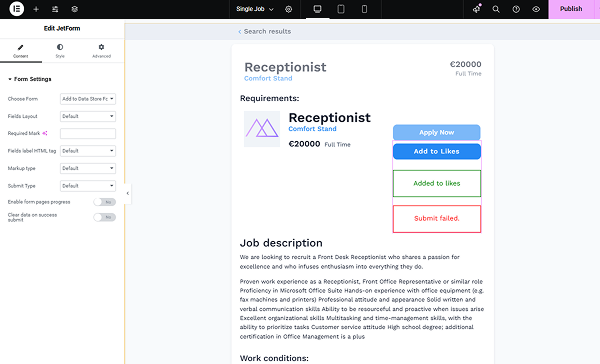
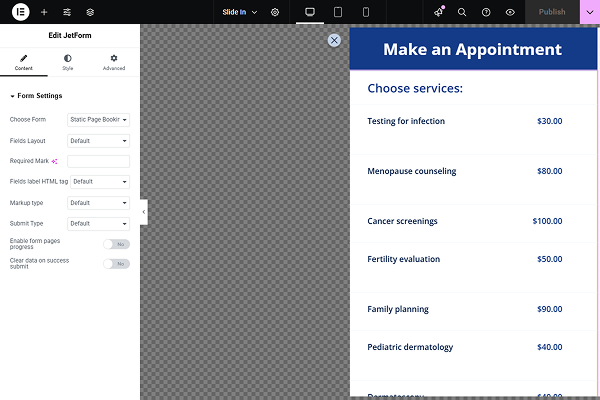
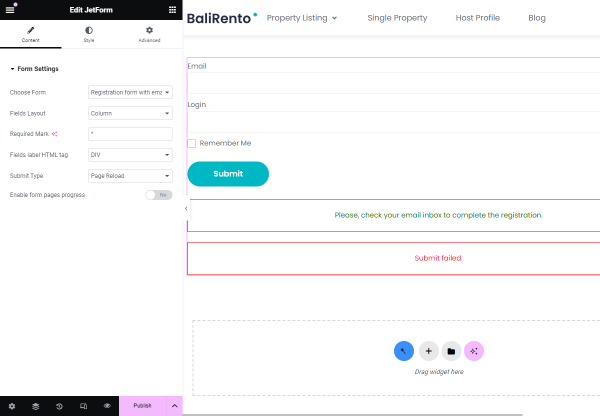
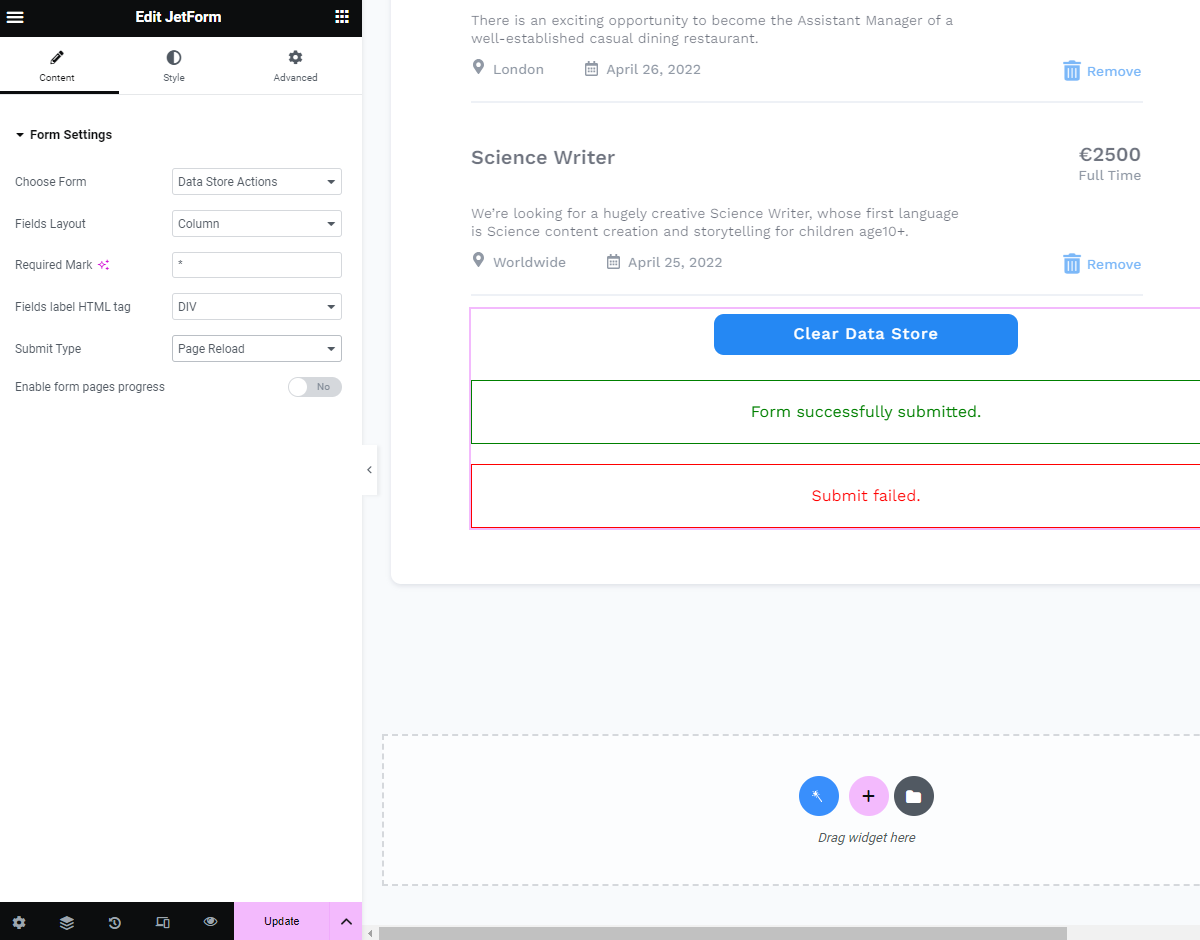
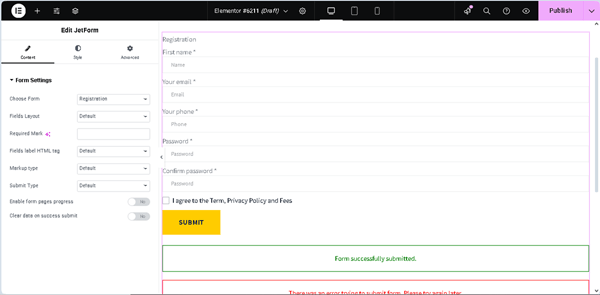
Refer to our How to Display a Form on the Front End tutorial if you are not sure about the setup. In this case, we add the form to the page in the Elementor editor. 

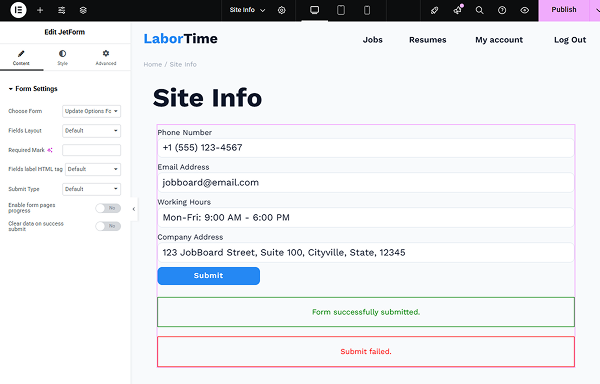
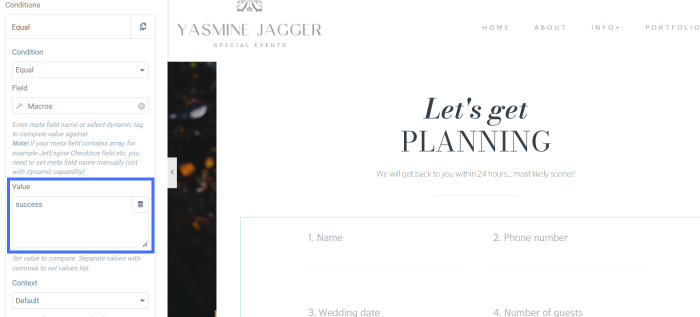
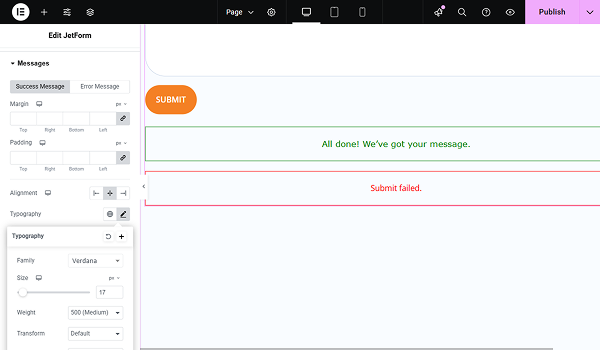
Proceed to the Style tab and scroll down to the Messages section. Here you can set up the style for the success and error messages by switching the tabs. 

So in this case, we style the success message. We do not change Marging, Padding, and Alignment for the message, and will move on to the Typography and click the pencil-shaped icon.  

Here, the pop-up appears with the common Elementor settings, where you can choose the Family, Size, Weight, Style, ot Decoration for the text. We select the Family, set up the Size, and choose the Weight.

family, size, and weight set up for the message

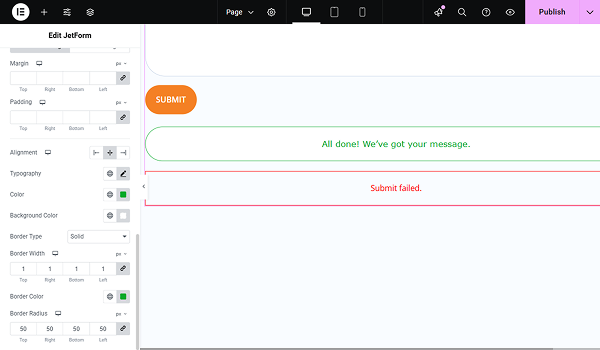
Then, we set up the text’s Color and Background Color.

color and background color are set up

Now, we can set the message border styles. We choose “Solid” for the Border Type and set “1” as the Border Width. Additionally, we set the Border Color and changed the Border Radius to “50”. 

message border settings

All the same settings can be applied to the Error Message.
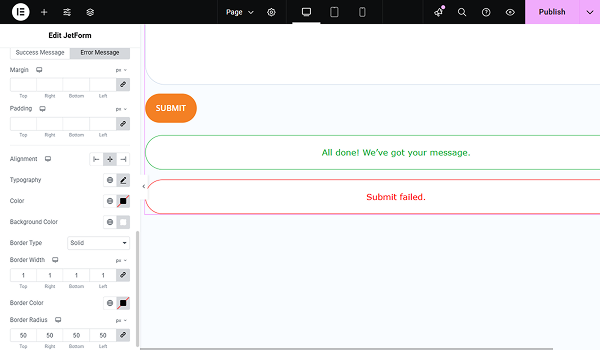
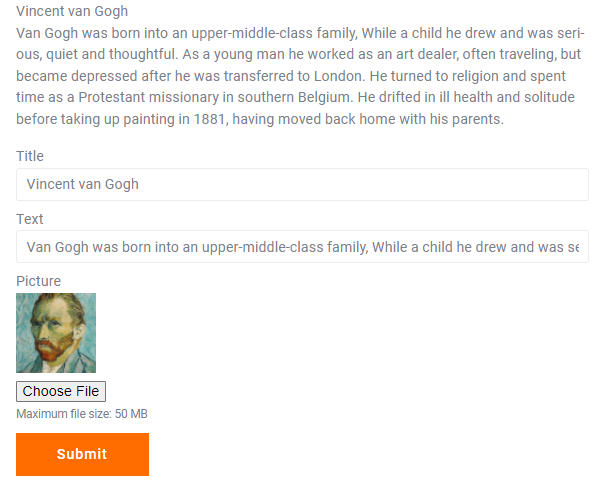
error message style settings

Click the “Publish” button once you are ready and proceed to the front end to submit the form. Here are the styles applied. 

styles applied in elementor displayed on the front

Adjust a Pop-up to Display the Confirmation Message

Now, let’s further customize the confirmation message and display it in the pop-up. 
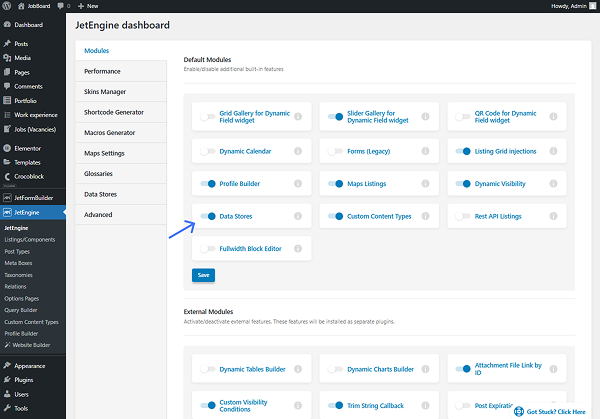
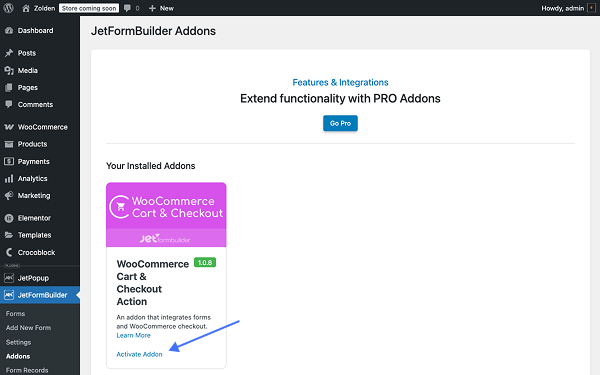
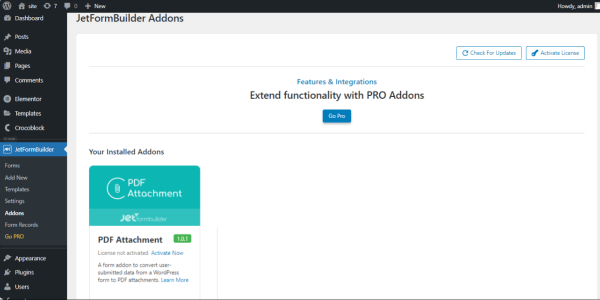
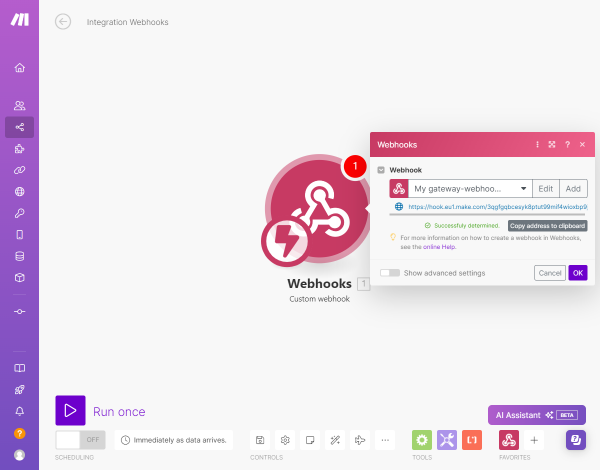
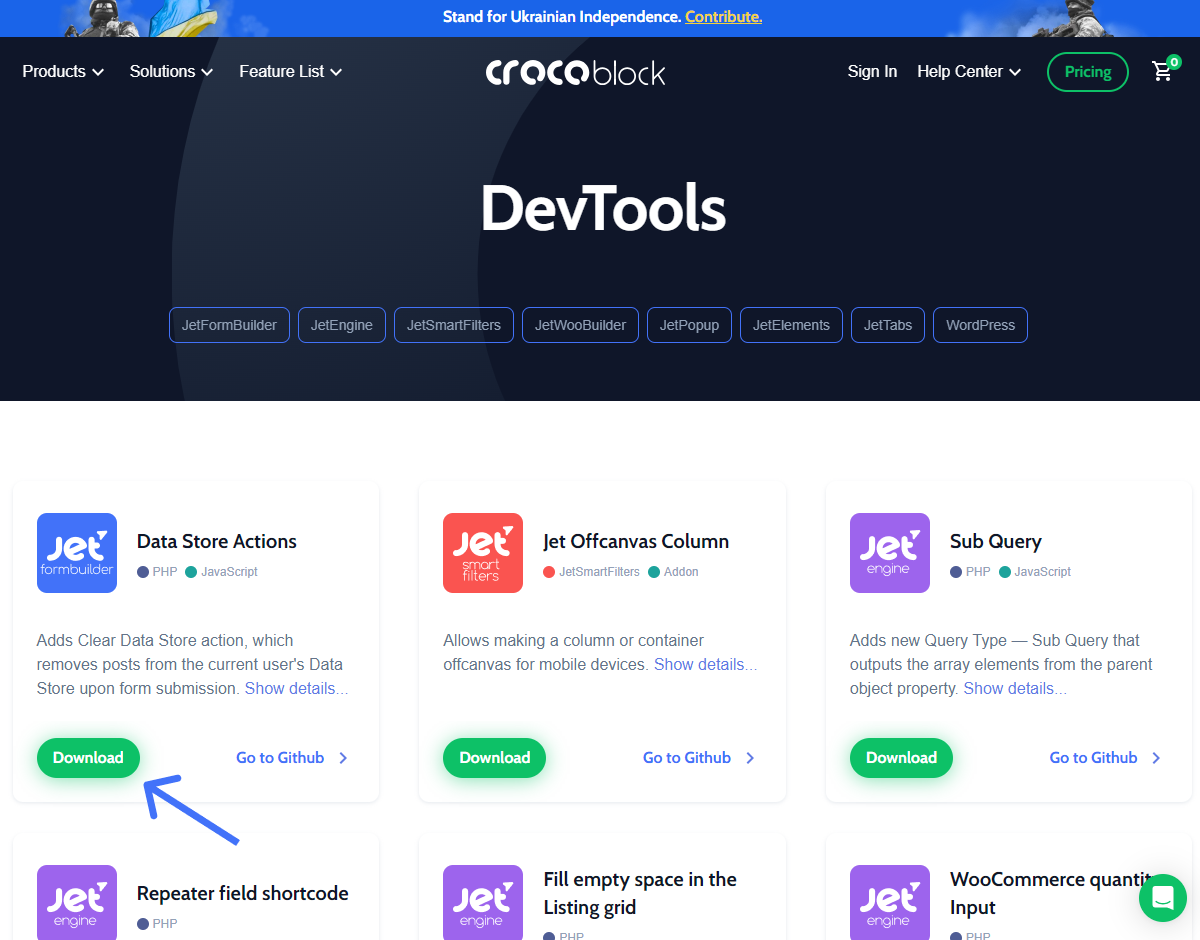
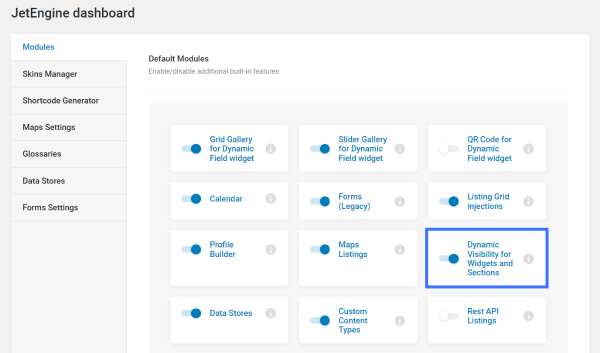
First of all, ensure that the Forms pop-up notification addon is installed and activated on your site. It is a free addon and you can get it from the DevTools page.

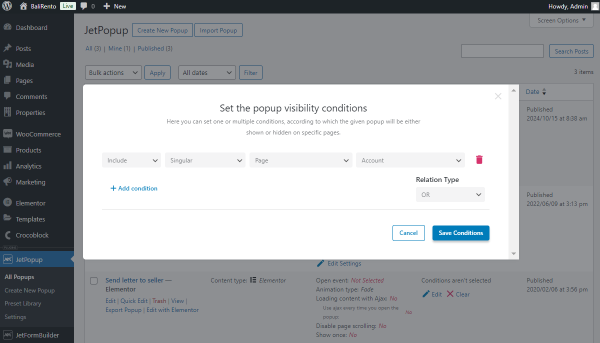
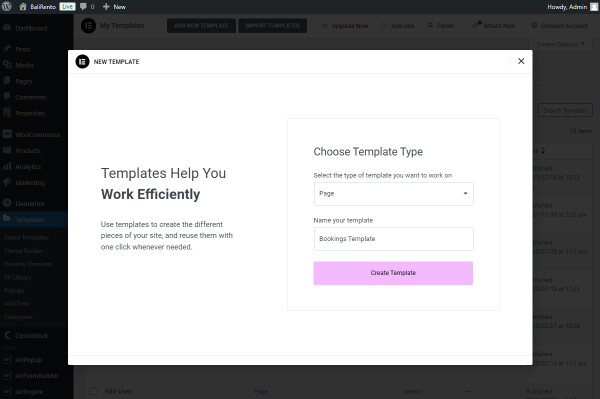
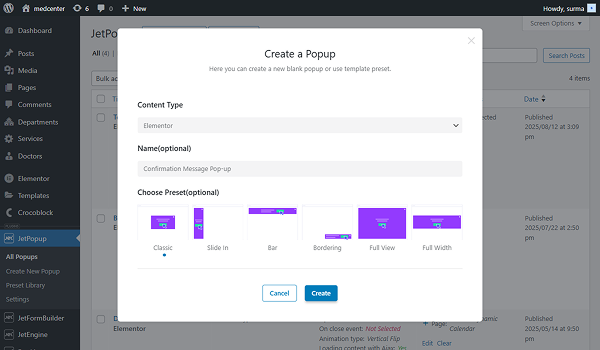
Return to WordPress Dashboard > JetPopup and click the “Create New Popup” button. Fill in the field in the Create a Popup window that will appear. In this case, we select the “Elementor” Content Type, type the “Confirmation Message Pop-up” text in the Name field, and tick the “Classic” option in the Choose Preset field. Finally, click the “Create” button.
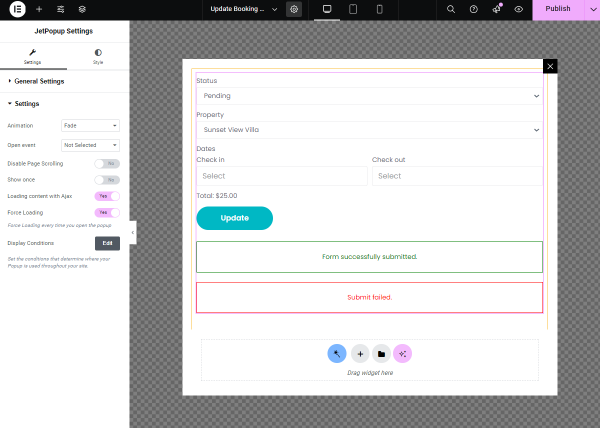
create pop-up

Inside the pop-up, we add the Heading widget only.

heading in the pop-up

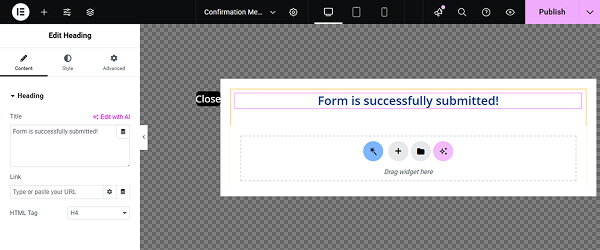
Style it according to your requirements and click the “Publish” button.

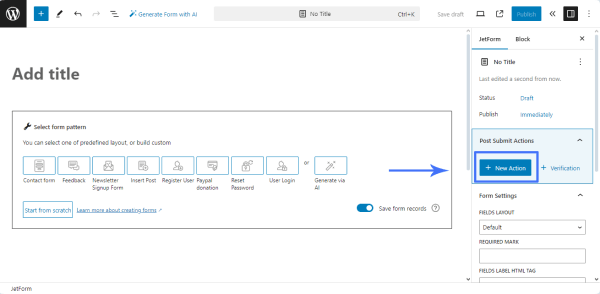
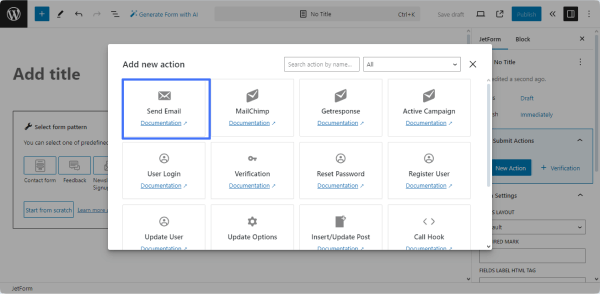
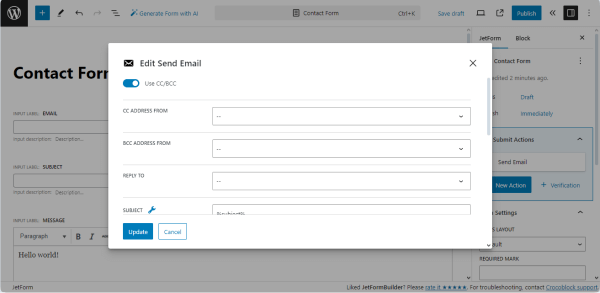
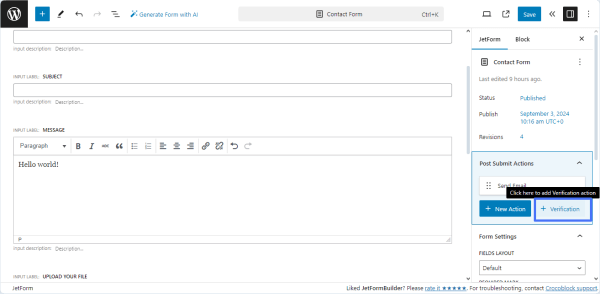
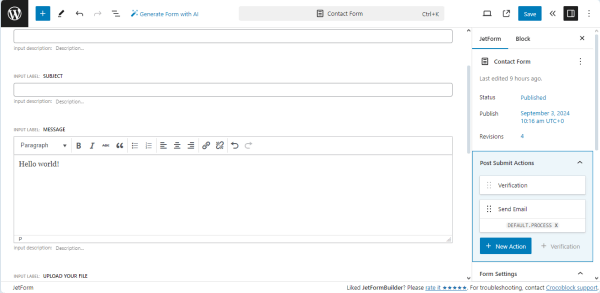
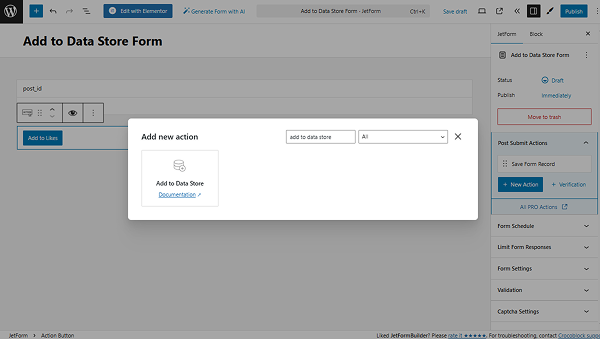
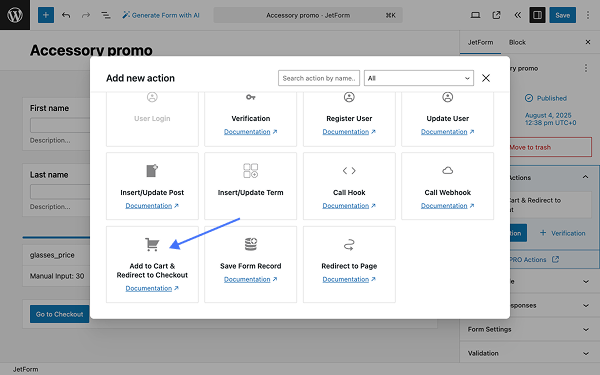
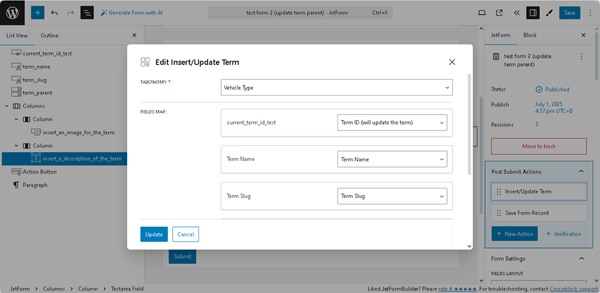
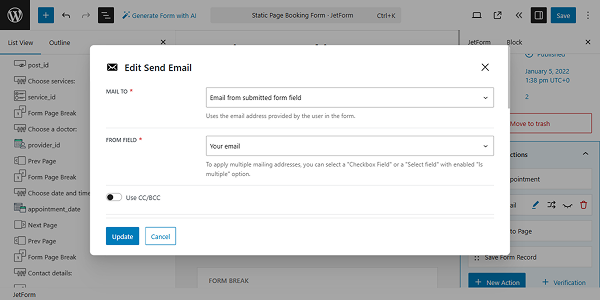
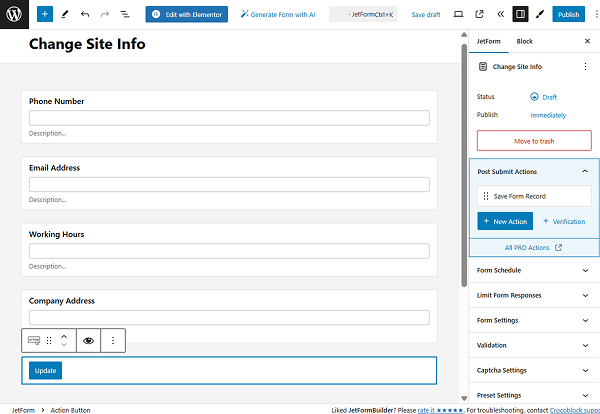
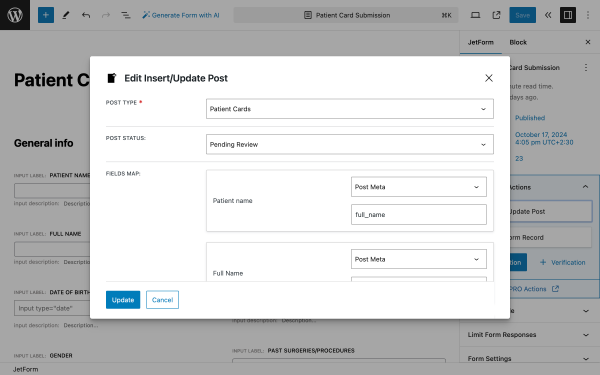
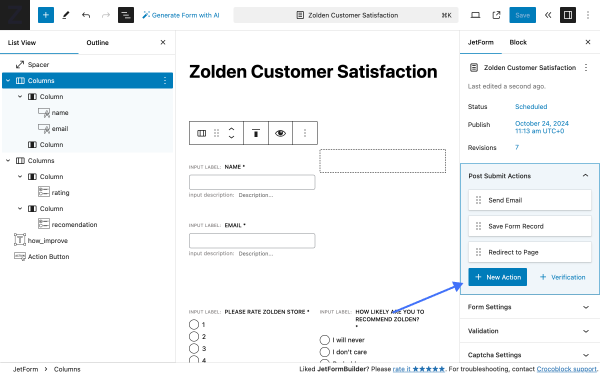
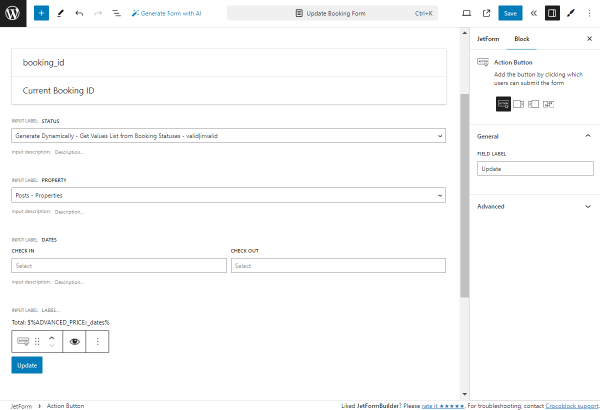
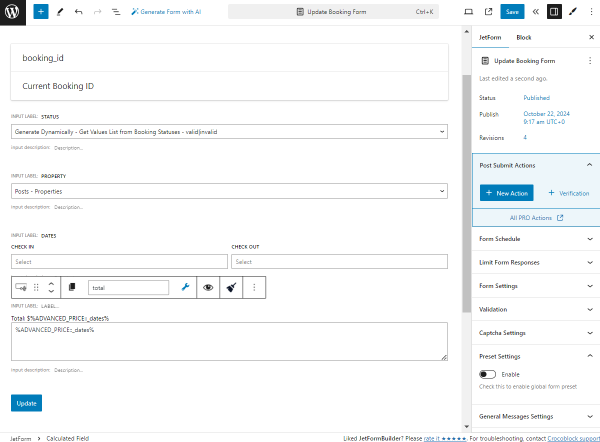
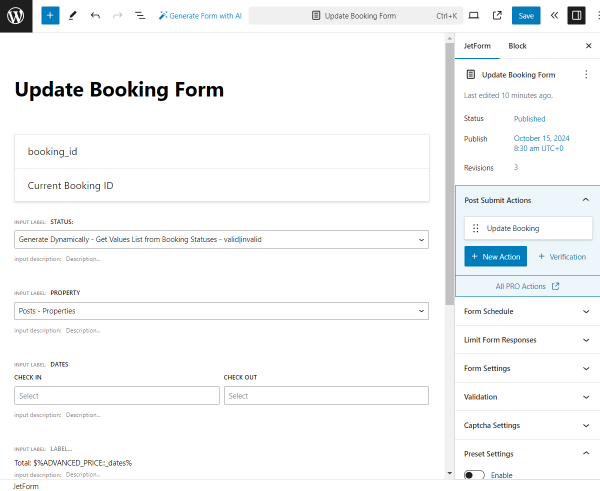
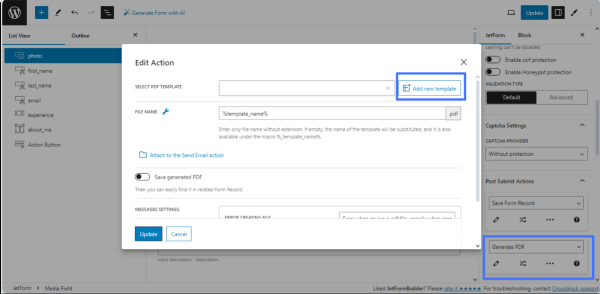
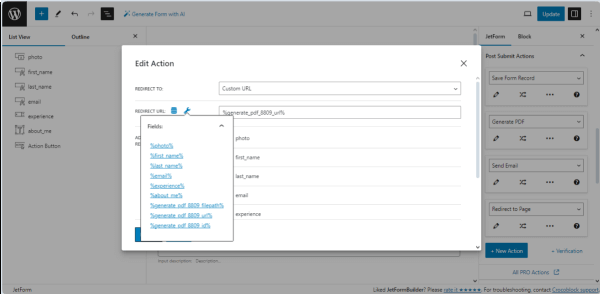
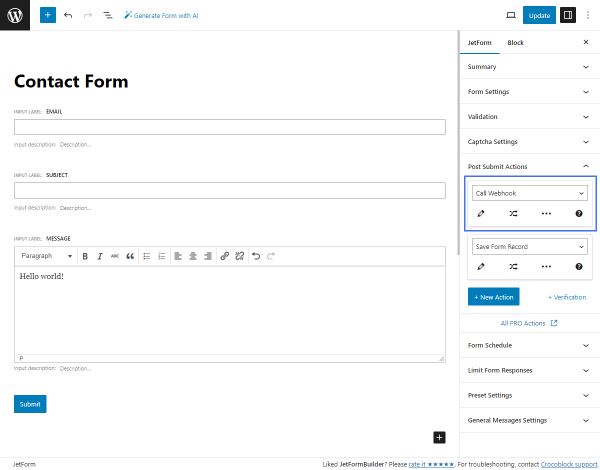
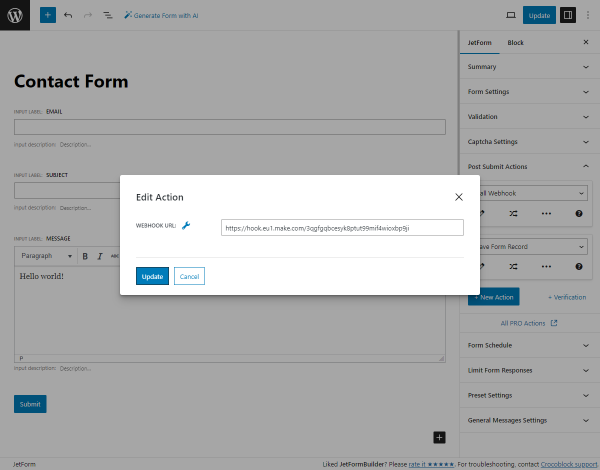
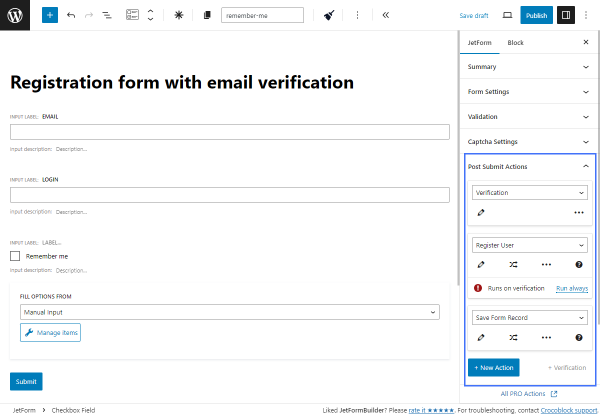
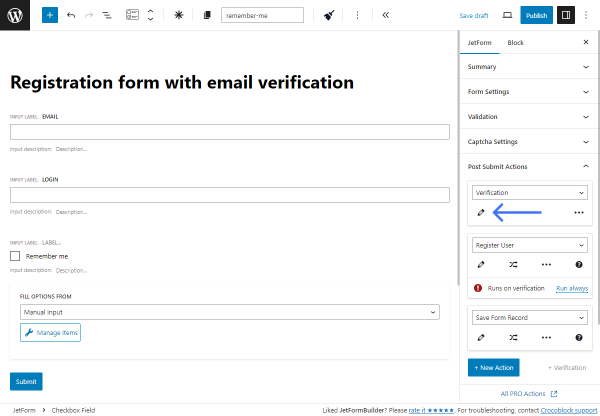
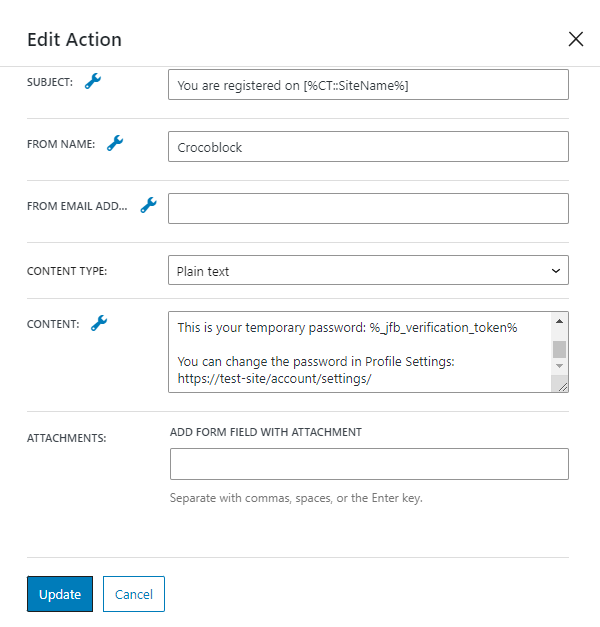
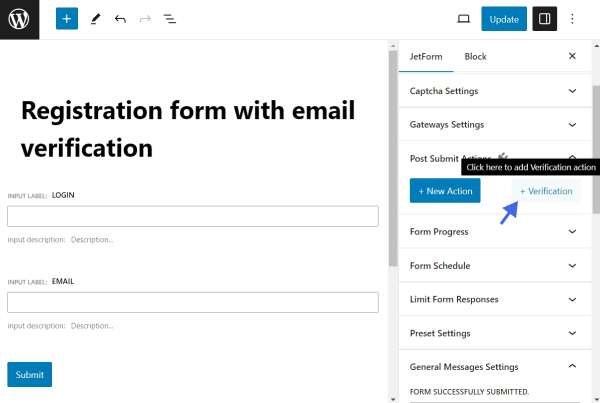
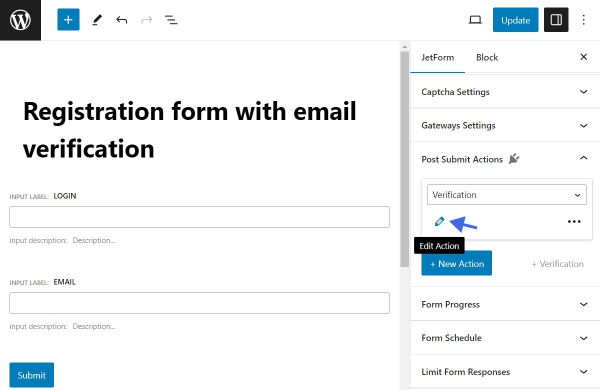
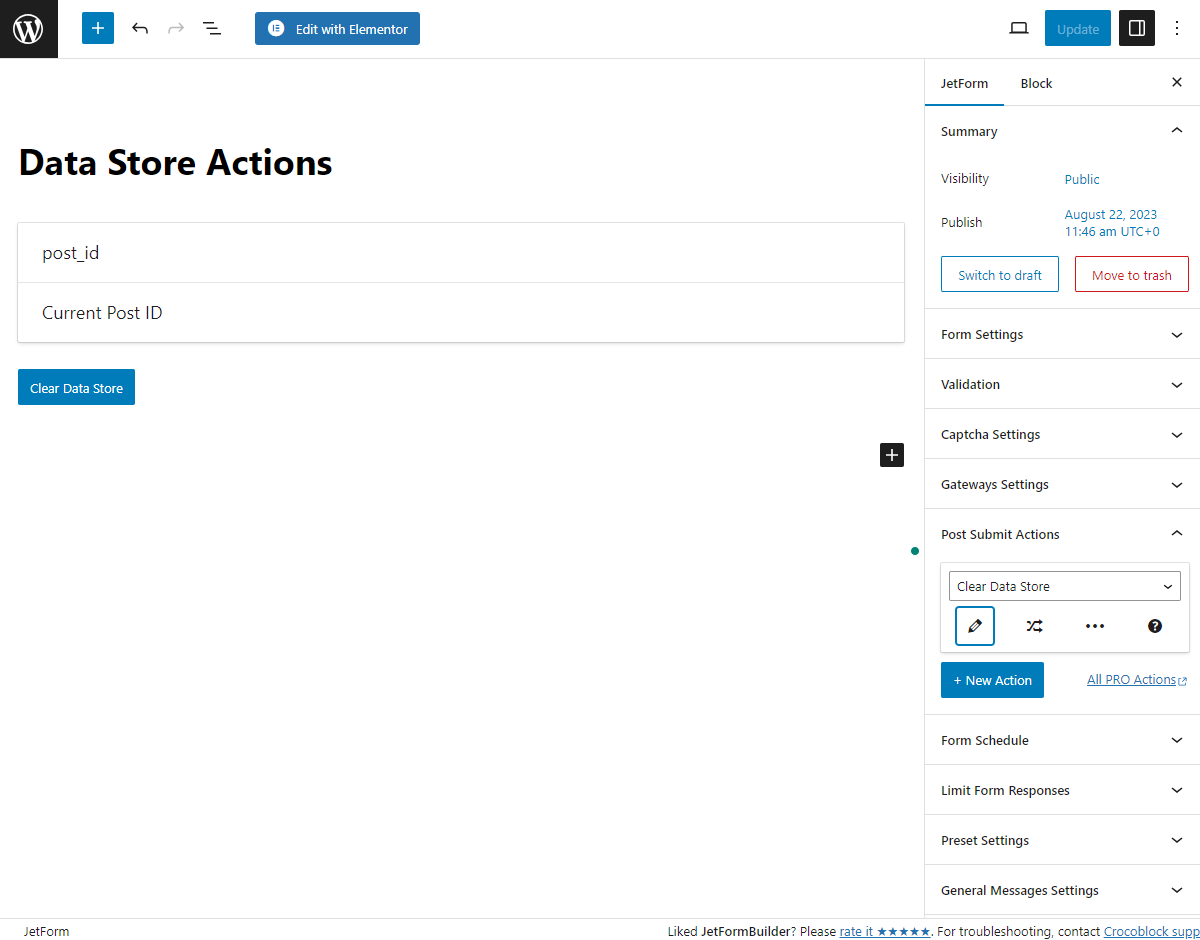
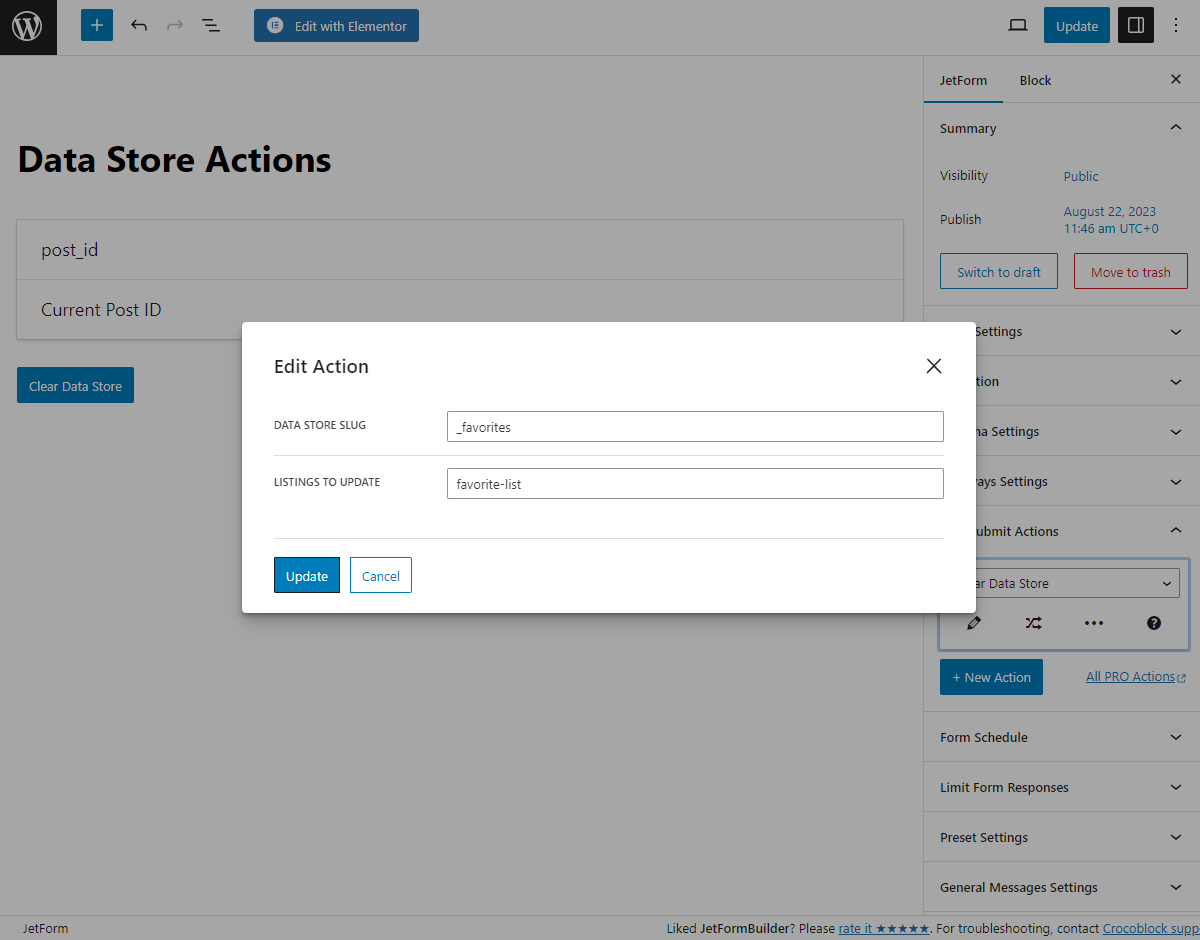
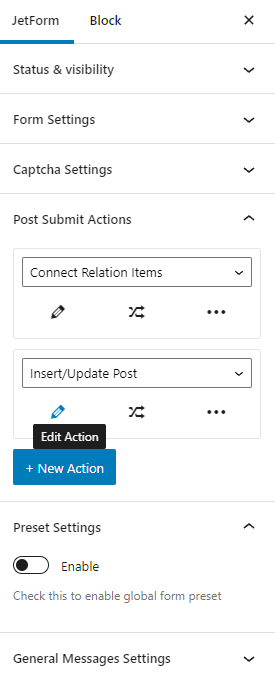
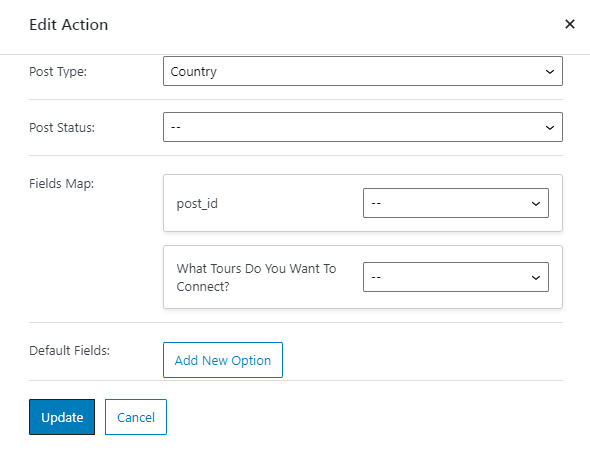
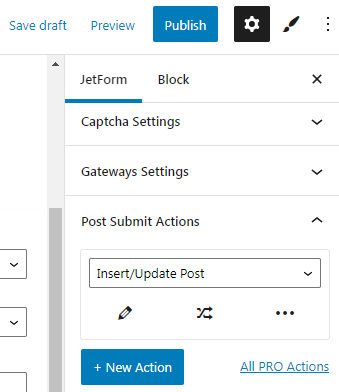
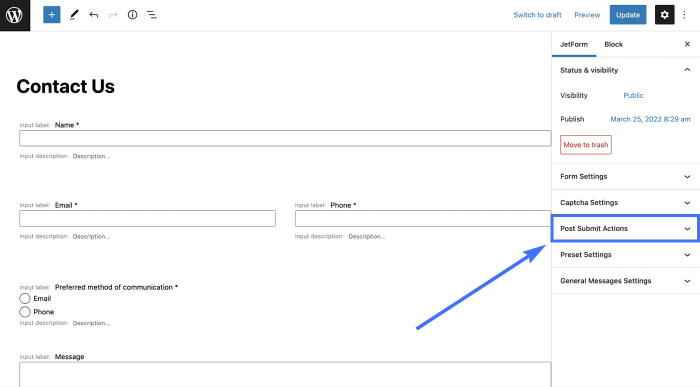
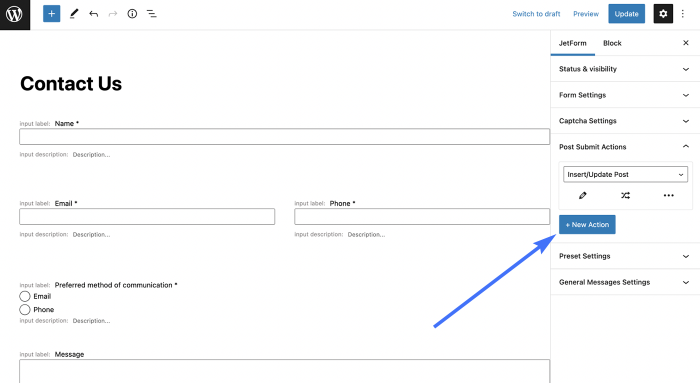
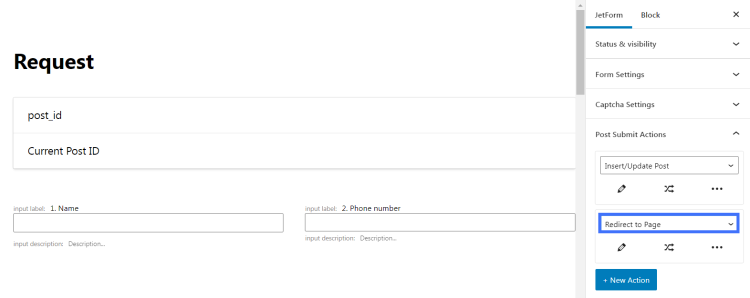
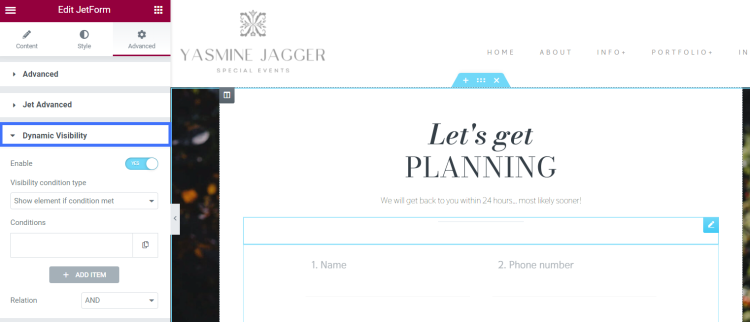
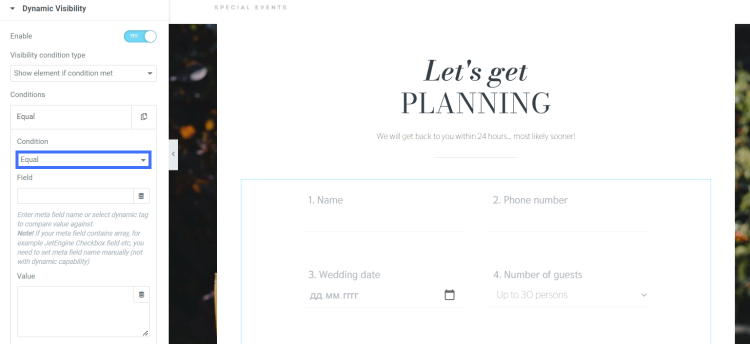
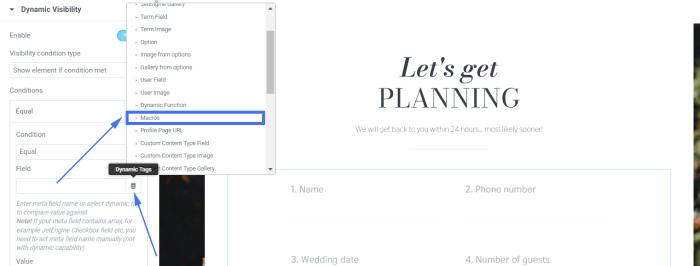
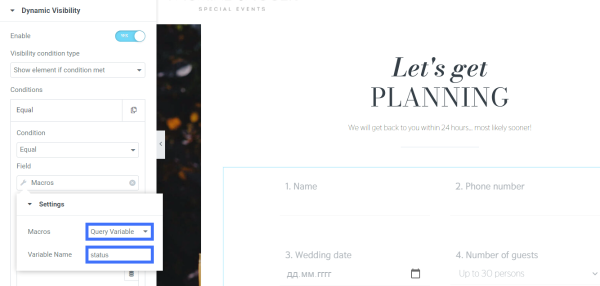
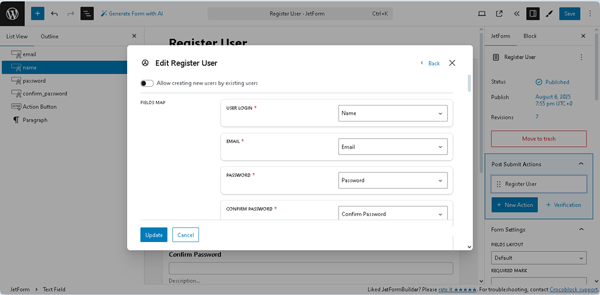
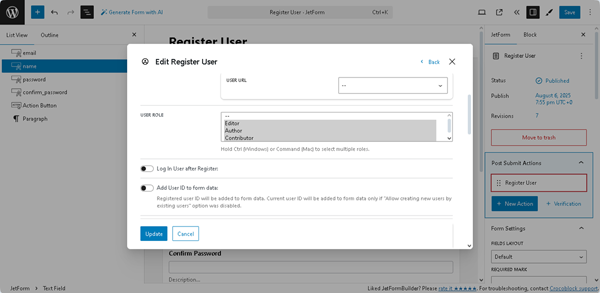
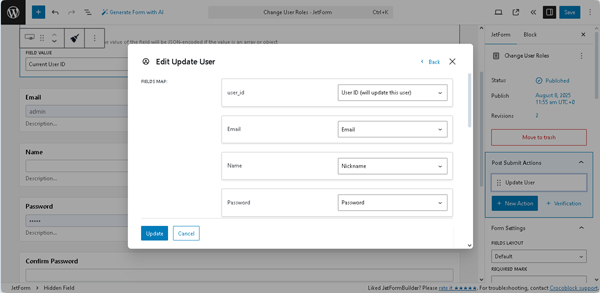
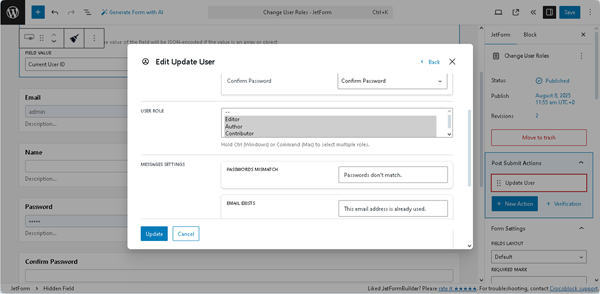
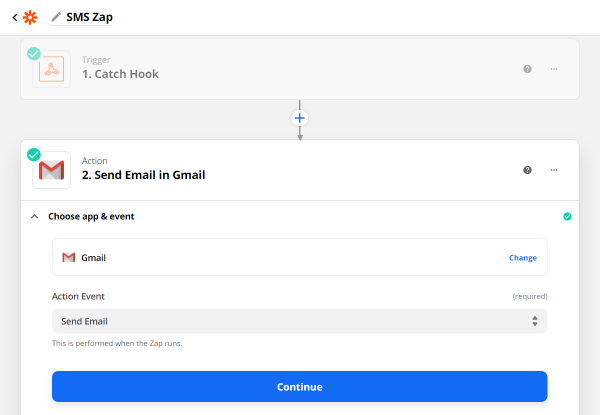
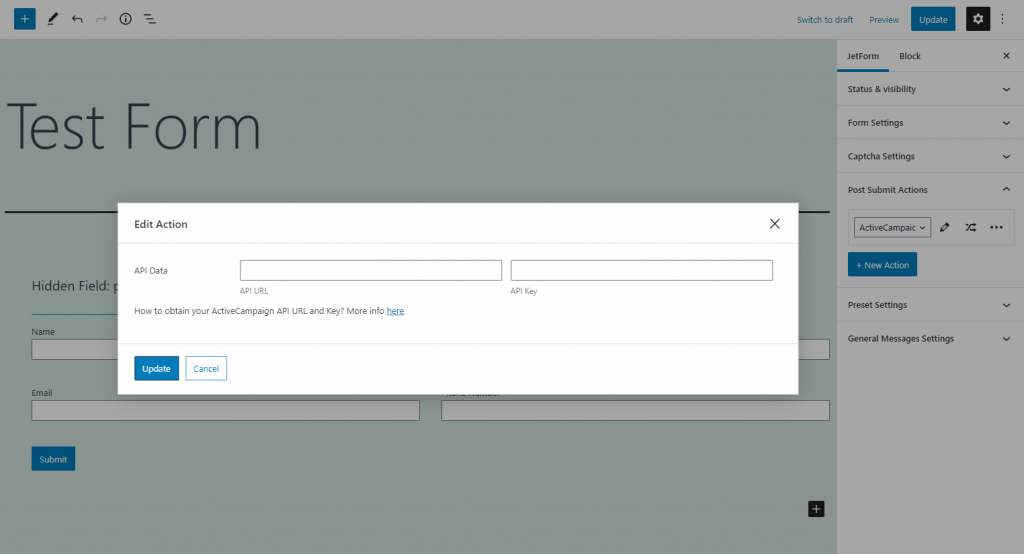
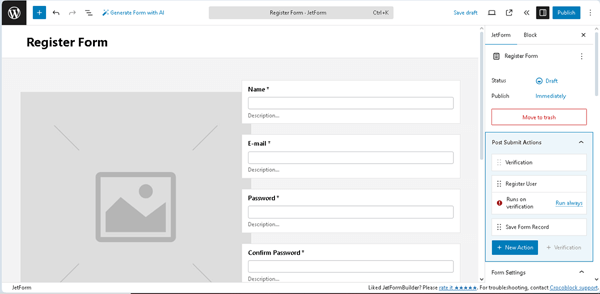
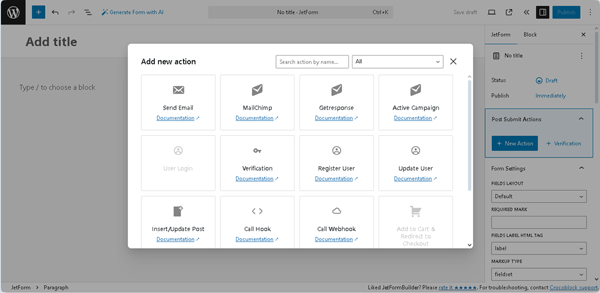
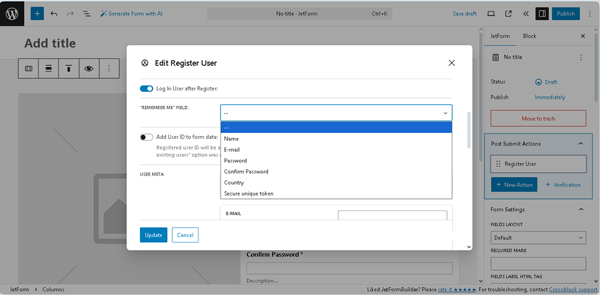
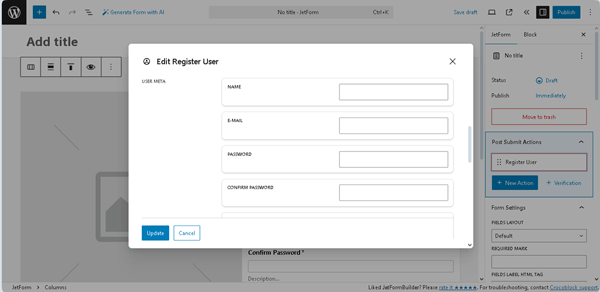
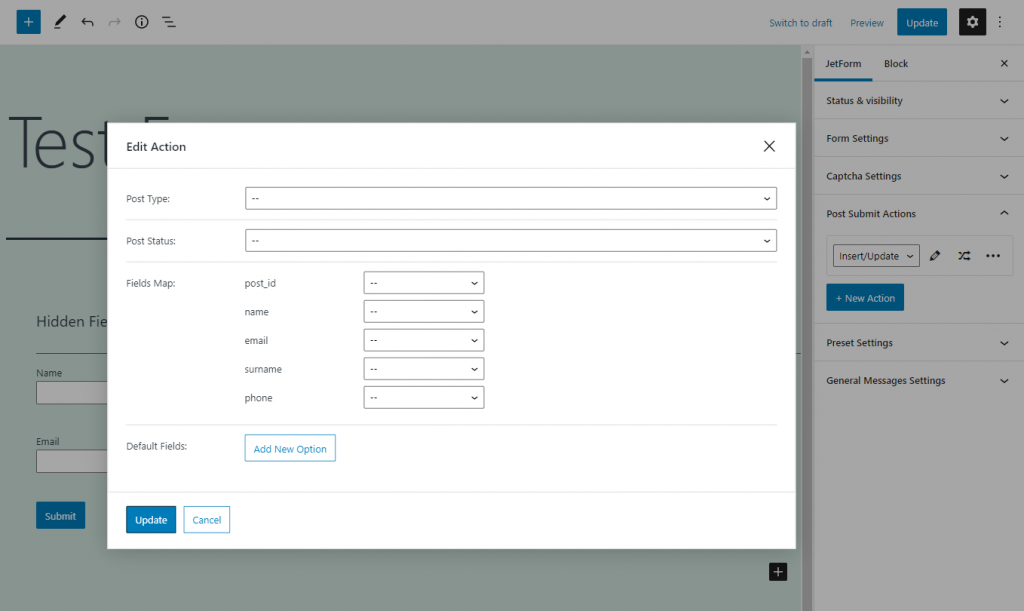
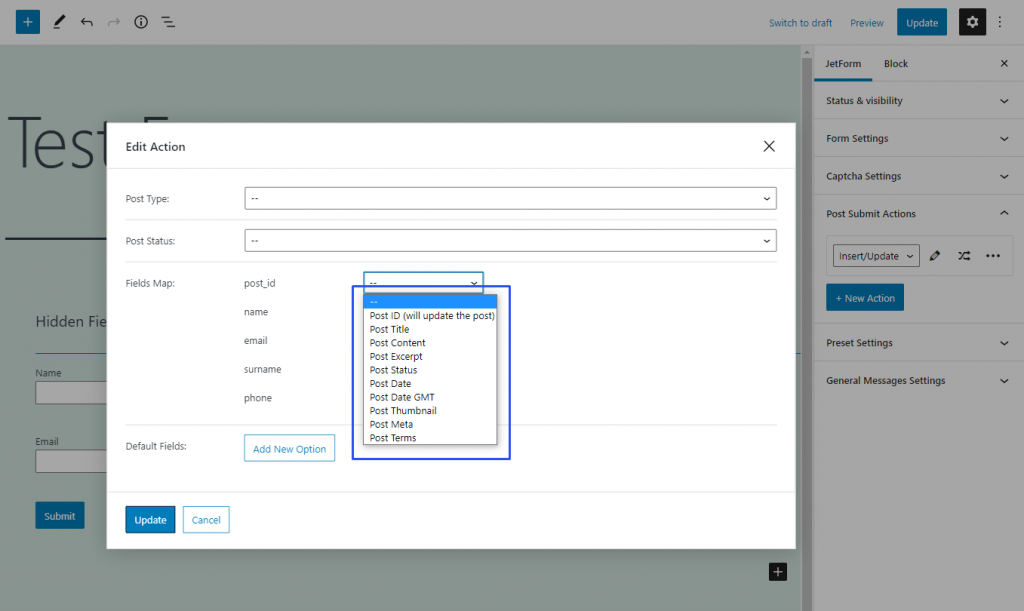
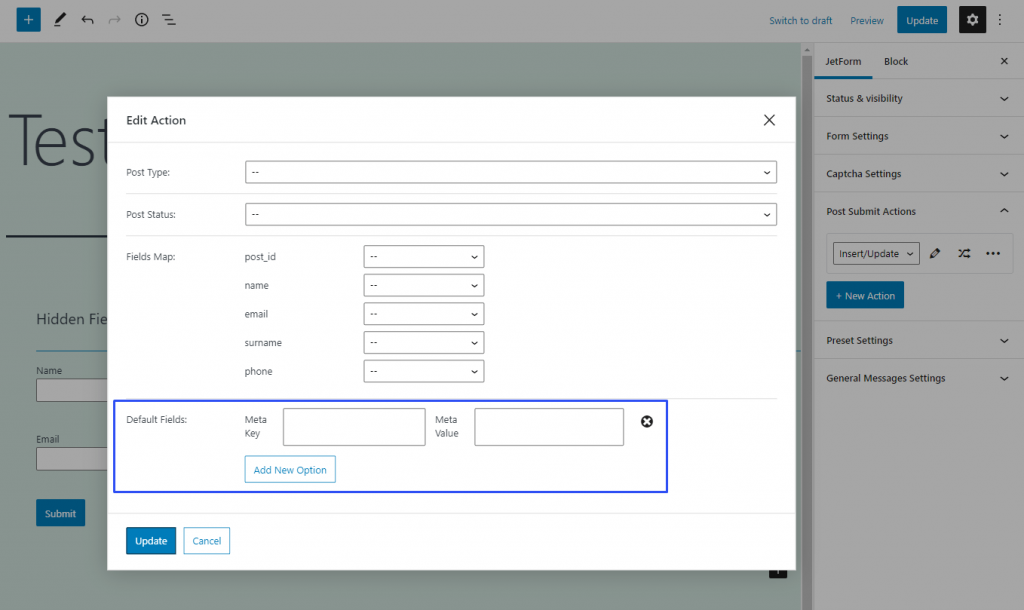
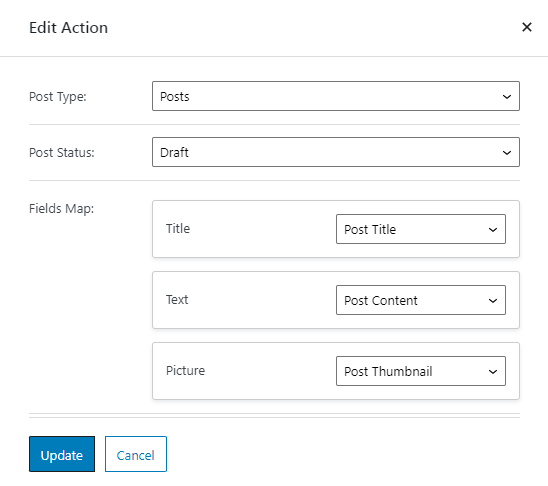
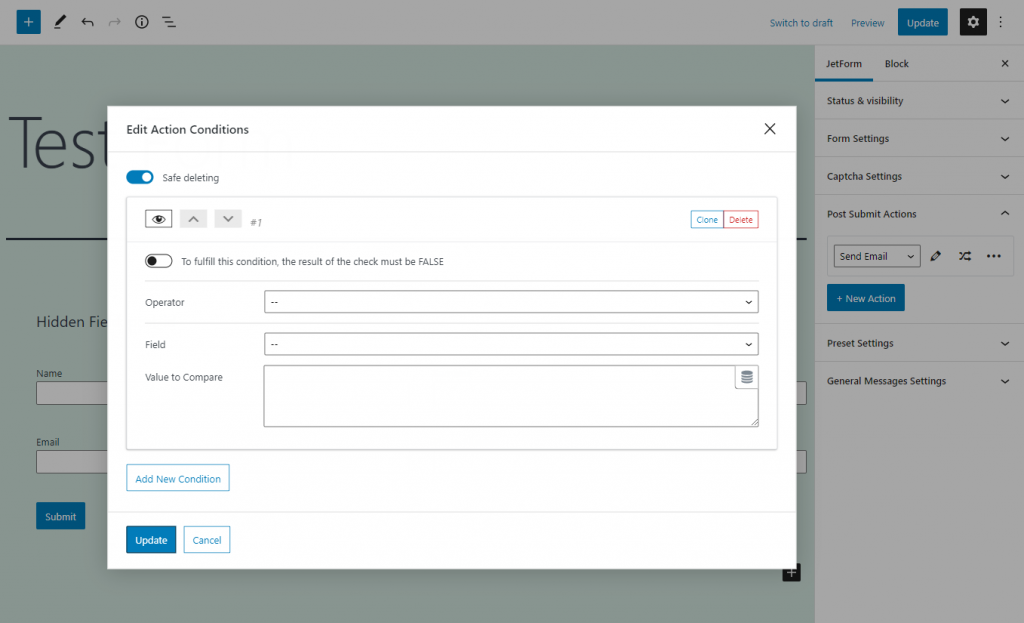
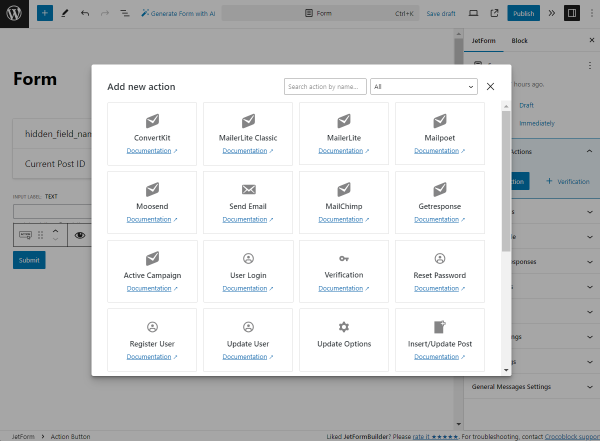
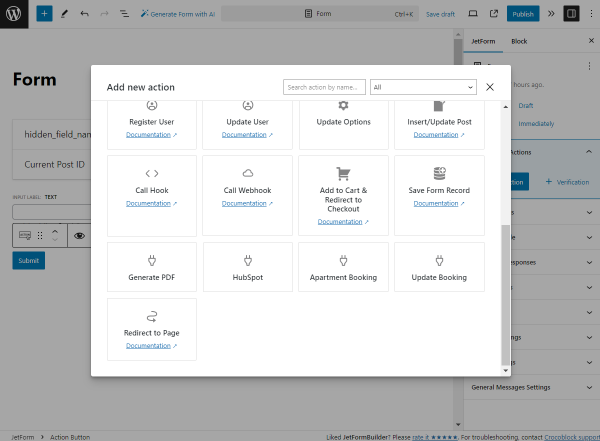
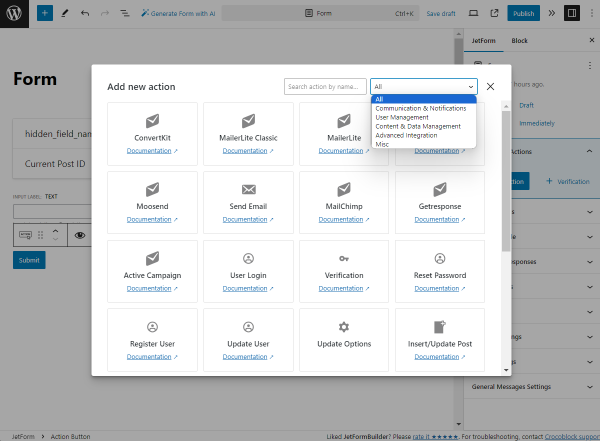
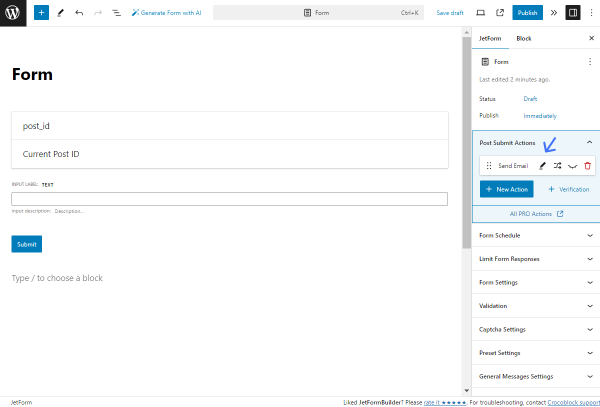
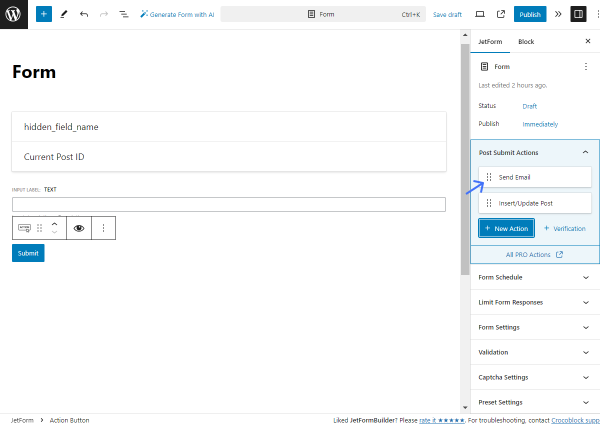
Now, proceed to the form you are working with. In the settings tab, open the Post Submit Actions and click the “New Action” button. In the newly opened pop-up, find and select the “Show Popup” action. 

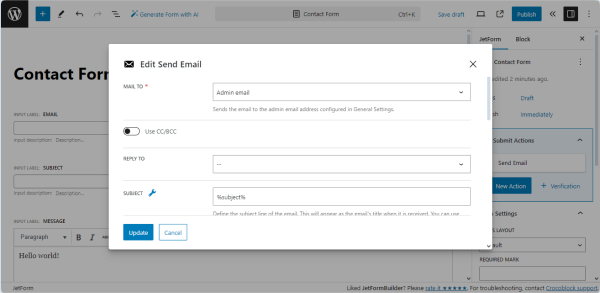
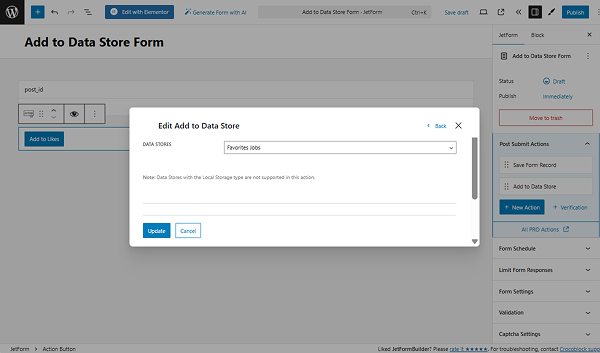
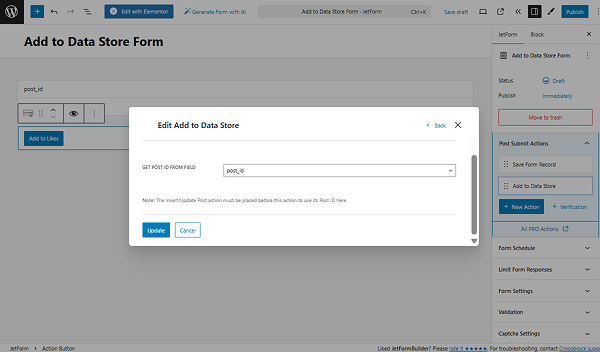
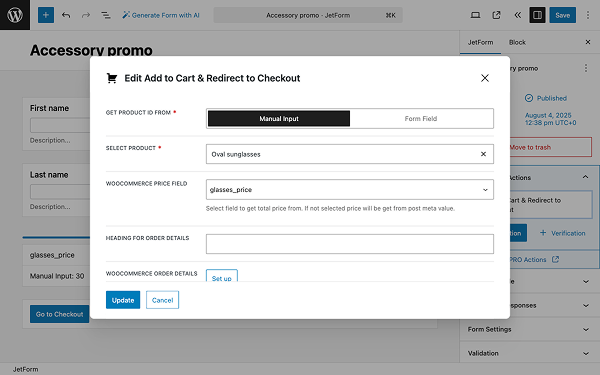
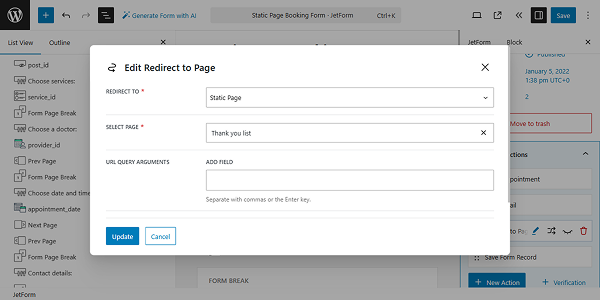
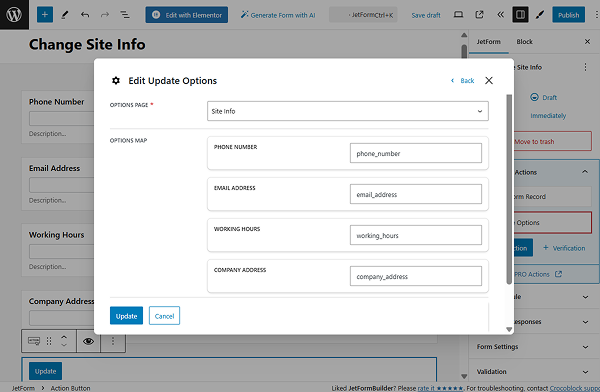
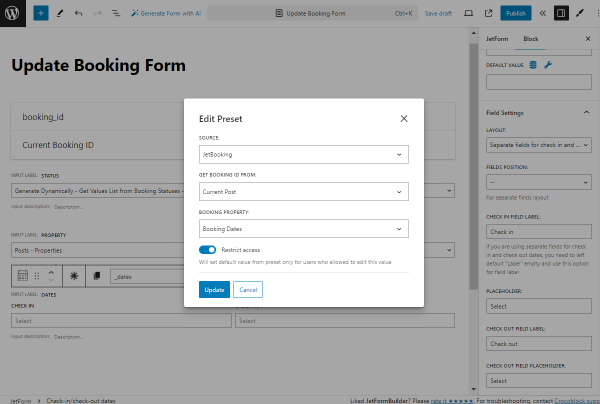
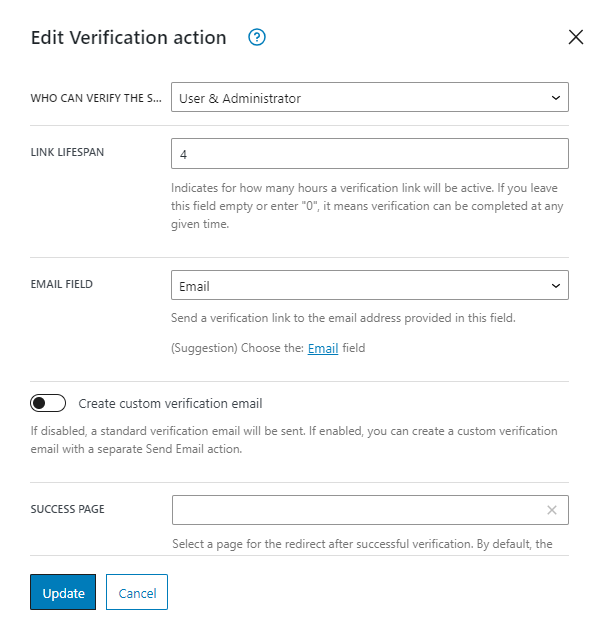
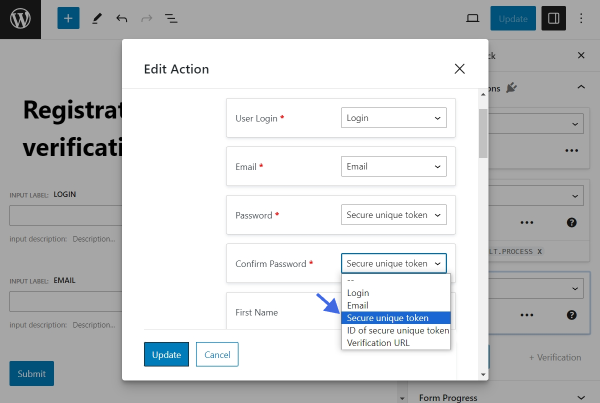
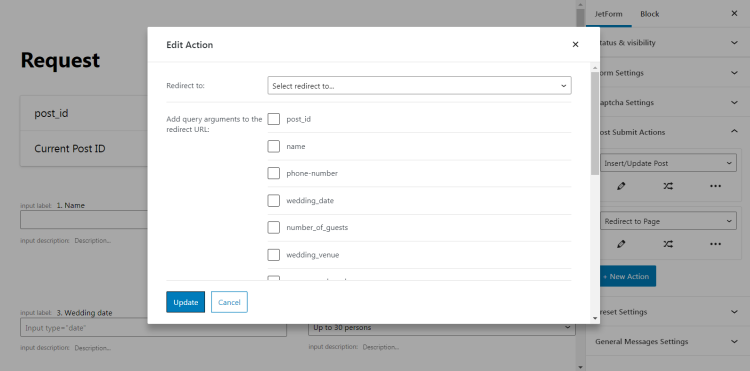
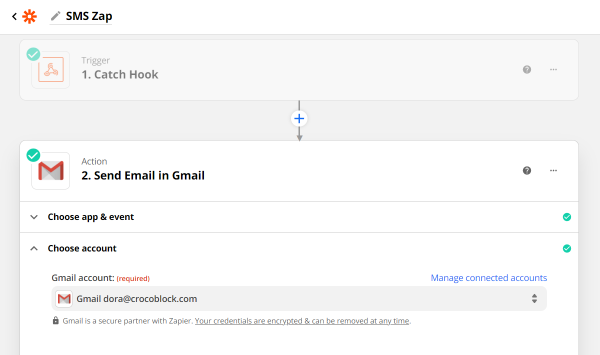
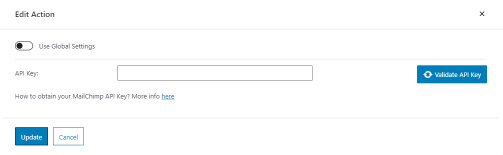
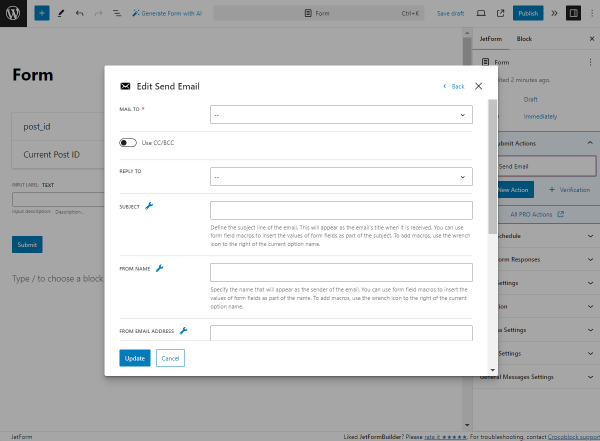
Then, in the Edit Show Popup window, choose the provider in the SELECT PROVIDER, and the pop-up you have just created in the SELECT POPUP. Click the “Update” button.

show popup action settings

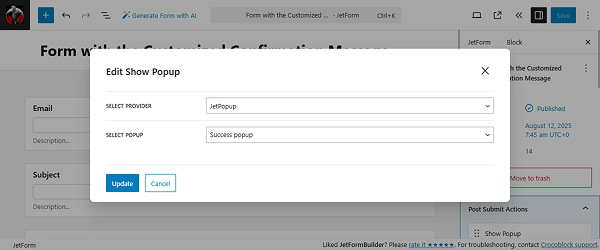
Click the “Save” button once you are ready.

Now, proceed to WordPress Dashboard > Appearance > Customize > Additional CSS and paste the following code: 

#jet-popup-5102 .jet-popup__container-content {
    display: flex;
    flex-direction: column;
    align-items: center;
}
.jet-popup__close-button svg {
    display: none;
}

.jet-popup__close-button {
    position: static !important;
    background-color: #0d6efd;
    color: #fff;
    border: none;
    padding: 10px 24px;
    border-radius: 6px;
    font-size: 16px;
    font-weight: 500;
    cursor: pointer;
    margin-top: 25px; 
}

.jet-popup__close-button::after {
    content: "Close";
}

Here, the “5102” is the pop-up’s ID, so make sure you are using the correct one. 

css code added

Click the “Publish” button when the code is added.

NOTE

Please note that the code is provided as an example, so feel free to customize it according to your specific needs.

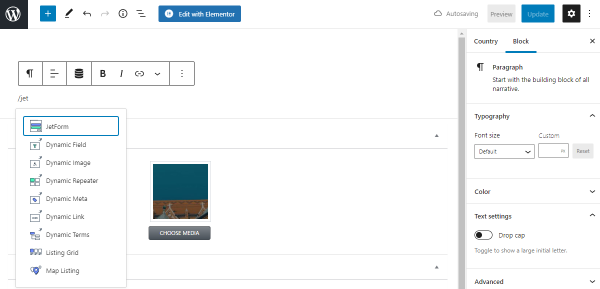
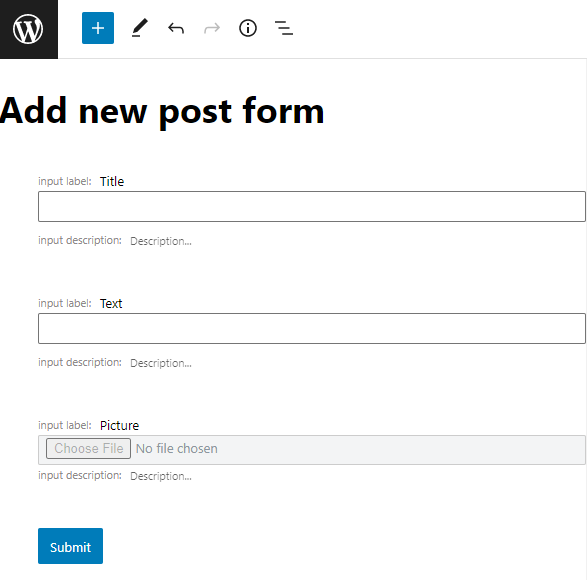
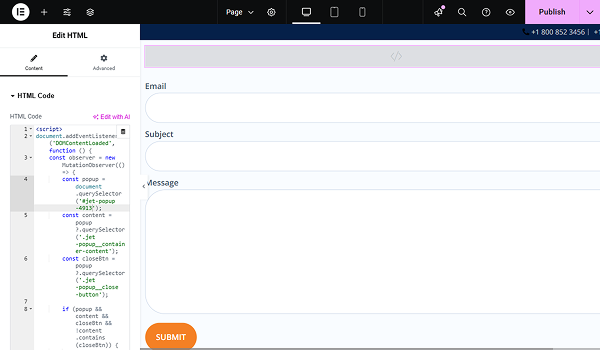
Let’s proceed to the last step. Open the editing page, where the form is added. Add the HTML widget before the JetForm widget, and inside the widget, add the following code:

<script>
document.addEventListener('DOMContentLoaded', function () {
    const observer = new MutationObserver(() => {
        const popup = document.querySelector('#jet-popup-5102');
        const content = popup?.querySelector('.jet-popup__container-content');
        const closeBtn = popup?.querySelector('.jet-popup__close-button');

        if (popup && content && closeBtn && !content.contains(closeBtn)) {
            content.appendChild(closeBtn);
        }
    });

    observer.observe(document.body, { childList: true, subtree: true });
});
</script>

Here, the “5102” is the pop-up’s ID, so make sure you are using the correct one.

code added to the html widget

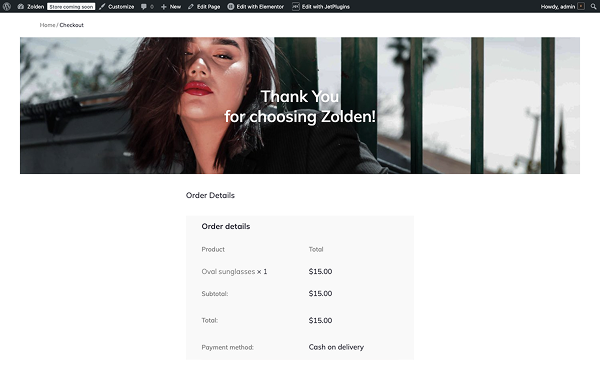
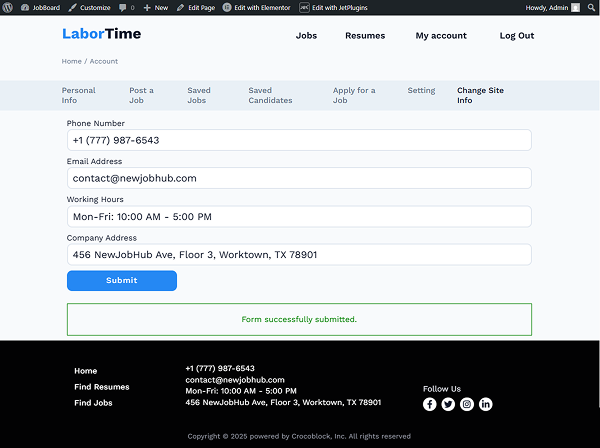
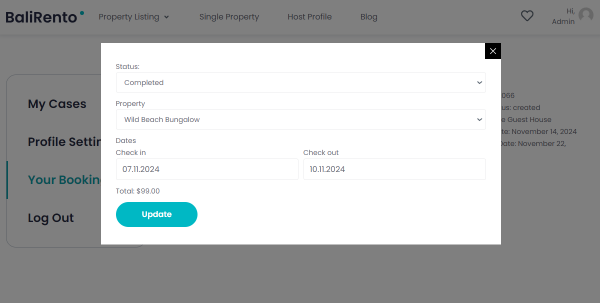
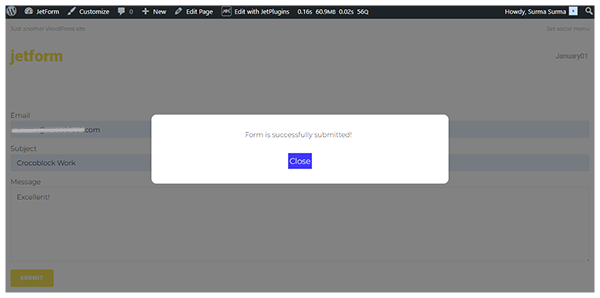
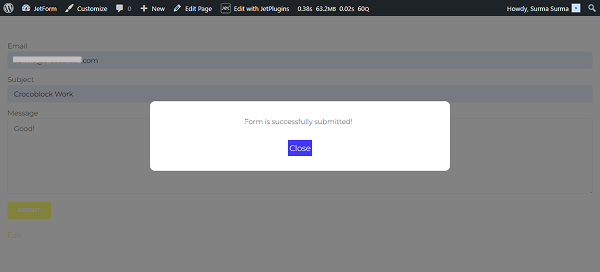
Click the “Publish” button and proceed to the front end. After the form is submitted, the confirmation message appears in the pop-up. 

pop-up with confirmation message is displayed on the front

As for the error message, it will still be shown as a default message, which can be customized in Elementor, as it was mentioned earlier.

Hide the confirmation message

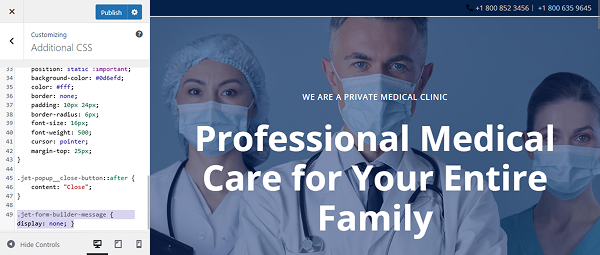
In case you additionally need to completely hide the confirmation message, add the following code to the WordPress Dashboard > Appearance > Customize > Additional CSS:

.jet-form-builder-message { display: none; }

 Click the “Publish” button.

hide message code added to the css customize

Then proceed to the front end and submit the form. Then the pop-up is displayed, and the default message is hidden.

default configuration message is hidden on the front

That’s it. Now you know how to customize the text and styles of the confirmation message, display it in the pop-up, or hide it using the JetFormBuilder WordPress plugin.

Tutorial requirements:

  • Elementor (Free version) or WordPress Block editor (Gutenberg);
  • WooCommerce plugin installed and activated;
  • JetFormBuilder plugin installed and activated.

In this tutorial, we’ll figure out how to redirect our form to the Thank you page with the help of the JetFormBuilder plugin and the WooCommerce Cart & Checkout Action addon.

Install and Activate Add to Cart & Redirect to Checkout Addon

So the first step will be the installation and activation of the addon. 

For this, navigate to WordPress Dashboard > JetFormBuilder > Addons and find the “WooCommerce Cart & Checkout Action” addon in the All Available Addons section. Click on the “Install Addon” and don’t forget to press the “Activate Addon” button.

activate add-on

Create a WooCommerce Product

To fetch the products into the JetFormbuilder form, you need to create a set of WooCommerce products in the WordPress Dashboard > Products. Since we’re using a demo store, Zolden, we have a set of items that we can demo in this tutorial.

woocommerce products

Copy the product ID(s) that you will include in the submit form; we will need it/them later.

Create an Order Submission Form

Once we complete the first step, let’s create a new form by moving to WordPress Dashboard > JetFormBuilder > Forms and pressing the “Add New Form” button.

create new form

Add as many fields as you need because later, we will display the submitted info on the Thank You page.

form fields

WooCommerce Cart & Checkout Action Settings

In the form settings, locate the Post Submit Actions section. Click the “+ New Action” button to open the Add new action pop-up window. In the pop-up, select the “Add to Cart & Redirect to Checkout” action to add it to your form.

adding add to cart & redirect to checkout add-on

In the action settings, we need to connect the WooCommerce checkout fields with the corresponding form fields. Let’s resume all action options.

add to cart & redirect to checkout add-on setup
  • GET PRODUCT ID FROM — a feature that contains two options (“Form Field” and “Manual Input”) to determine where the form will get the product ID from, allowing you to either pull the ID dynamically from a corresponding form field or specify it manually;
  • SELECT PRODUCT — a feature that allows you to either select the corresponding Product ID field from your form or input the Product ID manually, depending on your previous selection;
  • WOOCOMMERCE PRICE FIELD — a feature that provides a dropdown to select a field that stores the total price, with the price being received from the post meta value if the form field is left empty purposefully;
  • HEADING FOR ORDER DETAILS — a feature that allows you to type in the title you want to show before the order data on the Checkout page;
  • WOOCOMMERCE ORDER DETAILS — a “Set up” button to configure a list of custom fields displayed on the Thank You page and during order preview in the dashboard, allowing you to edit form metadata that applies to all Redirect to Checkout actions within one particular form;
add to cart & redirect to checkout field map
  • WOOCOMMERCE CHECKOUT FIELDS MAP — a set of fields that allow one to connect WooCommerce checkout fields to corresponding form fields, enabling a partly pre-filled form when users are redirected to the Checkout page.

If we choose the “Manual Input” option, we can add only one product to the submission form. However, if we select the “Form Field” option, we can add as many items as needed, which requires adding another field to the form, such as a Select Field or a Radio Field, and then add all the necessary products.

adding multiple products

In the Edit Options pop-up, fill in a set of fields including:

  • LABEL — in this field, add the name of the product;
  • VALUE — in this field, add the product ID (that you have copied in the WordPress Dashboard > Products section) so the form would know which product to fetch
  • CALCULATE — in this field, add the price.
NOTE

This addon allows adding only ONE item or product to the cart and then redirecting the user to Checkout. Also, keep in mind the reload method. If you select “AJAX” in the form settings, the redirect action will occur only after ALL post-submit actions. If you choose “Reload,” the redirect will happen immediately.

Add the Form to the Landing Page

Once everything is set up, let’s add the form to our landing page and test it. To do so, create a new page or open an existing one in the Elementor editor (or any other editor you’re using), and add a JetForm widget to the page.

In the Choose Form field, select the form you created in the previous step; in our case, it’s the “Accessory promo” form.

adding form to landing page

As mentioned previously, the add-on allows you to display products via “Manual Input” or the “Form Field” option, which will affect the look of the form on the front-end.

Form Field type

The first type form (that features three products) will have the following look with a Radio Field block where the user can select one of the three products whose photos are featured in the Basic Gallery widget.

multiple products form front-end

This page features a Basic Gallery widget displaying three product images of models wearing different sunglass styles. Below the gallery, a JetForm widget captures customer information (name, email, phone) and product selection through the Radio Field, with a “Go To Checkout” button that directs users to the WooCommerce checkout process.

Manual Input type

And the second type of form (that features one product) might have the following look.

single item product form front-end

This page features a Basic Gallery widget that displays four product images showcasing the Oval sunglasses from different angles and on models. The JetForm widget below collects basic customer information (first name, last name, email, phone) with a “Go To Checkout” button leading directly to WooCommerce checkout.

Redirect to Thank you Page

When users complete all required fields and click on the “Go To Checkout” button, they are redirected to the checkout to submit their billing and shipping information. 

As we added all form fields to the WooCommerce order details, we can see them all on the Checkout page.

checkout page

Right after clicking on the “Place Order” button, users will be redirected to the Thank You page that contains all the data submitted.

The first section of the page provides a summary of the order, including the product name, price, and payment method.

thank you page part 1

The second section of the page shows billing and shipping information.

thank you page part 2

Please note that you can output the created form in Elementor, Bricks, and Gutenberg using a dedicated widget, element, or block, as well as with any other builder via a shortcode.

That’s all; now you know how to redirect the JetFormBuilder form to the WooCommerce Thank You page on your WordPress website.

In this tutorial, the “Insert/Update Term” Post Submit Action is explained, which is intended to add or update terms (including the parent/child terms) of a selected taxonomy. Here, except for the JetFormBuilder plugin, the JetEngine plugin (for creating queries) and the JetThemeCore plugin (for displaying on specific pages) should be installed and activated.

Creation of a Custom Post Type, Taxonomy, and Terms

Since a new term should be added to an existing taxonomy, a Custom Post Type (CPT) and a taxonomy should be created.

Read the How to Create Custom Post Types in WordPress and How to Create Custom Taxonomy tutorials for more details.

In this case, we create the “Vehicle Type” taxonomy for the “Vehicle” CPT and add the “Media” meta field to the taxonomy. 

Then, we add terms such as “Cars,” “Trucks,” and more.

created terms enlisted

Inserting Terms

This action does not require additional work (e.g., usage of a query) except for creating a form with the fields that cover the data needed to insert terms. Here, we add a Hidden Field with the default “Current Post ID” FIELD VALUE set; Text Field for entering the term’s name. Additionally, you can add other fields to include CPT posts’ data (e.g., slug, metadata).

For improved usability, we insert a Checkbox Field to display all previously added terms and an Action Button to submit the form.

NOTE

Displaying terms via fields on the front end is available for the Checkbox Field, Radio Field, which allow adding terms due to their Enable Custom Options settings. Read more about this specific feature in the How to Use Allow Custom Feature for Checkbox and Radio Fields tutorial.

settings of the checkbox fields

Then, we navigate to the JetForm settings tab and open the Post Submit Actions tab. Here, we add the “Insert/Update PostPost Submit Action and set the following option in the newly appeared Edit Insert/Update Post pop-up: specify the POST TYPE (the “Vehicle”, in this case); set the required POST STATUS (the “Published” post), and move to the FIELD MAP fields.

Here, select the “Post ID (will update this post)” option in the field that refers to the form’s Hidden Field

the insert and update post pop-up settings

Since we added only the Text Field to display the post title, only this data will be shown.

the insert and update post pop-up scrolled

After that, scroll down the pop-up to the Select Term drop-down list, which refers to the Checkbox Field added in the form. Here, select the “Post Terms” option and the required taxonomy (in this case, “Vehicle Type”). Press the “Update” button and the pop-up will be closed.

In the next step, move to the JetForm settings and scroll down to the Preset Settings section. Here, activate the Enable toggle, which enables the SOURCE, GET TERM FROM, and other fields. Here, set the “Post” SOURCE, “Current post” GET TERM FROM. In the next fields, select options that refer to the form’s field: the “Post ID” option in the field that refers to the form’s Hidden Field; the Post Title in the corresponding drop-down list, etc.

the preset settings

Finally, publish the form. Add it to a single page of the CPT posts (we add it to the “My Vehicle” CPT post) using the JetForm widget or block (depending on the editor you prefer) and move to the front-end to view the post.

Read the Displaying a JetFormBuilder Form in Any Page Builder tutorial for more details. 

Here, we press the “+ADD NEW” button and type the “Bus” text in the opened field.

inserting terms on the front end

Then, we click the “Submit” button, and the form is submitted successfully, with the inserted term added to the list.

the new term added

After that, we return to the term tab and observe that the “Bus” term appears in the list. 

the new term added to the list

Also, this term is shown in the corresponding post settings.

the term shown in the cpt post

Attaching Child Terms to Parent Ones

In this case, a query for terms should be built first to allow selection of the needed parent term, for which the child term users intend to add via the Checkbox Field.

Here, we move to the WordPress Dashboard > JetEngine > Query Builder tab and press the “Add New” button to create a query with the following options. 

First, type the query’s Name (we type the “Insert New Term” text) and select the “Terms Query” Query Type

query settings

Then, move to the General tab and select the required Taxonomy (in this case, “Vehicle Type”). Next, unroll the Parent/Child tab and add the “0” number in the Child Of field. Finally, move to the top of the page and save the query by pressing the “Add/Update Query” button.

query general settings

In the next step, create another form and insert the needed fields. In the Hidden Field, set the “Current Term ID” FIELD VALUE.

NOTE

The “Current Term ID” and “Current Object ID” FIELD VALUE options of the Hidden Field fully cover the “Current Post ID” or “Current User ID” option functionality and can be used instead of them.

Also, insert the Text Fields needed to enter the term’s data (we insert the Text Fields to insert the term’s name and slug).

the hidden field settings

Then, to specify the needed parent term, for which the child term users intend to add, place the Checkbox Field and set the following options: “Generate Dynamically” FILL OPTIONS FROM, “Get values list from JetEngine Query” GENERATOR FUNCTION, and insert the FIELD NAME (here, we insert the “71|term_id|name”, which means the “71” 一 ID of the query (set in the Custom Query ID field of the query settings).

the checkbox field settings for displaying parent terms

Then, we insert a Media Field for entering an image associated with the term and a Textarea Field for entering the term’s description.

Then, add the Action Button.

In the next step, insert the “Insert/Update Term” Post Submit Action. Here, in the appeared Edit Insert/Update Term pop-up, select the needed TAXONOMY (we select the “Vehicle Type”) and navigate to the FIELDS MAP section to assign the pop-up field that refers to the form’s field: set the “Term ID (will update the term)” option in the field that refers to the form’s Hidden Field and select the Term Name, Term Slug, etc. in the corresponding drop-down lists.

the edit insert and update term pop-up

Then, scroll the pop-up down and choose the “Term Parent ID” option in the Term Parent drop-down list. Then, press the “Update” button. 

the edit insert and update term pop-up scrolled

In the final step, navigate to the JetForm settings and scroll down to the Preset Settings section. 

Here, activate the Enable toggle. Then, set the “Term” SOURCE and the “Current term” option in the GET TERM FROM field. In the next fields, select options that refer to the form’s field: the “Term ID (will update the term)” option in the field that refers to the form’s Hidden Field and the “Term Name,” “Term Slug,” and “Term Parent” in the corresponding drop-down lists.

preset settings of inserting a child term

After that, scroll the Preset Settings down and assign the form’s field to the corresponding taxonomy meta fields, e.g., the “insert_an_image_for_the_term” form’s field to the “image” taxonomy meta field.

preset settings scrolled

Publish the form.

Then, add the form to an archive page using the JetForm widget or block. For example, we use the page built with Elementor and place the JetForm widget there.

Then, move to the term list and view the required term. In this case, we open the “Bus” term and change the “Bus” text to “Van” in the Term Name field. Additionally, we correct the slug, select the parent term in the Term Parent drop-down list, and submit the form.

changing the parent term on the front end

Next, the updated term appears in the term list as a child term of the “Bus” taxonomy.

the added child term in the list

That’s it about the usage of the “Insert/Update Term” Post Submit Action to add or update terms (including the parent/child terms) of a selected taxonomy using the JetEngine plugin for WordPress.

With the Save Form Progress Addon from the JetFormBuilder WordPress plugin, you can activate the form progress saving mode. So even if the form was accidentally closed, all the entered data will be saved. This solution is suitable for very long forms and makes the multi-step form more user-friendly.

Table of Contents:

Set Up and Activate the Addon

To install the add-on:

  1. Go to WordPress Dashboard > JetFormBuilder > Addons tab and find the Save Form Progress addon in the All Available Addons section.
  2. Press the “Install Addon” button, and once installed, it will appear in the Your Installed Addons section.
  3. Click the “Activate Addon” button.
jetformbuilder addons tab

Create a Form

Navigate to the WordPress Dashboard > JetFormBuilder > Add New tab to create a new form.

The new form will be opened in the Gutenberg block editor. 

Press the “Start from scratch” button in the Welcome block to create your custom form. 

The Welcome block will be closed, and the Hidden Field, the Text Field, and the Action Button will be added by default.

Type the form’s name instead of the “Add title” placeholder. Also, check how to build forms from the Form Creation tutorial.

jetformbuilder default form

In this case, we created a multi-step form for inserting an appointment. The form contains five steps: selecting a service, choosing a provider, picking the date and time for the appointment, providing contact details, and confirming the appointment. These steps are divided by Form Page Breaks.

multi-step form structure

Set the Post Submit Actions

Navigate to the JetForm settings tab and open the Post Submit Actions tab.

Save Form Record

The “Save Form RecordPost Submit Action is set by default. We did not delete this action to collect and manage data via the JetFormBuilder dashboard on the Form Records Page.

Insert appointment

The “Insert appointment” Post Submit Action allows one to create an appointment entry in the corresponding section: WordPress Dashboard > Appointments > Appointments.

To edit the form submit action, hover over it and click the “pencil” icon.

In the Edit Insert appointment pop-up, you need to map the fields that correspond to your form.

insert appointment action set up

When done, click “Update” to save or “Cancel” to discard settings.

Redirect to Page

The “Redirect to PagePost Submit Action redirects the user to a “Thank you” or “Success” page upon completing the form. For this, you should create a separate page if you don’t have one.

For our use case, we’ve created a “Thank you” page that users will see after clicking on the “Submit” button.

redirect to page action set up

When done, click “Update” to save or “Cancel” to discard settings.

Send Email

The “Send EmailPost Submit Action allows sending a confirmation email of one’s appointment. So the message will be sent to the email address put in the form’s field.

send email action set up

Click “Update” to save or “Cancel” to discard settings once you are ready with the settings.

Enable the Saving Form Progress Mode

After installing the addon, in the JetForm settings tab, the Form Progress tab appeared. 

There are two toggles in the tab:

form progress tab set up
  • The Save form progress toggle allows you to enable/disable the functionality of the Save Form Progress addon. Switch it ON to activate the form progress saving mode.
  • The Clear saved form data after successful submission switcher allows to keep/discard the data put into the form field after the form is submitted. In this case, we kept the toggle OFF to allow users to book new appointments more easily.

Add the Form to a Page

Following the How to Set Up a WordPress Pop-up Form tutorial, we added the form to the pop-up, which is placed on the home page.

form placed in a pop-up

Check the Result

Let’s proceed to the frontend and check how it works. We open the form in a pop-up and fill out three form steps.

Now, we close the pop-up with the form to check the details on the doctor’s page. Come back to the home page and open the pop-up. We can continue filling the form fields, with no need to start from scratch.

We can finish filling out the form and submit it. 

That’s it. Now you know how to autosave the form progress and inputted data if the filling process is interrupted with the help of the Safe Form Progress Addon from the JetFormBuilder WordPress plugin.

In this guide, you will find out how to update the JetEngine’s options page values via form with the help of the “Update Options” post submit action from JetFormBuilder for WordPress.

Table of Contents:

In this guide, we will show how to build a JetFormBuilder form with the help of which you can update the JetEngine’s options page data on the front end.
An example form will be created for updating the site info and placed on the user’s account page. It will be available only for users with the “Administrator” user role.

NOTE

This guide is based on the JobBoard dynamic template from Crocoblock.

Build an Option Page

Initially, you should make sure you have created the Options Page with JetEngine.

Find out how to do it in the Options Pages Overview.

For example, we have created the “Site Info” option page with the “Phone Number,” “Email Address,” “Working Hours,” and “Company Address” text meta fields.

Also, we have completed the values by proceeding to the WordPress Dashboard > Your Options Page Name:

site info option page data completed
  • Phone Number — “+1 (555) 123-4567”;
  • Email Address — “jobboard@email.com”;
  • Working Hours — “Mon-Fri: 9:00 AM – 6:00 PM”;
  • Company Address — “123 JobBoard Street, Suite 100, Cityville, State, 12345”.

Next, we have also displayed the added options to the JetThemeCore’s footer with the help of the JetEngine’s Dynamic Field widget.

options dynamic fields added to the footer

Create a Form

Now, let’s build a form that will let users update options.

So, let’s proceed to WordPress Dashboard > JetFormBuilder > Add New.

Give a title to the form. In our case, “Change Site Info.” 

By default, you will see the Welcome block on the page. You can delete it to build a form from scratch.

change site info form name added

Now, we should add fields that will correspond to the previously added options.

First, we add a “Phone Number” Text Field (the FORM FIELD NAME will be generated automatically) and proceed to the Value section. 

Here, we press the “Dynamic Tag” button next to the DEFAULT VALUE field to adjust the value that will be displayed in the field by default.

default value button

In the opened Edit Preset pop-up, set the SOURCE to the “Option Page” and pick the corresponding OPTION VALUE. Now, we select the “Phone Number” option.

Click the “Update” button to save the changes.

Now, the value previously set in the “Phone Number” option field will be displayed inside the form field by default. It can be later changed by the user who completes the field.

phone number preset

When the DEFAULT VALUE field is completed, we head to the Field tab and set the FIELD TYPE to “Tel” so that the value put in the field should be only a phone number.

phone number text field in the form

Next, we add one more Text Field, this time named “Email Address.”

This field also has the DEFAULT VALUE preset, but this time the OPTION VALUE is set to the “Email Address” option correspondingly.

In the Field tab, we also change the FIELD TYPE to “Email.”

email text field in the form

The next field in our form is the “Working Hours” Text Field.

It has the “Working Hours” option connected to be displayed as the DEFAULT VALUE, and the FIELD TYPE is left by default, “Text.”

working hours text field in the form

The last Text Field of our form is called “Company Address”, it has the “Company Address” OPTION VALUE selected as the DEFAULT VALUE correspondingly, and the FIELD TYPE set to “Text.”

company address text field in the form

To finalize the form, we add an Action Button field and change the FIELD LABEL to “Update.”

update action button in the form

Adjust the Post Submit Action

Next, we should set up the “Update Options” action. 

Open the JetForm settings tab and proceed to the Post Submit Actions tab.

Click the “New Action” button to open the Add new action pop-up.

new action button in the post submit actions section

Here, find and click “Update Options” to open its settings.

add new action pop-up opened

In the opened Edit Update Options pop-up, select the needed OPTIONS PAGE. In our case, it’s “Site Info.”

Now, it’s time to connect the form fields with the options fields. It can be done in the OPTIONS MAP section.

To do so, put the FORM FIELD NAMES into the corresponding fields. In our case, “phone_number” is connected to PHONE NUMBER, “email_address” to EMAIL ADDRESS, and so on.

Save the action by hitting the “Update” button.

edit update options pop-up

Now, you can make other changes to the form if needed and press the “Publish” button.

Add the Form to a Page/Template

As we want to place our form on the Profile Builder’s Account Page, we head to the WordPress Dashboard > JetEngine > Profile Builder and open the Account Page tab.

Press the “Add New Subpage” button to add a new subpage to the account page.

We set the “Change Site Info” Title; the Slug is generated automatically. The Template in our case is set to the “Site Info (Elementor Template).”

You can click on the “Create New Template” link to build a template from scratch. 

Here, we also select the “Administrator” option in the Available for the user role field so the built template will be visible only to the admin.

When the changes are made, don’t forget to press the “Save” button.

change site info template in the profile builder

When we open the template assigned to the account page, we add a JetForm widget to it and select the built form in the Choose Form field.

You can adjust the widget settings as desired and press the “Publish” button when ready.

jetform widget added to template

Now, we navigate to the account page on the front end. In our case, the link to the account is located in the header’s menu.

Here, we open the Change Site Info tab and view the form we created.

As we have set the DEFAULT VALUES for all the fields, they are now completed with the values we have previously added in the options fields.

We also see these values in the footer, as we have added option fields to it.

Now, complete the form with different values and click “Update” to see if the data changes in the footer.

form on the front end

The form is now successfully submitted (we can see the notification), and the data in the footer is also changed.

site info changed on the front end

The data in the WordPress Dashboard > Your Options Page Name directory will also be updated. 

That’s all about the “Update Options” post submit action available as part of the JetFormBuilder plugin for WordPress.


This tutorial will guide you through creating a front-end patient card approval system for a healthcare environment using the JetFormBuilder plugin’s Formless Action Endpoint add-on.

Table of Contents

This use case is particularly helpful for clinics or hospitals that need to manage patient records effectively, including automated submission and approval workflows for patient cards. This is best for clinics where patients can register themselves on the website, fill out medical records, and book an appointment. 

The logic is following:

  • Patient registers on a clinic website, goes to the patient card submission form, fills in the form fields, and submits the form;
  • Clinic administrator checks the page that lists patient cards pending review, checks them, and either deletes or approves the cards:
    • When the admin clicks on the “Delete” button, the corresponding formless action fires, and the card goes to the “Trash” folder;
    • When the admin clicks on the “Approve” button, the corresponding formless action fires, and the card goes to the “Published” folder.

This approach can also be used to create a system for submitting and approving guest articles on a blog. The Formless Actions Endpoint can be used to create a front-end system for approving and categorizing all kinds of posts.

To create a patient card approval system using the Formless Action Endpoint addon of the JetFormBuilder plugin, follow these steps.

Create a Custom Post Type (CPT) for Patient Cards

Navigate to the WordPress Dashboard > JetEngine > Post Types section and create a new CPT (“Patient Cards”) by clicking on the “Add New” button. Since the patient card may contain lots of fields, we’re going to add a basic set for demonstration purposes. 

Our CPT will have 14 meta fields so patients can submit personal and health-related information. Most of these are “TextField types apart from the “Gender,” “Smoking Status,” “Blood Type,” and “Consent Form Signed,” which are “RadioField types.

creating patient card custom post type

For patients who might have an existing doctor in this clinic, we could add another field with a dropdown where they can select the doctor. To enable the doctor selection, you need to create a “Post Query” in Query Builder to pull in the list of doctors from the existing “Doctors” Custom Post Type.

For categorization, you may set up a taxonomy for the “Patient Cards” to categorize the patients by activity, age group, or whatever.

Create a set of pages/page templates

So we can display all patient cards on one page, we need to create and customize:

  • a dynamic listing for our CPT; we’ll do it in JetEngine (you can refer to this video tutorial to learn more about creating dynamic listing grids);
  • a CPT Single for an individual “Patient Card”;
  • a Patient Cards Archive template via Theme Builder, where we’ll place the dynamic listing using the Listing Grid Elementor widget (this will display all approved patient cards);
  • and a single page with Listing Grid Elementor widget (this will display all pending review patient cards).
patient cards page preview

Create a submission form

Go to WordPress Dashboard > JetFormBuilder and click the “Add New” button to create a front-end form to allow users to submit new patient cards.

patient card submission form

This form will contain a range of fields that will correspond to the meta fields from the custom post we’ve discussed above. To do that, we need to click on the JetForm tab, go to Post Submit Actions, and add an “Insert-Update Post” form action by pressing the “+ Add New” button. This action allows us to map the form fields with corresponding meta fields of the CPT

If you want your users to be redirected to some Thank You page after they submit the form, you can add another form action, “Redirect to page.” Check this tutorial to learn how to fine-tune this form action.

insert-update post form action

We’ll use the following settings for the “Insert/Update Post” action:

  • POST TYPE — the dropdown field contains all post types available on the website; in this field, we’ll select the CPT created previously, “Patient Cards”;
  • POST STATUS — the dropdown field contains all WordPress post statuses that can be assigned, and we’ll select the “Pending Review” one since the newly submitted patient card needs to be checked and approved by the clinic administrator;
  • FIELDS MAP — this section contains the list of fields from which we can assign the corresponding meta field of the CPT. Upon default, the dropdown doesn’t have any selected properties, and for our case, we need to choose “Post meta” and, in the newly appeared field, add the field value “full_name”. You need to go through the whole list and map all the fields.

When you’re done building the submit form, the first part of the job is done.

Create Formless Action Endpoints

Now, it’s time to utilize the Formless Action Endpoint extension of JetFormBuilder to set up the patient card approval workflow. For our system, we need two Endpoints that will fire different actions: publishing and deleting a card. 

wordpress custom endpoint jetformbuilder

But first of all, we need to create two JetFormBuilder forms where we can assign these actions endpoints. 

Create an approval formless form

Go to WordPress Dashboard > JetFormBuilder and click “Add new.”

creating a form in jetformbuilder

Add a Hidden Field block to the form. In the Field Value dropdown, you can leave the “Current post ID” default value.

In the sidebar, open Block settings and go to:

  • General settings tab, and in the FORM FIELD NAME field, type “post_id”;
  • in the Value tab, click on the “database” icon (next to the “wrench”) to edit the preset.

In the Edit Preset pop-up, we need to make the following edits:

editing present value
  • SOURCE — this field should be set to “Post”;
  • GET POST ID FROM — this field should be set to “Current post”;
  • POST PROPERTY — this field should be set to “Post ID”;
  • Press the “Update” button.

When you save the preset, the Default Value field will get a property that you need to save for further use.

Add Post-Submit Actions

Now, it’s time to add post-submit actions to this form. 

Go to the JetForm settings tab and unroll the Post Submit Actions.

Press the “+ New Action” button under the default “Save Form Record” action to add a new one. Select the “Insert/Update Post” option from the pop-up.

editing pot submit action
  • POST TYPE — in this dropdown, you need to select a corresponding post type that will be updated. In the given case, we need the “Patient Cards” CPT;
  • POST STATUS — in this dropdown, you need to select the required post status. In the given case, we need the “Published” option;
  • Fields Map — in this dropdown, you need to select the “Post ID (will update the post)” option;
  • Press the “Update” button and publish the form.

Now, let’s go back to the Endpoints section to create an Endpoint for this form.

Go to WordPress Dashboard > JetFormBuilder > Endpoints and click the “+ Add new route” button.

setting up action endpoint
  • RELATED FORM — in this field, you should pick the form that will fire the action. In our case, it’s the “Patient Card Approval” form;
  • ACTION TYPE — in this field, you should pick an option from the dropdown list:
    • “WordPress AJAX” — works through a standard WordPress AJAX request;
    • “Rest API Endpoint” — is triggered by a request to the Rest API;
    • “URL Query String” — works when switching to a URL with certain parameters.

In the given case, we selected the “Rest API Endpoint” option from the ACTION TYPE dropdown list. This option activates the ROUTE NAMESPACE and ROUTE text fields, where we typed the first and second parts of the Rest API URL (the “register” and “publishcard” texts, respectively).

  • Is Restricted this feature is deactivated by default. When disabled, the action is publicly accessible to anyone. When enabled, access is limited to users who meet specific criteria, ensuring controlled and secure access;
  • Log Requests — this feature is deactivated by default. When enabled, every form submission attempt through this route will be recorded, providing a detailed log of all form interactions for auditing and analysis.

The last thing we need to do is copy the sample request data.

Go to the Data Fields section on the JetFormBuilder Actions Endpoints page and click the “Sample request” tab.

The requested data will appear in the textarea field below. To copy this data, click the “Copy data for the request” button and save it; we’ll need it in one of the next steps.

sample request data

Finally, click on the “Update” button.

Create a removal formless form

You can duplicate the previous form since most settings are basically the same.

creating a form in jetformbuilder

For the Hidden Field, you don’t have to change anything.

Set the Post-Submit Actions

In the “Insert/Update Post” action, most settings are the same apart from the POST STATUS field, where you need to select the “Move to Trash” option.

editing insert/update post action

Press the “Update” button and publish the form when you’re done.

Now, let’s go back to WordPress Dashboard > JetFormBuilder > Endpoints and click the “+ Add new route” button.

creating an endpoint for the remove form

To create this endpoint, you need to complete the following steps:

  • RELATED FORM — in this field, you should pick the form that will fire the action. In our case, it’s the “Patient Card Remove” form;
  • ACTION TYPE — in this field, you should pick an option from the dropdown list:
    • “WordPress AJAX” — works through a standard WordPress AJAX request;
    • “Rest API Endpoint” — is triggered by a request to the REST API;
    • “URL Query String” — works when switching to a URL with certain parameters.

For the ROUTE NAMESPACE and ROUTE text fields, we’ll type the “form” and “deletecard” texts, respectively.

Go to the Data Fields section on the JetFormBuilder Actions Endpoints page and open the “Sample request” tab.

The requested data will appear in the textarea field below. To copy this data, click the “Copy data for the request” button and save it; we’ll need it in one of the next steps.

Edit Listing Template

At the beginning of this tutorial, we’ve mentioned a set of pages that we’ll use for this system. Now it’s time to edit the pages that list patient cards with “Pending” status.

Since this displays a dynamic listing, we need to go to WordPress Dashboard > JetEngine > Listing Items/Components and edit the corresponding listing.

editing listing

The listing contains a set of Dynamic Fields to display:

  • patient name;
  • phone number;
  • email ID;
  • block with two buttons that say “Approve” or “Remove” the card.

When we were creating action endpoints, we asked you to save sample request data; we’ll need it right now for the “Approve” and “Remove” buttons. You can set them using the Button (by Elementor) or Button (by the JetElements plugin) widgets.

adding sample request value to the button

Click on the Button widget to open the settings panel. Go to the Submit JetFormBuilder Form section:

  • Enable form submission — activate this switcher (upon default, it’s deactivated) to enable Choose route and Data for request fields:
    • Choose route — in the dropdown, you need to select the added route. In our case, it’s the approval form endpoint (the “/wp-json/register/publishcard” route);
    • Data for request fields — into this field, you need to paste the code received from the Data fields section;
  • Click on the “Publish” button to save the changes.

Check the Result

Let’s preview the system.When a new patient card is submitted, we can see it on the backend with the “Pending” status.

patient cards cpt backend status pending

On the front end, it will render with two buttons on a corresponding page:

pending approval patient cards page
  • Сlicking on the “Approve” button — the newly submitted card will change its status from “Pending” to “Published”;
  • Сlicking on the “Remove” button — will send the freshly submitted card to the “Trash” folder.

So when you click on the “Approve” button, you will see a small “Form successfully submitted.” sign.

pending approval patient cards page front-end

“Form successfully submitted.” is a default message that can be changed in the form’s General Message Settings.

This means that the action endpoint was fine-tuned successfully, and the system works. 

The same card now has the status “Published” on the backend.

patient cards cpt backend status published

That’s it. Now you know how to fine-tune the Formless Action Endpoint addon and set up a front-end system to approve/delete posts on a WordPress website.

The Generate PDF Form Action from JetFormBuilder enables users to create custom PDFs dynamically based on the information submitted through a form. This form-to-PDF generator is especially useful for creating a variety of documents, such as invoices, survey reports, receipts, contracts, and certificates.

Contents

Use cases for the PDF form generator include:

  • personalized reports for clients;
  • automating invoice generation for eCommerce transactions;
  • generating certificates for course completions;
  • replicating submission data into standardized documents.

These capabilities improve workflow efficiency in both business and educational environments.

To be able to use Generate PDF Form Action, one needs to have: 

  • JetFormBuilder plugin installed and activated;
  • Generate PDF Form Action installed and activated;
  • web form created with the JetFormBuilder plugin;
  • a PDF template created with the Generate PDF Form Action editor.

Generate PDF Form Action Installation

To install the Generate PDF Form Action, one needs to go to WordPress Dashboard > JetFormBuilder > Addons, and in the All Available Addons section, find the PDF Attachment addon. Clicking on the “Install Addon” button will start the installation, and then clicking on the “Activate Addon” will activate it.

form to pdf addon installation

When activated, a new section, Templates, will appear under the JetFormBuilder menu item. 

Create the Form

When the addon is activated, a form to apply it should be built. 

The new form can be created following the path: WordPress Dashboard > JetFormBuilder > Add New.

For demonstration purposes, we create a “Zolden Customer Satisfaction” form.

The form includes the following fields:

customer satisfaction form
  • Text Field — a field that collects the name of the user;
  • Text Field — a field that collects the email ID of the user;
  • Radio Field — a field that collects the grade of user satisfaction on a scale from “1” to “5”;
  • Radio Field — a field that collects the grade of probability if the user recommends the Zolden store on a scale from “1” to “5”.

We should add a PDF form generator action, “Generate PDF,” so this form can generate a PDF when the user clicks the “Submit” button.

To do so, one needs to go to JetForm > Post Submit Action to add a new action by clicking on the “+ New Action” button. By typing “PDF” in the search field and then clicking on the action, one can add the Generate PDF action to the form.

wordpress form to pdf new action search

When added, the form action pop-up settings will appear.

Generate PDF Form Action Settings

The form action pop-up contains a set of settings that allow the PDF generation capabilities to be finetuned in a few steps:

edit generate pdf settings popup
  • SELECT PDF TEMPLATE — a field where a PDF template can be chosen from available ones (upon default, this field is blank);
  • Add new template” — by clicking on this button, one can create a new PDF template in the blocks editor (if the template is already chosen, the button will say “Edit template”);
  • FILE NAME — a field where one can generate the structure of the PDF filename (default value is “%_template_name%”). By clicking on the “wrench” icon, the file name structure can be defined by including dynamic tags like “%name%” or “%email%” that correspond to the list of available fields in the form. This allows each generated file to have a unique, descriptive name based on form data, making it easier to organize and locate files. The file name should be entered without an extension, as the system automatically appends .pdf to the file;
  • “Attach to the Send Email action” — by clicking on this button, one can add the “Send Email” form action, ensuring that the PDF is delivered automatically to the recipient, admin, and also CC/BCC;
  • SAVE GENERATED PDF — by enabling this toggle, one can save a copy of the generated PDF in the related form record and into the folder in “wp-content”;
  • MESSAGES SETTINGS — this section includes a set of fields, ERROR CREATING FILE and ERROR CREATING ATTACHMENT, that allow one to modify the error values. The default values are: “Error when saving a pdf file, namely when creating it, or a directory for it” and “Error when saving a pdf file as attachment,” respectively;

To save or cancel changes, click the “Update” or “Cancel” button, respectively.

Template Editor

Alternatively, one can access the template editor by following the path: WordPress Dashboard > JetFormBuilder > Templates.

The template block editor provides tools to add text fields, images, and other form data. One can insert dynamic fields to populate the PDF with specific form submission data, such as name, date, or email ID. To do so, one needs to click on the “Insert JetFormBuilder Macros” button “[ / ]” and add the dynamic field.

The flow is as follows:

pdf template editor
  • one needs to add the same fields to the template as they are in the form;
  • by clicking on the block with the field name, one can choose a corresponding field macro.
field macros all set

When all the fields are mapped with corresponding field macros, the changes can be saved by clicking on the “Save” button.

To stylize the PDF template, one can choose among the following blocks:

additional blocks
  • Paragraph;
  • Heading;
  • Table;
  • Image;
  • Columns;
  • Conditional Block;
  • Custom HTML.

Once a template is customized, it can be saved for future use. This allows for the reuse of templates across different forms without the need to recreate the design each time.

pdf template customized look

Form Preview

Check the form submission process as it is perceived on the front end.

Form records can be accessed via the path: WordPress Dashboard > JetFormBuilder > Form Records.

The Generate PDF action was fired upon submission, and the generate_pdf_8033_filepath (in your case, the file name may be different) field contains the URL to the PDF.

form records

Also, the PDF was sent to the user and website admin email IDs as specified in the “Sent Email” form action.

To access the PDF files in the WordPress file system, one needs to go to the folder wp-content/uploads/jet-form-builder inside the year/month subfolder where the saved PDF files should be located.

wordpress form pdf generator file preview

That’s all one needs to know about fine-tuning the  “Generate PDF” form action in the JetFormBuilder plugin on a WordPress website.

In this guide, we will show how to build a JetFormBuilder form that will update the data of the bookings made with the JetBooking plugin.

Table of Contents:

Create a Form

Proceed to WordPress Dashboard > JetFormBuilder > Add New to build a new form.

Initially, once the form is opened, complete its name.

Also, you will see the Welcome block added to the page. We want to create a form from scratch, so we are deleting this block for now.

welcome block in the form

The first field we add to the form is the Hidden Field

We set its FORM FIELD NAME to “booking_id” and select the “Current Booking ID” option as FIELD VALUE.

hidden field in the form

Next, we add is Select Field and set its FIELD LABEL to “Status.” The FORM FIELD NAME is generated automatically from the label this time.

In the FILL OPTIONS FROM drop-down list, we pick the “Generate Dynamically” option. Then, in the appeared GENERATOR FUNCTION field, we select the “Get Values List from Booking Statuses” option and complete the FIELD NAME with the “valid|invalid” value.

NOTE

If you want to display all the available statuses in the list, leave the field empty. You can also show only the “Pending,” “Processing,” “Completed,” and “On hold” statuses; if desired, complete the field with the “valid” value. Also, you can display only “Cancelled,” “Refunded,” or “Failed” statuses with the “invalid” value or, like in the described case, complete the field with the “valid|invalid” value to pull out all the statuses except the “Created” one.


Also, we press the “Dynamic Tags” button next to the DEFAULT VALUE field to set the default value of the current “Status” Select Field.

select field block in the form

In the opened Edit Preset pop-up, we select the “JetBooking” SOURCE, “Current Post” option in the GET BOOKING ID FROM field, and “Booking Status” as the BOOKING PROPERTY.

To save the default value preset, press the “Update” button.

select field preset

Next, we add one more Select Field, this time called “Property” (FIELD LABEL). As the FILL OPTIONS FROM value, we select the “Posts” option and the “Properties” in the appeared POST TYPE field.

To set the DEFAULT VALUE, press the “Dynamic Tags” button next to this field.

property select field block in the form

In the opened pop-up, we pick the “JetBooking” SOURCE, “Current Post” as GET BOOKING ID FROM, and “Booking Apartment” as BOOKING PROPERTY

To save the changes, press the “Update” button.

property select field preset

The next field we add is the Check-in/Check-out dates field with the “Dates” FIELD LABEL and the “_dates” FORM FIELD NAME.

We select the “Separate fields for check in and check out dates” option in the LAYOUT field and set the “Check in” as the CHECK IN FIELD LABEL and “Check out” as the CHECK OUT FIELD LABEL.

We also complete the PLACEHOLDER and CHECK OUT FIELD PLACEHOLDER fields with the “Select” value and press the “Dynamic Tags” button next to the DEFAULT VALUE field to set a preset.

check-in check-out dates block

In the preset editing pop-up, we select the “JetBooking” option as a SOURCE, “Current Post” in the GET BOOKING ID FROM field, and “Booking Dates” in the BOOKING PROPERTY field.

Then, we press the “Update” button to save the preset.

check-in check-out dates preset

After that, we add the Calculated Field with the “total” FORM FIELD NAME and put the “%ADVANCED_PRICE::_dates%” value inside it. 

In the CALCULATED VALUE PREFIX field, we put the “Total: $” value.

calculated field in the form

The final field of the form will be the Action Button. To make it suitable for the case, we change the FIELD LABEL to “Update.”

action button in the form

After the form fields are added, navigate to the JetForm tab of the form. Here, open the Post Submit Actions tab and press the “New Action” button.

new action button

In the opened pop-up, find and select the “Update Booking” action.

Right away, the pop-up with the action settings will be opened.

In the BOOKING ID field, select the name of the Hidden Field where the booking ID is stored, and in the CHECK IN/CHECK OUT field, pick the corresponding fields with the check-in/check-out dates.

The following fields located in the FIELDS MAP are optional for this action. The fields presented here are taken from the JetBooking data columns added in the Tools settings

For instance, we have connected the status field with the “Status” field of the form, the apartment_id with the “Property” field, and the total with the “total” field.

To save the action settings, press the “Update” button.

edit update booking popup

Once the form is ready, press the “Publish” button.

Build a Pop-Up

NOTE

The following functionality is available with the JetPopup plugin.

We want to add the built form to the pop-up that will be later linked to the Listing Grid placed on the Account Page. So, initially, we go to WordPress Dashboard > JetPopUp > Create New Popup to build a pop-up. 

In the opened pop-up, select the desired Content Type (in our case, Elementor) and, optionally, complete the Name and select the preset in the corresponding section.

Press the “Create” button to proceed to the editor.

create a popup window

In the editor, we delete the content added to the pop-up by default and add a JetForm widget to the pop-up.

Once done, in the settings, pick a just-built form in the Choose Form field.

Customize the form settings if needed and press the “gear” button to open the pop-up settings.

jetform widget in jetpopup

Here, activate the Loading content with Ajax and Force Loading toggles and press the “Edit” button next to Display Conditions to set the pop-up conditions.

jetpopup settings

Once the button is clicked, the JetPopup dashboard will be opened in a new tab. There, the pop-up visibility conditions pop-up will be displayed.

Press the “Add condition” button and pick the following options in the available drop-down fields: “Include,” “Singular,” “Page,” and “Account.”

Save the conditions by hitting the corresponding button.

popup visibility conditions

Return to the editor and publish the pop-up.

Add a Query

Now, let’s build a Query that will be used as a source for the Listing template.

Head to WordPress Dashboard > JetEngine > Query Builder and press the “Add New” button.

In the Add New Query page, complete the Name field and set the Query Type to “JetBooking Query.”

jetbooking query

Scroll down to the JetBooking Query section and press the “Dynamic Tags” button. There, pick the “Current user ID” option and click the “Add Query” button.

This way, the future listing will query data by the current user.

user id field in the jetbooking query

Create a Listing

Now, it’s time to create a Listing Template based on the built query.

Open the WordPress Dashboard > JetEngine > Listings/Components directory and click the “Add New Listing Item” button.

Pick the “Query BuilderListing source and the just-built query as the Query. Then, complete the Listing item name and pick the preferred Listing view.

Press the “Create Listing Item” button.

setup listing item pop-up

First, we want to display the booking ID. 

So, we add a Dynamic Field widget to the page. Then, we open the Object Field drop-down field, scroll down to the JetBooking section, and pick the “Booking ID” option.

NOTE

The preset data will be shown if at least one booking is made on the website.

Then, we activate the Customize field output toggle and complete the appeared Field format field with the “Booking ID: %s” value.

booking id dynamic field settings

Next, we add another Dynamic Field to the page. This time, we pick the “Status” option in the Object Field.

For this widget, we activate the Customize field output toggle as well. This time, we fill in the Field format field with the “Booking Status: %s” value.

booking status dynamic field settings

The following field we add is one more Dynamic Field; this time, the Object field is set to “Booking Instance ID”.

Then, we activate the Filter field output toggle and pick the “Get post/page title” Callback

Next, we activate one more toggle, Customize field output, and complete the Field format field with the “Property: %s” value.

booking instance id dynamic field settings

The next data we want to display is check-in/check-out dates, so at first, we add a Dynamic Field with the “Check In Date” Object Field.

For this field, we activate the Filter field output toggle and pick the “Format date” Callback. Another toggle we activate is Customize field output and complete the Field Format with the “Check-In Date: %s” value.

Then, we repeat the same procedure, but this time for the check-out date, so we pick the “Check Out Date” option in the Object Field, and the Field Format is set to “Check-Out Date: %s” correspondingly.

check out dynamic field settings

The last widget of the current Listing Item is the Dynamic Link

Initially, we change its Label to “Edit Booking.”

dynamic link content tab

Next, we open the Advanced tab of the widget settings and unroll the JetPopup settings.

In the Attached Popup field, pick the built pop-up and activate the Jet Engine Listing popup toggle.

dynamic link jetpopup tab

If you have finished with the Listing Item, click the “Publish” button.

Build a Template

NOTE

The following functionality is available for Elementor users.

Now, we want to build a template that will be added to the Account Page.

Go to WordPress Dashboard > Templates > Add New directory of the Elementor plugin. 

In the pop-up, set the type of template to “Page”, complete the template’s name and press the “Create Template” button.

new template elementor popup

In the template, add the Listing Grid widget and pick the just-built Listing.

bookings elementor template

Customize the template additionally if needed, and whenever you are ready, hit the “Publish” button to save the template.

Attach Template to Profile Builder

Now, we want to connect the built template with the Account Page.

NOTE

For this functionality, the JetEngine plugin should be installed and activated, and the Profile Builder module should be enabled in the settings.

Head to WordPress Dashboard > JetEngine > Profile Builder and open the Account Page tab. 

Scroll down the page and hit the “Add New Subpage” button.

We complete the Title field with “Your Bookings,” and the Slug is filled automatically.

As the Template, we pick the previously built Elementor template and press the “Save” button.

profile builder settings

Check the Result

Open the Account Page on the front end and open the Your Bookings tab. 

Here, the listing with the bookings made on the website is presented. 

To access the pop-up with the form, we click the “Edit booking” button next to the first icon.

your bookings listing on the profile page

When the pop-up opens, you will see the completed form with the clicked booking data.

We change the dates in the Check in and Check out fields and press the “Update” button.

jetform pop-up on the profile page

To check if the booking was edited, go to WordPress Dashboard > Bookings and open the booking that you have edited via the form.

edit booking pop-up

That’s all; now you know how to update JetBooking booking with the help of the JetFormBuilder form.

Bookings can be updated using the JetFormBuilder form and its “Update Booking” post-submit action to change booking fields on the front end.

NOTE

The JetBooking plugin should be installed and activated to access the “Update Booking” post-submit action.

Post-Submit Action Settings

The Post Submit Actions tab can be found in the JetForm section of the form.

Once the “Update Booking” option is selected in the Post Submit Actions tab, the “pencil” button should be clicked to open the action settings.

update booking post submit action

When the button is clicked, the settings pop-up is opened. 

The pop-up includes the following customization fields:

the first part of the edit action pop-up
  • BOOKING ID — a field obligatory for completing. It should be connected to the form field indicating the booking ID. For instance, it can be the Hidden Field with the “Current Booking ID” FIELD VALUE;
  • CHECK-IN/OUT DATE FIELD — a field obligatory for completing. It should be connected to the form field indicating the check-in/check-out dates; 
  • FIELDS MAP — optional fields that correspond to the columns added in the JetBooking settings (Tools tab). The following fields should be assigned to the form fields added to the booking update form.

To save the action, one should click the “Update” button.

Once the form is built, the “Publish/Save” button should be pressed.

ready form

Form Submission

The form should be placed on any desired needed page/template.

For instance, our form is placed in the pop-up (built with the JetPopUp plugin) and connected with the listing put on the account page (created with JetEngine). 

In our case, the pop-up with the form can be opened by pressing the “Edit booking” button.

your bookings listing on the profile page

When the form is completed, one should submit it by pressing the corresponding button.

jetform pop-up on the profile page

Booking Update Check

To check the update, one should open the WordPress Dashboard > Bookings directory. 

Then, the booking, just edited on the front end, should be opened.

The new data should now be filled in as values in the corresponding fields.

edit booking pop-up

That’s all about the “Update Booking” Post Submit Action available with the JetFormBuilder and JetBooking plugins for WordPress.


PDF Attachment Addon for JetFormBuilder allows converting a submitted form to a PDF file with a predefined design. The user can then open the PDF file in a browser or receive it in a specific email.

This tutorial exemplifies creating a form with Text, Number, Media, and Textarea Fields, generating a PDF file based on this form, attaching this PDF file to an email, sending it to a pre-specified user, and downloading the PDF file via a browser.

Set Up and Activate the Addon

To install the add-on:

  1. Go to WordPress Dashboard > JetFormBuilder > Addons tab and find the “PDF Attachment Addon“ in the All Available Addons section.
  2. Press the “Install Addon” button, and once installed, it will appear in Your Installed Addons section.
  3. Click the “Activate Addon” button.

 jetformbuilder addons tab

Create a Form

Navigate to the WordPress Dashboard > JetFormBuilder > Add New tab to create a new form.

The new form will be opened in the Gutenberg block editor. 

Press the “Start from scratch” button in the Welcome block to create your form. 

The Welcome block will be closed, and the Hidden Field, the Text Field, and the Action Button will be added by default.

Type the form’s name instead of the “Add title” placeholder. 

Learn how to build forms from the form creation tutorial.

jetformbuilder default form

In the given case, we deleted the Hidden Field and customized the default Text Field. 

In this case, the form will contain a Media Field for uploading images, Text Fields to enter the first name, last name, and email, a Number Field to input a number value (the users’ experience in years in case they apply for a job) and a Textarea Field to add more information.

jetformbuilder form with added fields

Set the Post Submit Actions

Navigate to the JetForm settings tab and open the Post Submit Actions tab. 

The “Save Form RecordPost Submit Action is set by default. We did not delete this action to collect and manage data via the JetFormBuilder dashboard. In particular, it allows the upload of the generated PDF file as an attachment to the Media Library and displays the appropriate link on the Form Records Page

Set the “Generate PDF” Post Submit Action

The next step is setting the “Generate PDF” Post Submit Action.

Press the “+ New Action” button to add the “Generate PDF” Post Submit Action. Also, click the “Add new template” button in the opened Edit Action pop-up.

generate pdf post submit action

After clicking, you will be redirected to a new template. Type the template’s name instead of the “Sample template [locale time]” name default text.

Customize the template content according to your preferences. 

Using the Columns block, we divided the template into two parts, then added the Image block to the first column and the Table block to the second one. 

To display the appropriate values in the PDF attachment, we used the “%field name%” macro.

In particular, we placed the cursor in the first Column of the page and pressed the “plus” icon to select the Image block. We also hit the “[/]” button from the block toolbar to select the needed form field from the drop-down list (here, the “Photo” field).

selecting the form field to be added in a template

Then, we moved to the second column and added the Table block. Also, we pressed the “plus” icon and hit the “[/]” button from the block toolbar. Finally, we selected the “First Name,” “Last Name,” and “Email” Text Fields, “Experience” Number Field, and placed the “About me” Textarea Field under the Column.

jetformbuilder template

The created templates are collected in the WordPress Dashboard > JetFormBuilder >Templates tab and can be edited as any JetFormBuilder form.

For now, complete the template, press the “Update” button, and return to the form.

The last step at this stage is setting the “Generate PDF” Post Submit Action in the Edit Action pop-up. Type the required file’s name in the FILE NAME field or press the “wrench” icon to select the form field, whose name will be used as the file name of the submitted form.

In this case, we used the %_template_name% macro that returns the template’s header.

Also, enable the Save generated PDF toggle.

generate pdf edit action pop-up

Finally, scroll down the pop-up and type the texts of the ERROR CREATING FILE and ERROR CREATING ATTACHMENT messages.

Set the “Send Email” Post Submit Action

To attach the generated PDF file with the submitted data to the email, click the “Attach to the Send Email action” button in the Edit Action pop-up. While pressed, this button opens a tooltip with a “Confirm” button. Clicking the “Confirm” button adds the “Send Email” action after the “Generate PDF” Post Submit Action is created.

adding the send email action

Then, the tooltip will display the text that your file path is added to the attachments option of the next “Send Email,” and the “Go to the action” link.

redirecting to the send email action

Pressing this link opens the “Send Email” Edit Action pop-up, scrolls it down to the ATTACHMENTS section, and adds the generated PDF file as the attachment.

adding an attachment via the send email action

We scrolled up this pop-up, then selected the “Email from submitted form field” option from the MAIL TO drop-down list, and chose the form’s “Email” Text Field in the appeared FROM FIELD field. Then, we completed the SUBJECT field, set the “Plain text” CONTENT TYPE, and added the text in the CONTENT text field.

setting the send email action

Finally, click the “Update” button to save the settings and close the pop-up.

Set the “Redirect to Page” Post Submit Action

This Post Submit Action allows users to be redirected to a created PDF file with submitted data. Press the “+ New Action” button to add the “Redirect to PagePost Submit Action. Press the “pencil” icon to edit the action.

Set the “Custom URL” REDIRECT TO option and press the “wrench” icon to choose the REDIRECT URL from the drop-down list of macros.

selecting a custom url for redirecting

Finally, press the “Update” button to save the “Redirect to Page” Post Submit Action settings and close the pop-up.

Once completed, press the “Update/Publish” button.

Add the Form to a Page

Create a page or open a page/post you need and place the JetForm widget/block/element. 

Learn about its settings from the JetForm Overview.

Select the built form in the Choose Form drop-down list. 

the jetformbuilder form added via the jetform widget

To display the form in other page builders (i.e., Gutenberg or Bricks), check our guide on How to Display a Form on the Front End.

Check the Results

Navigate to the front end, fill in the form’s fields, and submit the form.

the jetformbuilder form on the front end

Once the “Redirect to Page” Post Submit Action is performed, the created PDF file will be opened in the browser.

the generated pdf file link opens in a browser

Then, enter your mailbox and check if you received the email with the PDF file attached. Open the attachment to observe the information from the submitted form fields.

the generated pdf file attached to an email

Finally, navigate to the WordPress Dashboard > JetFormBuilder > Form Records tab and unroll the submitted form details.

Scroll the record down and find the Generated PDF section. Press the “View link to open the attachment in the Media Library. Also, you can copy the file path link under the Label & Name section and paste this link into the browser to observe the created PDF file.

the generated pdf-file links on the form detail record

That’s all about creating a JetFormBuilder form for WordPress, generating the PDF file from that form, attaching that PDF to an email, sending it to a pre-specified user, and downloading the PDF file via your browser.

Make is a free platform that allows you to connect apps and services (e.g., Gmail) and automate workflows using a no-code visual builder. Let’s find out how to connect a WordPress form to Make with the JetFormBuilder plugin.

As an example, we will create a Contact Form and connect it to the Gmail service via the Make platform.

Set Up Make and Add a Webhook

Sign in or sign up for the Make platform. Once you’ve reached the dashboard, hit the “+ Create a new scenario” button in the upper right corner.

Proceed to this tutorial to learn more about the Make scenario creation process.

create a new scenario on the Make Dashboard

Choose the “Webhooks” module from the list of ALL APPS near the big “plus” button. In web development, a webhook is a method of augmenting or altering the behavior of a web page or web application with custom callbacks.

webhooks tool in a new scenario on the make platform

Then, you should choose the “Custom webhook” option from the TRIGGERS list.

custom webhook trigger

In a new pop-up for the Custom Webhook module, hit the “Add” button near the drop-down menu.

add a new webhook

Change the Weebhook name if required and push the “Save” button. 

webhook name

After that, you will see the generated link, which you should copy to the clipboard by clicking the corresponding button. Then, proceed to your WordPress website without closing the Make window.

copy webhook address

Set Up the JetFormBuilder Form

Navigate to WordPress Dashboard > JetFormBuilder > Forms, find the form you want to connect with Make and click to edit it.

Alternatively, you can create a new form by clicking the “Add New” button.

creating a new form with the jetformbuilder plugin

If you created a brand new form, give it a title. 

Select a pattern from the Welcome block (e.g., “Contact form” option) or hit the “Start from scratch” button.

welcome block for jetformbuilder with the contact form pattern

The “Contact form” option adds the following fields to the form: two Text Fields (“Email” and “Subject”), one Wysiwyg Field (“Message”), and an Action Button.

fields added to the contact form with a pattern

Adjust the form fields if needed and proceed to the Post Submit Actionstab of the JetForm section. Reselect the “Send Email” option to the “Call Webhook” and click the “pencil” icon.

call webhook post submit action

In the Edit Action pop-up, enter the previously copied WEBHOOK URL in the appropriate field. Then, hit the “Update” button.

webhook URL in the form post submit action

The “Save Form Record” action stores the form entries in the database, which can be accessed from the Form Records Page. You can keep this action if needed.

After customizing the form, press the “Publish/Update” button to save the changes.

Place the form on the page with the JetForm block/widget/element and push the “Submit” button.

submitting a form to determine the data structure

Return to the Make page after getting the “Form successfully submitted.” green note.

In the Webhooks pop-up, you should see another green note – “Successfully determinated.” – on the left from the “Copy address to clipboard” button. Hit the “OK” button.

data structure was successfully determined for the webhooks module

Adding Another Module

With the Webhook module in the Make platform, you can connect any app to the WordPress form. For example, let’s attach the Gmail app. To do so, hit the “Add another module” button first.

To observe the app settings, move to the Gmail module tutorial.

add another module to the scenario

Enter “Gmail” into the search bar and pick the “Send an Email” action.

send an email Gmail action

Click the “Create a Connection” button and connect Make to your Gmail account. 

Then, you can adjust the Gmail module fields.

Enter a recipient’s email address into the To field (for example, a website administrator’s email). For convenience, you can enable the Map toggle.

In the Subject and Content fields, you can enter the form field names to add the submitted form data to the email subject and content fields. Click on the field and select the needed field from the list.

Set other fields if needed and push the “OK” button.

Gmail module with send an email action settings in make

If you need to connect two or more modules to the Webhook, click the “wrench” icon between the Webhook and Gmail modules and hit the “+ Add a router” option.

add a router to make scenario

Now, you can click on the Router to add more modules to the scenario.

adding more modules to make scenario using router

For our case, we used only the Webhooks and Gmail modules. 

Test the Flow

After adjusting all modules, you can hit the “clock” icon to open the Schedule setting pop-up and alter the scenario scheduling. After that, push the “Run once” button to test the scenario.

scheduling a scenario in make

Proceed to the front end page of your WordPress website, where the form is placed, fill in the fields, and press the “Submit” button.

submitting a contact form

Return to the Make platform. If the scenario was completed successfully, all modules will be highlighted in green.

The scenario run was completed

Also, the email was sent smoothly.

Testing Contact Form Submission in Gmail

That’s all. Now you know how to link a WordPress form with the Make platform and connect it with different apps using the JetFormBuilder plugin.

With the help of the JetFormBuilder plugin, it is possible to create a front-end registration form with email confirmation. To register on the site, the user should input the login and email address and follow the verification link sent to the mailbox. Once the user follows the link, the registration process is completed.

Email verification helps validate the user request before the form is submitted. Also, it makes the registration process fast and effortless — creating a password to complete the registration is not required. The user can use an automatically generated password to log in to the site in the future.

submitting the registration form with email verification

Create a New Form

In the WordPress Dashboard, navigate to the WordPress Dashboard > JetFormBuilder > Add New tab to start creating a new form. 

In the form editing page, enter the form name. 

The form will contain two Text Fields and one Checkbox Field. The first Text Field will allow the user to enter the email address, and the second Text Field will allow entering the login. The Checkbox Field will serve as a “Remember Me” field. 

In the Welcome block, pick the “Register User” pattern.

register user form pattern

It adds two Text Fields: “Email” and “Login.”

In the right sidebar with Block settings, you can change the FIELD LABEL and FORM FIELD NAME of the Text Fields according to your preferences.

NOTE

Mind that the FORM FIELD NAME should contain only lowercase Latin letters with no spaces; numbers, dashes (“-”), and underscores (“_”) are allowed.

Also, note that the FIELD TYPE of the “Email” field should stay as “Email.”

email text field

Then, add a Checkbox Field below. Leave the FIELD LABEL empty and define the FORM FIELD NAME — for example, type “remember-me.”

Press the “Manage items” button to configure the options for this Checkbox Field.

creating remember me checkbox in jetformbuilder registration form

In the opened pop-up, click the “Add new Option” button. Complete a LABEL field — “Remember Me.” Insert “1” as the VALUE option.

configuring the remember me checkbox field

Once done, “Update” the changes.

Set Up Post Submit Actions

Switch the Block settings tab in the right sidebar to the JetForm tab. Unfold the Post Submit Actions section.

The “Register User” pattern added three post-submit actions: “Verification,” “Register User,” and “Save Form Record.”

post-submit actions added with the register user pattern

Configure the “Verification” action

Click the “pencil” icon under the “Verification” action to open the customization pop-up.

verification action editing

The “Verification” action sends an email with a verification link to the specified email address. The user should press this link within the defined timeframe to complete the verification. Once the verification is complete, the rest of the Post Submit Actions will be executed.

The WHO CAN VERIFY THE SUBMISSION setting defines who has the authority or capability to verify or approve a submitted form:

After setting the verification permission, enter the number of hours into the LINK LIFESPAN field. This setting defines the timeframe within which the verification link remains active. If the LINK LIFESPAN field is left empty or if “0” is entered, the verification link will not have an expiration time.

After that, choose the email field from the suggestions under the EMAIL FIELD drop-down menu. Once the email field is specified, a new toggle will appear, encouraging you to Create custom verification email.

edit verification action

If the toggle remains disabled, a standard email will be sent to the user from the Administration Email Address set in the WordPress Dashboard > Settings > General tab.

standard email verification letter of jetformbuilder

Enable the Create custom verification email toggle and proceed to the rest of the action settings. We will set up the “Send Email” action later.

Move on to the SUCCESS PAGE and the FAILED PAGE settings. Select a page where the user should be redirected in case of a successful or failed verification. If no page is selected, the user will be redirected to the page where the form was initially submitted. It is also possible to “configure a separate Redirect to Page action” for each case.

create custom verification email

In our example, we will redirect the user to a “My Account” page after successful verification and to a static “Verification Failed” page if the user fails to complete the verification. 

Once you finish the setup of this action, click the “Update” button to save the changes.

Set up the “Register User” action with an auto-generated password

Press the “pencil” icon to edit the “Register User” action’s settings.

edit register user action

In the FIELDS MAP section, the “Email” and “Login” fields are already mapped. Therefore, the value entered by the user into the “Login” field will be saved as the user login, and the value of the “Email” field will be saved as the user’s email. 

Then, map both the Password and the Confirm Password fields with the “Secure unique token” option. The “Secure unique token” option is added by the “Verification” action and represents a unique password auto-generated after form submission. This way, the form lets the user sign up with only their email and login, not requiring them to create a password manually at this stage. Later, this password will be sent to the user with a “Send Email” action.

register user action fields map

Scroll past the FIELDS MAP section and select the User Role, which should be assigned to the newly registered user (e.g., “Subscriber”).

user role setting

Next, scroll down to find and activate the Log In User after Register: toggle. This way, the user will be automatically logged in after completing the verification process. 

Select the “remember-me” Checkbox Field as the “REMEMBER ME” FIELD option. This field helps to keep the user authenticated for a longer period of time — after checking the “Remember Me” checkbox, the user will remain logged in for fourteen days; if not, only for two days.

We have finished setting up the “Register User” action. Save the settings and proceed to the next step.

log in user after register toggle

“Save Form Record” action

The “Save Form Record” action stores the submitted form data on the Form Records Page. On this page, you can verify emails manually as described in the Verify Emails Manually from the WordPress Dashboard chapter of this tutorial.

In our case, we don’t need to modify the action settings, but you can configure them according to your needs.

save form record action

Add a “Send Email” action for a custom verification email

Now, it is time to create a custom verification email.

Open the settings of the “Verification” action once more to click the “+ Add Send Email action” button. It will automatically add a new Send Email” action where each part of the verification email can be customized.

add send email action

Leave the MAIL TO and FROM FIELD settings intact and proceed to configure the rest of the fields.

edit send email action

After setting up the REPLY TO, SUBJECT, FROM NAME, and FROM EMAIL ADDRESS fields, select the “HTML” CONTENT TYPE to allow the processing of HTML tags in the content of the email.

Then, edit the content of the email according to your needs. It is also possible to insert Macros to retrieve the values entered by the user into the form fields. To see the list of available Macros, click the wrench-shaped icon near the CONTENT field label.

email content

The list contains general Macros that represent each form field and three special Macros added by the “Verification” action:

  • %_jfb_verification_token% — represents a unique token generated for the user. If this token was set as the user password in the “Register User” action settings, you can insert the %_jfb_verification_token% macro in the email content to send the user this automatically generated password. The user will use it to log in; 
  • %_jfb_verification_token_id% — represents the ID of the verification token in the database. A reference to each verification token is saved in the “jet_fb_tokens” database table; however, the token itself is not stored there;
  • %_jfb_verification_url% — a verification link the user receives to complete the verification process. The link contains the verification token and its ID.

We used only the %_jfb_verification_url% macro from the above list and composed such an email:

“Please confirm your registration on the site %CT::SiteName%.

<b>If this was a mistake, ignore this email, and nothing will happen.</b>

To complete the registration, click on the link:

%_jfb_verification_url%

The link expires in 4 hours!”

Click the “Update” button to close the customization window and proceed to the following “Send Email” action.

Add a “Send Email” action to send the password details

The next step is to compose an email, which will be sent to users after they complete the registration. The letter will include an automatically generated password that users can utilize to log into the site until they opt to modify it.

Press the blue “+ New Action” button to add a new “Send Email” action, and click the pencil-shaped icon under the action name to call the customization pop-up.

add new send email action

Select the “Email from submitted form field” option for the MAIL TO field. Then, pick the “Email” field in the FROM FIELD drop-down menu, which appears below.

email from submitted form field

After setting up the REPLY TO, SUBJECT, FROM NAME, and FROM EMAIL ADDRESS fields, select the “Plain Text” CONTENT TYPE option. To allow the processing of HTML tags in the content of the email, select the “HTML” CONTENT TYPE.

Finally, compose the content of the letter, which the users receive after they complete the registration. Include the %_jfb_verification_token% macro to send the users their auto-generated passwords.

We composed such a letter:

“Your registration on [%CT::SiteName%] is completed. Follow this link to enter your account:

https://test-site/account/

This is your temporary password: %_jfb_verification_token%

You can change the password in Profile Settings: 

https://test-site/account/settings/”

including auto-generated password in the email content in jetformbuilder

Once you are finished with the settings, “Update” the changes.

General Messages Settings

Scroll past the Post Submit Actions settings tab and unfold the General Messages Settings. Settings in this tab allow changing the default notifications that pop up after the form submission.

Most importantly, change the default FORM SUCCESSFULLY SUBMITTED message and encourage users to check their mailbox after they submit the form. For example: “Please, check your email inbox to complete the registration.”

general messages settings

Once you finish customizing the form messages, the form is complete. Hit the “Publish/Update” button to save the result. 

Display the Form on the Front End

Head to the page or template where the registration form should be located.

If editing the page with Block Editor, use the JetForm block to display the form in the needed part of the page.

display the registration form with the jetform block in block editor

If editing with Elementor, use the JetForm widget to place the form on the page.

display the registration form with the jetform widget in elementor

For more details, follow the detailed How to Display a Form on the Front End guide to learn how to add the form in any page builder.

Test the Flow

Move to the front end and complete the form to register a new user. Use an email address you can access.

submitting the registration form with email verification

Check the email inbox for a new letter containing the verification link. Follow the link to complete the registration.

click the link in the inbox to complete the registration

After following the link, one should be redirected to the page previously selected in the settings of the “Verification” action. The registration is complete, and a new user is created in WordPress.

Also, the second email is sent to the user containing the password to the account.

auto-generated password is sent to the registered user in email

Verify Emails Manually from the WordPress Dashboard

With the “Save Form Record” post-submit action, you can reach the submitted form data in the WordPress Dashboard > JetFormBuilder > Form Records tab.

If the form has the “Verification” action, the submitted form can have three Statuses

  • Verified – if the user verified the form from the email or the administrator verified it manually. You can set who can verify the form (only admin or user and admin) in the “Verification” action WHO CAN VERIFY THE SUBMISSION setting;
  • Waiting verification – if the user or admin hasn’t verified the form yet;
  • Verification token expired – if the user or admin didn’t manage to verify the form in the timeframe set in the LINK LIFESPAN settings of the “Verification” action. Then, the user needs to submit the form one more time to verify it.
form verification statuses

If the submitted form has the “Waiting verification” Status, it contains the “Verify manually” action by clicking which the form obtains the “Verified” Status.

verify form manually

If you hit the “View” action under the form with the “Verification” post-submit action, you’ll see the Verification section. 

This section shows the verification Status: “Pending,” “Expired,” or “Verified.” It also displays the time when the verification Expires, Expired, or was Verified according to the Status.

If the verification has a “Pending” Status, the section contains the “Verify” button with which the administrator can verify the form.

verification section in the form details

Also, pay attention to the Actions Log sections: if the form is expired or waiting for verification, only two actions are completed: “Verification” and “Send Email” with the custom verification email.

If the user or administrator verifies the form, the next two actions are completed: “Register User” and “Send Email” with the password details.

verified form actions log

That’s it; you have learned how to create a registration form with a double opt-in using only the free version of the JetFormBuilder plugin.

The “Verification” action allows verifying the user’s email before processing other Post Submit Actions. The form will send an email with a confirmation link to the address entered by the user. After the user follows the confirmation link, the verification is completed, and the form is submitted successfully.

email verification action settings in jetformbuilder

Table of contents:

Verification Action Settings

The “Verification” action can be found by opening the Post Submit Actions tab of the form. To add a “Verification” action, the “+ Verification button should be pressed. 

Each form can have only one “Verification” action.

add new verification action in jetformbuilder

To edit the action, one should click the pencil-shaped button.

edit verification action

Pressing the button activates the customization pop-up.

the first part of verification action settings
  • LINK LIFESPAN — after submitting the form, the user receives an email containing a verification link. The LINK LIFESPAN setting indicates the expiration time of this verification link. Here, one can specify the number of hours during which the link stays active. If this field is left empty or contains the “0” value, the link will have no expiration time;
  • EMAIL FIELD — a drop-down list to select a form field in which the user should enter the email address. A verification email will be sent to the address entered into the selected field. If one of the Text Fields in the form has the “Email” Field Type chosen, this Text Field will appear in suggestions.
create a custom verification email
  • Create custom verification email — the toggle appears after selecting an EMAIL FIELD option. If the switcher is disabled, a standard verification email will be sent. If enabled, an Add Send Email action” button will appear, encouraging one to create a custom “Send Email action with complete control over the email settings.
select the custom page to redirect the user after email verification
  • SUCCESS PAGE — here, one of the existing pages can be selected to redirect the user after a successful verification. If no page is set, the user will be redirected to the page where the form was submitted. It is possible to configure a separate “Redirect to Page action for the same purpose by clicking on the “configure a separate Redirect to Page action link;
  • FAILED PAGE — here, one of the existing pages can be selected to redirect the user in case of a verification failure. If no page is selected, the user will be redirected to the page where the form was submitted. By clicking the “configure a separate Redirect to Page action link, a fully customizable “Redirect to Page” action can be created.

Events

Events define the time and condition under which a specific Post Submit Action should be performed. Usually, events are used with the Payment Gateways to control when the action should be executed — after or before the payment is completed.

The “Verification” action adds two new Events — “VERIFICATION.SUCCESS” and “VERIFICATION.FAILED.” These events can be added to Post Submit Actions to define which action to perform in case of a successful or unsuccessful verification. 

In a form where the “Verification” action is present, and the Payment Gateways are disabled, three events can be used:

  • DEFAULT.PROCESS — actions with the “DEFAULT.PROCESS” Event will be executed right after the form submission and before the user completes the email verification. For example, if a custom verification email is created through the “Send Email” action, the “Send Email” action is automatically assigned the “DEFAULT.PROCESS” Event
  • VERIFICATION.SUCCESS — this event fires after the email verification is completed successfully. Therefore, actions with the “VERIFICATION.SUCCESS” Event will be performed once the user clicks the confirmation link in the mailbox and the verification is successful;
  • VERIFICATION.FAILED — this event is triggered when the user fails to complete the email verification. Actions with the “VERIFICATION.FAILED” Event will run if the user follows a verification link that was already used or if the link contains an incorrect token.
NOTE

If an action is not associated with any specific Event, it will be executed after the verification is completed successfully, identically to the behavior of the “VERIFICATION.SUCCESS” Event.

To assign a new Event to a Post Submit Action, one should click the “Edit Conditions & Events button under the name of the specific action.

adding new events to post submit actions

Then, one should switch to the Events match tab in the Edit Action Conditions & Events pop-up to add a new Event.

add new post submit action event

Additional Settings for Register User Action

The “Verification” action adds new field options to the settings of the “Register User” action:

fields added to post submit actions by the verification action
  • Secure unique token — this option is usually selected for the Password and Confirm Password fields. The “Secure unique token” allows automatically generating a password for the user until the user creates a new password manually. This token can be sent to the user in the “Send Email” action using the %_jfb_verification_token% macro;
  • ID of the secure unique token — a reference to each token is saved in the “jet_fb_tokens” database table, and the “ID of the secure unique token” option represents the ID of that record in the database. The token itself is not stored in the database;
  • Verification URL — a verification link the user clicks to complete the verification process. The link contains the token and its ID.

Follow a related step-by-step guide to learn How to Create Registration Form With Email Verification from scratch.

That’s all about the “Verification” Post Submit Action available as part of the JetFormBuilder functionality for your WordPress-built forms.

Tutorial requirements:

  • Elementor (Free version) or WordPress Block editor (Gutenberg);
  • JetFormBuilder plugin installed and activated;
  • JetEngine plugin installed and activated.

The JetEngine Data Store module allows users to save featured items. The Data Store Actions add-on adds a Post Submit Action to the JetFormBuilder forms to remove saved items with one click.

Install and Activate the Data Store Actions Add-on

The first step is the installation and activation of the add-on. 

For this, navigate to the Crocoblock Free DevTools Kit page, find the Data Store Actions add-on, and click the “Download” button.

Crocoblock Free DevTools Kit

Move to the WordPress Dashboard > Plugins > Add New tab, install and activate the add-on.

upload plugin

Create a Data Store

Create a full-set data store on the website.

For example, I created a data store for the favorite jobs in the JetEngine > JetEngine > Data Stores tab with the help of the Data Stores Overview and How to Create Favorites Page Using Data Stores Module.

Besides that, you can learn How to Create “Recently Viewed” Section Using Data Stores Module, and How to Add Terms to Data Store.

data store example

I proceeded to the page with the Listing Grid with jobs and saved several job positions.

job listing grid

Also, I went to the page with the Listing Grid with the query that shows items added to the data store. Open the page in the Elementor or WordPress (Block) editors, and click to edit the Listing Grid widget or block. 

Open the Advanced settings tab and enter the CSS ID. Later, you can enter the Listing Grid CSS ID into the form to clear the data store if the “AJAX” Submit Type for the form is set.

The Elementor view:

CSS ID for widget in the Elementor editor

The Gutenberg view:

CSS ID for block in the WordPress block editor

Create a Form

Go to the JetFormBuilder > Add New tab. Enter a title, delete the Text Field, and change the Action Button label according to your needs. 

submit button label

Navigate to the JetForm tab and unfold the Post Submit Actions tab. Pick the “Clear Data Store” option and hit the pencil icon.

clear data store post submit action

In the Edit Action pop-up, enter the Data store slug (you can find it in the JetEngine > JetEngine > Data Stores tab) and the Listing Grid CSS ID into the Listing to update field. If you want to clear data stores of several Listing Grids, separate the CSS IDs with commas. The Listing to update option helps to update Listing Grids if you select the “AJAX” form Submit Type when you set the form placed on the page.

Then, push the “Update” button.

data store slug and listing to update

Press the “Publish/Update” button to save the form.

Place the Form

Open the page where the data store items are in Elementor or Gutenberg editor and place the JetForm widget or Form block.

Choose Form from the drop-down menu and set other settings. You can learn more from the Adding the Form Block tutorial.

jetform widget

Settings in the WordPress editor are the same:

form block

Also, you can hide the form after removing the data store items using the JetEngine Dynamic Visibility Feature.

NOTE

The Dynamic Visibility feature works only with the “Page Reload” Submit Type.

In the Elementor editor, go to the Advanced settings tab and open the Dynamic Visibility tab. Enable the toggle, pick the “Show element if condition met” Visibility condition type, and “Query Has Items” Condition. From the Query to check drop-down, select the needed custom query that shows data store items in the Listing Grid on the page.

visibility condition for the form

In the WordPress (block) editor, click the eye icon.

dynamic visibility icon in the Gutenberg editor

Enable the toggle, pick the “Show element if condition met” Visibility condition type, click the “Add new item” link, and select the “Query Has Items” Condition. From the Query to check drop-down, select the needed custom query.

dynamic visibility in the Gutenberg editor

Finally, click the “Update” button to save the form.

Check the Results

Open the page on the front end.

clear data store action on the front end

Hit the “Submit” button to check how the action works.

After that, all data store items are successfully removed from the page, and the form is hidden according to the visibility condition.

data store items are removed with the action

That’s all. Now you know how to clear the data store with the JetFormBuilder plugin.

Tutorial requirements:

The JetEngine’s relations feature allows you to connect, create, and edit related items just on the editing page of posts, CCT items, users, and taxonomies.

But if you want to connect related items on the front end, you can do this via the form with the help of the JetFormBuilder plugin and the Gutenberg block editor.

Connect Child Objects to Parent Ones

Go to JetFormBuilder > Add New. Give the new form a title and leave the default settings of the Hidden Field block.

creating new jetformbuilder form

Click on the Toggle block inserter button and place the Select, Radio, or Checkbox fields to display the child items in the form. Be informed that the Radio and Select allow choosing one option and it suits the “One to Many” relation type, and the Checkbox allows selecting one and more options and it matches the “Many to Many” relation type, so we decided to drag-and-drop such Checkbox Field block to our form.

checkbox field block

Select the “Posts” as the source in the Fill Options From field and define the needed Post Type. As we want to choose the related children for the relationship “Country > Tours,” we have selected the “Tour” Post Type.

In the Block General settings, type the Field Label and change the Form field name.

NOTE

Be aware that all field names inside one form must be unique, and field names must contain a value with only lowercase letters in Latin, no spaces. If you want to split words, this can be done by using the “-” and “_” characters.

Press the “Dynamic tags” button in the Default Value field to open the pop-up.

checkbox field block settings

Pick the “Related Items” option in the Source field.

editing preset and choosing source

After that, you get the new additional settings:

  • From Relation. Define the relationship you want to use as the source;
  • From Object. Specify if you want to display children (Child object option) or parent (Parent object option) items;
  • Initial Object ID From. Indicate where the query will get the object ID from to display its related items in the form:
    • Current Object ID. Shows the related items of the current post, of the current active listing item, and so on;
    • Current User ID. Shows the related items of the currently logged-in user;
    • Queried User ID. Shows the related items of the selected user, e.g., on the User Page in the Profile Builder;
    • Query Variable. Shows the related items from the global request or WordPress request variables. If you select this option, the fourth Variable Name will appear;
    • Current Object Variable. Shows the related items from the object defined as current by JetEngine. If you select this option, the fourth Variable Name will appear;
    • Default WordPress Object (for current page). Always shows the related items of a current global object for the current page defined by WordPress, as opposed to the “From Relation” option.
  • Variable Name. This field appears if you select the “Query Variable” or “Current Object Variable” options. This option allows setting the variable’s name, which the plugin will search for in the query or current object.

In this case, we have picked the “Current Object ID” option in the Initial Object ID From field because we want to display the Tours child posts in the form on the Country parent post.

relation settings in the jetformbuilder

Press the “Update” button and move to the JetForm settings and the Post Submit Actions tab. Select the “Connect Relation Items” option and click on the pencil-shaped icon to edit the action.

connect relation items post submit action

In the new pop-up window, select the needed Relation. Pick the name of the Hidden Field (with the default “Current Post ID” option) as the Parent Item ID. As the Child Item ID, select the label of the created field for the related items (the Checkbox in our case). Since it’s needed to display the children objects in the form, choose the “We updating children items for the parent object” option in the Update Context field.

edit action

Push the “Update” button to save this action and click on the “+ New Action” button to create a new one.  Select the “Insert/Update Post” option and hit the pencil-shaped icon under this action.

insert update post submit action

Select the parent post type that you want to update via the form in the Post Type field.

Select the needed Post Status or leave it empty. Also, leave the default Fields Map values.

NOTE

Be aware that if you fill the Fields Map, the new related items replace the old ones instead of just being added to them.

edit insert update post submit action

Hit the “Update” button and publish or update the form to save the changes when you finish editing fields and actions.

To place the form on the parent object, proceed to the parent Post Type on the WordPress Dashboard and Edit the needed post.

parent post editing

Place the JetForm block in the post.

dding jetform to the post

Choose the needed Form to display in the Form Settings and push the “Update” button.

form settings

To reach the post on the front end, return to the post type and click on the “View” button of the parent post.

The form is now displayed in the post. Since we have added the Checkboxes field as the selector for the posts, you can select as many posts as you need. When you finish, press the “Submit” button.

NOTE

If some child posts are already related to the parent post, they will be ticked in the form placed on the parent post page. So, if you untick them, they will be disconnected from the parent post.

Return to the parent post editing page and scroll down to the Children tab. The options you have checked in the form will be added to the related posts list.

list of the children posts on the parent post

Now you can add the form to all desired parent posts.

Connect Child Objects to New Parent Post

Now let’s find out how to build a form that will make a new parent post and connect child objects to it.

Go to JetFormBuilder > Add New. Give the new form a title and delete the Hidden Field.

Click to edit the Text Field, it will be for the parent object name. Fill in the needed fields and remember to fill in the Name field appropriately, separate words with the “-” and “_” symbols, and use only lowercase Latin letters.

text field for the country name

The following field will serve as a selector for child items, so we add a Checkbox Field. During the field adjusting, focus on the Fill Options From and Post Type fields. Here you should select the correct source, the child post type.

checkbox for tour selecting

Moving to the Post-submit Actions tab, select the “Insert/Update Post” option and click on the pencil-shaped icon to edit the action.

insert update post submit action

In the appeared pop-up define the parent post type as the Post Type. Set the Post Status to “Published” and head to the Fields Map.

The displayed fields refer to those fields you have added to the form. The Text Field of yours should be connected to the “Post Title” and the following Checkbox Field left with the default option. 

Hit the “Update” button to save the result, and let’s add one more action by pressing the “+ New Action” button.

edit action

This time we select the “Connect Relation Items” post submit action.

connect relation items

Set the needed Relation, choose the “inserted-post-id” option as the Parent Item ID, choose the name of the Checkbox Field as the Child Item ID, and leave the Update Context field empty. In the How to Store the New Item field, you can select the most appropriate choice for you. When you finish, press the “Update” button.

edit connect relation items action

Feel free to add as many additional fields, as you need, for instance, the Media Field to add a picture to a new post. 

The final step here is to save the form, so push the “Publish” or “Update” button and head to the page where the form will be located.

Place a JetForm block on the editing page, and fill in the Choose Form field with the form’s name.

Set up the fields and form styles, and press the “Update/Publish” button to save the page.

 jetform on the single page in the Gutenberg editor

Check the front-end result. You can fill in the form with a title and relate some items to it. Finally, press the “Submit” button.

jetform on the front end

Head to the parent post type (“Country”, in our case) and search for the newly created post. Open it in the editor by pressing the “Edit” button next to the post title and check the attached children posts.

newly created parent post with related posts

Connect Parent Objects to Child Ones

Navigate to the WordPress Dashboard > JetFormBuilder > Add New. Give a title to the form. Leave the default Hidden Field block settings and create the field for the parent object items list.

For example, we have added the Radio Field block to have the ability to pick only one option in the form.

Select the “Posts” as the source in the Fill Options From field and define the needed Post Type. As we want to select the related parent for the relationship “Country > Tours,” we have chosen the “Country” Post Type.

In the Block General settings, type the Field Label and change the Form field name.

Press the “Dynamic tags” button in the Default Value field to open the pop-up.

radio field block

Preset in this form has the same settings and options as in the previous form, but in this case, you need to select the “Parent object” option in the From Object field and click on the “Update” button.

preset editing of the form

Move to the JetForm settings and the Post Submit Actions tab. Select the “Connect Relation Items” option and click on the pencil-shaped icon to edit the action.

In the new pop-up window, select the needed Relation. As the Parent Item ID, choose the label of the created field for the related items (the Radio Field in our case). Pick the name of the Hidden Field (with the default “Current Post ID” option) as the Child Item ID. Since it’s needed to display the parent object in the form, choose the “We updating parent items for the child object” option in the Update Context field.

edit connect relation items action

Push the “Update” button to save this action and click on the “+ New Action” button to create a new one.  Select the “Insert/Update Post” option and hit the pencil-shaped icon under this action.

Select only the Post Type of the parent items in the new pop-up and nothing more. Otherwise, the new related items replace the old ones instead of just being added to them.

edit insert update post action for parent object form

Hit the “Update” button and publish or update the form to save the changes when you finish editing fields and actions.

To place the form on the child object, proceed to the child Post Type on the WordPress Dashboard, click to edit the needed post, and put the JetForm block in the post. Choose the needed Form to display in the Form Settings and push the “Update” button.

list of the parent posts on the child post

To reach the post on the front end, return to the post type and click on the “View” button of the child post.

The form is now displayed in the post. Select the needed parent object and press the “Submit” button.

form for the parent item on the front end

Connect Parent Objects to New Child Post

You can also build a form that will add a new child post and connect it to the parent at once.

Navigate to the WordPress Dashboard > JetFormBuilder > Add New.

Now you can delete all the Hidden and Text fields to avoid getting confused during editing.

We start with adding a Text Field for a new post name. Feel free to adjust this field as desired. Remember that the Name field shouldn’t include capital letters, spaces, and other special characters.

text field for children post name

The following field is for choosing a parent, so we select Radio Field to let users pick one option.

Select the “Posts” as the source in the Fill Options From field and define the needed Post Type. As we want to select the related parent for the relationship “Country > Tours,” we chose the “Country” Post Type.

In the Block General settings, type the Field Label and Form field name.

radio for parent post selection

Move to the JetForm settings and the Post Submit Actions tab. Select the “Insert/Update Post” option and click on the pencil-shaped icon to edit the action.

Pick the child post type in the Post Type menu and select the “Published” Post Status.

In the Fields Map, we define the ‘tour-name’ Text Field as a “Post Title” and leave the default “Select post property” in the ‘choose-country’ field.

Click on the “Update” button to save the result.

insert update children post submit action

Click on the “+ New Action” button to add a new one. Select the “Connect Relation Items” option and hit the pencil-shaped icon under this action.

Set the needed Relation, select the name of the Radio Field as the Parent Item ID, choose the “inserted-post-id” option as the Child Item ID, and leave the Update Context field empty. In the How to Store the New Item field, you can select the most appropriate choice for you. When you finish, press the “Update” button.

connect relation items action

Feel free to add as many additional fields, as you need, for instance, the Media Field to add a picture to a new post. 

The form is ready, so press the “Publish” or “Update” button. 

Go to the page you want to place the form. For instance, it can be a standard WordPress page.

Place the JetForm block onto the page editor, and pick a new form name in the Choose Form field.

Work on the other fields if you wish. Ultimately, press the “Update/Publish” button and go to the front end to check the final result.

jetform on the page in the Gutenberg editor

Now you can complete the form with the title and related parent. Click the “Submit” button to save the post and add a related item to it.

jetform for children posts creation on the front end

Let’s check if the new tour was added to the child post type. Head to the child post type and search for the new post. For instance, you can type in a post title in the search bar.

Once the post is opened, scroll down to the Related… tab. The parent post is now successfully connected.

newly created child post

That’s it. You know now how to connect the JetEngine relation items via the JetFormBuilder forms.

save form record action

Save Form Record is a post-submit action that stores the form entries in the database and makes them easily аccessible from the dashboard.

This action keeps complete information regarding the forms submitted by a user. It will include the data entered into the form fields, as well as performed post-submit actions and errors.

How to Use Save Form Record Action

Go to WordPress dashboard > JetFormBuilder > Forms. Open a previously created form and proceed to the Post Submit Actions section.

post submit actions section

Unfold it and click on the “New Action” button.

add new action

Select the “Save Form Record” option from the drop-down list. Click on the pencil-shaped button to edit the action and proceed to its settings.

select save form record

If you want to save the user’s IP address and User-Agent data, then enable the Store the IP address and other request headers switcher in a pop-up settings window. Don’t forget to update the action and form itself.

enabling save form record action

The form can be filled in and sent now.

sending a form on the front end

Once it’s submitted, you can proceed to the WordPress Dashboard > JetFormBuilder > Form Records tab.

submitted forms

When you open a submission, there will be a Form Record page displaying complete form information.

Now you know how to store the form data and easily review it in the WordPress dashboard.

If you want the visitor of your website to see a Thank You page after form submission, you need to set up the Redirect to Page post-submit action.

This guide includes a simple way to redirect a form to a Thank You page and describes how to create a personalized message displayed to the user after the form submission alongside the option to hide a section with the form using the Dynamic Visibility module.

If you’re a fan of visual guides, don’t hesitate to follow our detailed video tutorial. 

Redirect Form to Thank You Page

For this option, you need only the JetFormBuilder plugin installed and activated.

Go to JetFormBuilder > Forms and open the form you want to add a redirect to. 

Proceed to the JetForm settings > Post Submit Actions. Add a new action and select “Redirect to Page” from the drop-down menu. 

redirect to page action

Click on the pencil-shaped button to edit the action and proceed to its settings.

redirect to page settings

In the Redirect to drop-down menu, choose “Static Page” and proceed to the next option, Select page. There will be a list of all the pages you’ve created so far. Select a “Thank you page” option here. 

redirect to the static page

Update the form. The result can be seen in this video

Create Personalized Thank You Message

A personalized thank-you message will display the user’s name previously entered into the form.

Before we start, make sure you have the JetEngine plugin installed and activated since we will be using a CPT, meta fields, and a listing template.

A Custom Post Type contains the list of the meta fields repeated in the form. This way, the form will be saved as a post, and the information the user entered into the form fields will be saved under the appropriate meta fields.

CPT meta field name

That’s why you need to create a meta field called Name and make sure that you have the same Name field in the form.

form field name

To link the form field with the CPT meta field, you need to set up Insert/Update Post action.

Proceed to the JetForm > Post Submit Actions pathway. Add a new action, select “Insert/Update Post” from the drop-down list, and click on the pencil-shaped button to edit the action. 

In the Post Type drop-down menu, you will find all types of posts available to you. Select the CPT you’ve previously created. Proceed to the Fields Map and find the Name form field.

In the drop-down menu next to this field, you need to select the “Post Meta” option and enter the name of the same meta field below.

setting up insert update post action

Update the settings and the form.

Now we need to create a listing template to dynamically pull the content from the back end to the Elementor page builder to display it on the front end.

Go back to WordPress Dashboard > JetEngine > Listings. Create a new listing. Don’t forget to set the listing source to Posts and specify it in the following drop-down menu.

setup listing item

Once you hit the “Create Listing Item” button, you will be redirected to the Elementor page editor. Add a section and apply the Dynamic Field widget.

Under the Content tab, set “Meta Data” as a Source and select the “Name” meta field from the corresponding drop-down list.

dynamic field widget settings

Scroll down the settings and enable Customize field output. In the Field format box, enter the message you want to display on a Thank You page. %s, in this case, will be replaced with the Name field value.

customize field output

Publish the listing template. Now you need to add this listing to the page.

Head back to the WordPress Dashboard > Pages directory and edit the Thank You page with Elementor.

Find the Listing Grid widget in the elements panel and drag it to the page’s section. Choose the listing template you’ve previously created in the Listing drop-down menu. Also, set Columns and Posts number to 1.

listing grid settings

Click on the “Update” button, and here’s the final result.

Hide Form Using Dynamic Visibility

The last option is for those who don’t want to create a separate Thank You page. This way, a form will be hidden after the submission, and a thank-you message will show up.

Before we proceed, go to JetEngine > JetEngine Dashboard and make sure that you have the Dynamic Visibility for Widgets and Sections module enabled.

dynamic visibility module

For this option, we don’t need a redirect to a different page; that’s why go back to the form settings and remove the Redirect to Page post-submit action.

Proceed to the Dashboard > Pages directory. Find the page with the form and edit it with Elementor.

Add the Text Editor widget and enter a message, e.g., “Your request has been successfully submitted.”

message of success

Edit the form and proceed to the Advanced tab. Unfold the Dynamic Visibility section and enable it.

enabling dynamic visibility

Set the Visibility condition type to “Hide this element if condition met” since we need a form to disappear.
To add a new Condition, press the “Add Item” button and select “Equal” from the drop-down list of conditions.

Now edit the Text Editor widget. Proceed to the Advanced tab. Enable Dynamic Visibility and repeat the same steps changing only the Visibility condition type to “Show this element if condition met.”

dynamic visibility condition

For the Field, click on the Dynamic Tags button and choose “Macros” from the list.

dynamic visibility field

Once it’s selected, there will be a small Settings pop-up window with the list of macros. Set it to “Query Variable” and enter ‘status’ to the Variable name field bar.

macros and variable name

Proceed to the Value and enter ‘success’ there.

dynamic visibility value

Now edit the Text Editor widget. Proceed to the Advanced tab. Enable Dynamic Visibility and repeat the same steps changing only the Visibility condition type to “Show this element if condition met.”

thank you message visibility

Update the page and check how it looks on the front end.

The JetFormBuilder’s Post Submit Actions allow changing the User Profile settings via forms, specifically updating a user’s data in the User Account and assigning one or multiple roles to users.

Configuring the User Role(s) is available in the “Register UserPost Submit Action, which can be used initially to add a new user. However, it is not the only feature of this Post Submit Action. You can also use it to set the role of the newly-added user.

Changing user roles is available via the “Update UserPost Submit Action applied to a form. In addition, to assign some user roles, the User Role Editor plugin should be installed and activated.

NOTE

Before changing the user roles, the users should be logged in to the site.

Assign Multiple User Roles when Registering Users

In this case, the needed roles are assigned to the form during its building. More details can be found in the How to Assign User Role Automatically via Registration Form video.

Create a form

The starting point is creating a form. Go to WordPress Dashboard > JetFormBuilder > Add New. The Welcome block will be opened by default. Here, you can select the needed pattern or build the form from scratch.

Here, we insert the Text Fields to enter data necessary for the “Register User” Post Submit Action (e.g., “USER LOGIN,” “EMAIL,” and more) and the Action Button.

a form with the block fields

Since this tutorial focuses on assigning roles, we keep only these fields. Also, the Hidden Field with the specific options is not necessary for this case.

Configure the “Register User” Post Submit Action

In the next step, insert the “Register User” Post Submit Action. In the newly appeared Edit Register User pop-up, we keep turning off the Allow creating new users by existing users toggle to prevent existing users from limiting the ability of other users to add new users. However, only logged-in users can change their roles.

Next, match the needed form fields with the corresponding option from the drop-down lists in the FIELDS MAP group.

edit register user pop-up

 These fields correspond to the names of the columns in which the user’s data is displayed via the WordPress Dashboard. After assigning the fields, scroll the pop-up down and select the required USER ROLE or assign some roles. 

assigning user roles in the edit register user pop-up

In this case, we allow adding some roles and select the “Editor,” “Author,” and “Contributor” roles, holding the “Ctrl” (Windows) or “Command” (Mac) key to select multiple roles.

In the last step, insert the required messages into the MESSAGE SETTINGS fields. Here, we keep the default data.

NOTE

You can combine both login and register forms using the User Login Action add-on from JetFormBuilder. More details are presented in the How to Combine Registration and Login in One Form Using Render States tutorial. Also, you can combine the registration with the a href=”https://jetformbuilder.com/features/email-verification” target=”_blank”> email verification.

Once completed, press the “Update” button at the bottom of the pop-up. Finally, save the form.

Add the form to a page

In the second step, open a page or create a new one in your preferred editor. Next, add the form to the page using the JetForm widget/block/element. In this case, we use Elementor.

To learn how to add your form on pages using Elementor, Block Editor, or the Bricks theme, read the Displaying a JetFormBuilder Form in Any Page Builder tutorial.

adding the form to a page via the jetform widget

Watch the video to learn How to Add WordPress Form to any Page Builder using the JetFormBuilder plugin.

Publish the page.

Test the flow

Navigate to the front end and fill out the form.

filling out the form on the front end when registering users

To check the registration, proceed to the WordPress Dashboard > Users tab and observe that the new roles have been added to the needed user.

the assigned roles added to the user

Change User Roles

In this case, the WordPress user should already exist.

Modify the form

Return to the form (or create a new one). Then, insert the Hidden Field and set the “Current User ID” option in the FIELD VALUE drop-down menu.

hidden field with set options
NOTE

The “User ID” Hidden Field is obligatory as you need it for the correct work of the form. To find out the User ID, go to the WordPress Dashboard > Users and hover the mouse over the required user name. A small pop-up window with a user ID will appear.

Then, add the needed blocks and/or fields. In this case, we change the form’s name and keep all previously inserted fields.

After that, delete the “Register User” Post Submit Action and add the “Update User” Post Submit Action.

Configure the “Update” Post Submit Action

In the newly opened Edit Update User pop-up, match the form’s field with the FIELD MAP drop-down list options.

In particular, we set the “User ID (will update this user)” option for the user_id form’s field, “Nickname” option for the Name form’s field, “Email” option for the Email form’s field, “Compare with the Current Password” option for the Current Password field, and the “Password option for the New Password field.

the edit update user pop-up

After assigning the fields, scroll the pop-up down and select the required USER ROLE or assign some roles. 

the edit update user pop-up

In this case, we allow adding some roles and select the “Editor,” “Author,” and “Contributor” roles, holding the “Ctrl” (Windows) or “Command” (Mac) key to select multiple roles.

In the last step, insert the required messages into the MESSAGE SETTINGS fields. Here, we keep the default data.

Once completed, press the “Update” button at the bottom of the pop-up. Finally, save the form.

After that, add it to the page using the JetForm widget/block/element.

Test the flow

Move to the front end, fill out the form fields, and submit the form. 

filling out the form on the front end when updating the user

After that, if the form is built correctly, the “Form successfully submitted.” text will appear.

To check the update, move to the WordPress Dashboard > Users tab and observe that the new roles have been added to the needed user.

user data updated on the backend

alt text: That’s it. Now you know how to update WordPress user roles via JetFormBuilder forms using the “Update User” and “Register User” Post Submit Actions.

Presently, all the services successfully work with email integration. Nevertheless, the email marketing profit is still questionable. The modern user subscribes to a large number of services and does not continuously check the inbox.

One of the most valuable choices is mass SMS messaging. People open them much more often than constantly sent emails. 

Common SMS Integration Use Cases

Order confirmation

It is widespread that users await the order confirmation. Otherwise, they may become nervous in expectation of the desired email. SMS notifications are displayed without additional settings and don’t confuse the customer.

Appointment reminder

An excellent opportunity not to lose clients is to remind them about their appointment. And it helps to save money because of not missing events.

Vital notifications

There is always something important to say. Do not waste the opportunity to have close contact with the clients and inform them about important news.

Discount programs

Send users discount codes that will activate limited offers. Such a campaign will interest the customers so they will not forget about the products you sell.

All these use cases can be implemented with the help of the steps described below.

Set Messaging Tool with Zapier

Many messaging tools provide website maintenance services. All of them have their exclusive features. However, if you have considered working with Twilio, this guide is for you.

Twilio is believed to be one of the best messaging services, according to Zapier. You can link JetFormBuilder forms to Zapier; read more about it in this overview.

Initially, start with the Twillio registration if you don’t have an account yet. Customize all the settings that will allow you to work with messages. Once you are registered, proceed to Zapier and make a registration there.

Push the “Create Zap” button. 

zapier create zap

Webhooks trigger event

Let’s set a “Webhooks by Zapier” option as the trigger. Note that this action works only with Zapier’s trial period or premium accounts. 

Set “Catch Hook” as the Trigger Event and click on the button to continue.

catch hook trigger event

Copy the Custom Webhook URL for setting an integration between the JetFormBuilder form and Zapier.

set up catch hook trigger

Navigate to JetFormBuilder > Forms. Create or open the form you want to integrate with Twilio Messaging Tool. 

Open JetForm Settings and scroll down to Post-Submit Actions. Choose the “Call Webhook” option for Zapier integration.

order confirmation call webhook post submit action

Paste the Webhook URL and update the form. 

Proceed to the frontend to test the action. Fill in the form and click on the “Submit” button.

order confirmation form on the front-end

Fill in the form and click on the “Submit” button. Come back to Zapier and test the trigger.

test catch hook trigger

“Send Email in Gmail” action event

The following step is choosing the action event. Let’s set a “Send Email in Gmail” action. It is not necessary. However, in this way, you will get notifications about new orders.

send email in gmail action

Select the Gmail account to connect it with Zap. Continue to set up all the required fields to form emails that will be sent to Gmail.

choose account for send email in gmail action

Once the email has been sent, pick the subsequent action event for messaging.

test send email to gmail action

“Send SMS in Twilio” action event

Pick the “Twilio” option from the drop-down list and “Send SMS” as an action event. Click on the button to continue adjusting the settings and connect the Twilio account as you did before with Gmail.

choose send sms in twilio action

Set up the action by filling in the required information.

set up send sms in twilio action

If everything was set successfully, you should get an SMS sent to the number you put in the form.

test twilio action

As you can see, there is additional information before the custom text you have adjusted. It is displayed due to the setting Twilio Trial. However, if you have upgraded the account, there will be no extra notes.

twilio text message confirmation

Turn on Zap once you are ready. JetFormBuilder form integration with Twilio is ready. The message will now be sent every time after the form submission.

Mind that you are also free to use any SMS application that is compatible with Zapier.

Managing the form results can be a challenging task. Though if you work with Zapier and JetFormBuilder, it should be much easier. Let’s find out how to connect WordPress form to Zapier.

Create a Zap

Sign up for a Zapier account or open the one that already exists. Click on the “Make a Zap” button to start working on the connections.

zapier dashboard

Name a Zap, and let’s begin. There are two main steps that define a Zap. Firstly, you need to pick a Trigger Event and then an Action that will be performed.

Choose the first trigger. You can do it by typing its name in the search bar. Add Webhooks by Zapier and choose “Catch Hook” as a Trigger Event. It is essential if you want to connect your form to the Zapier. Click on “Continue.”

catch hook trigger event

Copy a Custom Webhook URL to conjoin it to the form.

set up catch hook trigger

Connect a Zap to the Form

Navigate to the WP Dashboard > JetFormBuilder > Forms, find the form you want to connect with Zapier, and change a default “Send Email” Post Type Action to “Call a Webhook.” Click on the “Edit” button and paste the URL to the field. Update the Post Submit Actions and WordPress form by clicking on the similarly named buttons.

call a webhook post submit action

Add this form to the page if you haven’t done it yet and go to the front-end. Fill in the fields and submit the form. Note that you do this for Zapier integration testing, so type in a valid email to which you have access.

submitting a form front-end test

Go back to the Zap editing. The next step is the Test trigger. That is why we needed to fill in the form.

test catch hook trigger

When the connection is established, click on the “Continue” button. Now we have learned how to connect WordPress form to Zapier.

Set an Action

Select the app that will perform an Action. For instance, we will choose Gmail and arrange “Send Email” as an Action Event.

gmail action in zapier

Choose a Gmail account. To link a new Gmail, click on “Connect a new account” and type in all the required credentials.

Then you can set up action by putting all the data about where to send an email, the email address that will send this letter, and other fields like From Name, Reply To, Subject, Body, and so on.

gmail set up action

When the desired fields are input, you can send a test email to check WordPress integration with Zapier in action. You can check this letter on the email you have put in the To field.

gmail test action

Now just hit “Turn on Zap,” and it is ready. The WordPress integration with Zapier completely works.

However, note that you can add more than one action. So if you want to set some other events, just go back to the Zap editing and choose one more app. 

That is why Zapier integration makes form management simple. For example, you can connect a MailChimp account, work with Google Calendar, or use Google Sheets for better productivity at the same time.

Furthermore, watch our video and learn how to integrate Zapier with the JetEngine forms to create similar form integrations.

MailChimp is a service that helps you manage email notifications and a list of user emails. With the MailChimp Post Submit Action, you can connect the JetFormBuilder form and the MailChimp service. The data that users insert into the form will be transferred to the application, and you will be able to use it there.

If you still don’t have a MailChimp account, please, feel free to check this tutorial. It provides detailed instructions on creating an account and finding out your MailChimp API key and Audience ID.

To create a MailChimp Subscribe Form in WordPress, head to JetFormBuilder > Add New. Give a name to the form and delete the default post_id field since we don’t need it.

add a new form

Add new fields manually or use the Subscribe Form Pattern. It is the list of fields that you can create and later connect to the MailChimp:

  • Text Fields:
    • for Email is required;
    • for first\last name, address, phone can be added if you wish;
  • Date Field for date of birth.
create new fields

Then open the JetForm tab and proceed to the Post Submit Actions section. Set the type to MailChimp and click on the “Edit Action” icon.

post submit action mailchimp

In the newly appeared window, you should input your MailChimp API Key.

edit action window

You can paste it manually or enable the Use Global Settings toggle. If you pasted the MailChimp API Key in the JetFormBuilder Settings, it appears automatically. Then hit the “Validate API Key” button.

jetform builder settings

If the operation is successful, you will see the new “Audience” field. Select the Audience name that you have input on the MailChimp website. If you have added another Audience and don’t see it in the list, click on the “Update Audience List” button.

After you set the Audience, more fields will appear:

  • Groups. If you have created them in the Manage contacts tab on the MailChimp website, your groups should appear in this field;
  • Tags. You can input here tags, which you have created on the MailChimp website;
  • Double Opt-in. Enable this toggle in case you want the contacts to receive an opt-in confirmation email when they subscribe to your list;
  • Fields Map. There is a list of fields where users can enter their data, which can be attached to the MailChimp website. In that drop-down, you can choose appropriate fields from the form. The Email field is required.
validate api key

After customizing all settings, “Update” the Edit Action and “Publish” or “Update” the form.

The next step is adding the form to a page. To obtain the information on how to do this, follow this link.

When users subscribe with your form, you can see all information about them on the All contacts tab.

subsribed audience

That’s it. Now the users’ data will be transferred to the MailChimp website.

The post expiration period addon allows you to display a new post for a limited time. You also could set expiration action so that a post would be deleted or changes the status to draft after the date elapses. This feature works if you have limited-time offers for the customers on your site or want clients to publish posts, which would be deleted, like, after a month. The expiration period can be added via the JetFormBuilder form and set in the Insert/Update Post notification settings.

Install the post expiration period

Download the addon from the DevTools page, where this and other features are free. After that, navigate to Plugins on the Dashboard, click on the “Add New” button, then “Upload plugin.” The last step is to activate the plugin.

Create a JetFormBuilder form

Since the expiration period can be set via the WordPress JetFormBuilder form, you should create one.

To find out how to create a form, follow this tutorial.

Get through another guide if you want to know more about form Notifications Settings, especially Insert/Update Post type.

When you set up a form for creating posts, open the JetForm tab and proceed to the Post Submit Actions section. Choose the type to Insert/Update Post and click on the “Edit Action” icon.

insert update post

Toggle on the “Enable expiration period” control. In the Expiration period field, enter the required number of days and choose where you want to move posts in the Expiration action radio – to Trash or Draft. Then press the “Update” button.

enable expiration period
NOTE

This option does not work with forms for updating posts, only for creating. Also, the post expiration period feature will work only for the newly-created posts with the form, and the old posts will remain unchanged.

After setting the form up, be sure to “Publish” the form.

Create a new post with the form

Add the form with the post expiration period to the page on the front-end. To find information on how to do that, follow this tutorial.

To see the addon in action, we have created a new post with the JetFormBuilder form and set it up to move to Trash with the expiration of one day.

published post

As we can see, the post has been moved to trash within 24 hours after creation.

post in trash

That’s all for the post expiration period. Now you know how to install the addon, set it up in the JetFormBuilder form, and move posts to Trash or Draft automatically after the date elapses.

configuring activecampaign api data

Description

ActiveCampaign is an app that helps you to perform email marketing automation. This action creates a link between this app and your form, allowing you to use the information from the form fields in the ActiveCampaign account. 

Settings

To connect the form and the ActiveCampaign account, you have to generate the API URL and key. Copy those two codes and paste them to the API URL and API Key bars.

To obtain more detailed information about generating the key and URL, follow this link.

configuring getresponse through the api key

Description

GetResponse is an application that makes email marketing easier. This action allows you to create a connection between your form and the GetResponse account. The data from the form can be used through the GetResponse functionalities.

Settings

As for every third-party application of that type, you will need to get the API key to create a connection. When you obtain it, paste it to the API Key bar and press the “Validate API Key” button.

You will be able to read about the process of getting the API key in more detail here. However, be aware that this page is available only to logged-in users.

 inserting api key for mailchimp

Description

MailChimp is an app for email marketing. This action allows you to connect the form with the MailChimp service. The data that users insert into the form will be transferred to the application, and you will be able to use it there.

Settings

To create a connection between the form and the MailChimp app, you will need to get the MailChimp API key. Insert it into the API Key bar and press the “Validate API Key” button.If you need a helping hand, go through this API key obtaining tutorial.

redirect to page

Description

When the user clicks on the “Submit” button, this action redirects him/her to another page. Here, in the editing window, you can define the target page.

Redirect to Page Form Action Settings

  • REDIRECT TO — in this drop-down field, one can choose the type of page users are sent to:
    • Static Page — in this option, one can choose the target page. When selected, it reveals the SELECT PAGE drop-down field that contains all the pages created so far;
    • Custom URL — in this option, one can type any address into the REDIRECT URL field, and this action will redirect the user there;
    • Current Page — in this option, users are redirected to the same page they were on;
  • URL QUERY ARGUMENTS — in this select field, one can choose which field(s) to add to the form. When selecting the field(s), their values are used as the query arguments and added to the URL;
  • URL HASH — in this field, one can set the subject of the letter that the user will receive;
  • OPEN IN NEW TAB — this switch (deactivated by default) enables the target page to open in a new tab. This option applies only to the AJAX form submit type.
editing call webhook action

Description

This action allows you to connect your form to third-party apps like Zapier or Make. Those apps can give you a webhook that can be used to transfer data from the form to some other websites or apps. 

Settings

Insert the obtained webhook to the Webhook URL field and check the connection with the third-party app. Afterward, click the “Update” button.

Tutorials

call hook action editing

Description

When the user submits the form, this Post-Submit Action calls a “hook” – a special little code fragment that does some action. If you want to know more about hooks, follow the link.

Settings

Place the name of the needed hook to the Hook Name bar. Examples of such names are presented under the bar, so you can use them as a reference. When you are done, press the “Update” button.

Learn how to update a user’s data (including assigning multiple roles) by confirming the previously set password using the “Update User” Post Submit Action and “Advanced” Validation methods. The “Update User” Post Submit Action allows server-side validation, but the “Advanced” Validation with an Advanced Rule set is a more user-friendly way.

NOTE

For security reasons, data from the Text Field of the “Password” FIELD TYPE will be displayed on the Form Records page in a hashed format.

Create a User

Initially, you have to create a new user and insert the corresponding data. Read the How to Create a New User via WordPress Dashboard tutorial for more details. Also, if needed, you can add the required settings by managing the User Profile feature of JetEngine.

Also, to configure some roles assigned to a user, the User Role Editor plugin should be installed and activated.

Create a Form

To update user data via forms, create or edit a form with the necessary blocks or use premade patterns.

Read the Creating a Form tutorial to learn the main features of this process. In this case, we intend to build a form with the following fields: a Hidden Field and Text Fields for contact data and passwords.

First, we insert the Hidden Field and set the “Current User ID” option in the FIELD VALUE drop-down menu.

hidden field with set options

After that, we add the Text Fields and set their FIELD TYPES (e.g., the “Password” FIELD TYPE for the Text Field to enter a password). Next, insert the Action Button and move to the Post Submit Actions.

the form with added fields

Set a New Password Using the “Update User” Post-Submit Action

Configure the Post-Submit Actions

First, set the “Save Form RecordPost Submit Action. After that, insert the “Update User” Post Submit Action. In the newly appeared Edit Update User pop-up, specify the fields to be updated for users of certain user roles. 

The FIELDS MAP group shows all fields of the current form and includes fields displayed on the WordPress Dashboard > Users tab. Here, match the needed form fields with the corresponding option from the drop-down lists. 

In particular, we set the “User ID (will update this user)” option for the user_id form’s field, “Nickname” option for the Name form’s field, “Compare with the Current Password” option for the Current Password form’s field, “Email” option for the Email form’s field, and “Password” option for the New Password form’s field.

the edit update user pop-up

In particular, we set the “User ID (will update this user)” option for the user_id form’s field, “Nickname” option for the Name form’s field, “Email” option for the Email form’s field, “Compare with the Current Password” option for the Current Password field, and the “Password” option for the New Password field.

These fields correspond to the names of the columns in which the user’s data is displayed via the WordPress Dashboard. 

After assigning the fields, scroll the pop-up down and select the required USER ROLE or assign some roles. 

setting user roles

In this case, we allow adding some roles and select the “Editor,” “Author,” and “Contributor” roles, holding the “Ctrl” (Windows) or “Command” (Mac) key to select multiple roles.

In the last step, insert the required messages into the MESSAGE SETTINGS fields. Here, we keep the default data.

the message settings of the edit update user pop-up

Once completed, press the “Update” button at the bottom of the pop-up. Finally, save the form.

In the second step, open a page or create a new one in your preferred editor. Next, add the form to the page using the JetForm widget/block/element. In this case, we use Elementor.

To learn how to add your form on pages using Elementor, Block Editor, or the Bricks theme, read the Displaying a JetFormBuilder Form in Any Page Builder tutorial.

jetform widget added to a page

Watch the video to learn How to Add WordPress Form to any Page Builder using the JetFormBuilder plugin.

Test the flow

Move to the front end and fill out the form fields.

NOTE

Before changing their passwords, the users should be logged in to the site.

If the form is built correctly, the “Form successfully submitted.” text will appear.

user data updating on the front end

To check the update, proceed to the WordPress Dashboard > JetFormBuilder > Form Records tab and observe that the new roles have been added to the needed user.

 the assigned roles added to the user

Next, move to the WordPress Dashboard > JetFormBuilder > Form Records tab and observe that the user data has changed by opening the needed Form Record page.

form record data

Set the Advanced Validation with the Server-Side Callback

NOTE

The Advanced Validation with the “Server-Side Callback” option works only for logged-in users.

Modify the form

We recommend dividing the previously created form into two parts using the Form Page Break Field. This way, the modified form contains the “CURRENT PASSWORD” Text Field on the first page and the “NEW PASSWORD” Text field on the second page. The current password verification will be done on the first page of the form, and users will not be allowed to go to the next page until they enter the correct current password.

the modified form

Read the Building a WordPress Multi-Step Form for more details.

Next, delete the previously added “Update User” Post Submit Action.

Set the Advanced Validation Rules

Select the Text Field assigned to enter the current password (the “CURRENT PASSWORD” Text Field, in this case). Next, scroll the field’s settings down to the Validation section and select the “Advanced” VALIDATION TYPE.

advanced validation type option

After that, click the blue block under the VALIDATION TYPE options to open the Edit Advanced Rules pop-up. In this pop-up, select the “Server-Side callback” RULE TYPE and “Compare with Current User Password” CHOOSE CALLBACK options in the corresponding drop-down lists.

the edit advanced rules pop-up

Next, press the “Update” button. Then, the “Rule: Function: Is_user_password_valid” text will appear in the blue block under the VALIDATION TYPE.

the advanced validation rule set

Finally, save the form and, after that, add it to the page using the JetForm widget/block/element.

jetform widget with the modified form

Test the flow

Move to the front end and fill out the form fields. First, fill out the CURRENT PASSWORD field on the first page. If the entered password is correct, you will be redirected to the next page.

the first page of the form on the front end

On the second page, enter a new password and submit the form.

the second page of the form on the front end

After that, if the form is built correctly, the “Form successfully submitted.” text will appear.

To check the update, proceed to the WordPress Dashboard > JetFormBuilder > Form Records tab and open the needed one.

form record data updated on the backend

That’s it. Now you know how to update a user’s data by confirming the previously set password using the “Update User” Post Submit Action and “Advanced” Validation methods.

The “Register User” Post-Submit Action is intended to add a new WordPress user, a list of which can be found in the WordPress Dashboard > Users directory. Due to the “Register User” functionality, the applied form should contain Text Fields to fill out the user’s data. 

Also, the pre-made Register Form Pattern is available.

register form pattern

In addition, you can combine both login and register forms using the User Login Action add-on from JetFormBuilder. More details are presented in the How to Combine Registration and Login in One Form Using Render States tutorial.

NOTE

The JetFormBuilder plugin enables payment to be collected upon registration, for example, using the PayPal WordPress Form . The PayPal gateway is available by default, but one can use the Stripe functionality if the Stripe Payments add-on is installed and activated. Configuring the Paypal and Stripe settings is described in the How to Build WordPress Registration Form With Payment tutorial.

Inserting the “Register User” Post-Submit Action

The “Register User” Post-Submit Action can be added to any form by navigating to the JetForm settings and pressing the “+New action” button. After that, in the newly appeared Add new action window, the “Register User” button should be pressed.

inserting the register user post submit action

Next, the editing window opens.

Configuring the Settings

The Edit Register User window has the following settings:

the edit register user window 
  • Allow creating new users by existing users 一 a toggle that, if enabled, activates the WHO CAN ADD NEW USER? drop-down list to pick the user role allowed to register new users;
  • FIELDS MAP 一 a group of fields that allows filling out the corresponding fields in the WordPress User Profile (e.g., USER LOGIN, EMAIL, PASSWORD, and more). The group contains both the necessary fields (marked with a red star) and non-required ones (these fields can be left empty). For every field in this group, a drop-down menu with a list of form fields is available. By choosing a form field, the link between the form field and the user account field will be set.

Also, except for the form’s fields presented as options in the corresponding drop-down lists, the “Secure unique token” is added to every field in this section. This option is often used for the Password and Confirm Password fields since it is intended to automatically generate a password until the user creates a new password manually. This token can be sent via email using the Post Submit Action. If the “VerificationPost Submit Action is inserted, the “ID of the secure unique token” (allows saving a reference to each token in the “jet_fb_tokens” database table) and “Verification URL” (allows a verification link the user has to click to complete the verification process) options are added to the FIELDS MAP field drop-down lists. 

More details can be found in the Create Registration Form with Email Verification video. 

the fields map section

In addition, the User URL field in the FIELDS MAP section allows inserting a URL that will be saved in the wp_users table of the site’s database and displayed in the Website field of the User Profile.

the website field in the user profile
  • USER ROLE 一 a drop-down list that allows the specification of people who have a profile on your site to perform this action. More details about user roles can be found in the WordPress User Roles and Permissions for the Website article. Here, some user roles can be added by holding the “Ctrl key (Windows) or “Command” key (Mac) to select multiple roles. Also, the JetFormBuilder Plugin: Changing User Roles via Forms tutorial should be looked through to learn how to configure a form to change roles using different Post Submit Actions.
selection of user roles
NOTE

The JetFormBuilder plugin reproduces all User Roles and Capabilities set by other WordPress plugins (e.g., by the User Role Editor plugin).

  • Log In User after Register 一 a toggle that, if enabled, activates the “REMEMBER ME FIELD drop-down list that allows specification of the corresponding form’s field;
the remember me field
  • Add User ID to form data 一 a toggle that, if enabled, allows keeping the user ID in form data. Or, if the form is completed by a user already logged in, the current user ID will be added to the form data;
  • USER META  一 a group of fields that allows linking the form’s custom fields to the user account. Additionally, the User Profile functionality can be enhanced by utilizing Meta Boxes.

The JetFormBuilder plugin does not create custom meta fields, but it allows inserting data from forms to Custom Post Types or Custom Content Types using the “Insert/Update PostPost Submit Action. In this case, the specific plugins should be applied (e.g., JetEngine (recommended), ACF, Meta Box, Pods, etc.). 

the user meta section
  • MESSAGES SETTINGS 一 a group of fields that refers to notifications shown to the user in corresponding cases.
the messages settings section

Pressing the “Update” button saves the “Register User” Post Submit Action settings.

Testing the Workflow

After creating the form with the necessary fields and settings mentioned above, it should be added to a page in your preferred editor via the JetForm widget/block/element.

the jetform widget added to a page

By filling out the form’s fields and submitting the form on the front end, a new user will be created.

the form on the front end

To check a user’s credentials, one should navigate to the WordPress Dashboard > Users tab and check if the new user is already listed here.

the jetformbuilder users tab

To change the specific user data or check if the completed information is saved in the database, a cursor should be hovered over the user’s name, and the “Edit User” button should be pressed to check if the completed information is saved in the database. 

More information on User Profile creation using forms can be found in the JetFormBuilder Plugin: WordPress Profile Form Creation tutorial.

That’s all about the “Register User” Post Submit Action and building workings form with the JetFormBuilder plugin for WordPress.

editing insert/update post action

Description

This Post-Submit Action creates a new post of some post type or edits the existing one according to the data the user puts into the form. The information from the form fields is inserted into the post’s meta fields you choose. In case of the updating, the values of the selected meta fields are rewritten according to the data the user adds to the form fields.

Settings

  • Post Type. In this drop-down menu, you will find all types of posts available to you. If you’ve created some Custom Post Types using such plugins as JetEngine or ACF, they will be on the list too;
  • Post Status. Here you can choose the status of the created or updated post after the Action is performed. For example, if you choose “Published” for Insert Post Action, the created post will be immediately published;
  • Fields Map. All the fields you have added to the form will be listed here, named by their Field Names. And there is a drop-down menu next to every field’s name. In that drop-down, you can choose the post’s meta field where the data from the form field will land. As you can see, it is possible to link the form field not only to custom meta fields but to the default ones like Post Title or Post Content, too;
filling out the fields map for insert/update post action
  • Default Fields. If some of the post’s meta fields have to be filled with specific data, you can set them here. In the Meta Key bar, you type in the name of the meta field and add the value you need to the Meta Value text area. The default value will be added to the meta field only if that field is not connected to any of the form fields.
filling out the meta key and meta value fields

How to Create a Post via the Form?

Proceed to the JetFormBuilder > Add New tab on the WordPress Dashboard.

Give the form a name and add as many fields as necessary. For this tutorial, we created a few:

form fields creation
NOTE

In the form which adds a new post, you can delete the post_id Hidden Field, as it will be created automatically after submitting the form.

Go to the JetForm section and move to the Post Submit Actions tab. Select the “Insert/Update Post” option and hit the pencil-shaped button.

jetform post submit actions

In the Post Type field, choose the post type for which posts will be created. It could be a default WordPress post type (e.g., Posts, Pages) or a custom post type (created with the help of the JetEngine plugin, for example).

In the Post Status field, you need to select the status of future posts.

The next is to set the Field Map block, where form fields should be assigned to the appropriate post fields names.

Then, click the “Update” button.

edit jetform action

When you finish working with the form, press the “Publish/Update” button.

Navigate to any page, place the JetForm block onto it, and select the newly created form in the Choose Form field.

After you’ve done with form customizing, push the “Publish/Update” button.

place a form on the page

To check if the form works correctly, open the page on the front end, fill in the form fields, and hit the “Submit” button.

jetform on the front end

Also, you can proceed to the post type and inspect if a new post appears.

newly created post

How to Update a Post via the Form?

The form for the post updating works most effectively if it is placed on the Single Page. You can create such a template for the default WordPress post type (e.g., Posts, Pages) or a custom post type created with the help of the JetEngine plugin.

To create a form, go to the JetFormBuilder > Add New tab on the WordPress Dashboard.

Give the form a name, and add as many fields as necessary. For this tutorial, we created a few:

form fields for post updating
NOTE

The post_id Hidden Field is obligatory for the post updating form as we need to know which exactly post should be edited.

Also, for the data to be rewritten, proceed to the JetForm section, Preset Settings tab, and enable the toggle.

Select the “Post” option as the Source, “Current Post” in the Get post ID from field, and choose the “Post ID” option under the post_id field. Set other fields, so they match the required post data.

preset settings

Move to the Post Submit Actions tab. Select the “Insert/Update Post” option and hit the pencil-shaped button.

jetform post submit actions

In the Post Type field, choose the post type for which the fields will be updated. 

In the Post Status field, you need to select which status the updated posts will have.

The next is to set the Field Map block, where form fields should be assigned to the appropriate post fields names.

It’s obligatory to choose the “Post ID (will update the post)” option for the post_id field as it is responsible for a post update.

Then, click the “Update” button.

edit action

When you finish working with the form, press the “Publish/Update” button.

Navigate to the Single Page, place the JetForm block onto it, and select the newly created form in the Choose Form field. After you’ve done with form customizing, push the “Publish/Update” button.

jetform on the single page

To check if the form works correctly, open any post on the front end, change the preset date on the form fields, and hit the “Submit” button.

jetform for post updating on the front end

That’s all about the Insert/Update Post action, with the help of which you can submit new posts and update the created ones.

The “Send Email” Post Submit Action allows sending emails to one or some users, sending attachments, selecting options dynamically, using CC/BCC, deactivating auto-formatting, and more.

The “Send Email” Post Submit Action can be used separately or as part of another Post Submit Action (i.e., it allows sending a link for verification of a user, sending a confirmation email with booking details, or sending a PDF file after submission of a form, etc.).
More details about managing the Post Submit Actions can be found in the Post Submit Action Controls Overview.

Adding the “Send Email” Post Submit Action

To set the “Send Email” Post Submit Action, open the JetForm settings tab, scroll down to the Post Submit Action section, and press the “+ New Action” button. 

adding a new post-submit action

Then, pick the “Send Email” option in the newly-appeared Add new action pop-up. 

jetformbuilder add new action pop-up
NOTE

Press the “Documentation” link below the Send Email text to be redirected to the JetFormBuilder documentation base.

Once the “Send Email” Post Submit Action is picked, the Edit Send Email pop-up will appear.

Editing the “Send Email” Post Submit Action Settings

The Edit Send Email pop-up appears if you select the corresponding Post Submit Action while creating it or when you press the pencil-shaped “Edit Action” button on the “Send Email” Post Submit Action panel.

In this tutorial, we first created a new form and then added the “Send Email” Post Submit Action.

edit send email post-submit action

The Edit Send Email pop-up has the following settings:

  • MAIL TO 一 a required field to select who will receive the message. It includes the following options:
    • Admin email 一 an option that, if selected, allows sending email to the admin email address configured in General Settings of your site;
    • Email from submitted form field 一 an option that, if selected, enables the FROM FIELD drop-down list 一 a menu that allows selecting a form’s field for taking the email from. 
    • Custom email 一 an option that, if selected, activates the EMAIL ADDRESS text field where the email address(es) can be entered to which the message will be sent.
the mail to field of the send email post-submit action
  • Use CC/BCC 一 a toggle that enables the CC ADDRESS FROM and BCC ADDRESS FROM drop-down lists, which allows sending the secondary and hidden recipients of the email, respectively. These drop-down lists have the “Admin email,” “Email from submitted form field,” and “Custom email” options that provide the same functionality as the corresponding MAIL TO list options.
use cc and bcc toggle of the send email post submit action
  • REPLY TO 一 a drop-down list that allows setting the email that you would like to use for receiving answers. These drop-down lists have the “Admin email,” “Email from submitted form field,” and “Custom email” options that provide the same functionality as the corresponding MAIL TO list options.
  • SUBJECT 一 a text field that is intended to enter the subject of the letter that the user will receive. It can be simple text, and you also have the option to insert values from the fields of the submitted form. To do this, click the “wrench” icon and choose the desired macros.
adding macros to the send email post-submit action
  • FROM NAME and FROM EMAIL ADDRESS 一 text fields for inserting the name that will appear as the email’s sender and the email address that will be added as the address of the letter sender, respectively. Both these fields allow text to be entered or data to be inserted from the form’s fields by pressing the “wrench” icon and picking the needed field from the enlisted ones.
  • CONTENT TYPE 一 a drop-down list allowing choosing if the message will be Plain Text or an HTML code:
    • Plain Text 一 an option that specifies that the email content text will have no images and/or other multimedia;
    • HTML 一 an option that allows using rich text, images, and other multimedia elements in the email content. When this option is selected, the Disable Auto-Formatting toggle is activated, which disallows the default to separate the email content text into paragraphs and turn links into clickable hyperlinks;
  • CONTENT 一 a textarea field intended for adding the body of the email. It allows adding texts, HTML code, or data from form fields. To add macros to insert the form field data, click the “wrench” icon to the right of the current option name.
disable auto-formatting toggle of the send email post-submit action
  • ATTACHMENT 一 a drop-down list for selecting the field from which the attachment will be taken.
selecting a form field for attachment
NOTE

To attach a file to the email, create a Media Field in the JetFormBuilder form. Select this form field to get the attachment from. Besides, the attachment will only be added to the email if the “Insert Attachment” option was initially checked in the Media Field. Also, be aware that the files from the Repeater Field should not be attached in the Send Email action because this function isn’t intended for this field type.

Finally, to save the changes, press the “Update” button in the left bottom corner of the pop-up.

Setting Conditions

To set the conditions when the “Send Email” Post Submit Action should be performed, press the “criss crossed arrow” icon on the “Send Email” Post Submit Action panel. If no conditions are set, the action will be performed by default after submission.

the edit condition button of the send email post-submit action

For an in-depth understanding of how to set one or some conditions, customize their options, and meet requirements, read the Conditions overview.

Deleting and Turning Off

For temporary deactivation of this action, click the “Turn off/Turn on” button (the “closed eye” icon) on the “Send Email” Post Submit Action panel. To delete this action, press the “Delete Action” button (the “recycle bin” icon) on the “Send Email” Post Submit Action panel. 

the send email post-submit action deleting and turning off buttons

Setting Verification

To allow user verification via email, press the “+ Verification” button on the “Send Email” Post Submit Action panel.

the verification button of the send email post submit action

Then, the “Verification” Post Submit Action panel will be added above the “Send Email” Post Submit Action panel. Press the “Edit Action” button on the “Verification” Post Submit Action panel. The Setting Up Email Verification tutorial explains in detail how to customize the verification settings, define specific events, and send a confirmation email with a verification link.

the verification post submit action added

In turn, the “Runs on verification” warning text and the “Run always” link will be added to the “Send Email” Post Submit Action panel. Press the “Run always” link to separate these actions. Then, the “DEFAULT. PROCESS X” text will be added under the “Send Email” text.

the verification and send email post-submit actions separated

That’s all. Now you know more about the “Send Email” Post Submit Action settings of the JetFormBuilder WordPress plugin.

post-submit action conditions on the editing page

By default, all the Post-Submit Actions will be performed after the user clicks on the “Submit” button. However, you can set some conditions.

After clicking on the “Conditions” button, you can choose the form field and set the value to compare. The conditional block will take the value from the chosen field, compare it with the one you set according to the operator, and perform the Post-Submit Action only if the comparison was “true”.

Controls

post-submit action conditions editing tab
  • Safe deleting. This toggle is enabled by default. When it is on, it prevents you from deleting any of the conditional rules accidentally. After clicking on the “Delete” button, you will see a message that asks you to confirm deleting. If this toggle is turned off, the conditional rule will be deleted without any notifications;
  • “Show/Hide” button. The button with a cross-shaped icon on it simply hides or unfolds the conditional rule tile. It doesn’t affect the settings in the tile;
  • “Up/Down” buttons. These buttons are placed next to the “Show/Hide” button and have the up and down arrows on them. Clicking on those buttons moves the conditional rule tile upwards or downwards. It is used for navigation purposes only, these buttons don’t affect the work of the conditional block;
  • “Clone” button. Creates a copy of the conditional rule tile;
  • “Delete” button. Erases the conditional rule tile;
  • To fulfill this condition, the result of the check must be FALSE. Normally, the condition works if the result of values comparison is “true”. By enabling this toggle you make it vice versa;

“Add New Condition” button. Click this button to add a new conditional rule to the Conditional Logic window list.

Settings

defining operator for post-submit action conditions

In this drop-down menu, you choose how the value from the form field and the one you will put to the Value to Compare field will be compared.

  • Equal. The Post-Submit Action will be performed if the value in the chosen field will be equal to the one you place into the Value to Compare text area;
  • Greater/Less than. The result will be considered “true” if the value in the chosen field will be greater/less than the one you type into the Value to Compare field;
  • Between. This operator checks if the value in the form field falls into the range you set in the Value to Compare text area. The range is set from the smallest number to the biggest and must be separated by commas, like that – 1,8”. The first and last numbers count, so if the value in the form field will be equal to 1, 2, 3, 4, 5, 6, 7, or 8 – the result of the comparison will be “true”;
  • In the list. A special operator for the Radio, Select, and Checkbox form fields. If the user chooses the option, the value of which is equal to the value you put to the Value to Compare field, the Post-Submit Action will be performed;

Contain text. This one works with the Text and Textarea form fields. You can insert any value to the Value to Compare field, be it text or numbers, and if the user types the same value into the chosen field – the result will be considered “true”.

Field

Here you can choose one of the fields that you’ve already added to the form. All of them, named by their labels, are listed in this menu. The conditional block will take a value from this field and compare it with the one you put to the Value to Compare field.

Value to Compare

This is a text area where you place the value that will be compared with the value from the chosen field. It can be both text, symbols, and numbers. Besides that, you can fill this field dynamically with the value from some posts or user’s meta fields. To do it, click on the button with a cylinder-shaped icon in the right upper corner of the field. You will be offered to choose the Source, specify where to take the data from (Get post ID from), and choose the meta field to take the information from (Post property).

choosing the source for post-submit action conditions

When you are done setting a conditional rule, click the “Update” button at the bottom of the Conditional Logic window.

This overview is about the Post Submit Actions, its controls, and settings.

The Post Submit Actions tab is a vital feature of the form creation. One should adjust the post-submit actions in order to activate needed actions after the form submission. 

With this feature, various actions can be adjusted and combined. For instance, the form submission can be saved in the JetFormBuilder directory, or an automatic email can be sent to the admin/customer.

Post Submit Actions Tab

The Post Submit Actions tab can be found in the JetForm tab of the form settings.

It includes two buttons: a “New Action” that allows adding and adjusting the new post-submit action and a “Verification” to add a “Verification” action right away.

Also, if the PRO license of JetFormBuilder is not activated, the “All PRO Actions” link will be available.

New actions can be added by pressing the “New Action” button. All of them will be performed at the same time after the user submits the form. It is also true for the actions that have some conditional rules set. They will be performed after the form’s submission if the requirements are met.

post submit actions tab

Once the “New Action” button is clicked, the pop-up with presented actions appears.

the first part of the add new action pop-up
the second part of the add new action pop-up

If desired, the actions can be filtered by category. The filter is presented right in the pop-up.

action categories

For every type of action selected, there is a separate list of settings. When one of the options is clicked, the settings pop-up is opened.

Here, one can adjust the action and save it, return to the list of actions, or cancel the pop-up editing window.

edit send email pop-up

When the action is added and one hovers over it, several buttons are displayed next to the action name.

The first is the “Edit” button that allows returning to the post-submit action editor pop-up.

edit button on hover

When the second “Conditions” (with a crisscrossed arrows icon on it) button is clicked, one can set when the form will perform a selected action. If no conditions are set, the action will be automatically done right after the form submission. However, one can choose to do some additional actions if some requirements are met. For example, the confirmation email can be only sent in case the user ticks a special checkbox. 

The Conditions overview includes more details about the conditions customization.

conditions button on hover

The next button is “Turn off/Turn on.” It can turn off/on the action if needed. It doesn’t delete the action — just deactivates it till not activated with this button again.

turn off button on hover

The following button is “Delete Action.” It deletes the action correspondingly and can’t be undone.

delete action button on hover

Also, if several actions are added, their order can be changed by dragging the icon before the action name up or down.

This doesn’t affect the efficiency of the actions — it is useful only for navigation and organization purposes. 

drag actions button

That’s all about the Post Submit Actions feature directory available with the JetFormBuilder plugin for WordPress.